Step 1: Adding a Git Application
To add a Git application:
- In the Management Console, click Settings -> Destinations ->Add Application.
- Select Git Server.
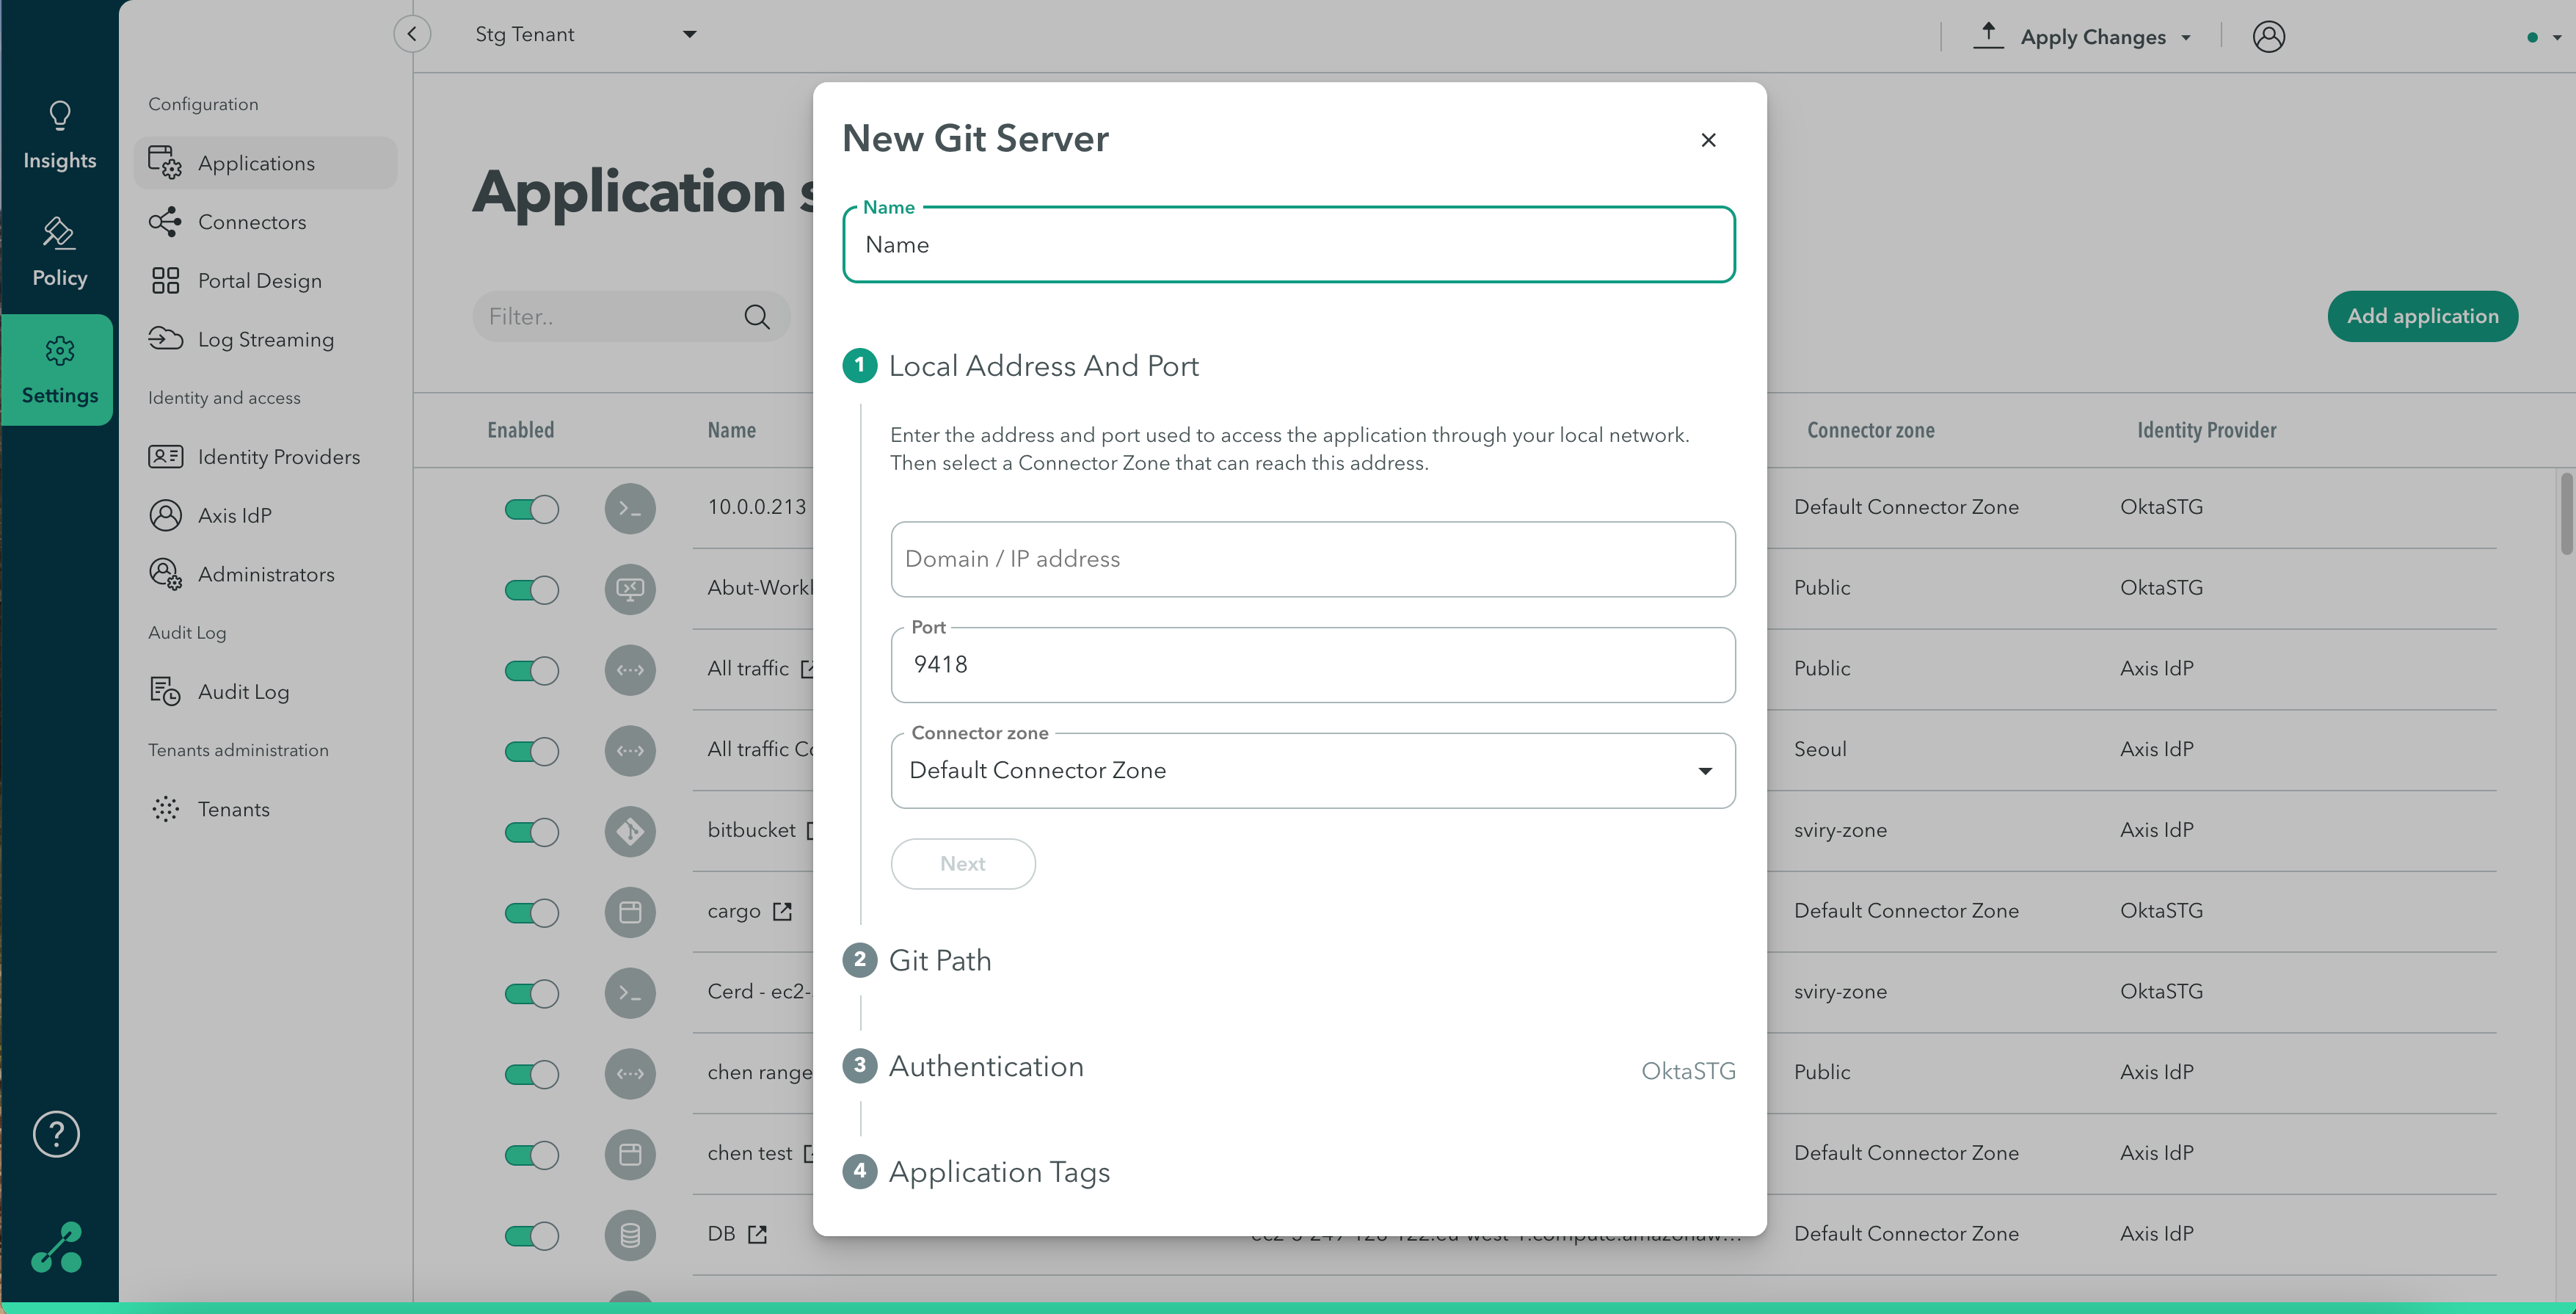
- Add a meaningful name for the application.
Local Address And Port
- Add domain or IP address. Specify the application’s Local Domain/FQDN/IP address that is visible to the connector for the network segment.
- Specify the port for the application as an integer. This setting pre-populates with a default port which can be edited:
- 80 - for HTTP
- 443 - for HTTPS
- 22 - for SSH
- 3389 – for Remote Desktop
- 9418 for Git
- From the Connector zone drop-down menu, select a connector zone within the same network segment or that has access to the application. For more information about connector zones, click here.
- Click Next.

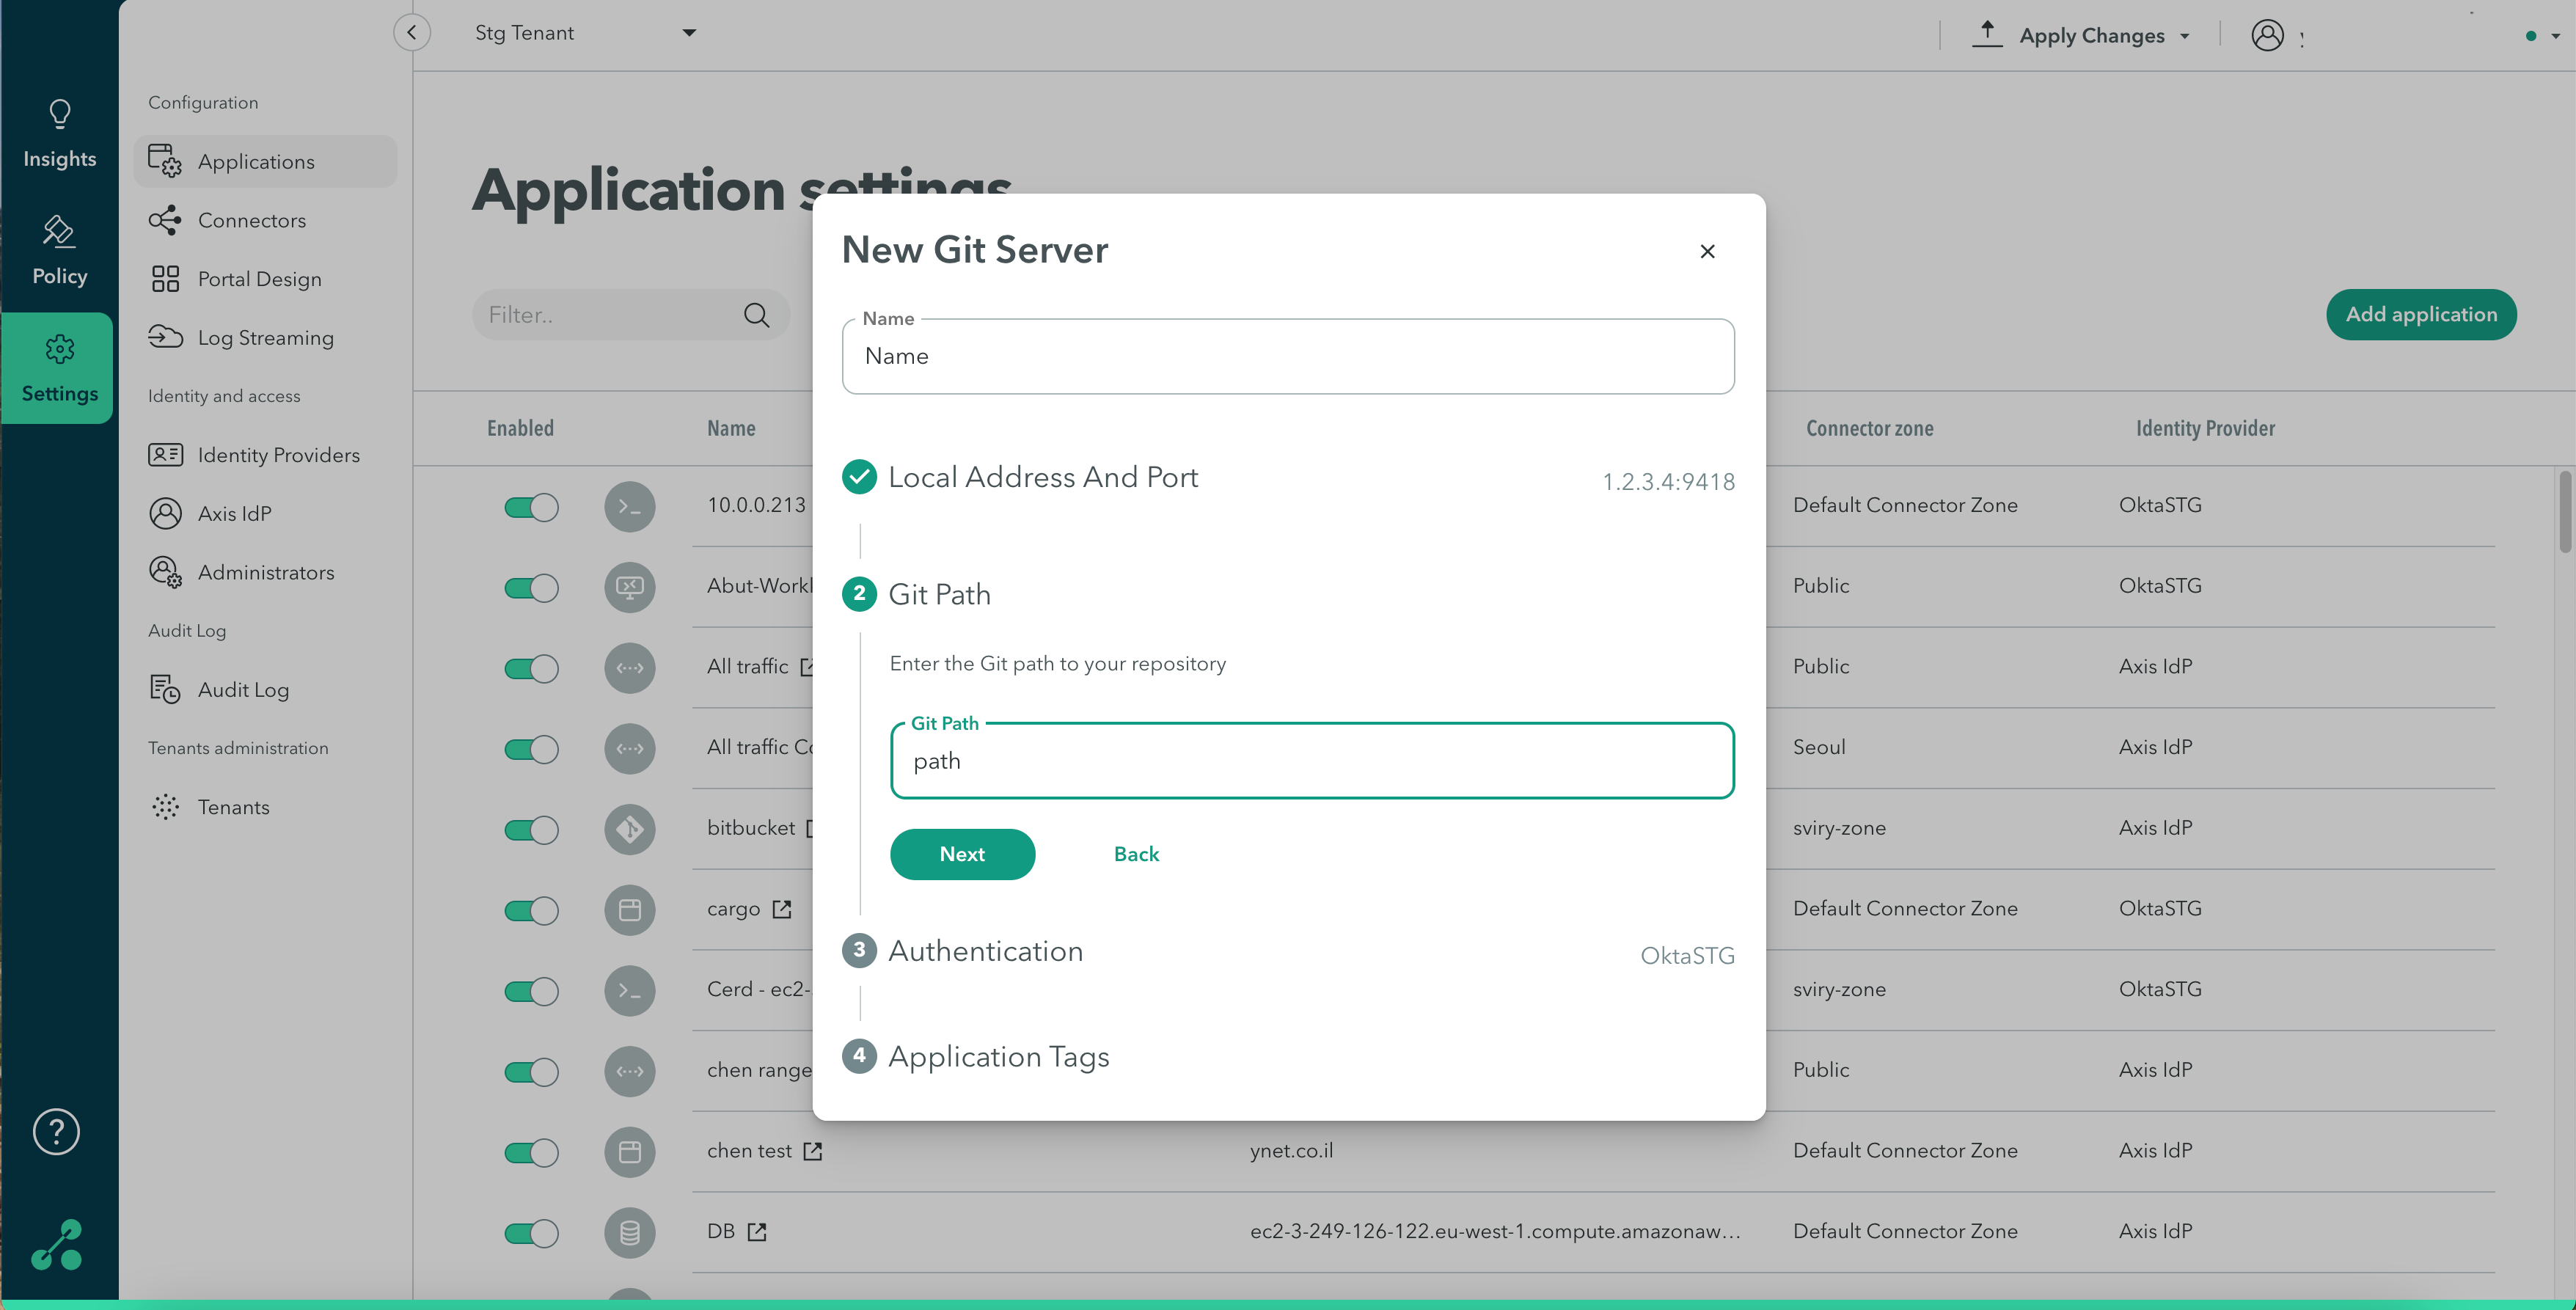
Git Path
- Enter the Git path. This is the repo path provided by Git.
- Click Next.

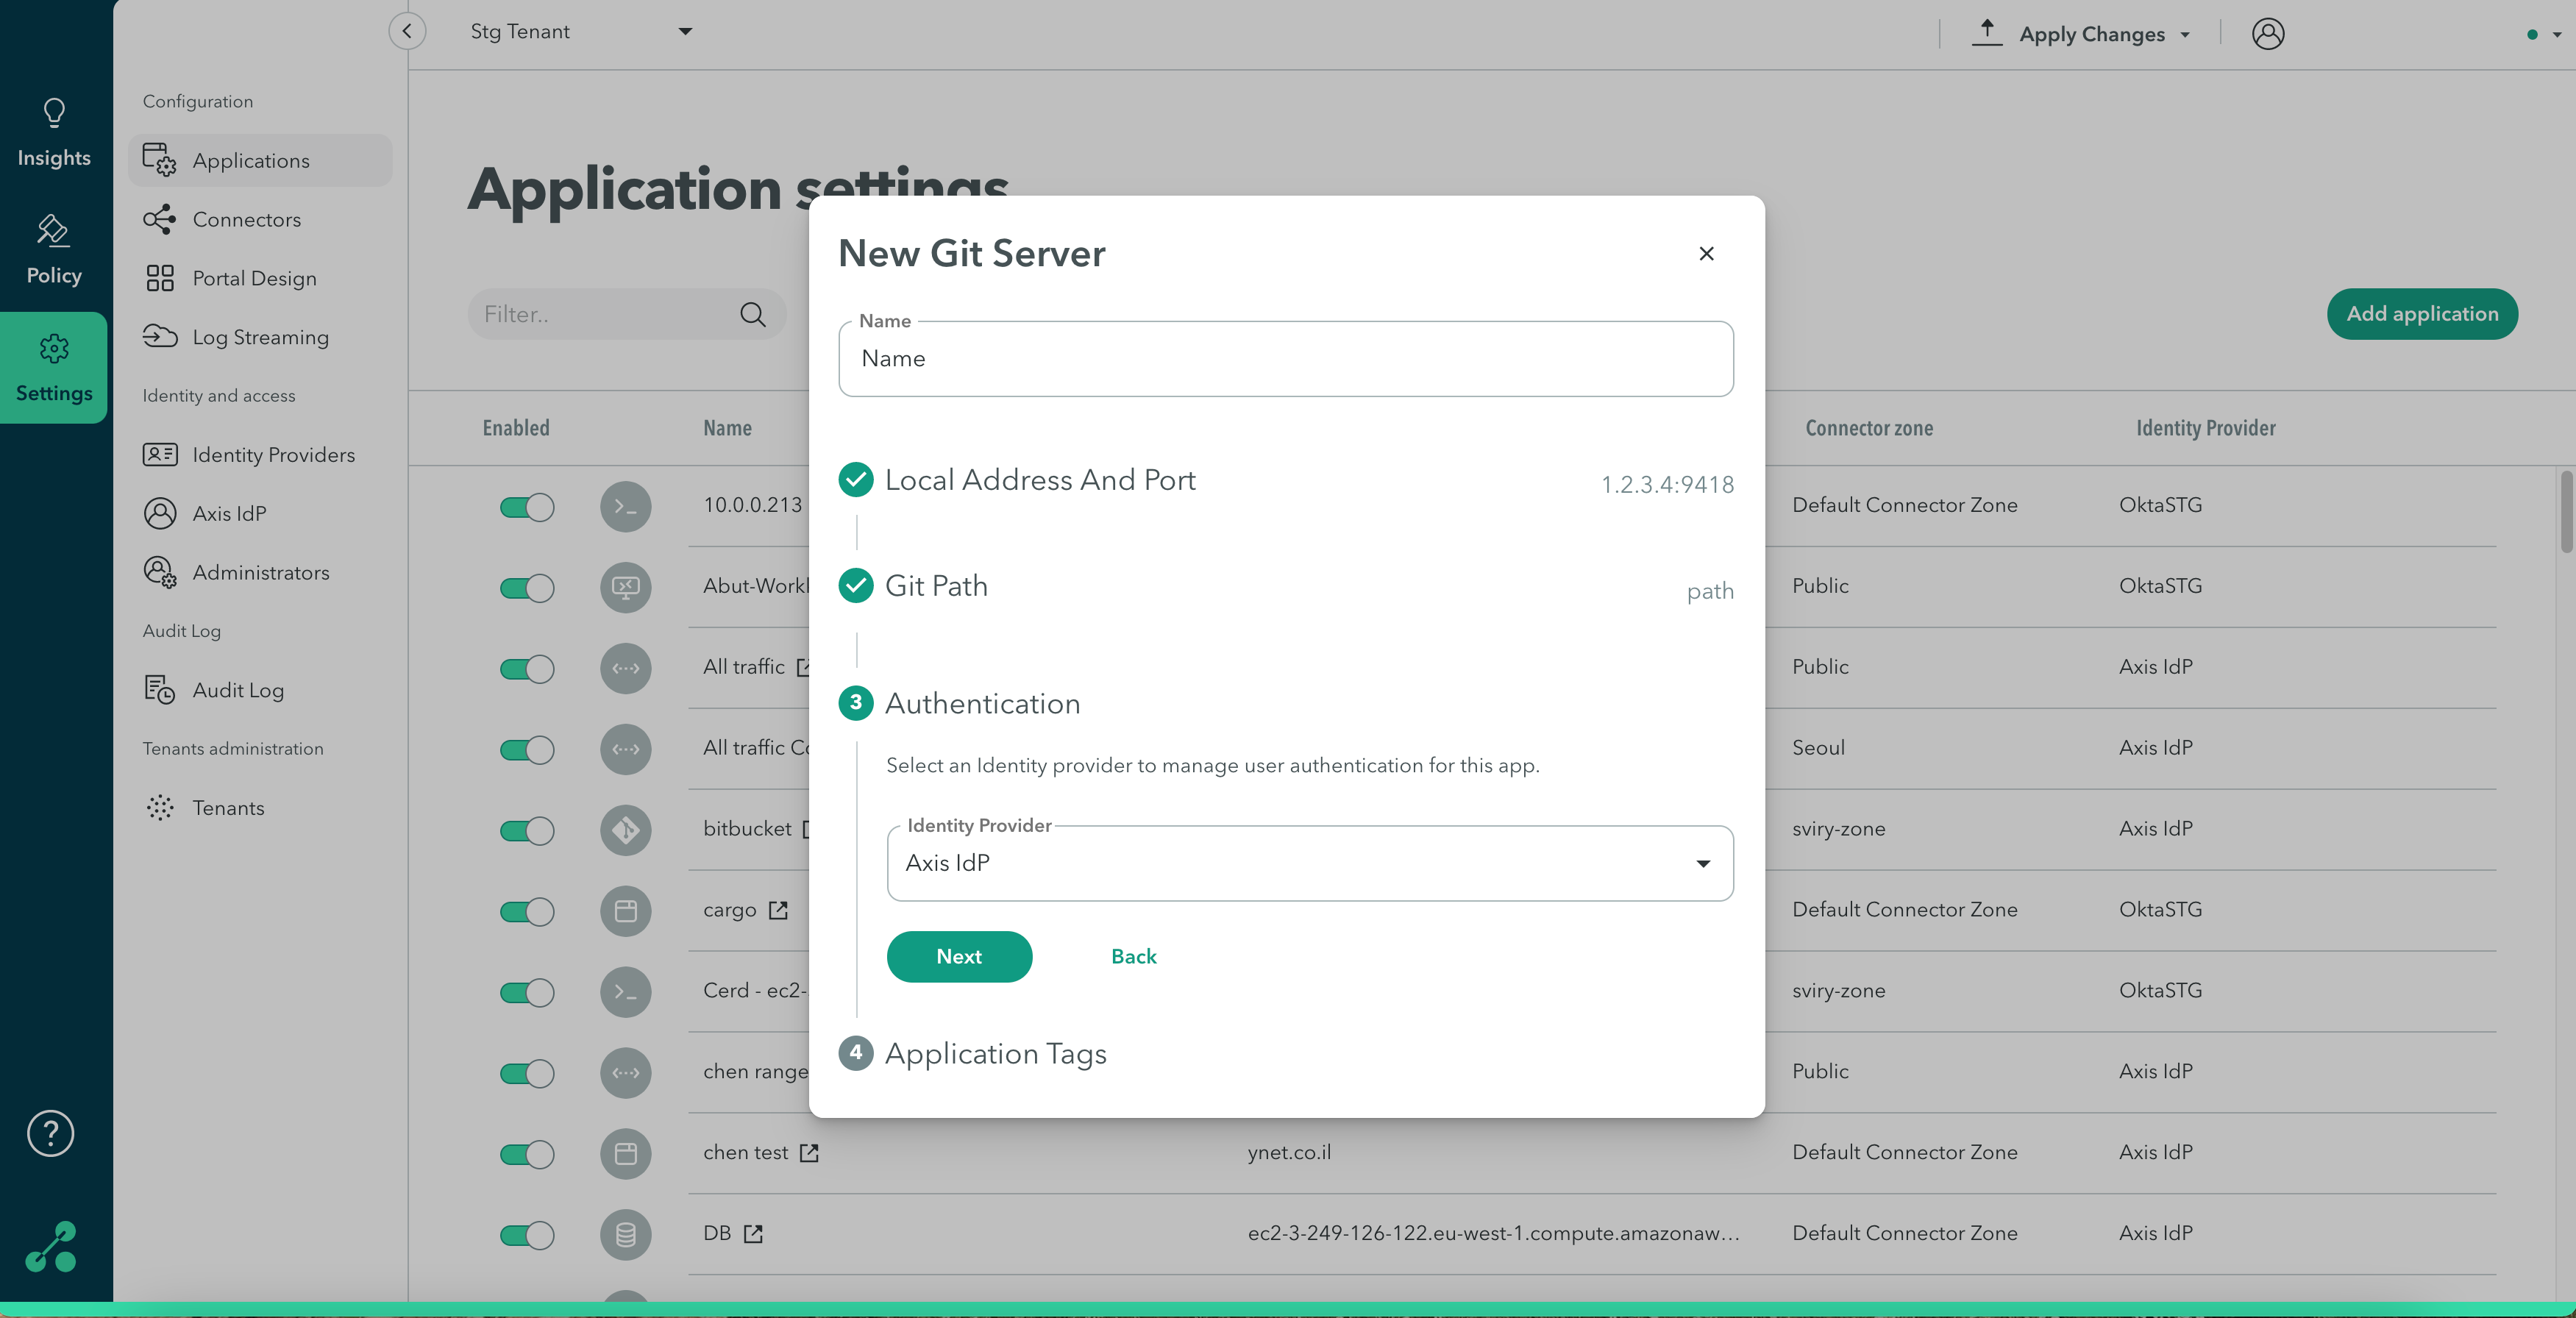
Authentication
- Click the Identity Provider drop-down menu to select an Identity Provider that will manage authentication for this application.
- Click Next.

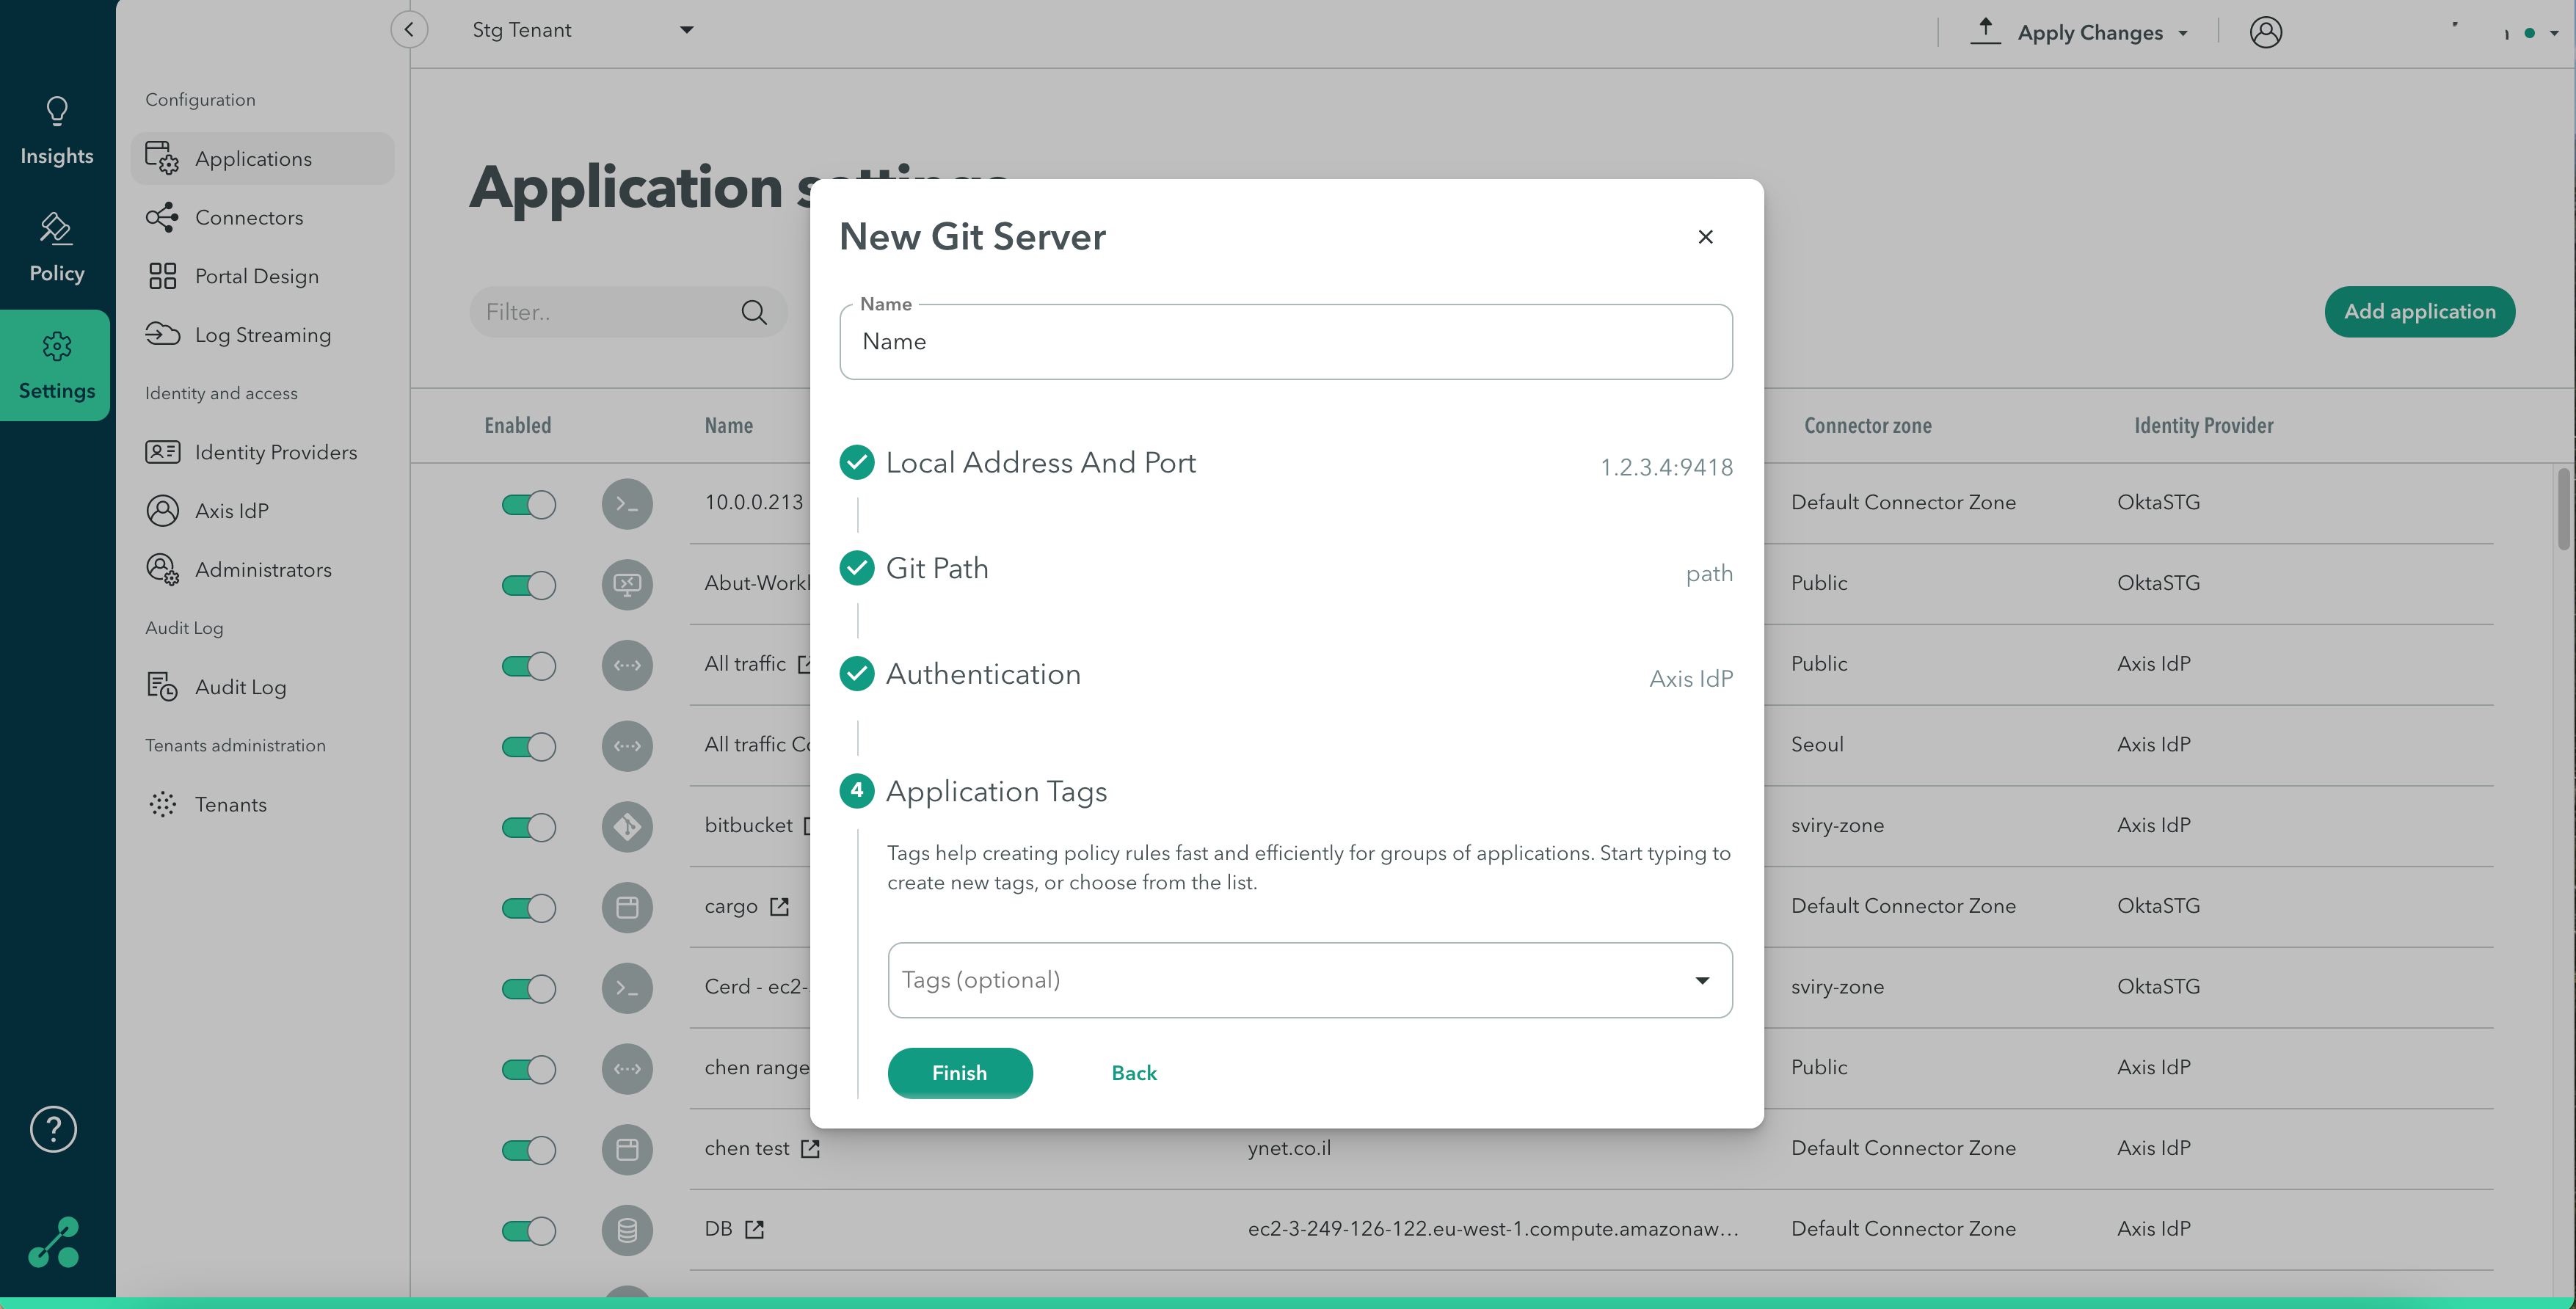
Application Tags (Optional)
Tags help creating policy rules fast and efficiently for groups of applications. Click here to learn about creating application tags.
- Start typing to create new tags, or choose from the Tags drop-down menu.
- Click Finish.
- Next Steps: Step 2: Adding a Git Profile.

Note
To commit your changes, navigate to the top-right menu, click Apply Changes, then select Commit Changes.
Updated almost 2 years ago
