Block Profiles and Customized Block Pages
Overview
Block Profiles allow Admins to configure block behavior and customize end-user notification pages across private applications and internet access on a rule-by-rule basis.
Block Profiles are a powerful tool for strengthening and customizing your organization's access policy strategy. Additionally, it gives you the option to provide a tailored experience to users when they encounter restrictions on certain destinations and websites.
This article explains the wide range of Block Profile customization options available as you walk through the steps of creating/managing a Block Profile and provides the following scenario examples:
Adding/Managing Custom Block Profiles
To access and configure a Block Profile:
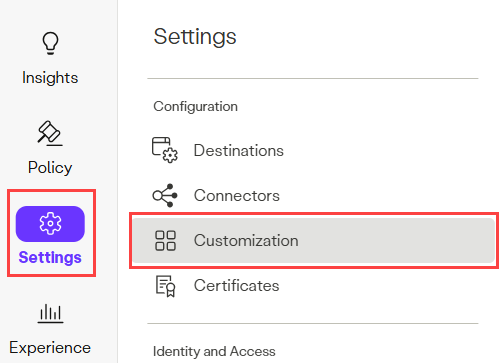
- Navigate to Settings > Customization.
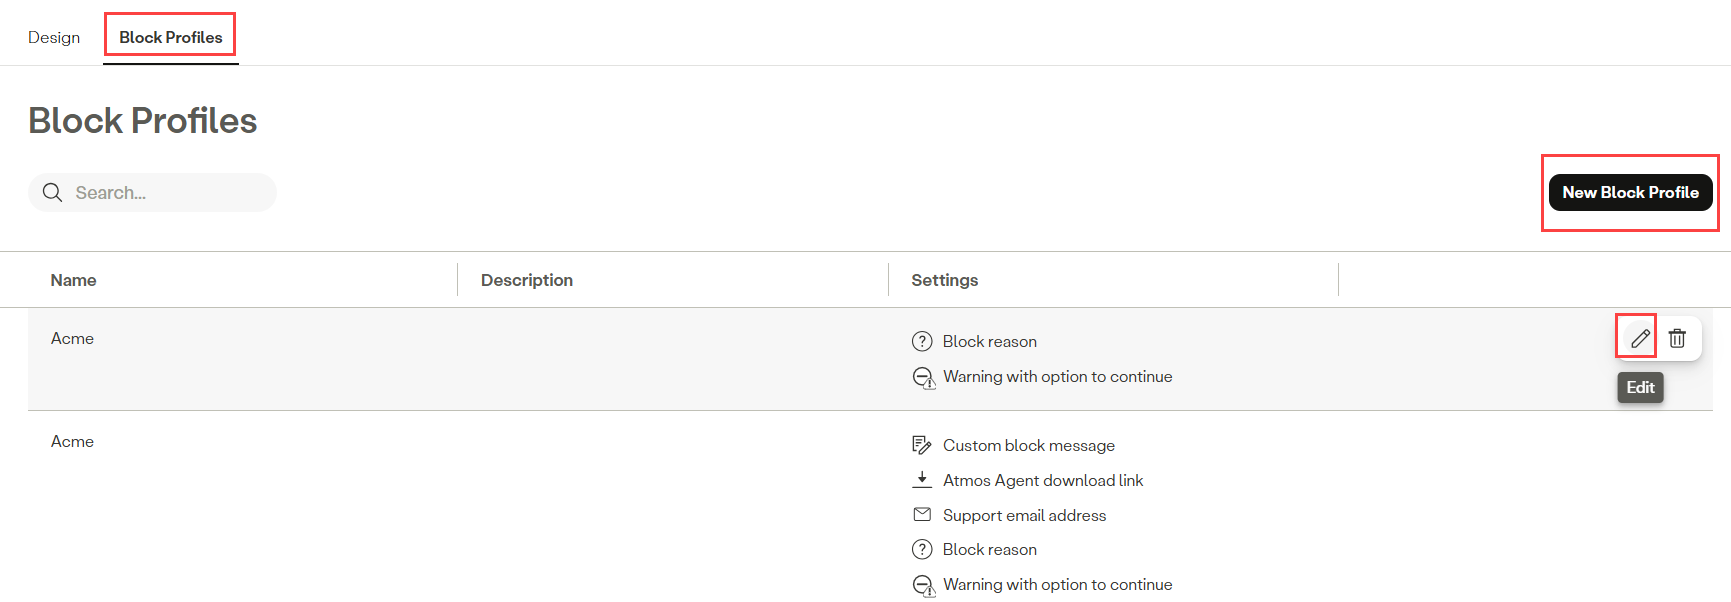
- Click Block Profiles, then click the New Block Profile button, or click the Edit icon to edit an existing Block Profile.
Note
The Default Block Page is automatically applied to new policy rules unless you choose to modify it when creating or editing a rule.
- Enter a Name (required) and Description (optional).

Custom Block Profile Options
Private Access
- Select Private Access options.

-
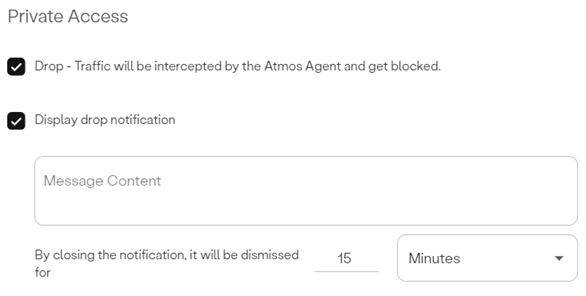
Drop - Traffic will be intercepted by the Atmos Agent and get blocked – This option controls the block behavior for Zero Trust Network Access (ZTNA) access. If selected, the Atmos Agent intercepts and drops traffic destined for the applications defined in the rule. If unselected (default), the Atmos Agent does not send private application traffic out via the tunnel and ignores the traffic.
- Display drop notification – Select this option to display the default drop notification or enter your text in the Message Content text field to customize the message displayed to end-users when a block is triggered.
- By closing the notification, it will be dismissed for – Admins can also set a dismiss period of time (Minutes/Hours) for each block notification to prevent excessive notifications for users (default is 15 minutes). During this time users do not receive a pop-up notification for blocks triggered by the same rule.
- Display drop notification – Select this option to display the default drop notification or enter your text in the Message Content text field to customize the message displayed to end-users when a block is triggered.
-
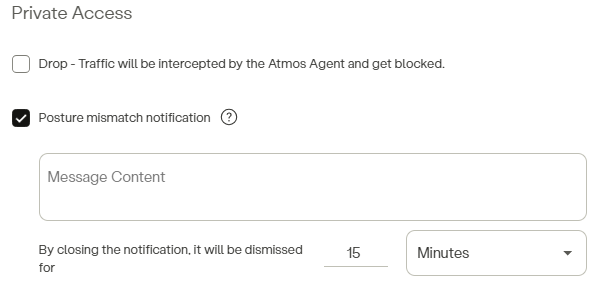
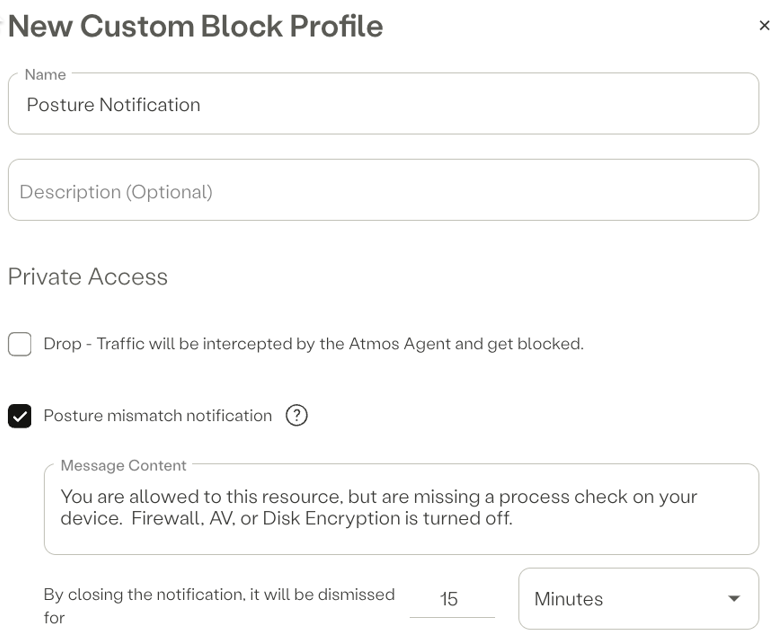
Posture mismatch notification – This option displays a custom block message when a user attempts access but fails to meet device posture requirements.
- Enter your text in the Message Content text field to customize the message displayed to end-users when a posture block is triggered.
- By closing the notification, it will be dismissed for – Admins can also set a dismiss period of time (Minutes/Hours) for each block notification to prevent excessive notifications for users (default is 15 minutes). During this time users do not receive a pop-up notification for blocks triggered by the same rule.
ZTNA Block Example:
If an organization implements ZTNA for both on-network and off-network scenarios, there may be instances where ZTNA can help prevent lateral movement to internal applications. For example, consider a situation where a user has unrestricted access to the entire network when on network and no additional security controls are in place. By using ZTNA policies, you can restrict the user's access by enforcing granular controls at the ZTNA layer.

In this scenario, the network range is configured to allow wildcard access to all subdomains of acme.com. However, if access to a specific server, such as server1.acme.com, needs to be blocked, this can be achieved by creating a rule with higher priority than the general network range policy. This rule will explicitly block access to the specified server. Additionally, a custom notification message can be sent to the user agent, informing the user about the blocked access attempt. (reference the examples section below).

ZTNA Posture Example:
HPE Aruba Networking SSE also allows admins to grant users access to a resource only if their device meets specific security requirements. For instance, you can check whether the firewall is enabled, disk encryption is active, and/or antivirus software is running. Any combination of postures is possible. If any of these security checks fail, the system can notify the user's device with a message explaining why access was denied.
Note
The following Rule screen is accessed via Policy > Rules > New Rule.
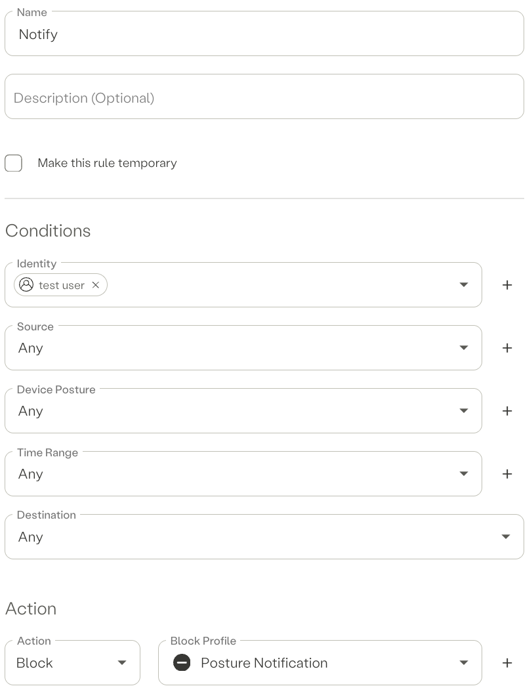
This rule grants the "test user" access to the ZTNA destination only if all required posture checks pass. If any of the checks fail, access to the resource is blocked, and a posture mismatch notification is sent to the user. For example, if the antivirus check fails, the "test user" would match rule 2, triggering the posture notification message to be delivered through the agent.

Internet Traffic
Continue creating the Block Profile’s Internet Traffic options following the steps below:
- Select Internet Traffic options.
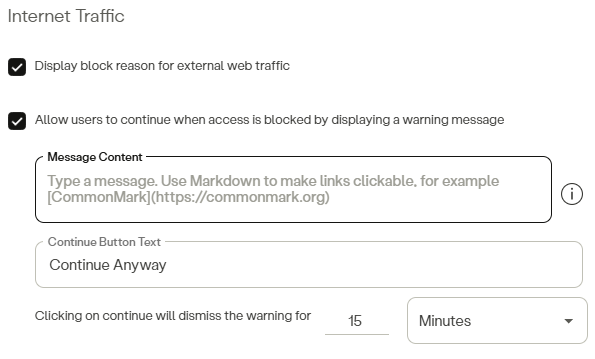
- Display block reason for external web traffic – This option displays a block page to the user when an external website is blocked.
- Allow users to continue when access is blocked by displaying a warning message – Selecting this option displays a Warning page instead of a Block page with a Continue Anyway button. (Refer to the Warning with Option to Continue section below for additional information.)
- Both the Warning Message Content and the Continue Button Text label are editable.
- Clicking on continue will dismiss the warning for – After the user opts to continue, the warning notification will remain dismissed for the specified period. Sets the time period (Minutes/Hours) that the Warning Notification remains dismissed after the user opts to Continue.
Page Customization
- Select Page Customization options.
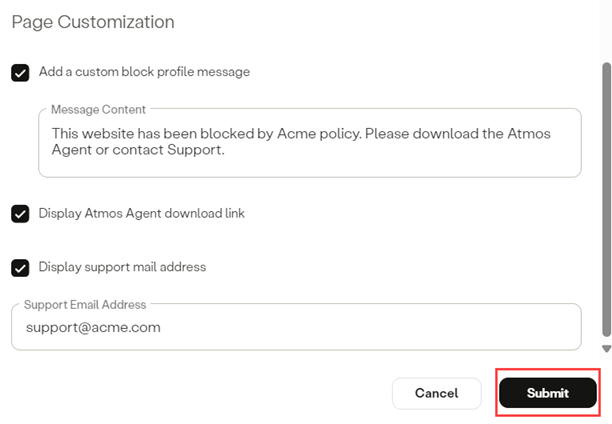
- Add a custom block profile message – Enter the Message Content you wish to display to users. You can use markdowns to customize the message and make links active. For example: CommonMark.
- Display Atmos Agent download link – Selecting this option displays a Download Atmos Agent button on the block page.
- This option is typically used in scenarios where organizations require the use of the Agent to access certain resources.
- Display support email address – Selecting this option adds a Contact Support button to the block page for user support. If selected, enter your Support Email Address.
- Click Submit.
Warning with Option to Continue – Important Information
- Enabling this option is intended to inform users about the possible consequences when trying to access a restricted website.
- It's crucial to note that this setting does NOT restrict or block access to the website – it merely provides a warning before granting access.
- This option is applicable exclusively to external web traffic.
- POST requests do not trigger the warning page. Therefore, if a session starts with a POST request, it will be blocked immediately.
- This is a limited release feature. For more information contact HPE Aruba Networking SSE: [email protected]
View Warning Events in Activity Exploration
- Navigate to Insights > Exploration.
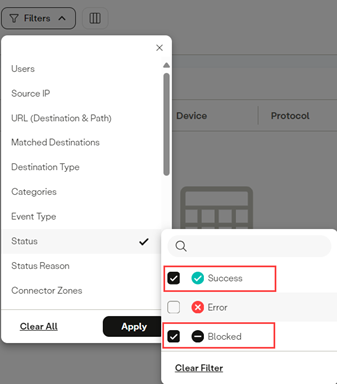
- Click Filters > Status and select Success and Blocked.
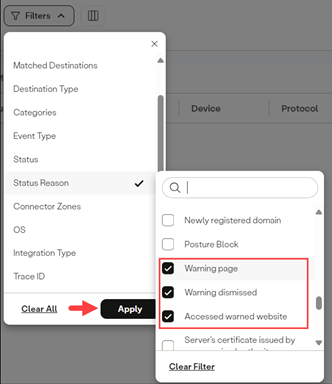
- Click Status Reason then select the following:
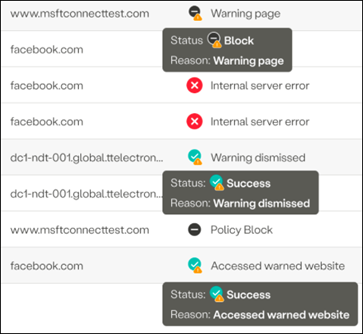
- Warning Page – This indicates that a user encountered a warning page
- Warning Dismissed – This indicates that the user opted to continue.
- Accessed Warned Website – This event indicates that a user successfully accessed a website after opting to continue. It's the event you'll observe for every access made during the Dismiss Period.
- Click the Apply button.
- The Exploration page now displays all the warnings, dismissals, and warned websites accessed (for the time duration selected).
Block Page Examples
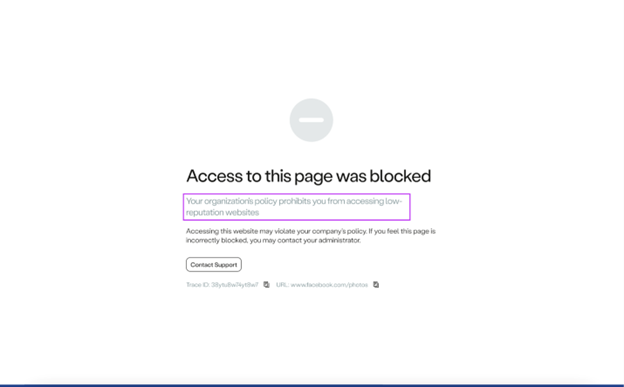
Access was blocked due to low reputation
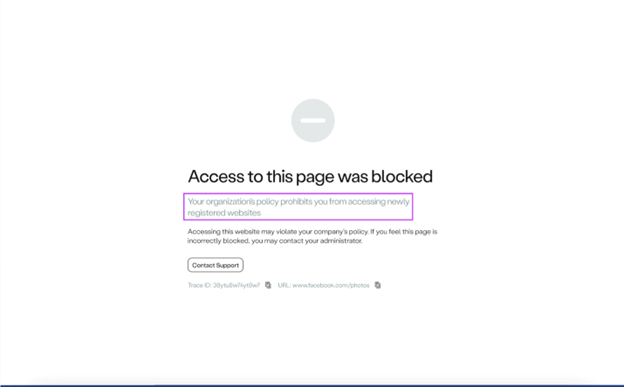
Access was blocked due to a newly registered domain
Updated 10 months ago
