Step 3: Configure Azure Active Directory Conditional Access
This article describes how to integrate Azure Directory with Conditional Access with Axis Cloud.
Prerequisites
Before you begin:
- Add an Office 365 Application with Conditional Access on Axis Cloud
- Apply a rule to the Office 365 Application with Conditional Access
See also About Office 365 Applications with Conditional Access.
To configure Azure Active Directory Conditional Access:
- In the Azure Admin UI, configure Azure Active Directory Conditional Access at https://portal.azure.com.
- Go to Azure Active Directory Security define Named Locations.
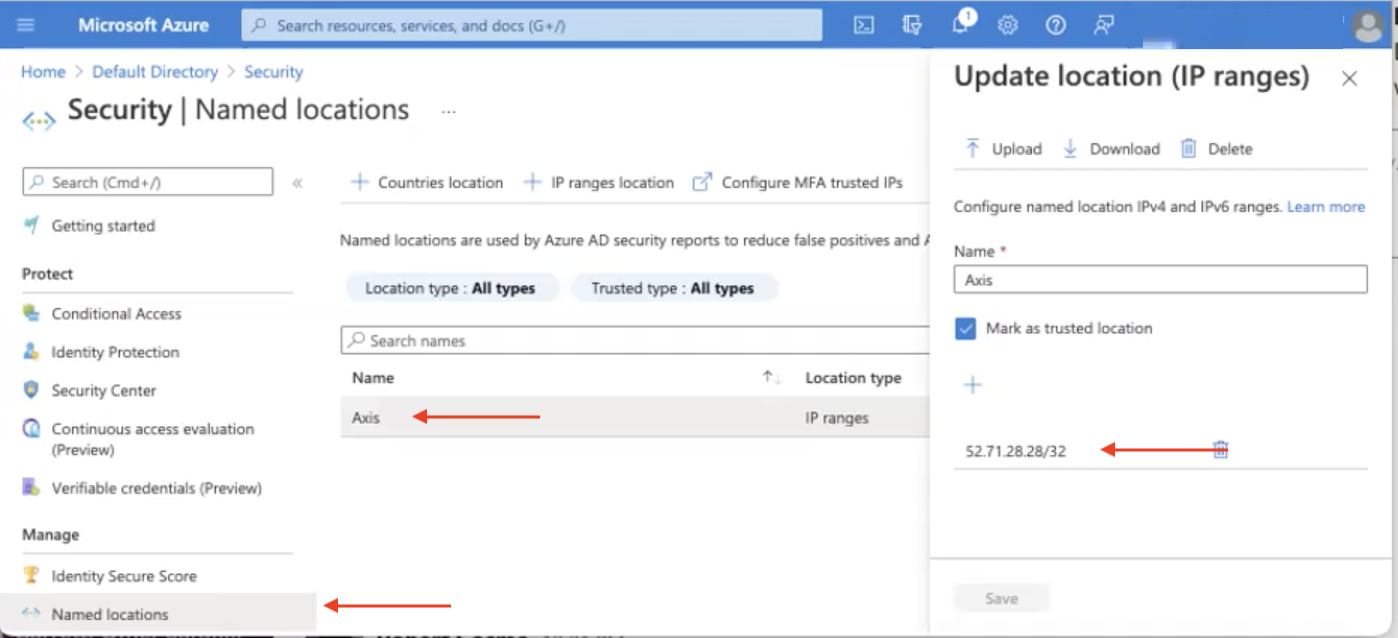
- In the Updated location (IP ranges) section, click the + sign to add the IP address(s) of the Axis Connector (s) as part of the trusted location.
Note
You typically deploy 2 or more Axis Connectors. Usually, all the connectors go through the same public IP address.
- Click Save.
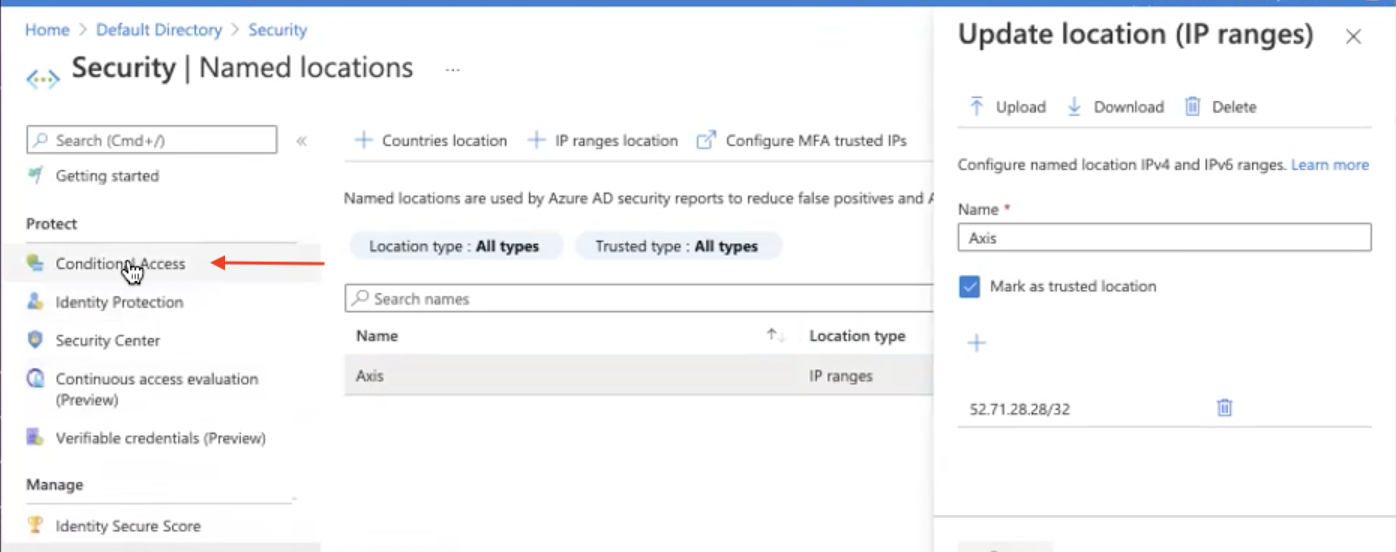
- Go to the Azure Active Directory Security > Conditional Access screen.
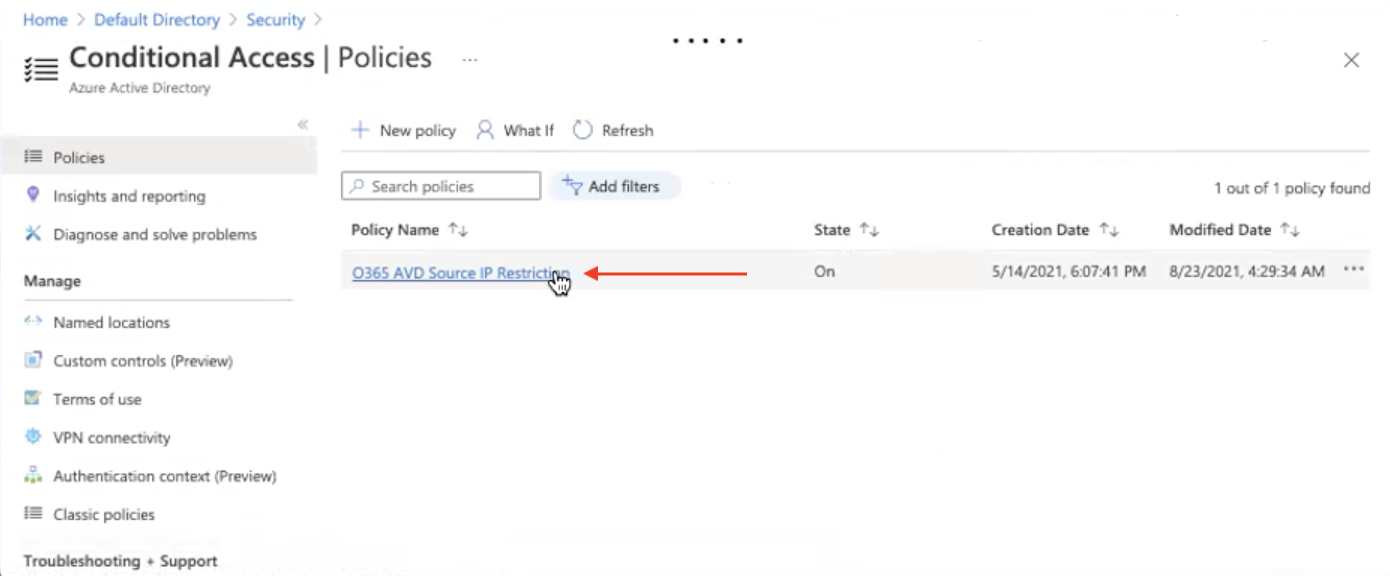
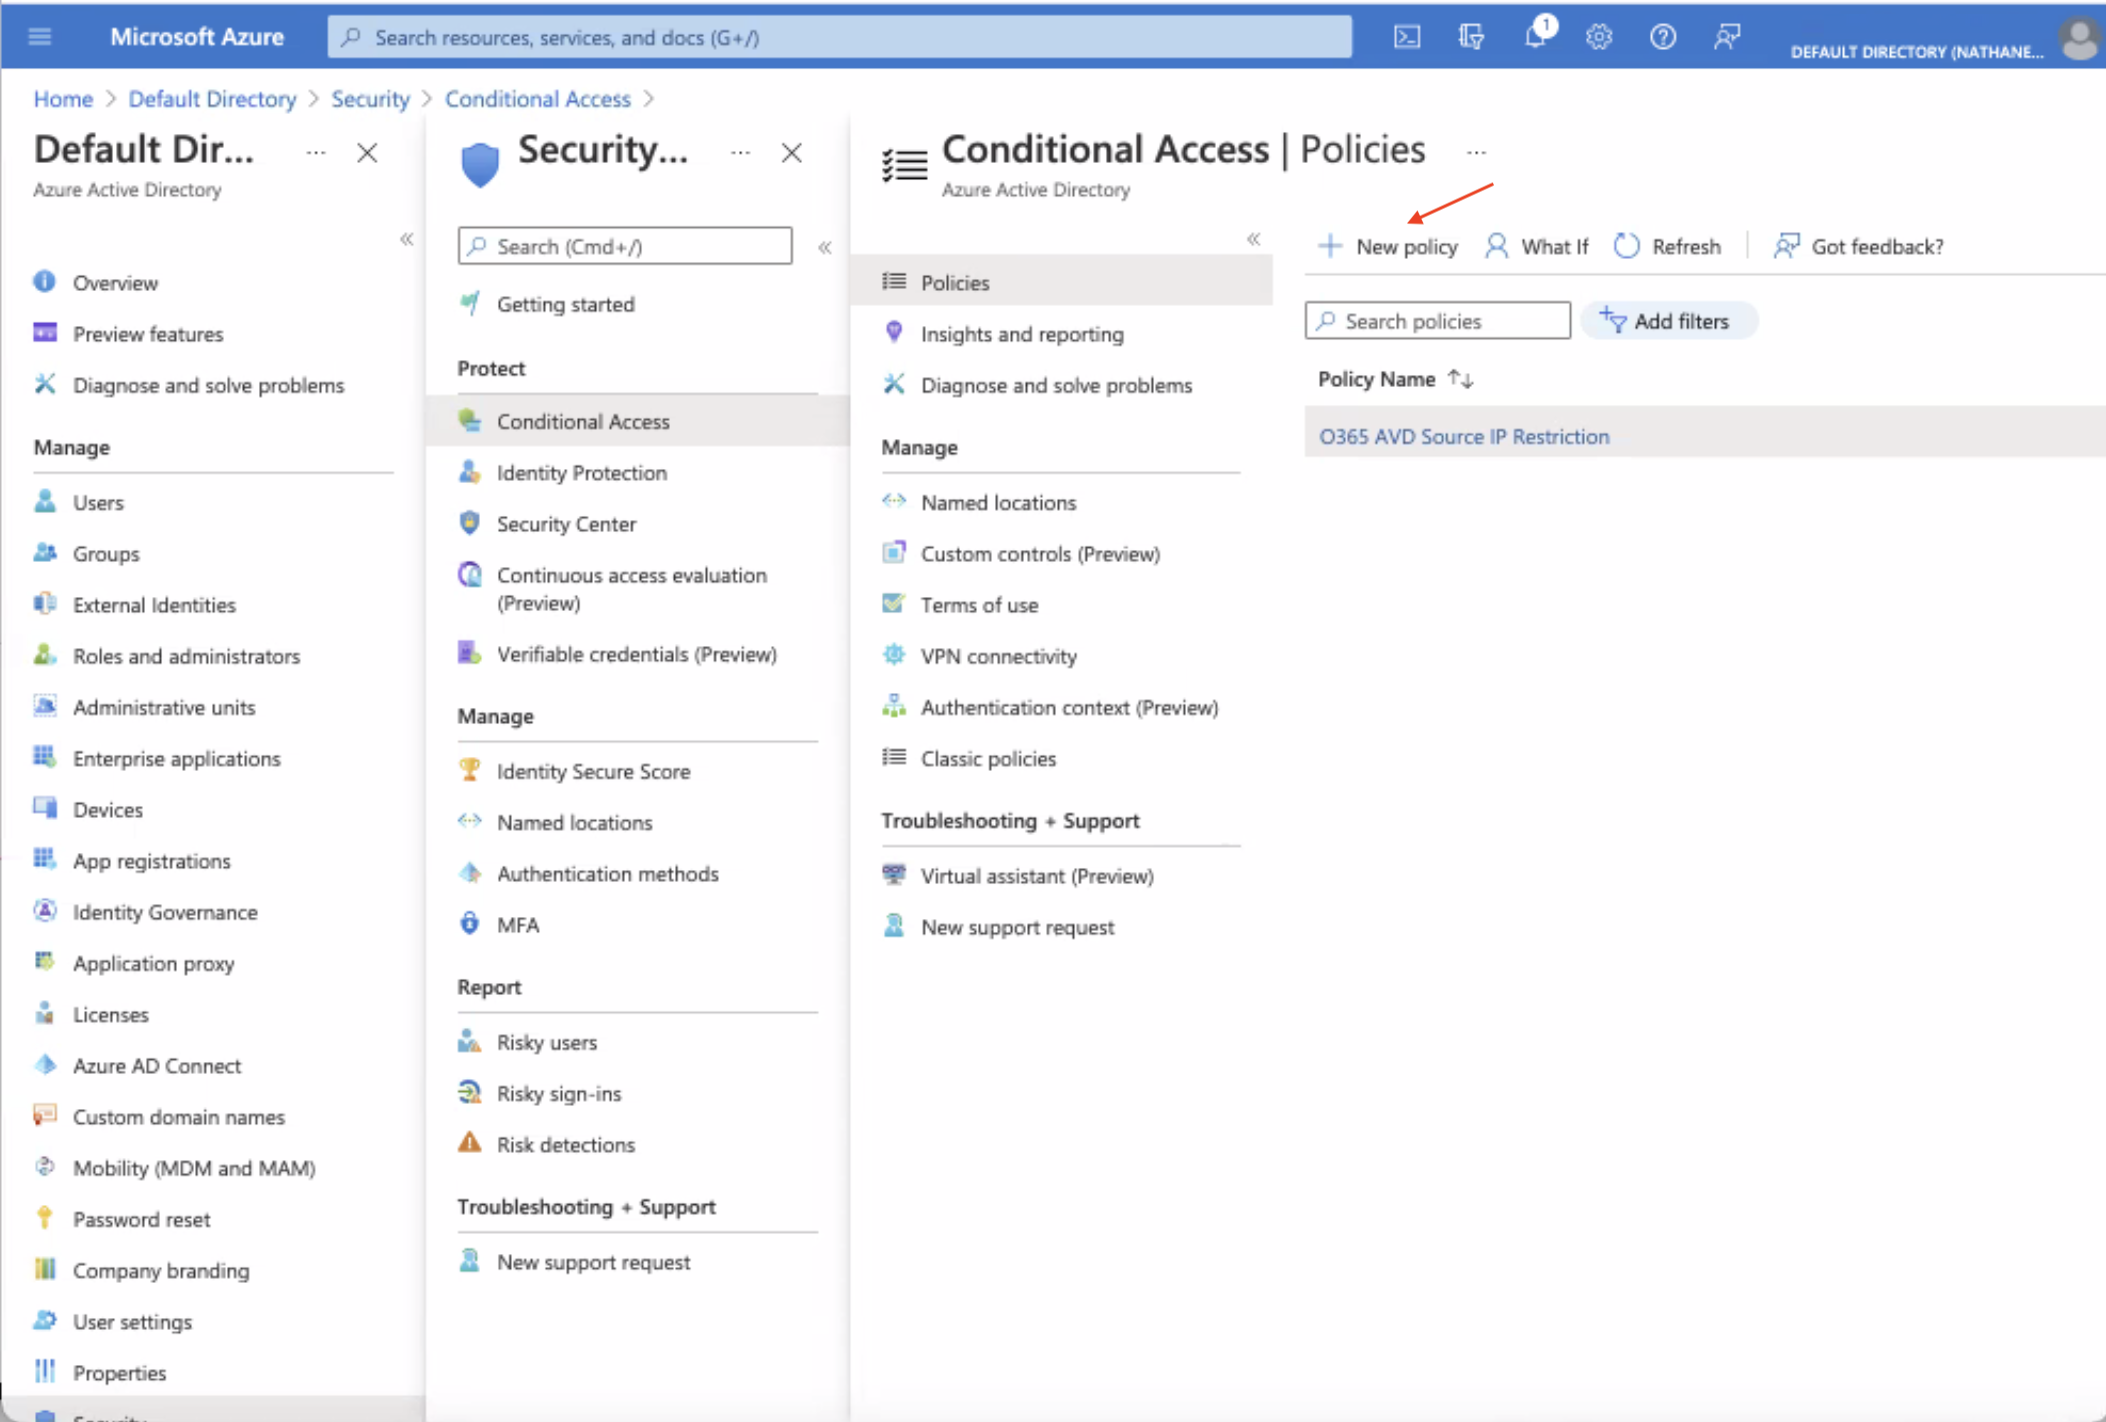
- Go to the Security > Policies screen, click the policy you created for conditional access. In this example, the policy name is O365 AVD Source IP Restriction.
The Conditional Access | Policies screen is displayed.
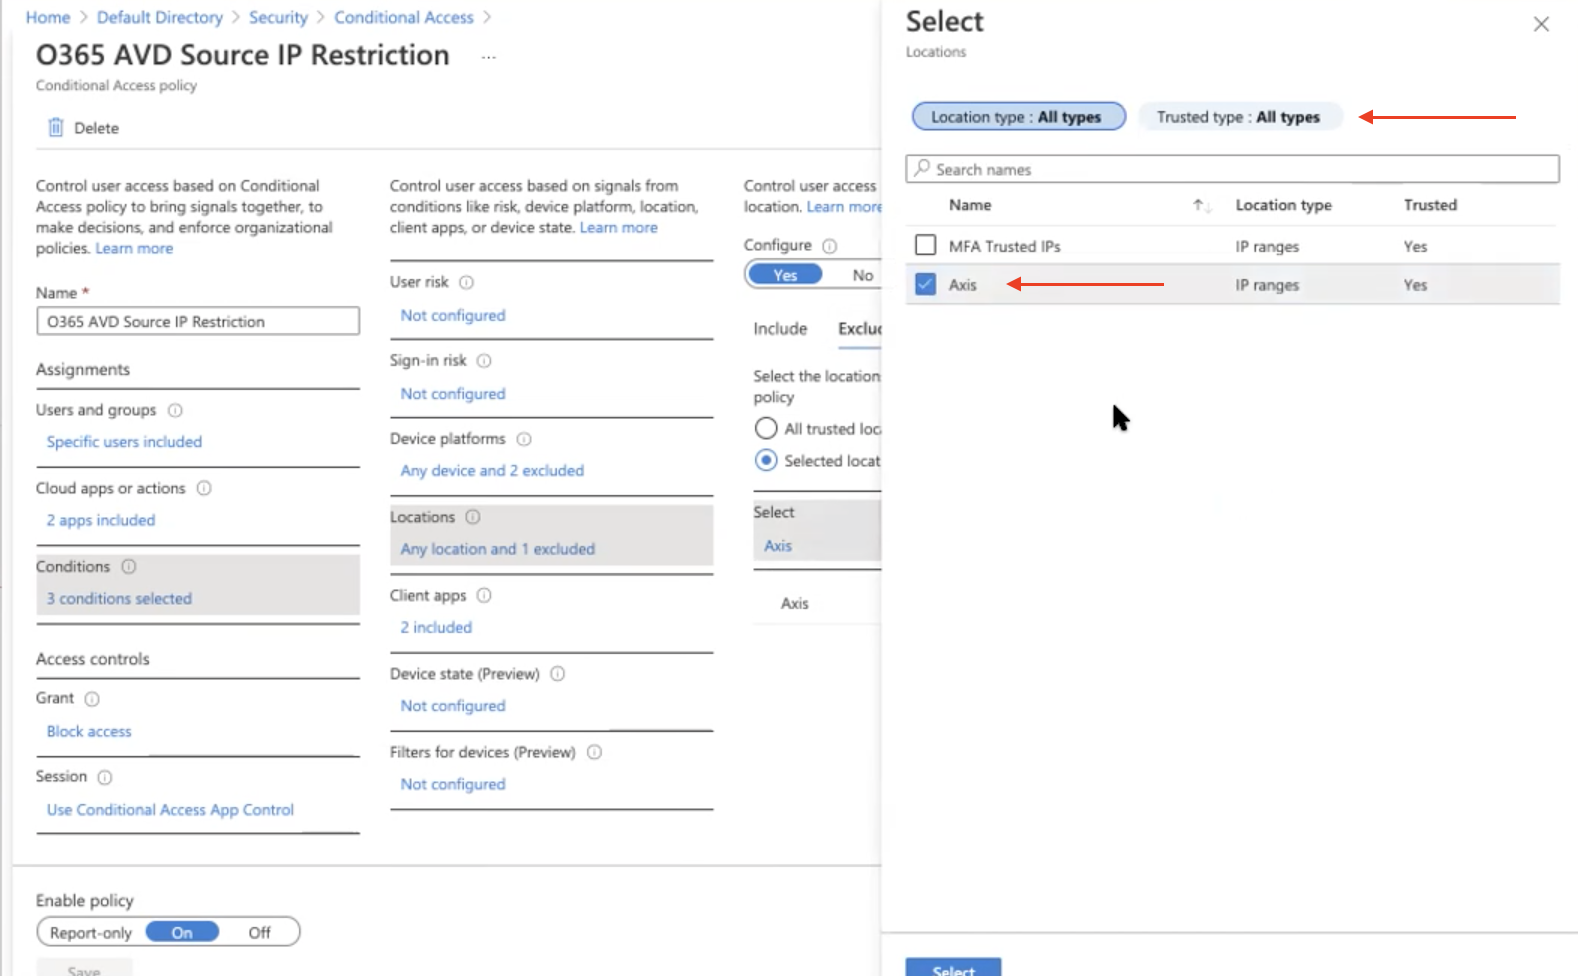
- Click the new policy to view the policy.
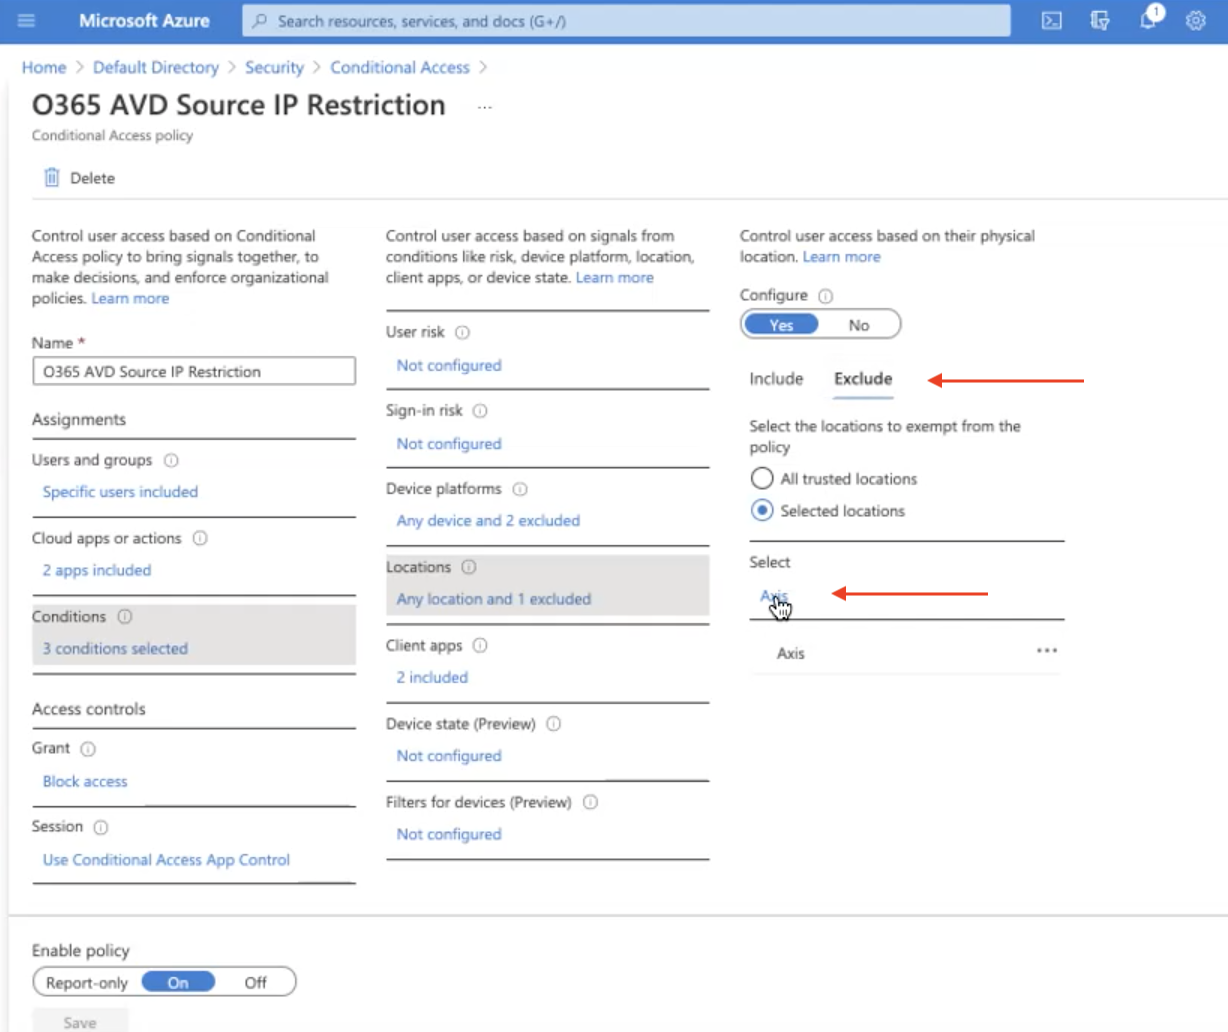
- Configure access controls using the Exclude option, to exclude the Axis Connectors from being blocked.
- Make sure to select the Named Location configured in step 6 is added as Exclude under the Conditions. This essentially only allows traffic from the Axis Connector.
- Save your configuration.
- Next Steps: Verify that the Office 365 deployment is Working
Verify that the Office 365 deployment is Working
To verify that your Office 365-related domains are being being routed by the Axis Client to Axis Cloud
being routed by the Axis Client to Axis Cloud::
- Open the Axis Client.
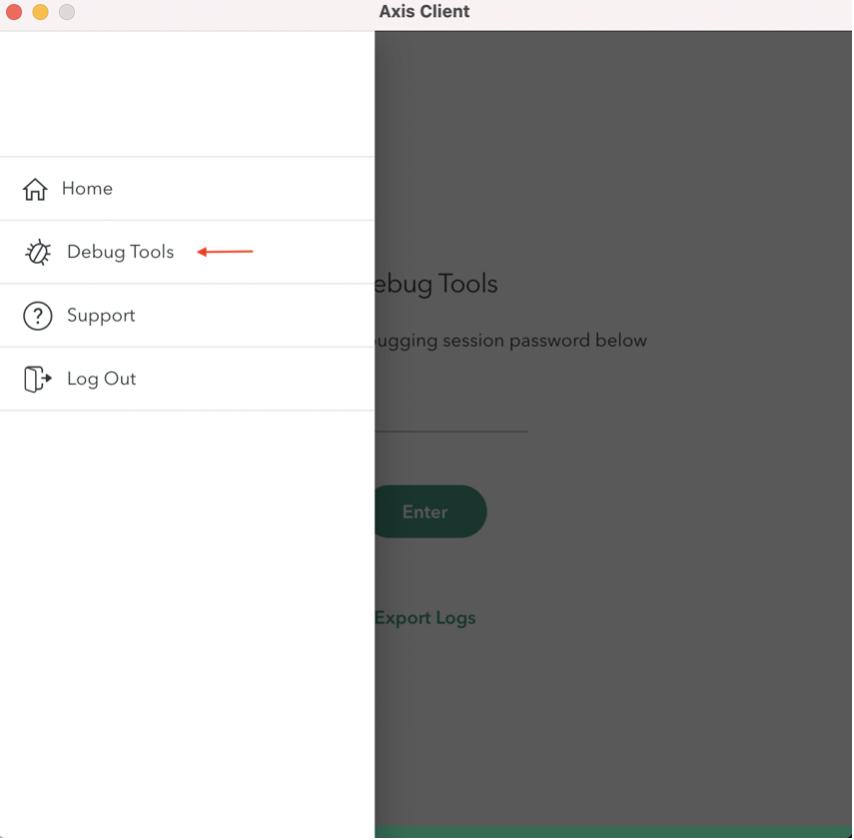
- Go to Debug Tools and enter your password.
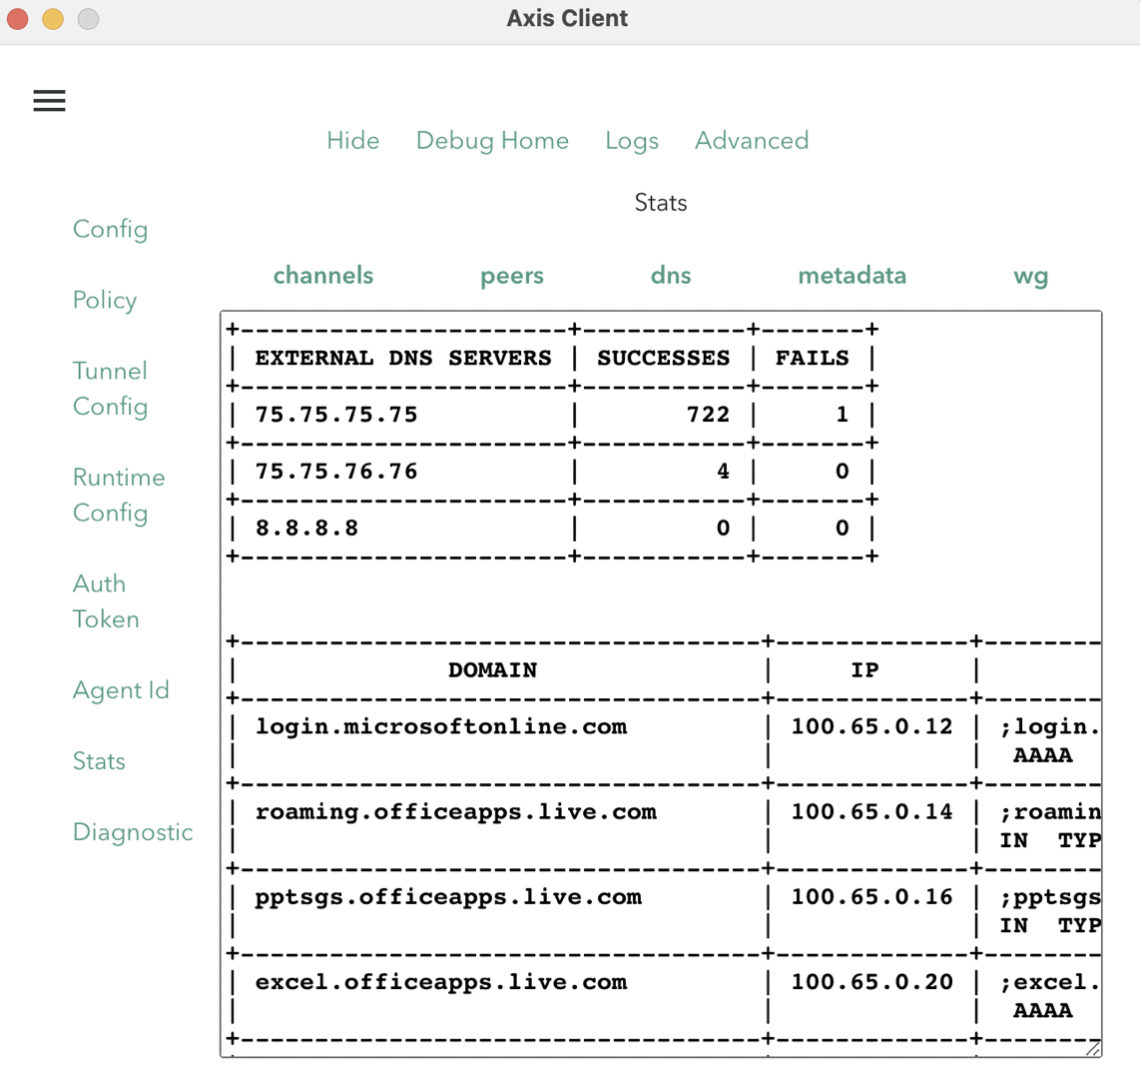
- Go to the Advanced > Stats > DNS screen to verify that the following Office 365 domains are being routed by the Axis Client to Axis Cloud:
- login.microsoftonline.com
- login.microsoft.com
- login.windows.net
Updated almost 4 years ago
