Step 3: Integrate PingFederate
This article describes how to integrate the PingFederate Identity Provider (IdP) with Axis Security using SAML.
Step 1: Create a SAML App in PingFederate
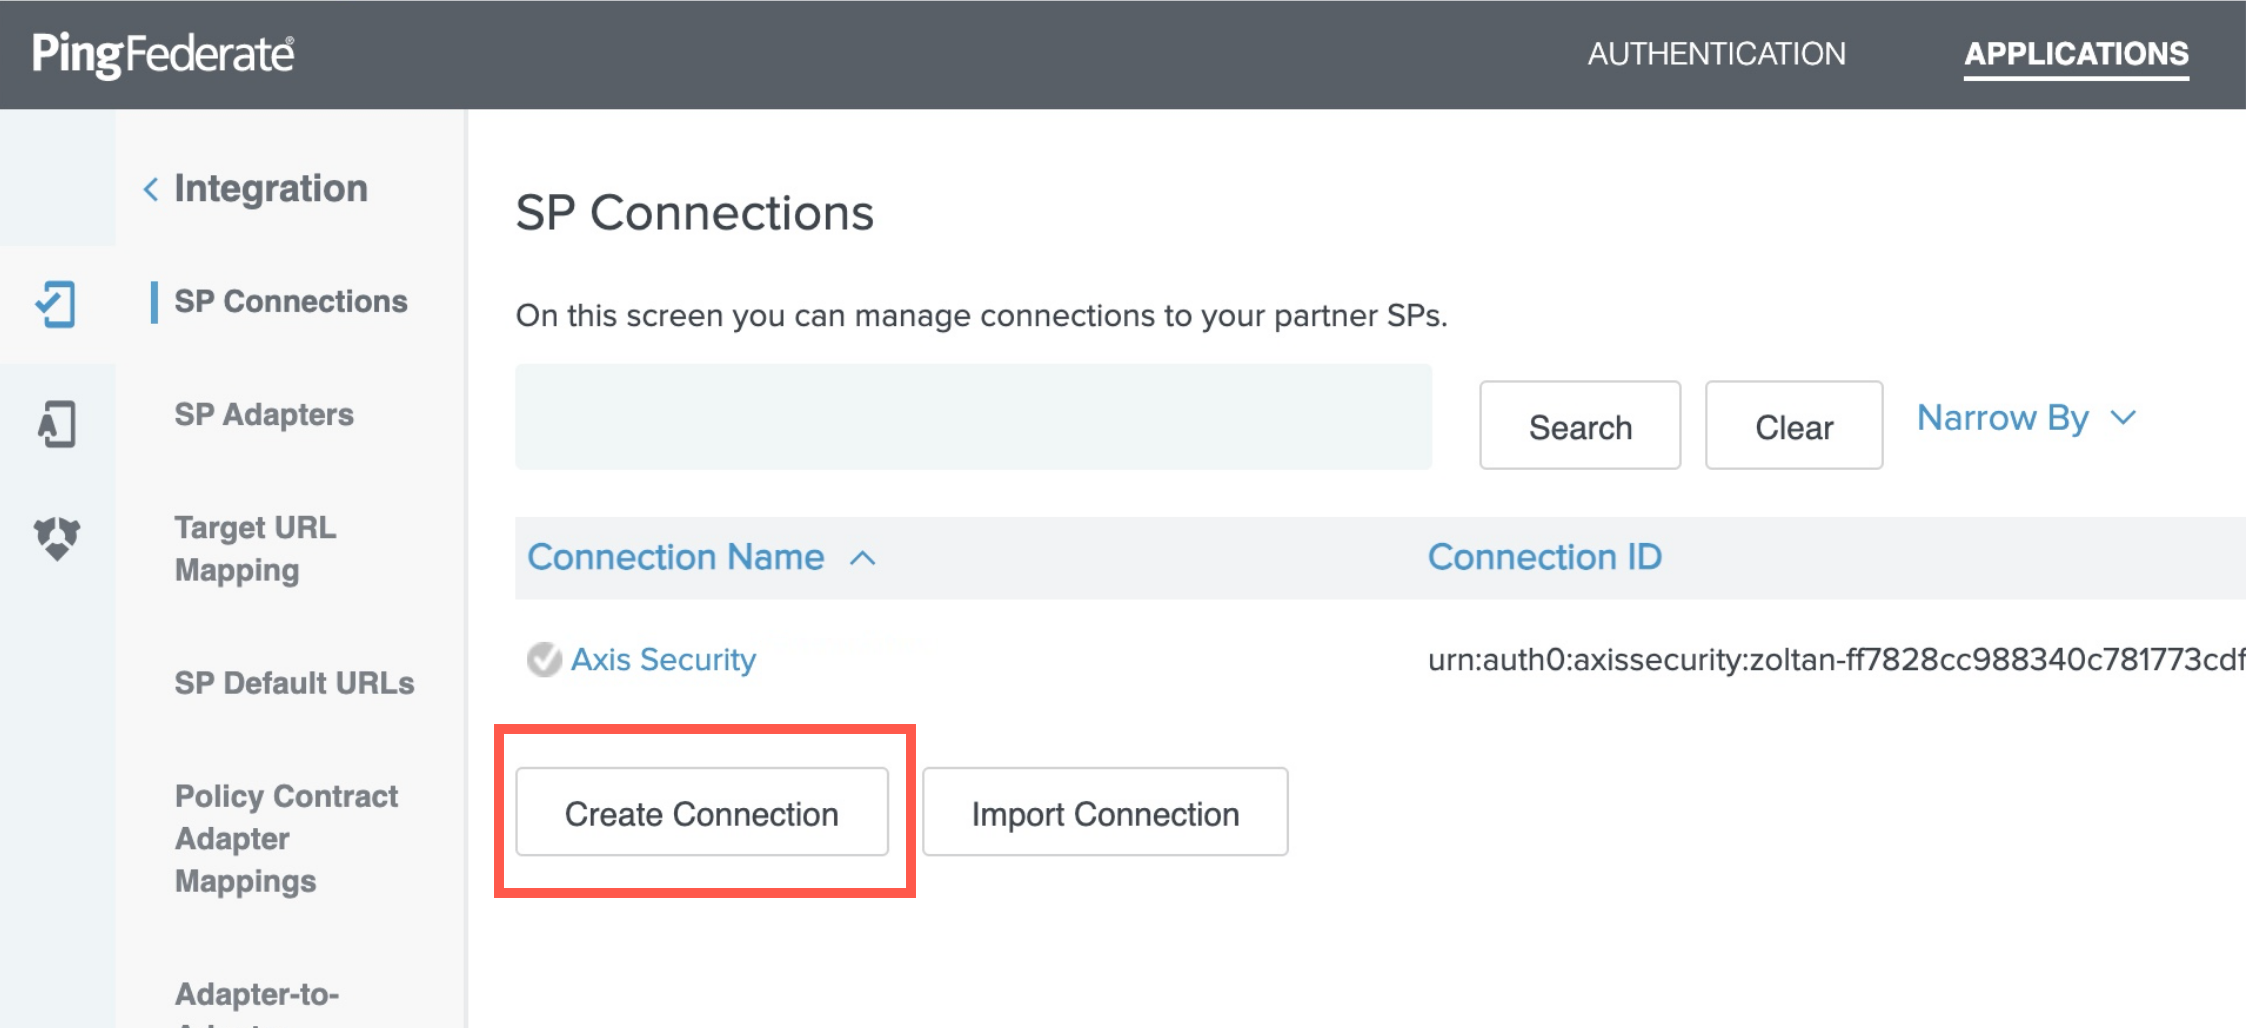
- Go to Applications -> SP Connections.

- Click Create Connection.
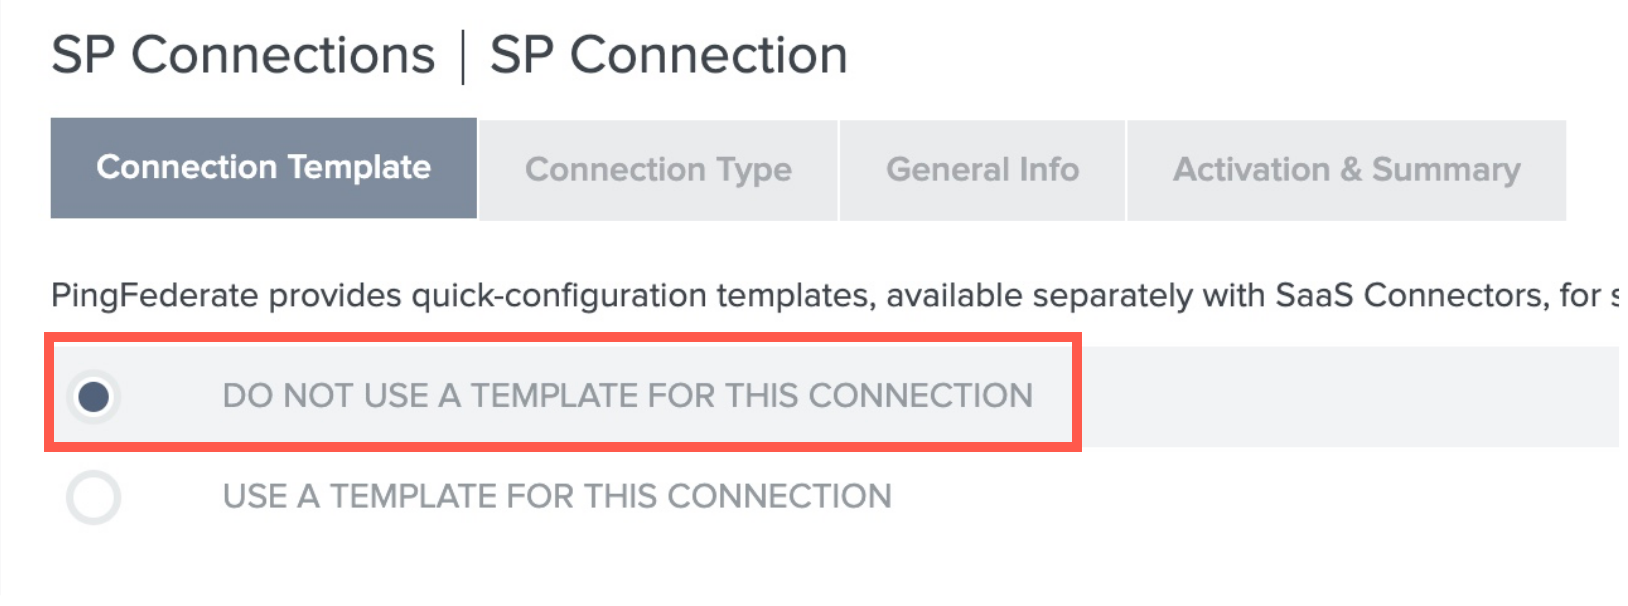
- Select Do not use a template.
-
Click Next.
-
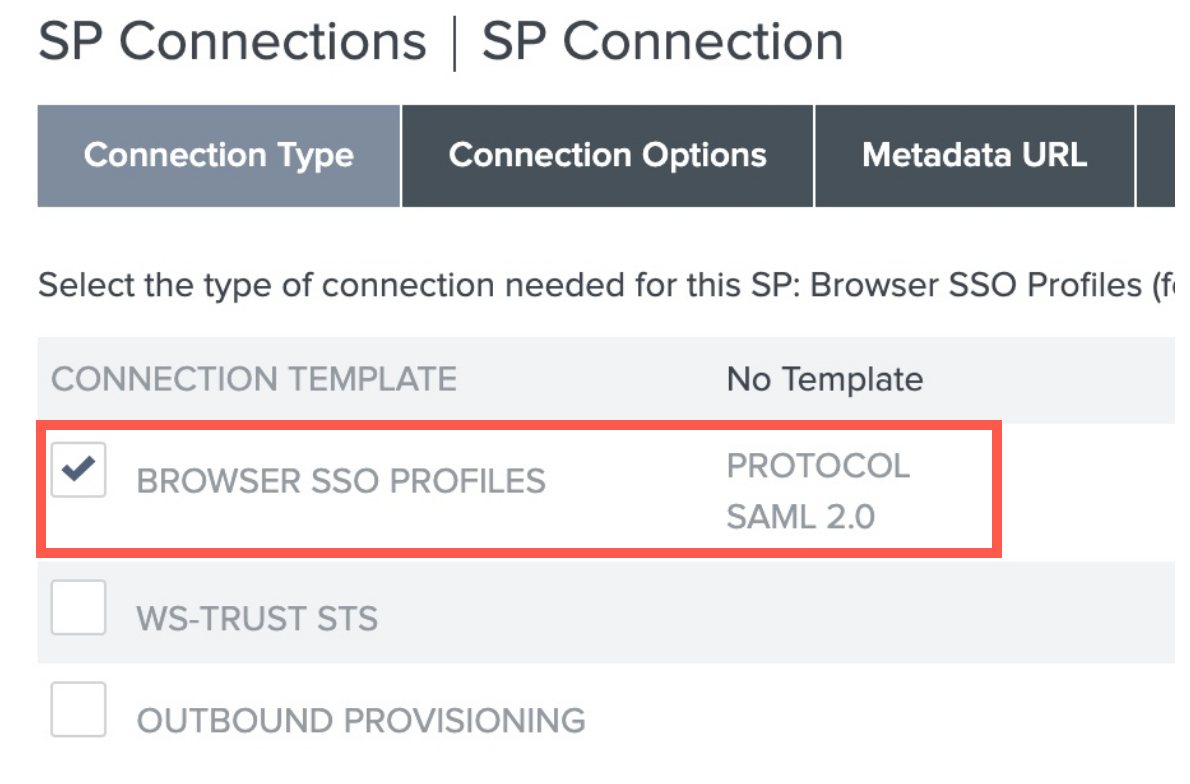
Click Browser SSO Files, and make sure the protocol is set to SAML 2.0.
-
Click Next.
-
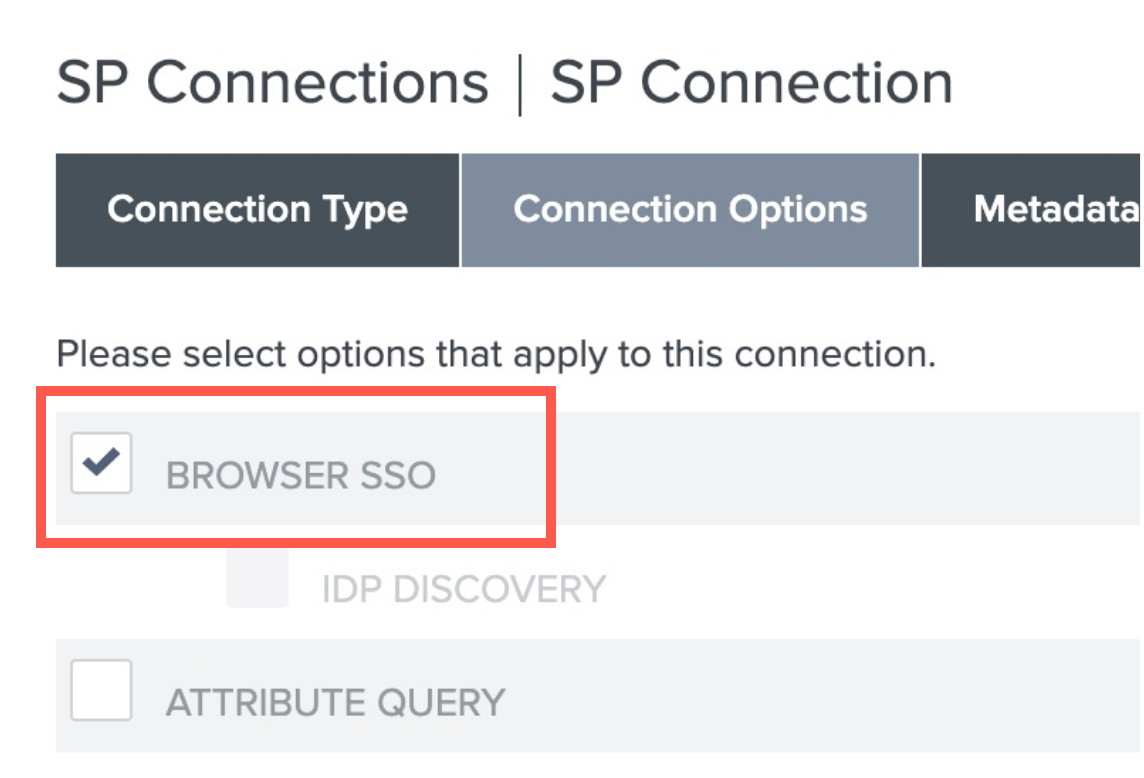
Make sure the Browser SSO is checked.
-
Click Next.
-
Leave Metadata URL to None.

- Click Next.
Step 2: Add PingFederate as an Identity Provider in Axis Security
To add PingFederate as an Identity Provider in Axis Security:
- In the Axis Management Console, go to Settings -> Identity Providers.
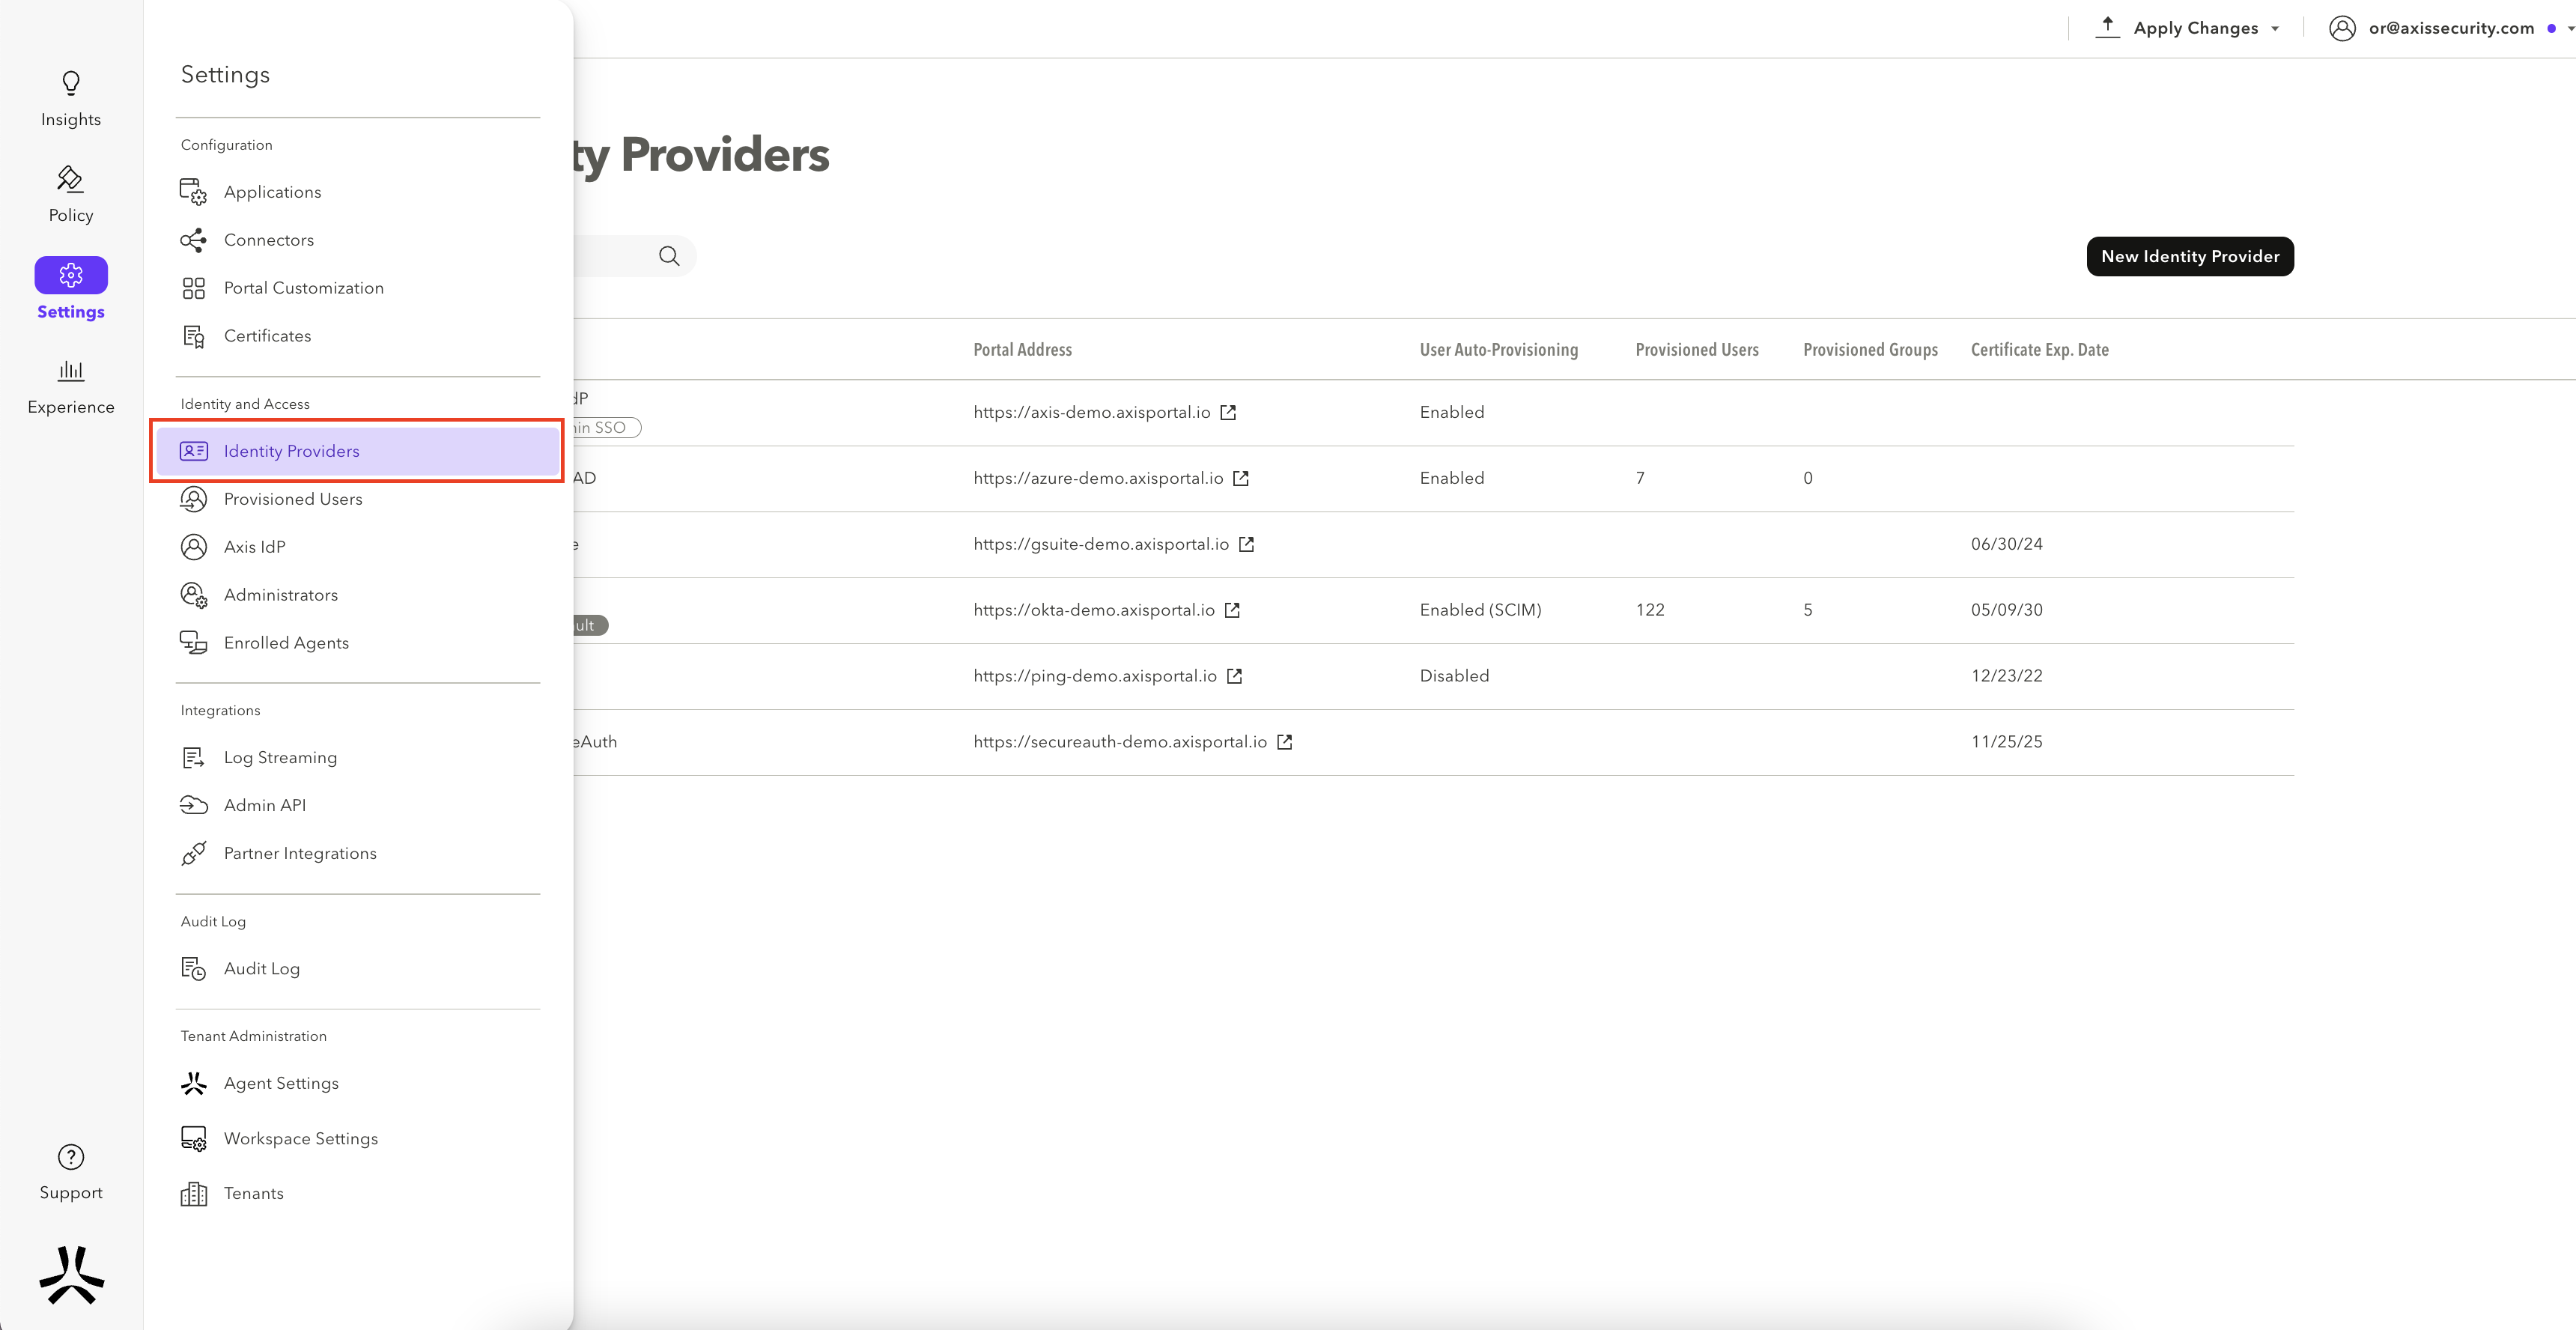
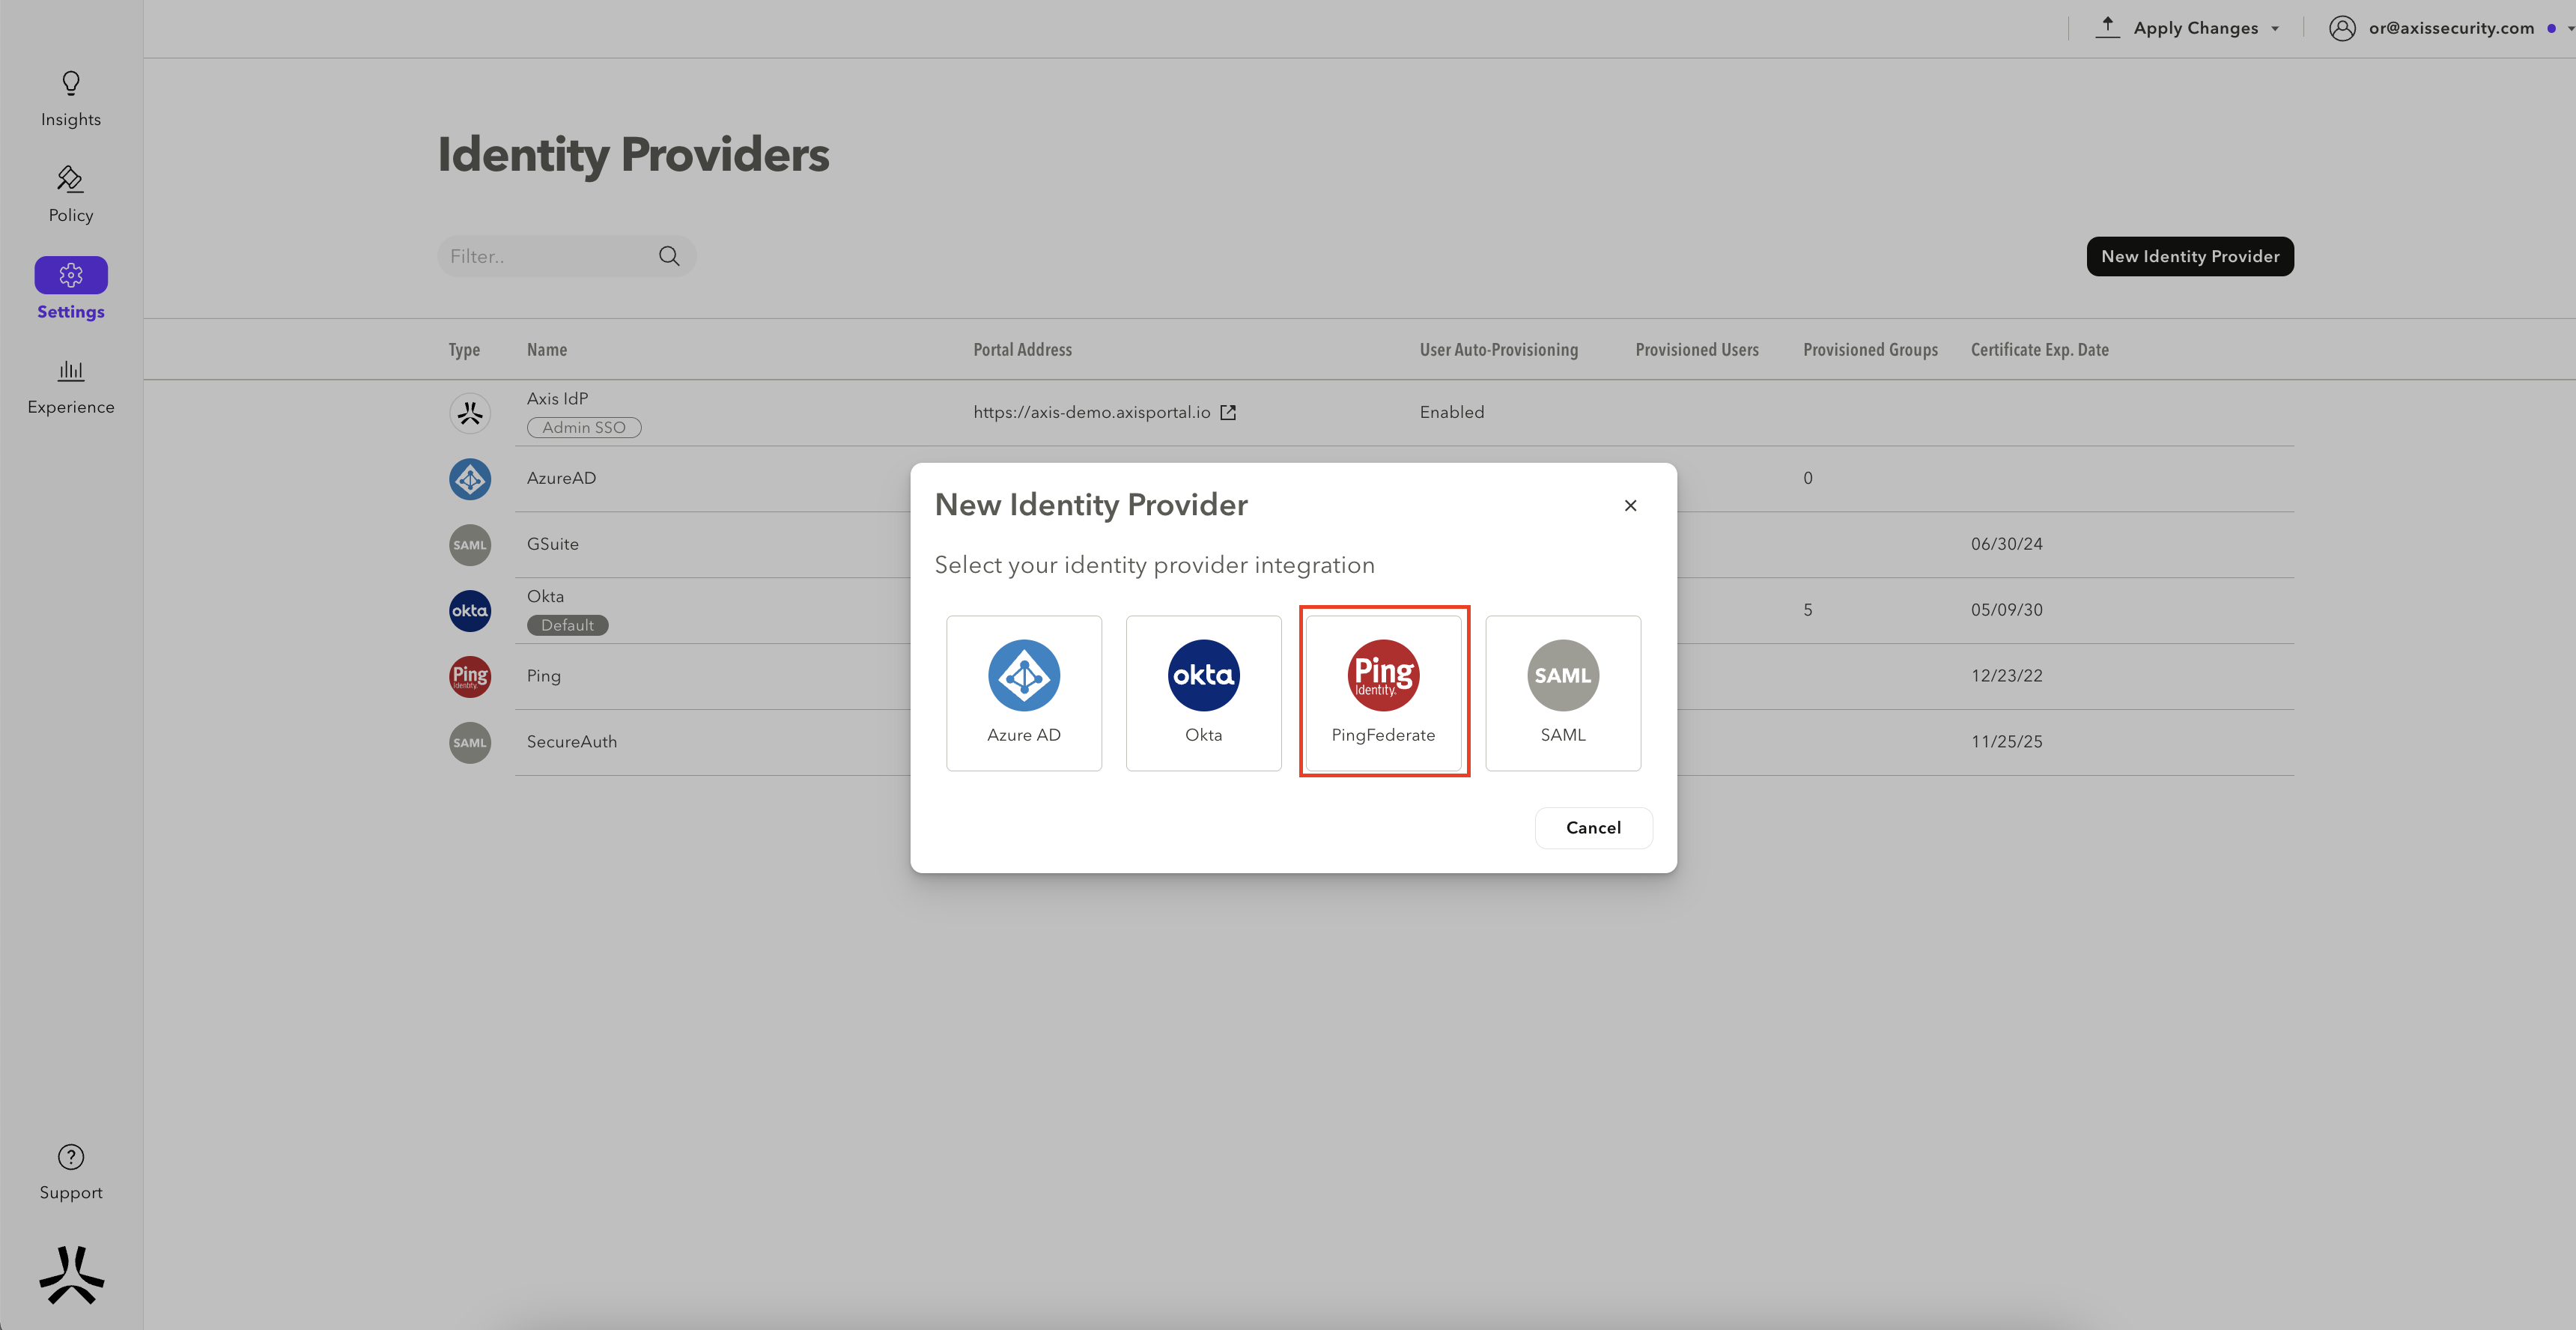
- Click on Add Identity Provider and select PingFederate.
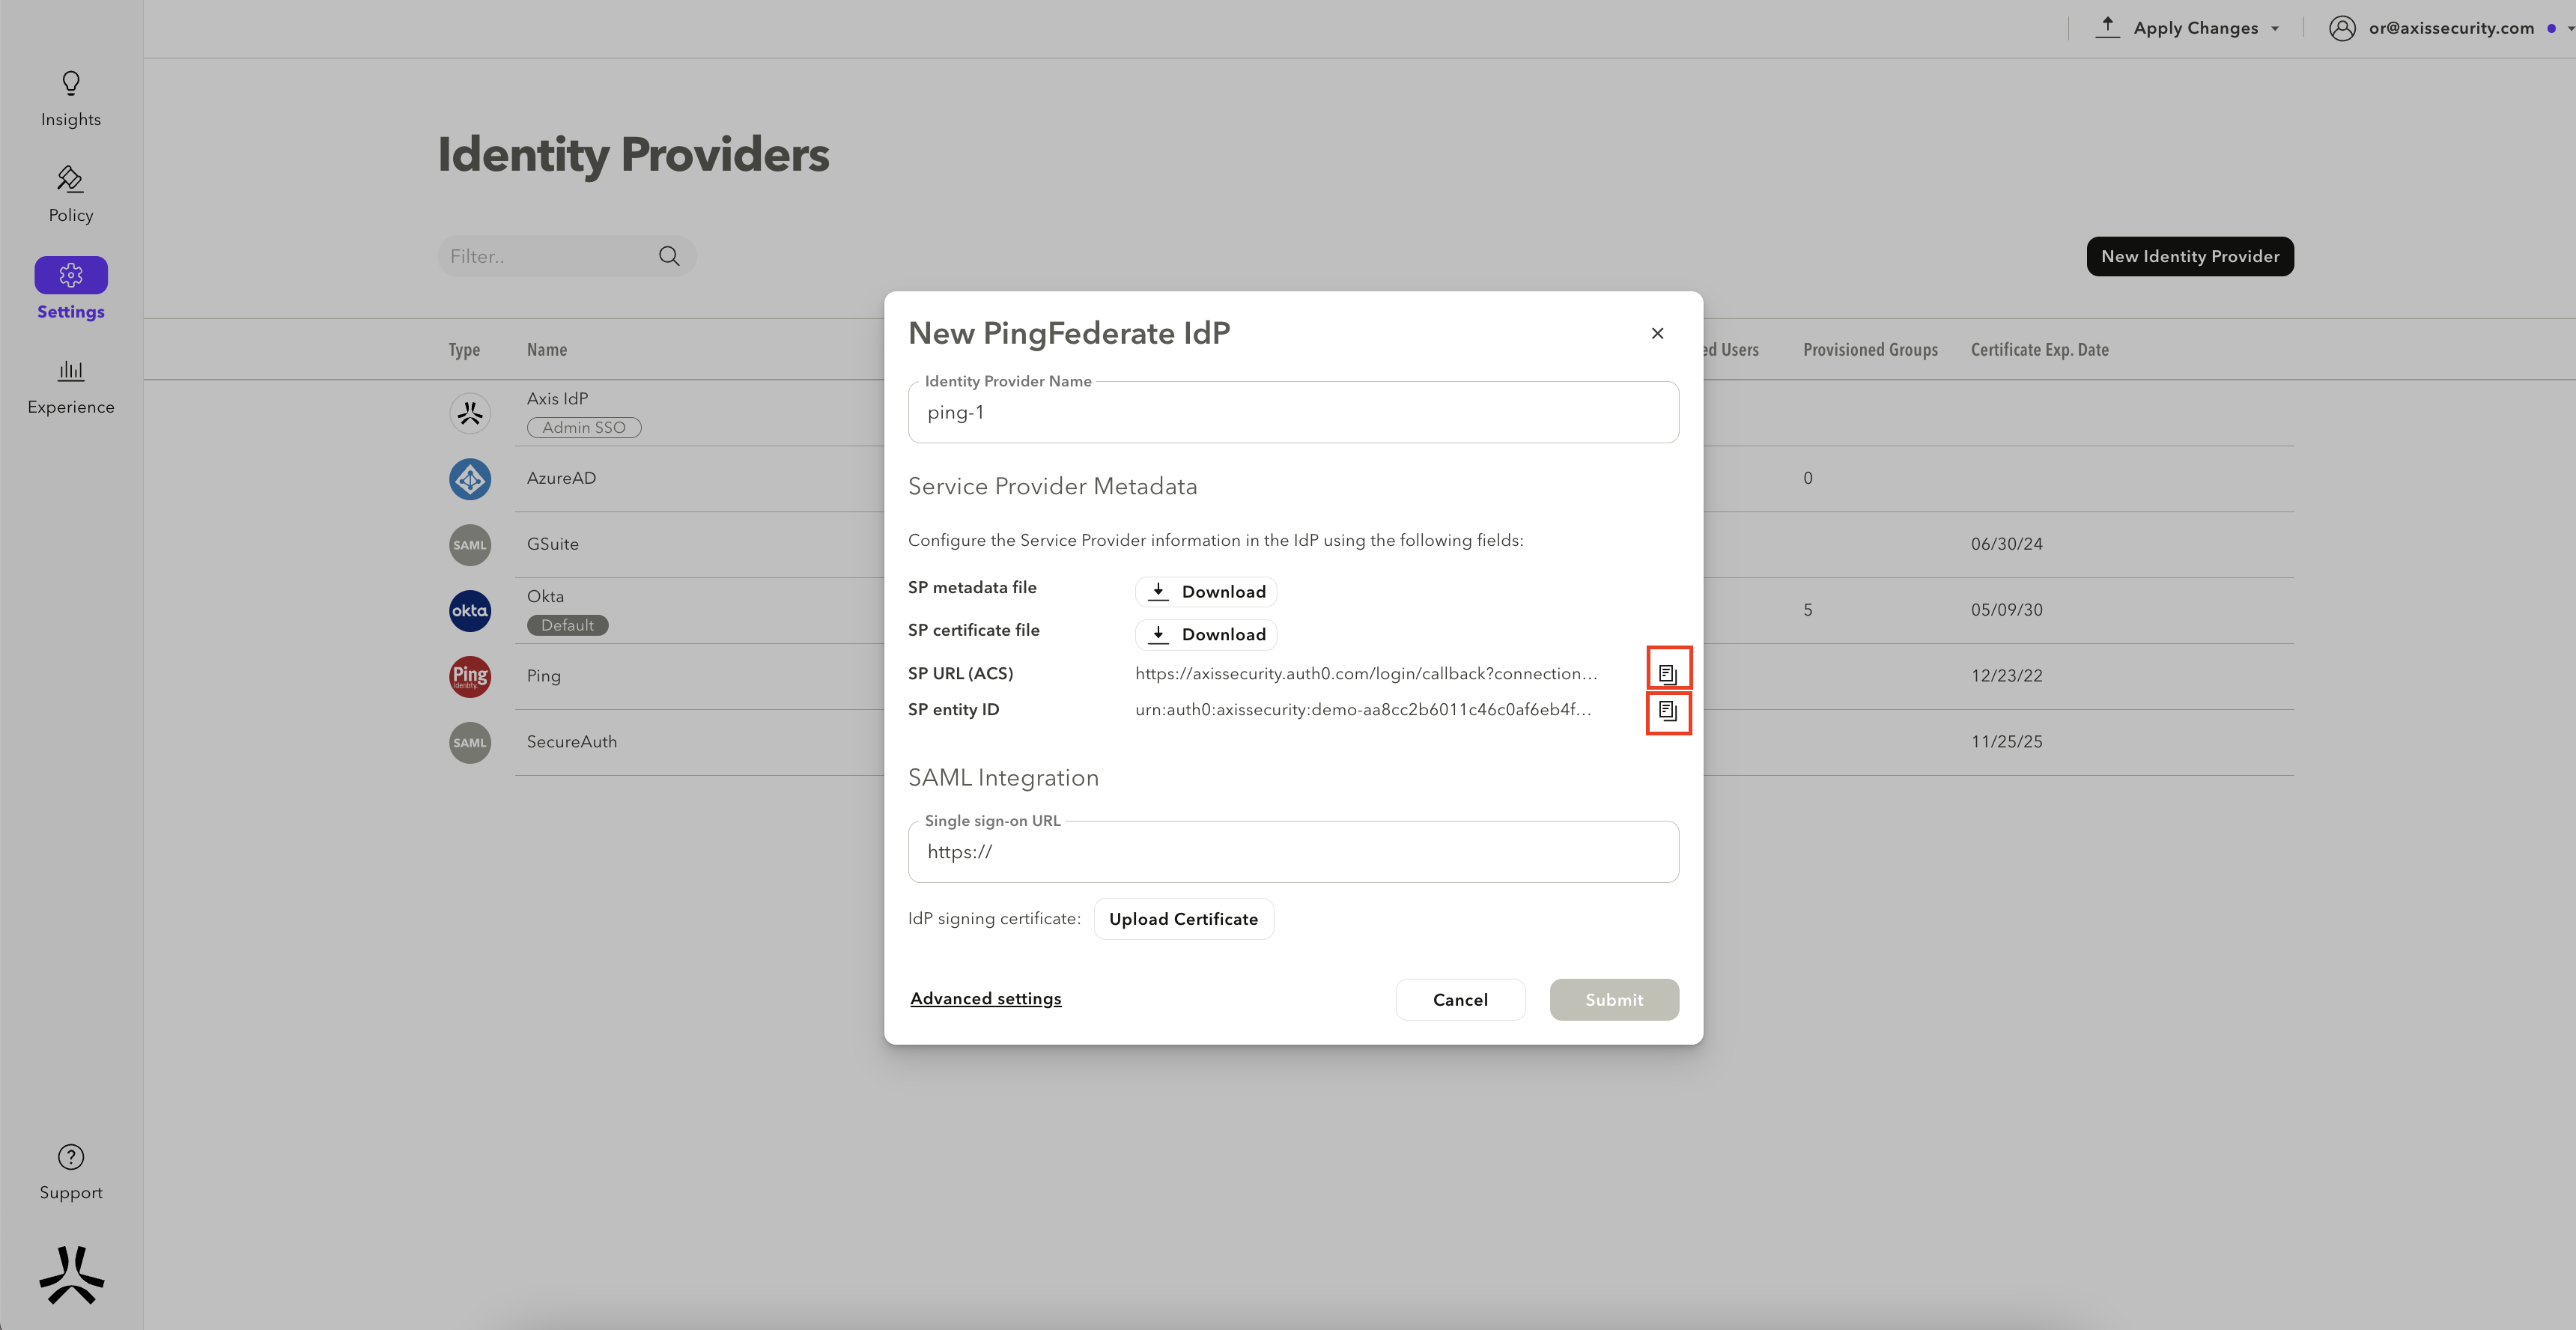
- Enter a Name for the IdP. Copy the SP Application ID and the SCIM Provisioning Token, and paste them into a text editor. You will need these details for Step 3: Finish Configuration in PingFederate.
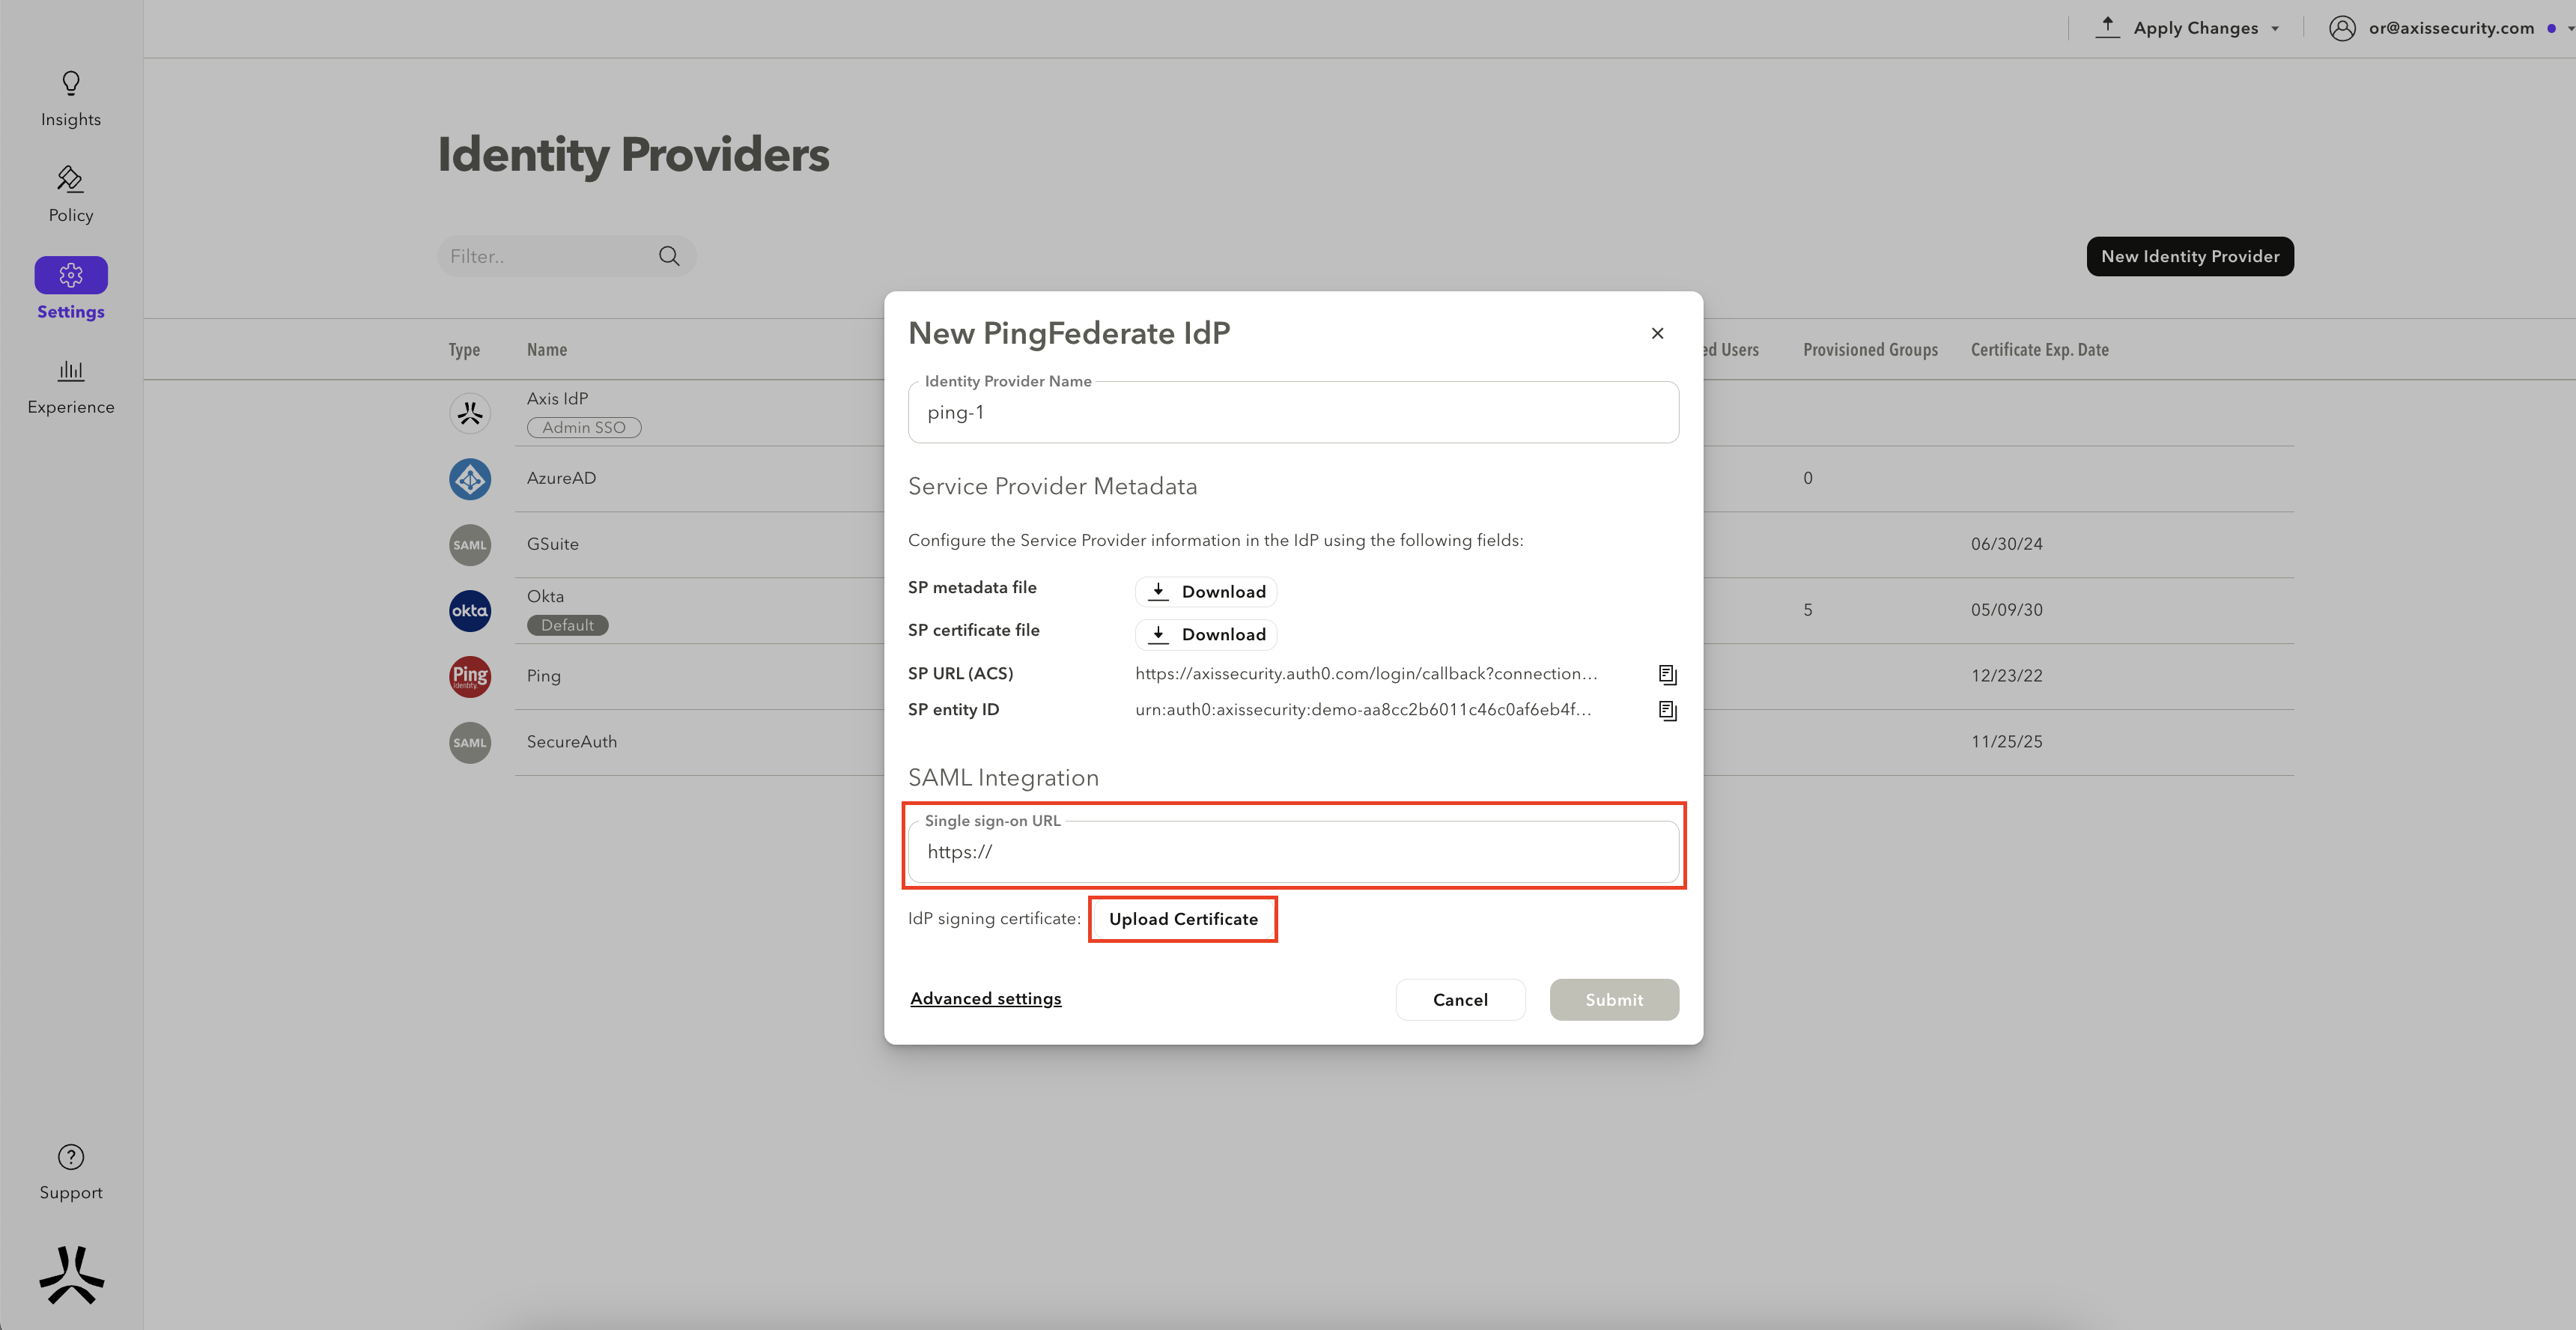
- In the Single Sign On URL field, paste the IdP SSO URL you obtained in step 1 (for example, https://ping.axisinternal.com:9031/idp/SSO.saml). Click Upload certificate and upload the certificate you obtained from Step 2.
- Click on Submit
Step 3: Finish Configuration in PingFederate
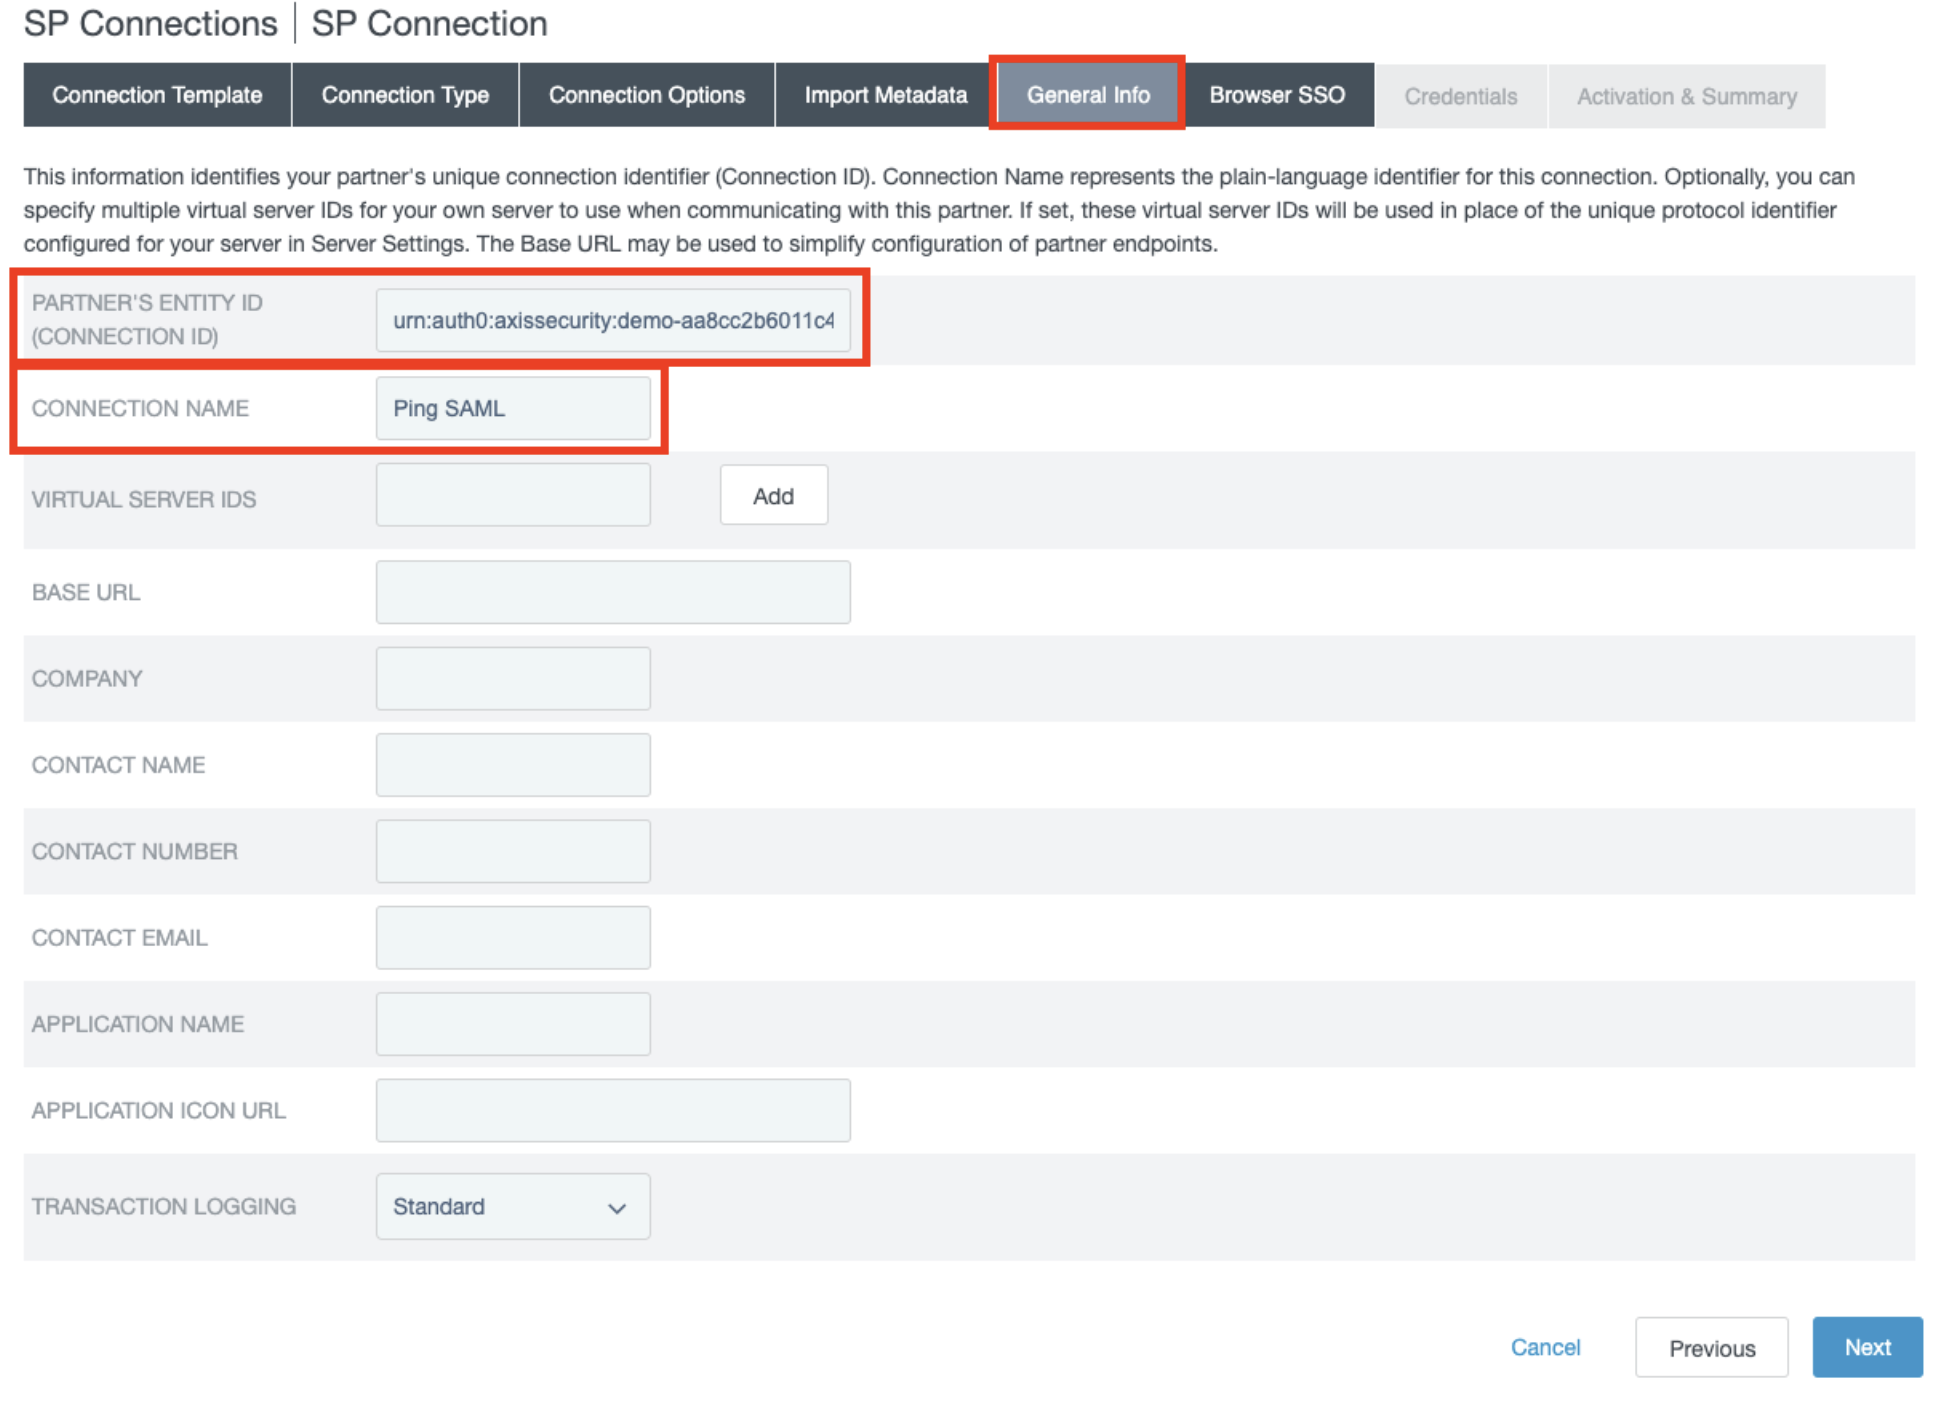
- In the General Info section, enter the Entity ID obtained from Axis. Add Connection Name and other optional information.
-
Click Next.
-
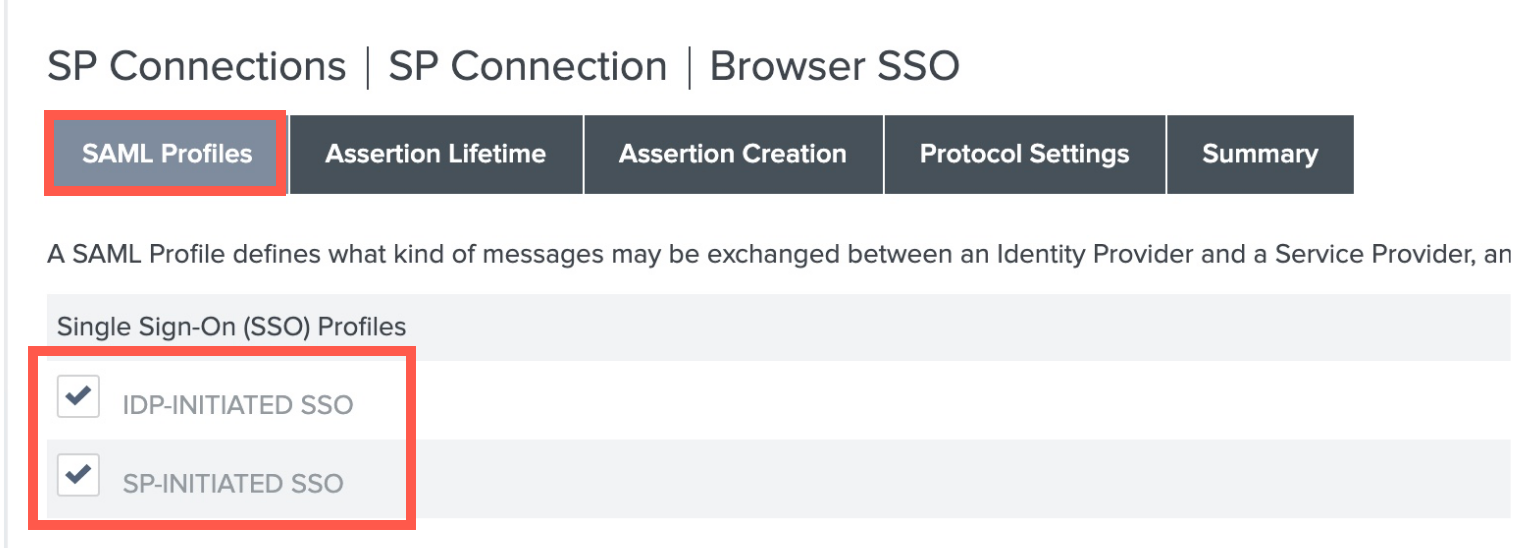
In the Browser SSO section, under Single Sign-on (SSO) profiles, click Configure Browser SSO.

- In the SAML Profiles section, check the box for both IDP-INITIATED SSO and SP-INITIATED SSO.
- Click Next.
- In the Assertion Lifetime section, change the assertion lifetime if needed (optional), and click Next.

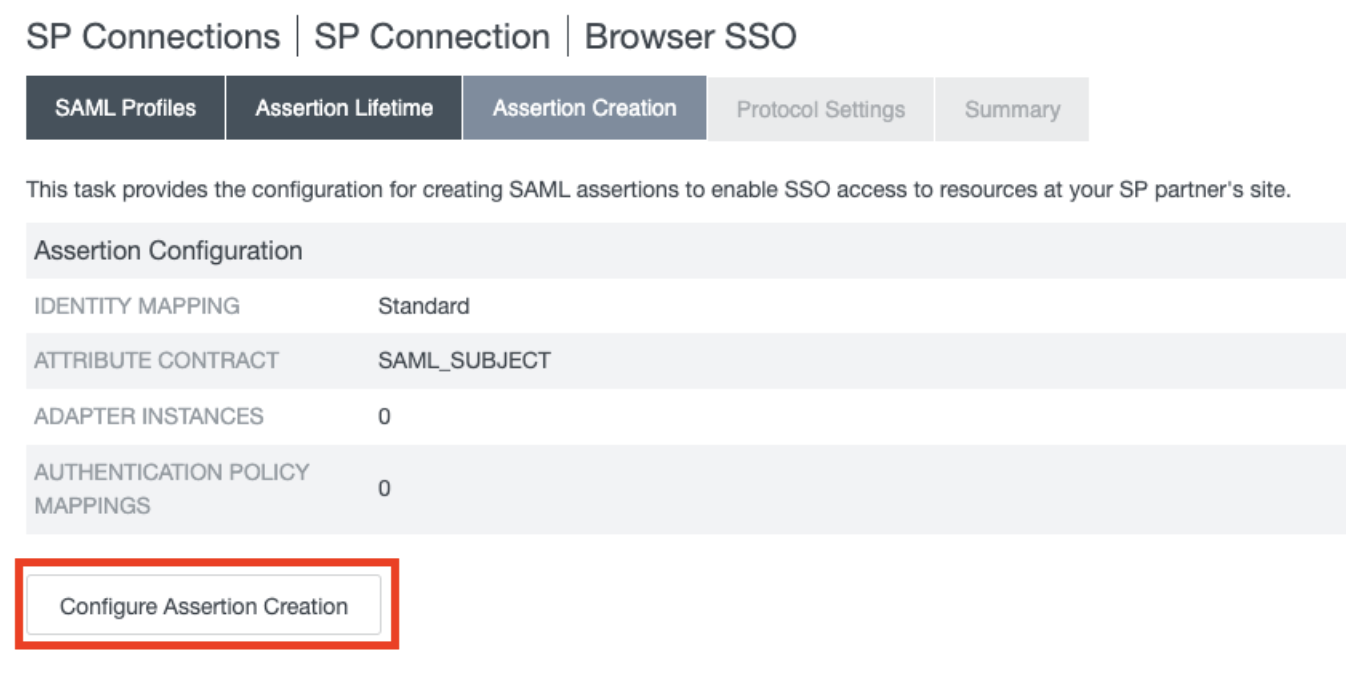
- In the Assertion Creation section, click Configure Assertion Creation.
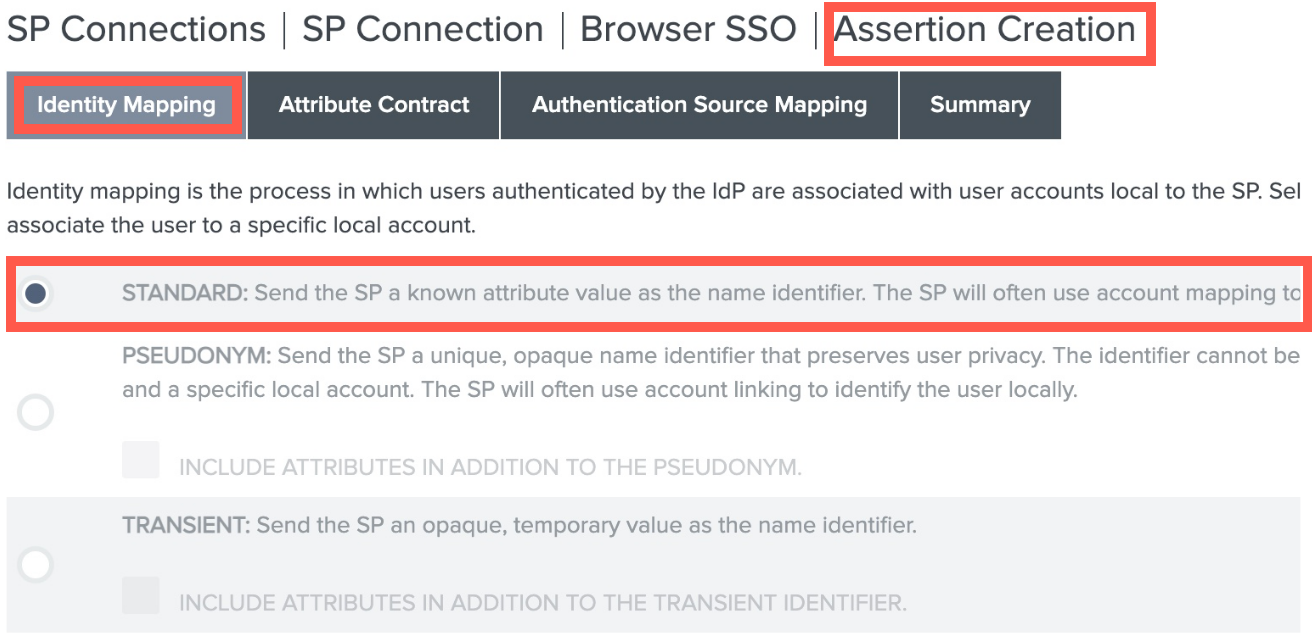
- In the Identity Mapping section, select Standard.
-
Click Next.
-
In the Attribute Contact subsection, select a format for the SAML_SUBJECT with the value urn:oasis:names:tc:SAML:1.1:nameid-format:emailAddress
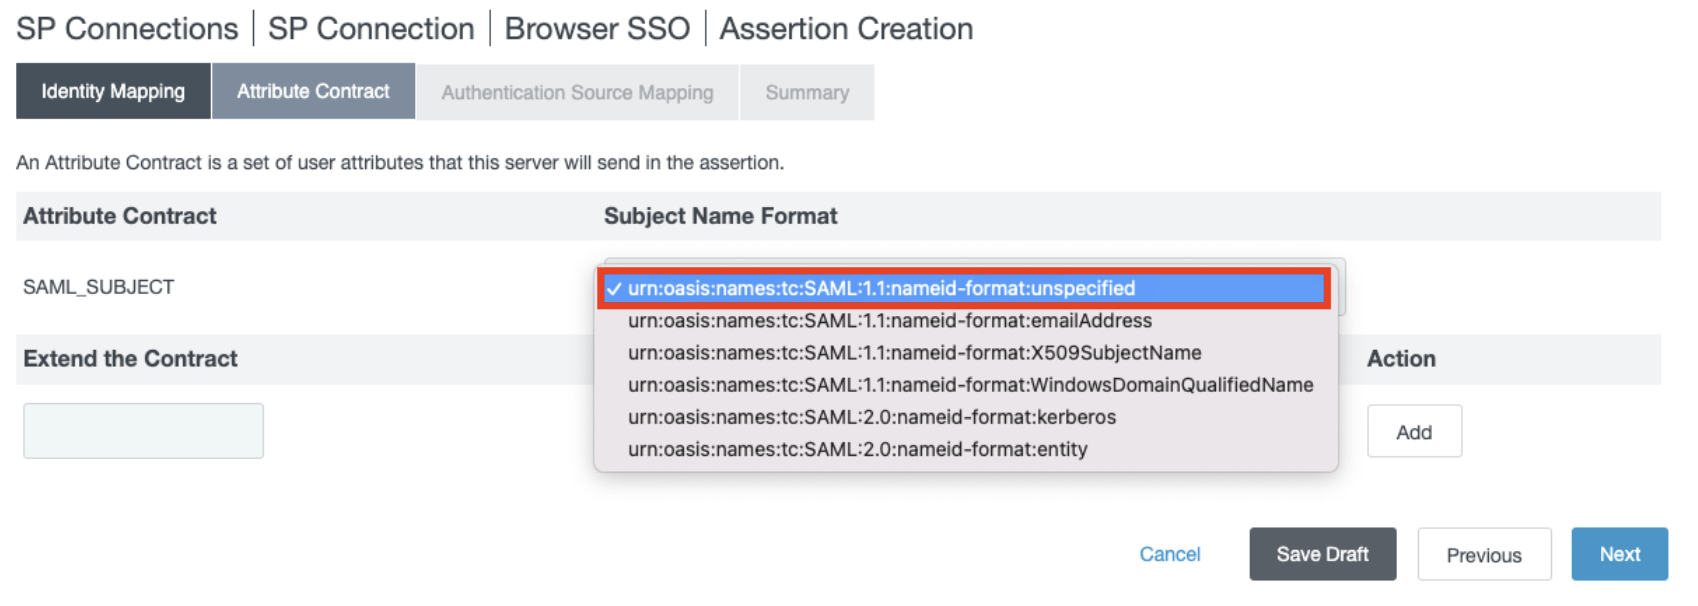
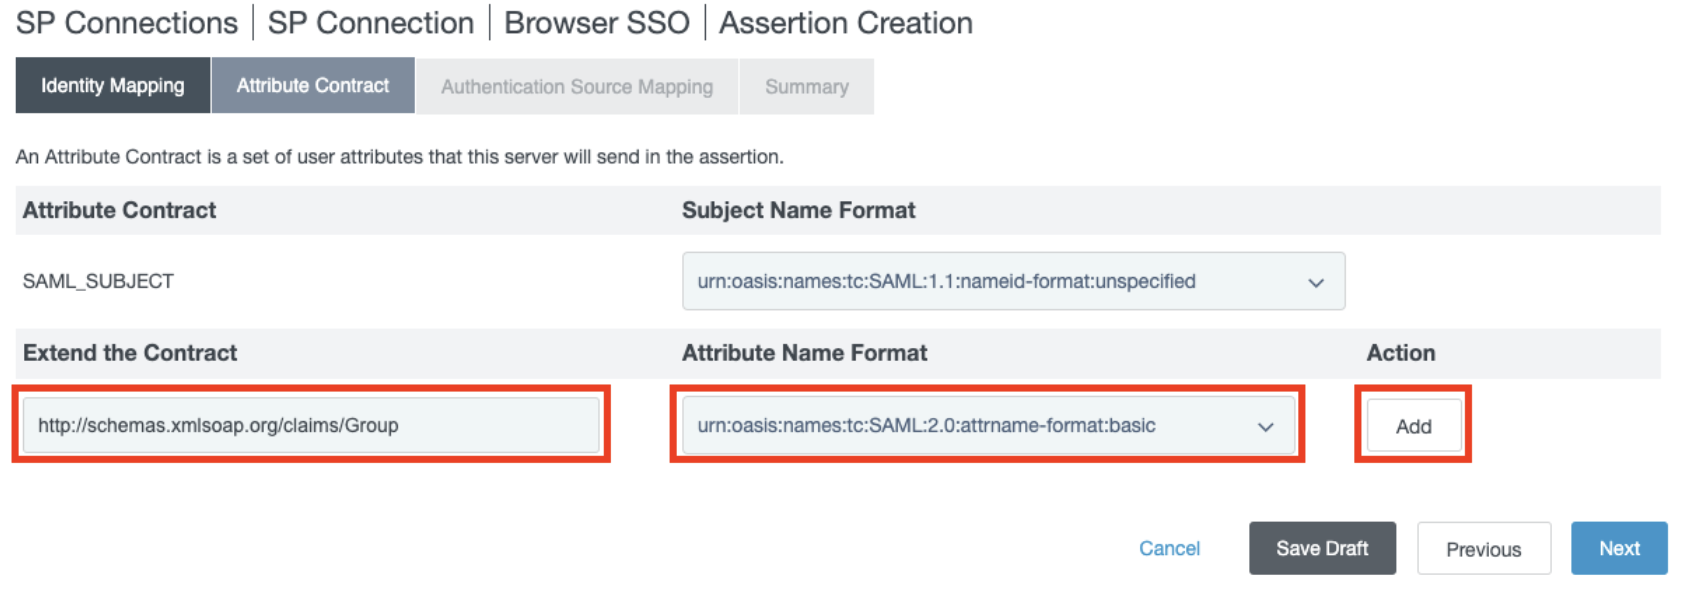
- In the Extend the Contract subsection, add the value "http://schemas.xmlsoap.org/claims/Group" with format urn:oasis:names:tc:SAML:2.0:attrname-format:basic, and click Add.
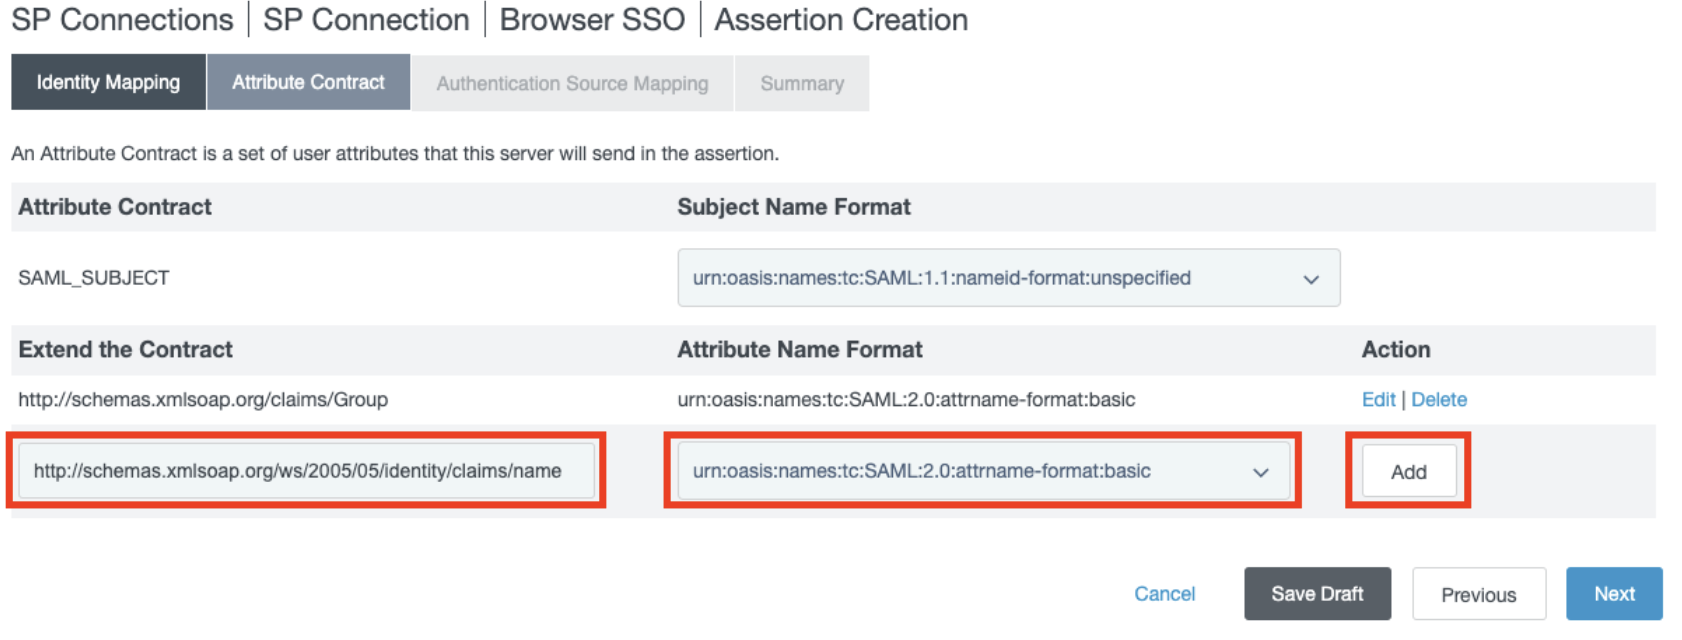
And then add the value "http://schemas.xmlsoap.org/ws/2005/05/identity/claims/name" with format urn:oasis:names:tc:SAML:2.0:attrname-format:basic, and click Add.
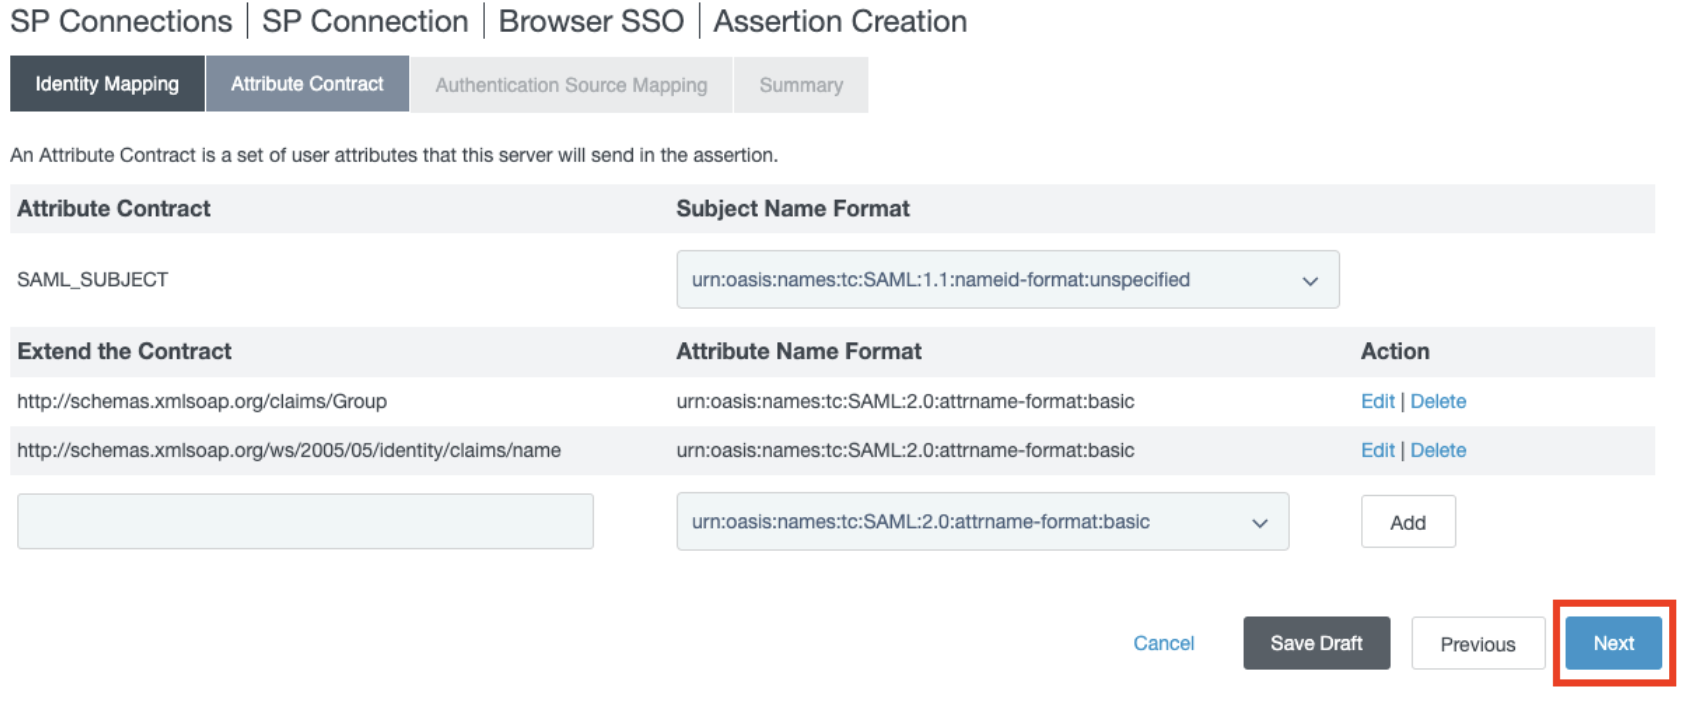
- Click Next.
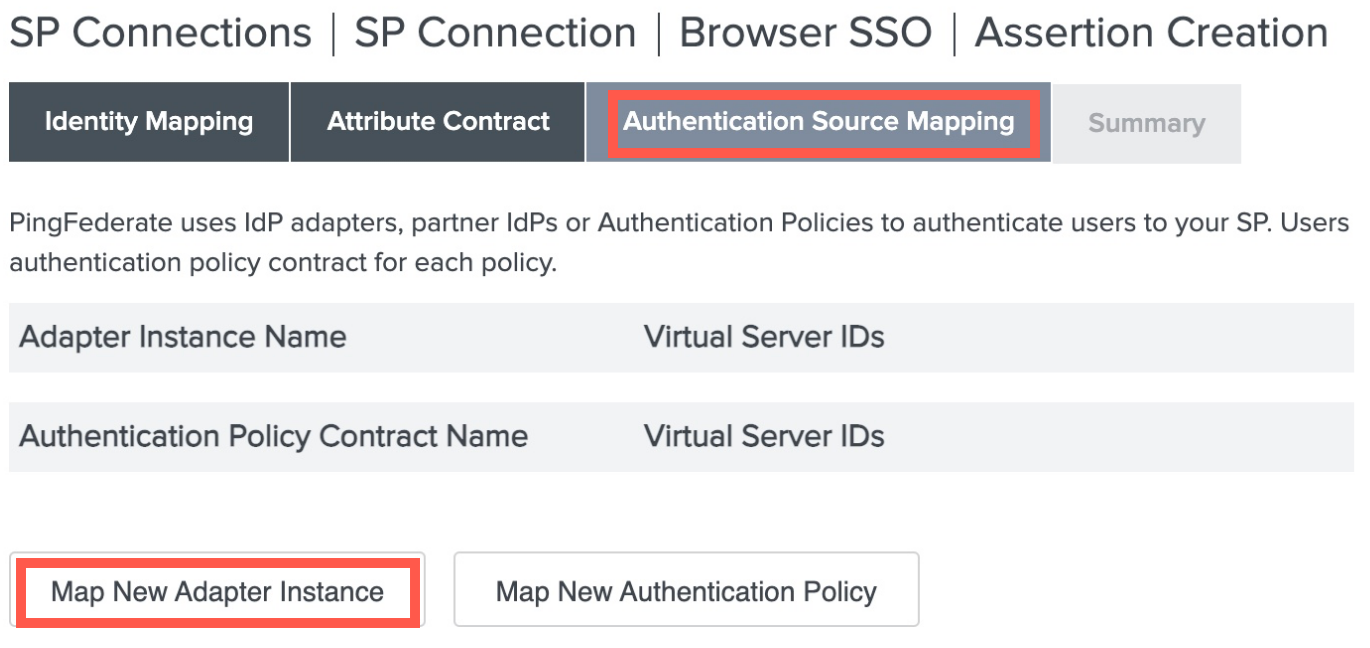
- In the Authentication Source Mapping section, click Map New Adapter Instance.
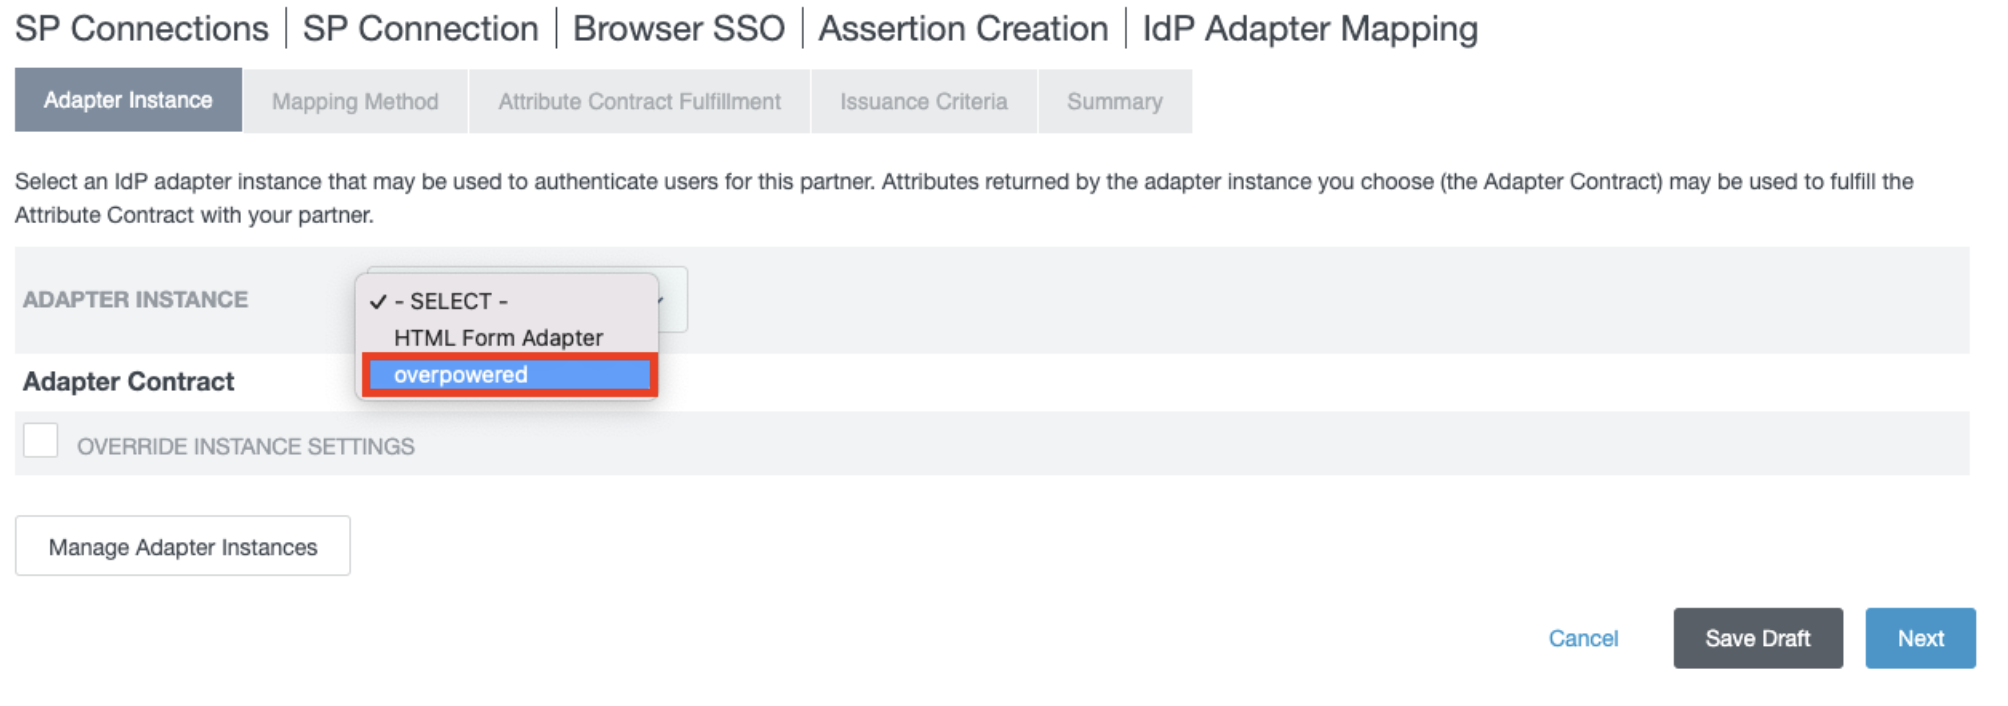
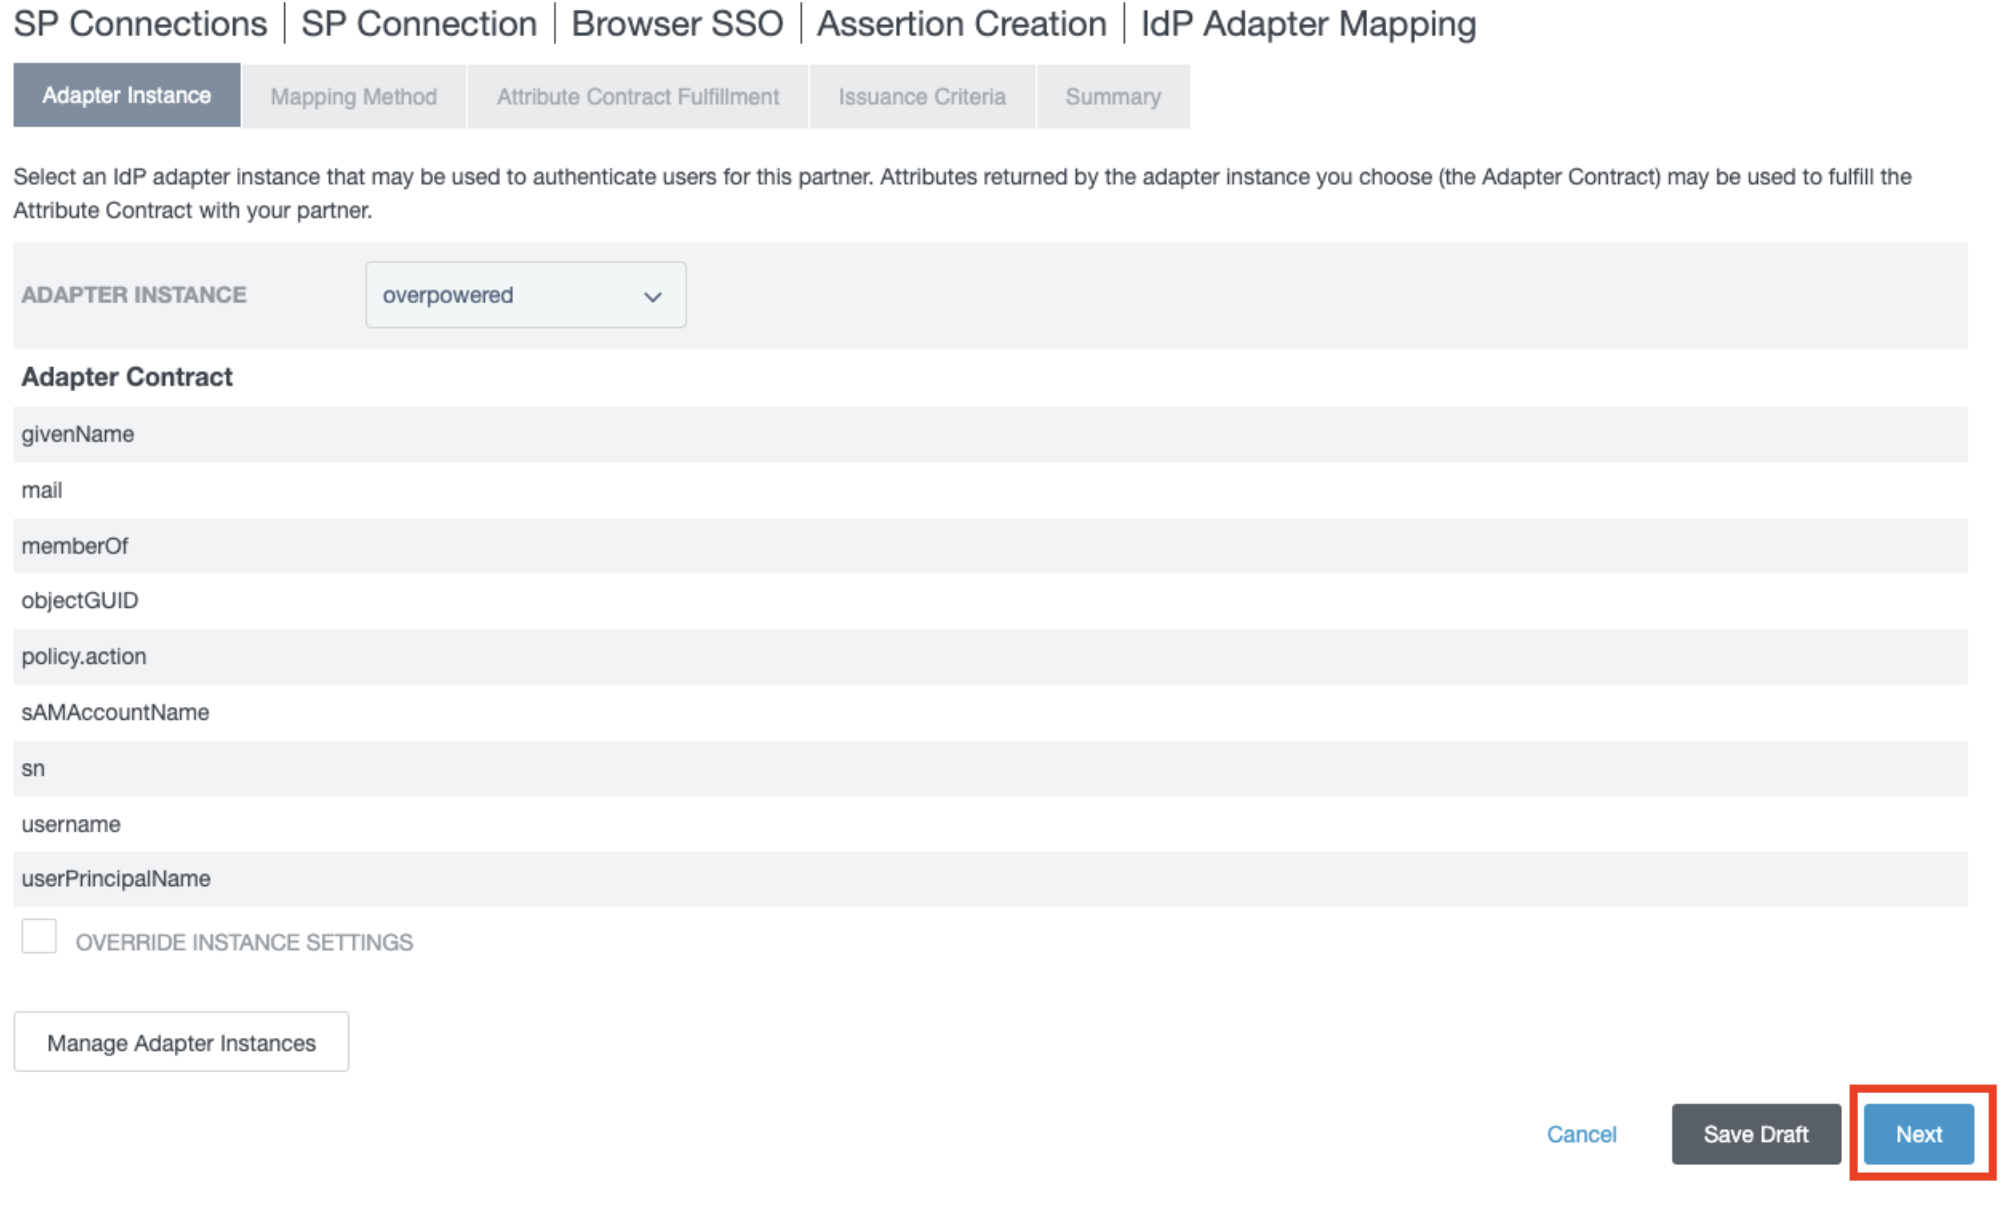
- In the Adapter Instance section, choose the adapter that is connected to your data store.
- Click Next.
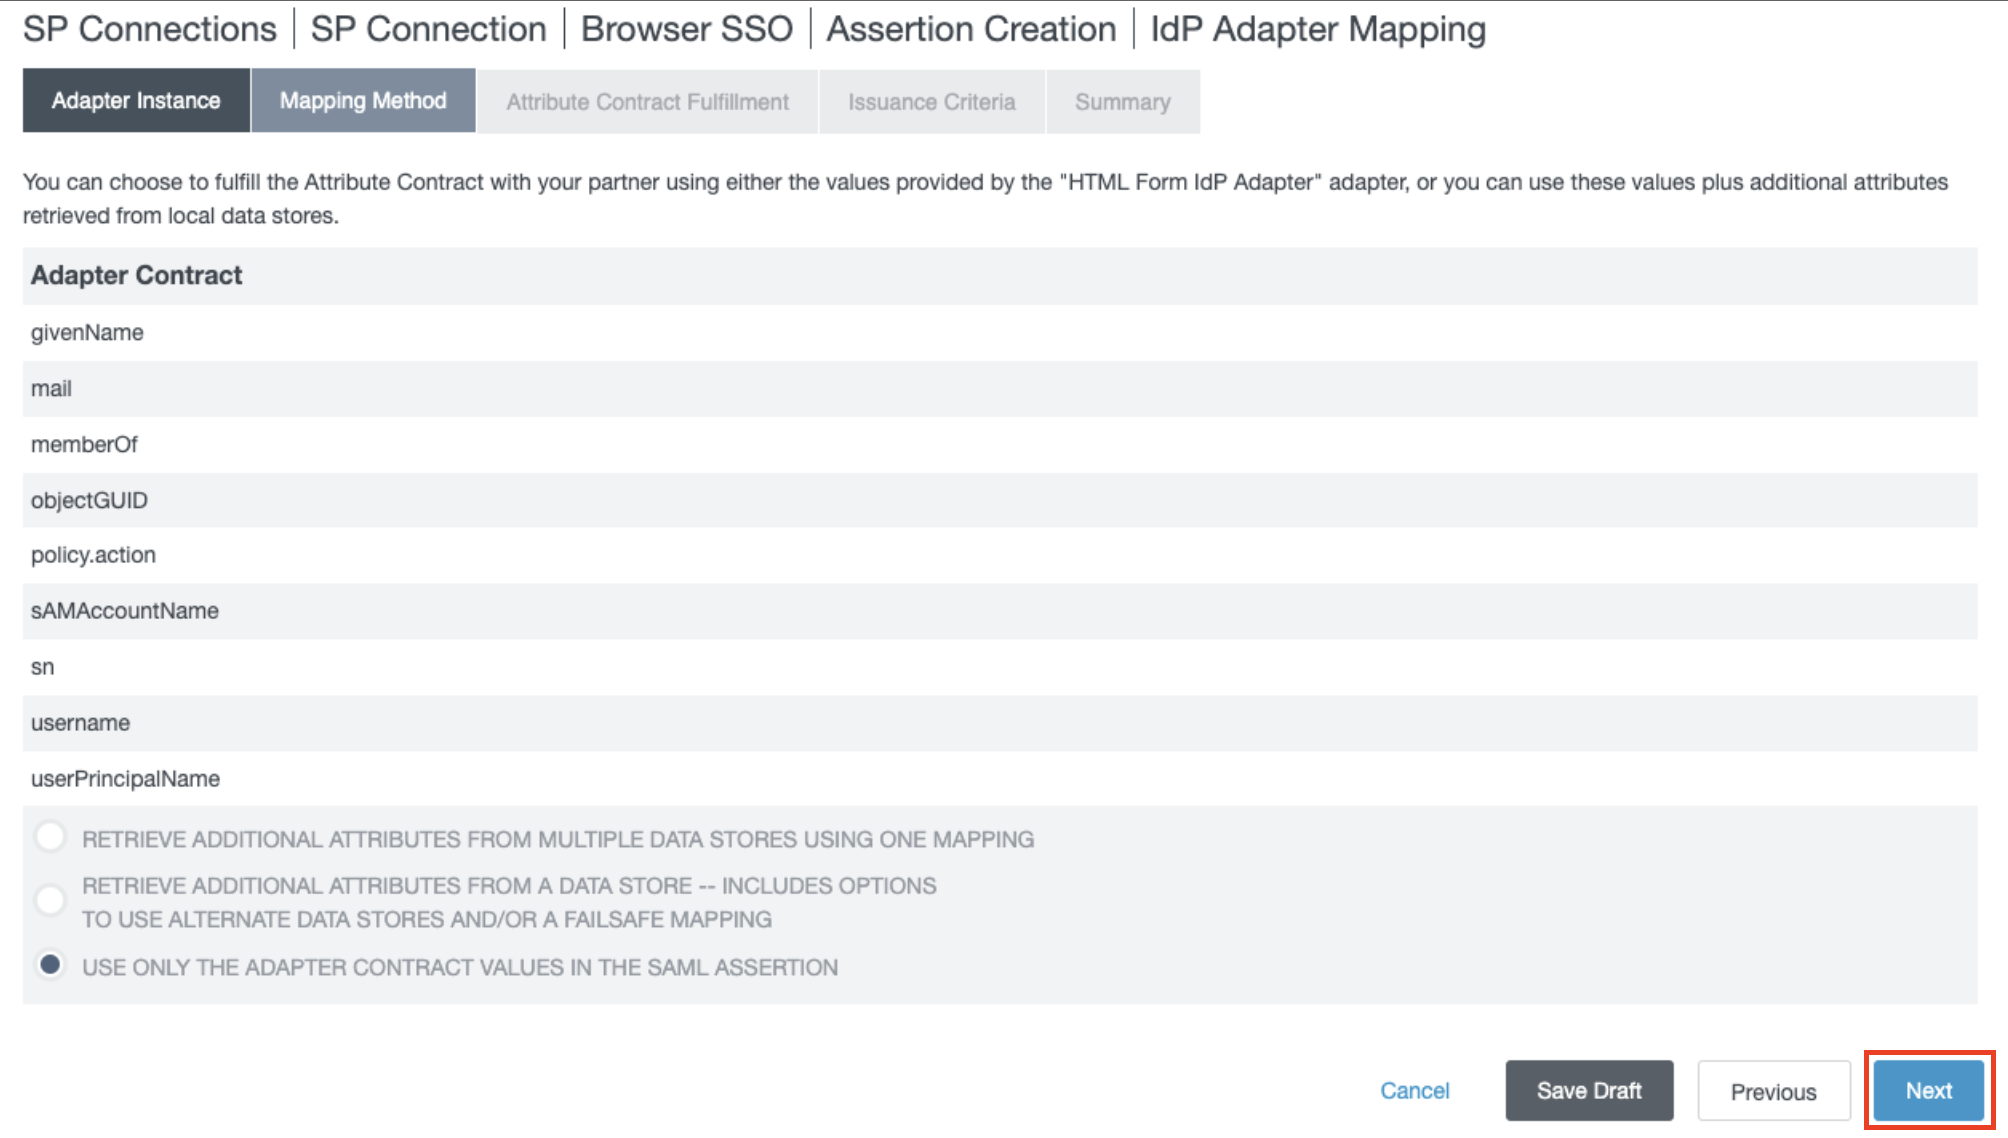
- In the Mapping Method, click Next.
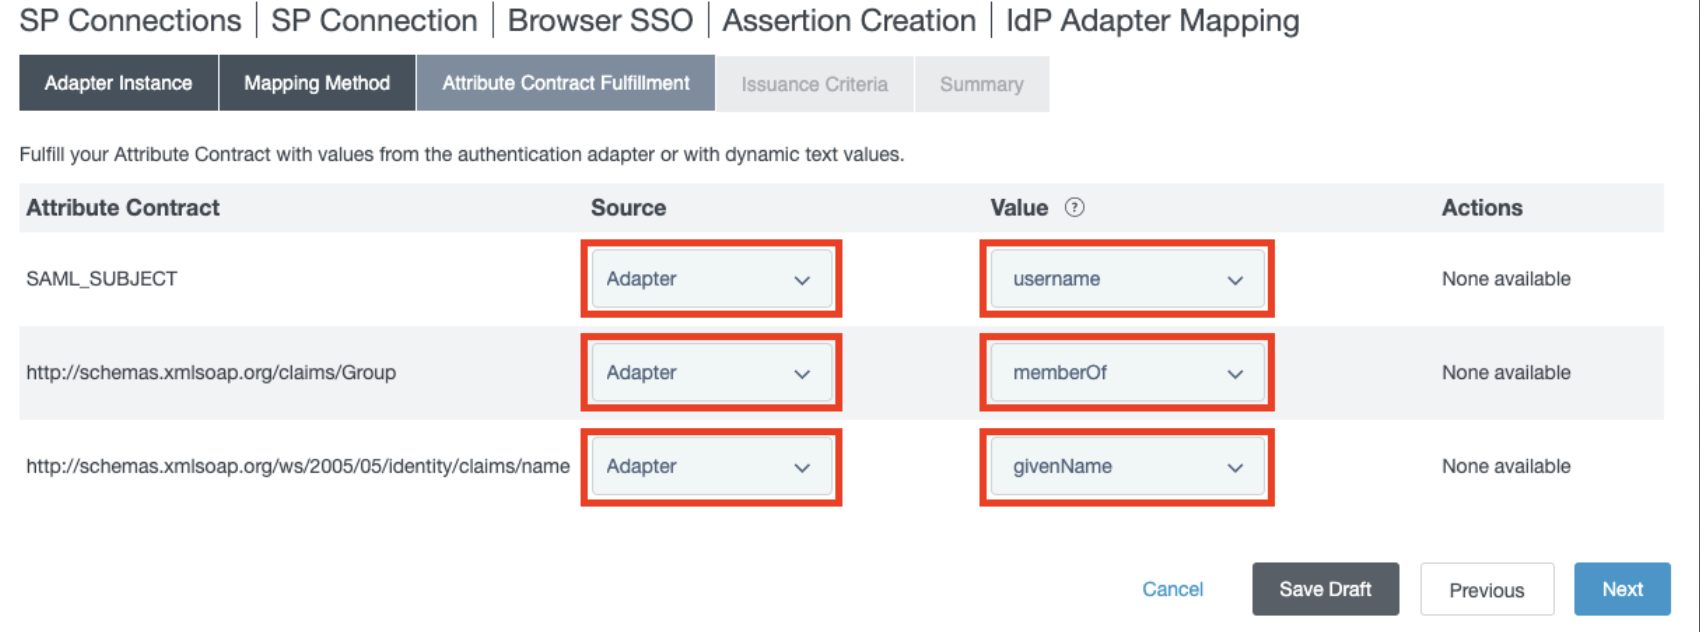
This is where we map what values are sent to Axis from PingFederate. They are all sources from Adapter but are configurable by the admin.
- In the Attribute Contact Fulfillment section, set the following mappings:
-
Click Next.
-
In the Issuance Criteria section, click Next.

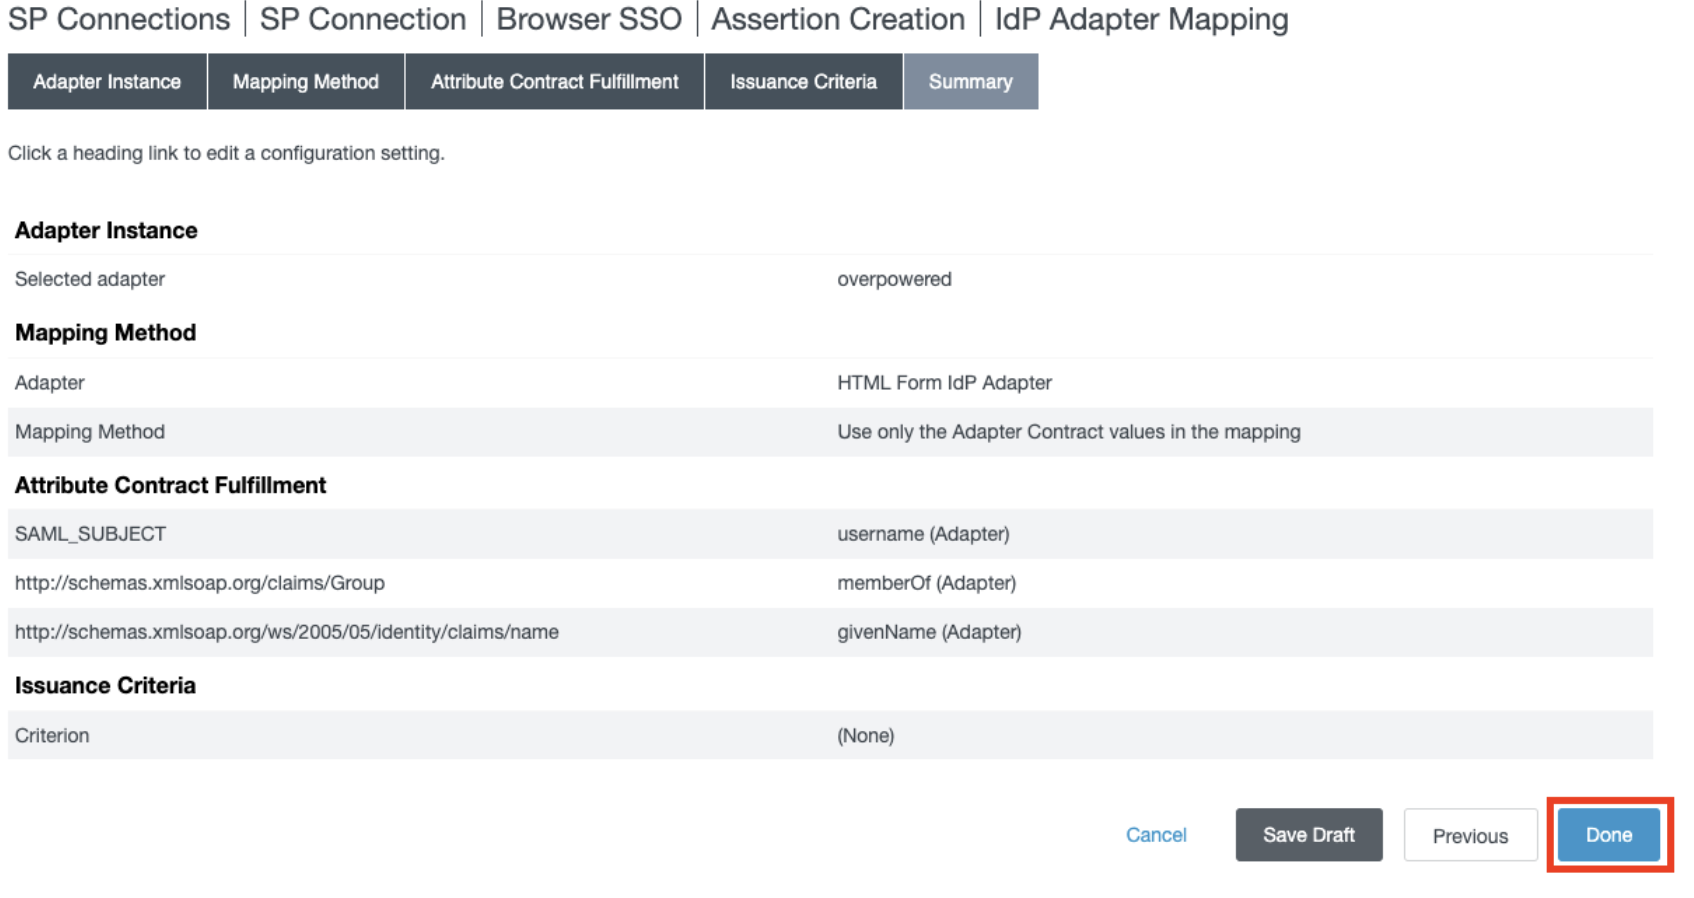
- In the Summary section, click Done.
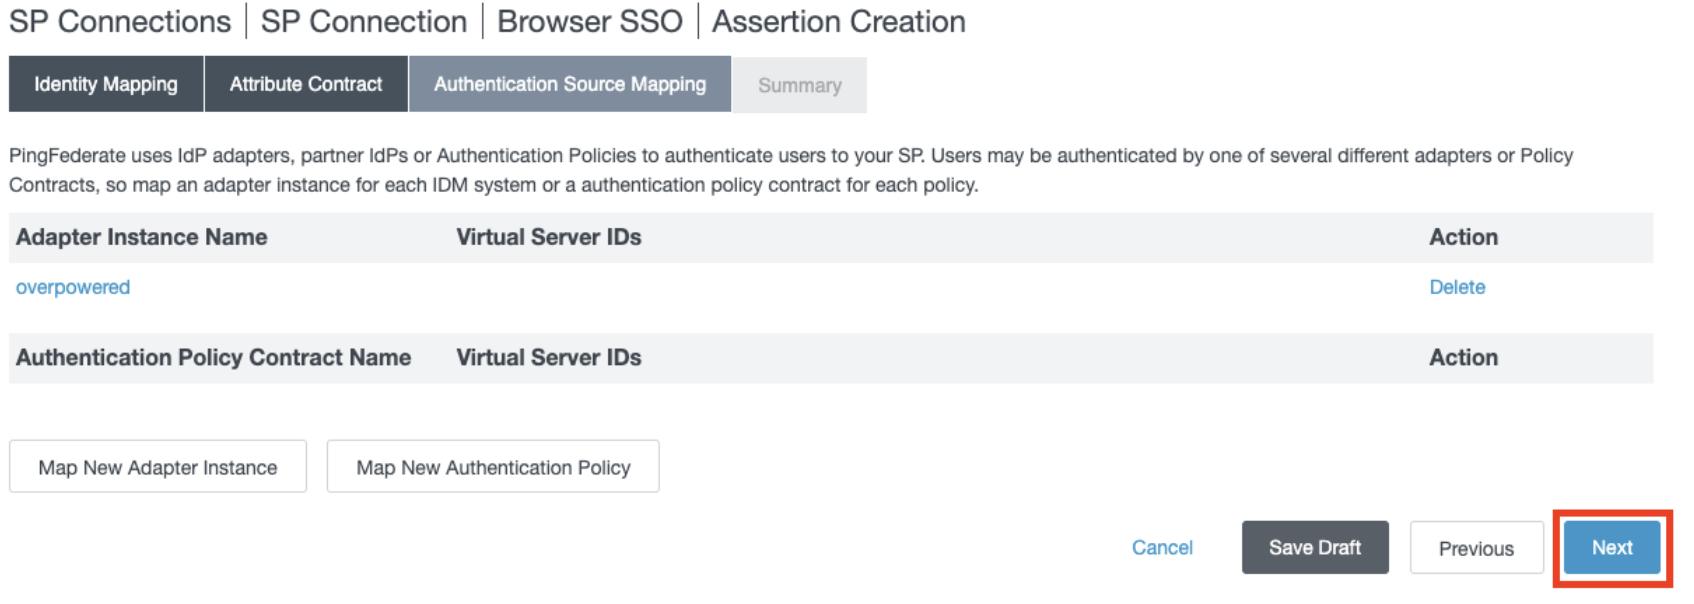
- In the Authentication Source Mapping section, click Next.
- In the Summary section, click Done.
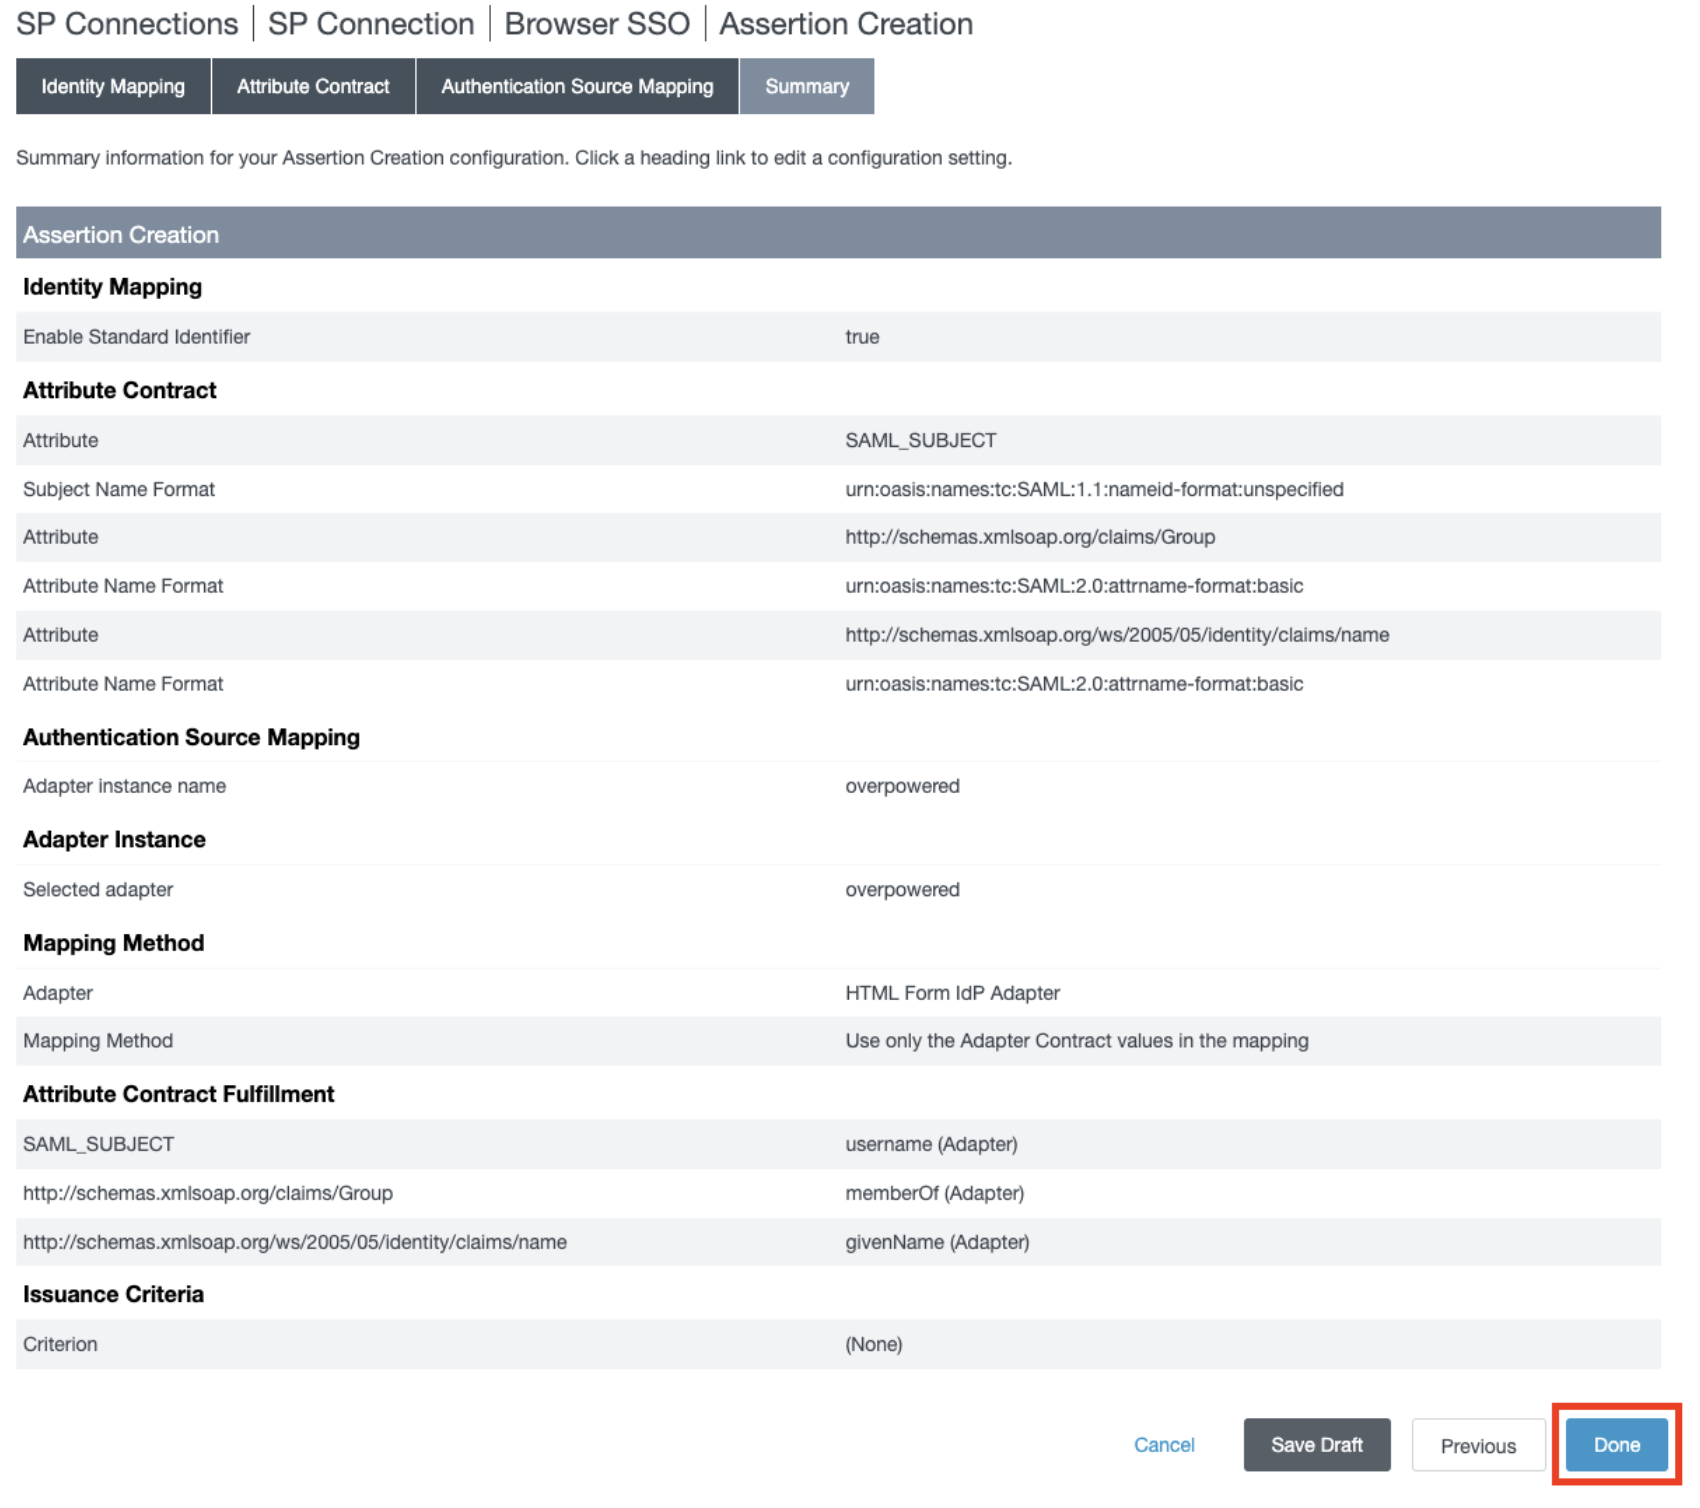
- In Assertion Creation section, click Next.
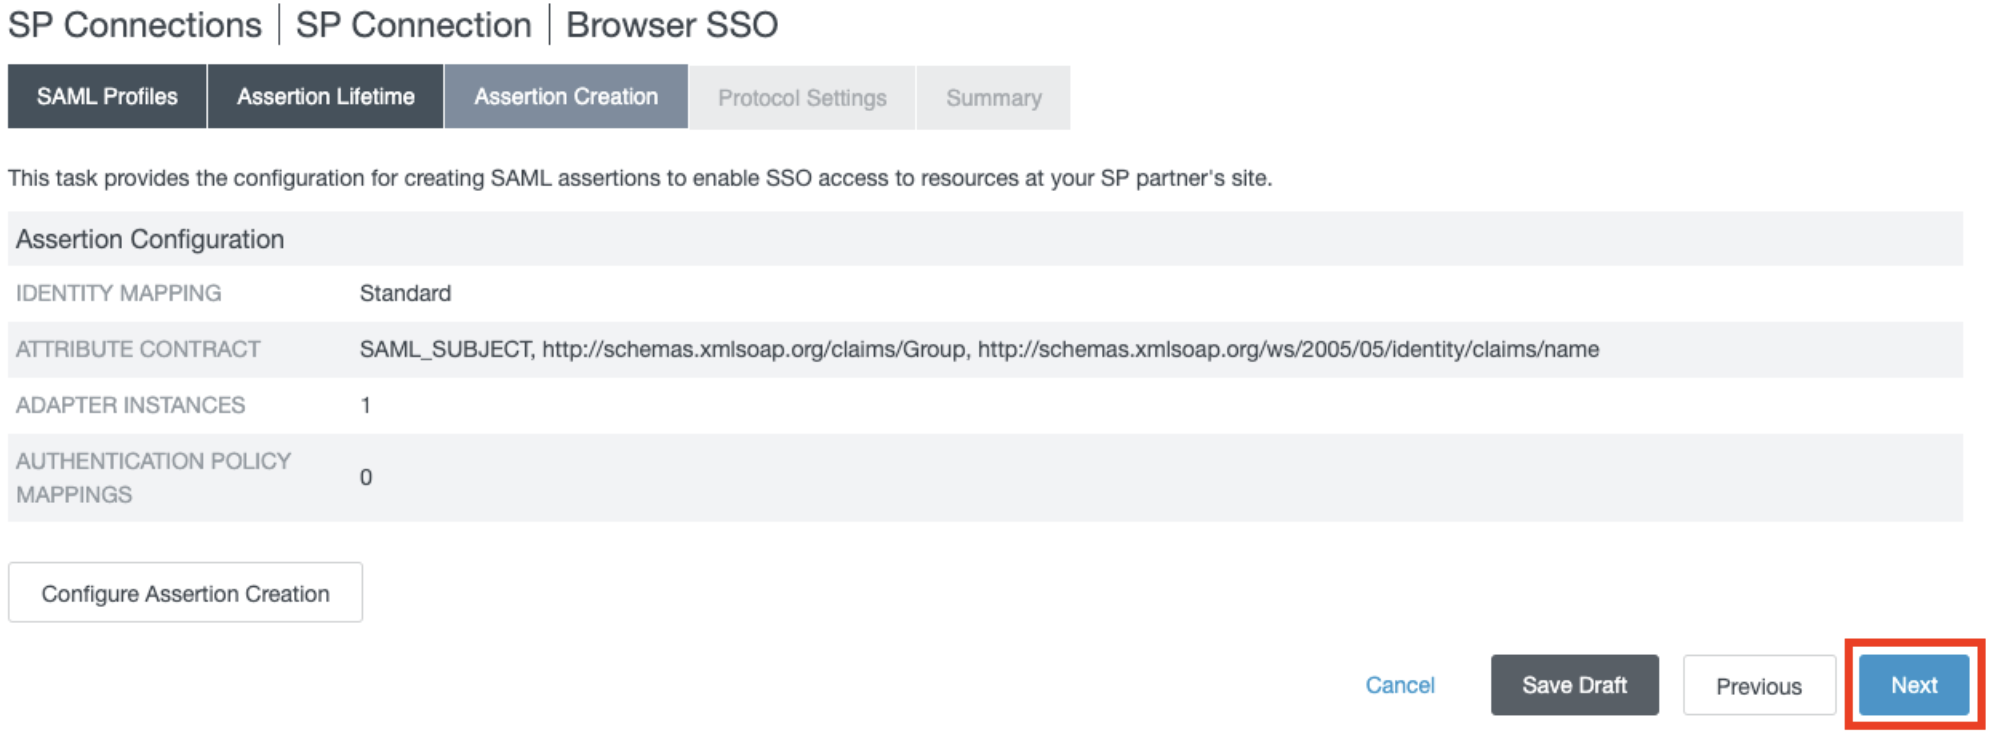
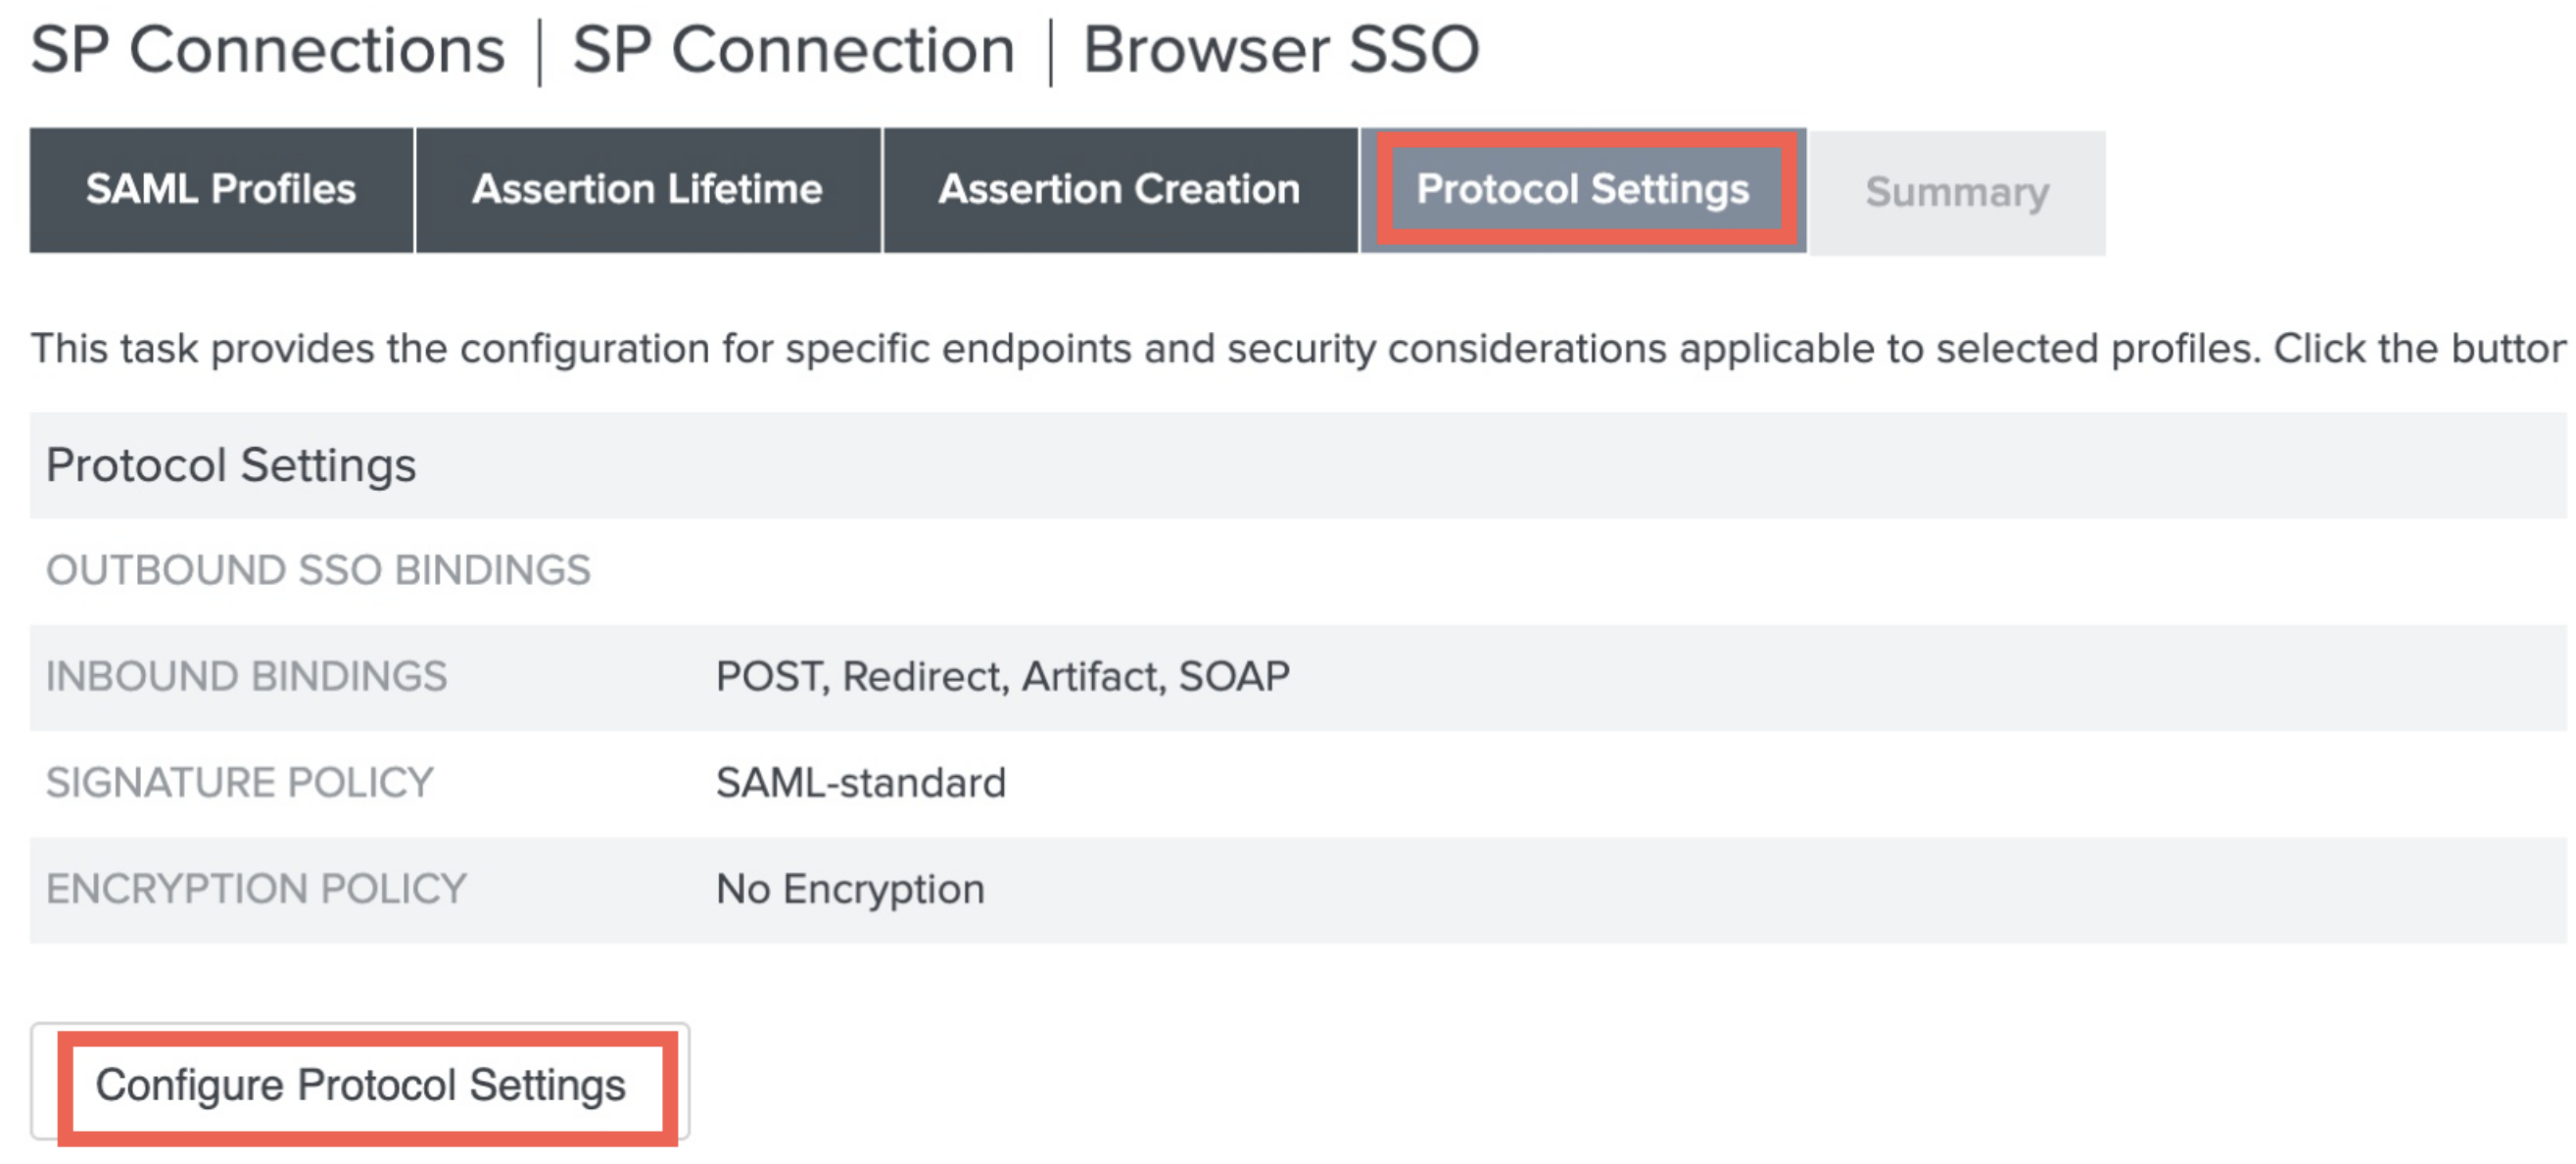
- In Protocol Settings section, click Configure Protocol Settings.
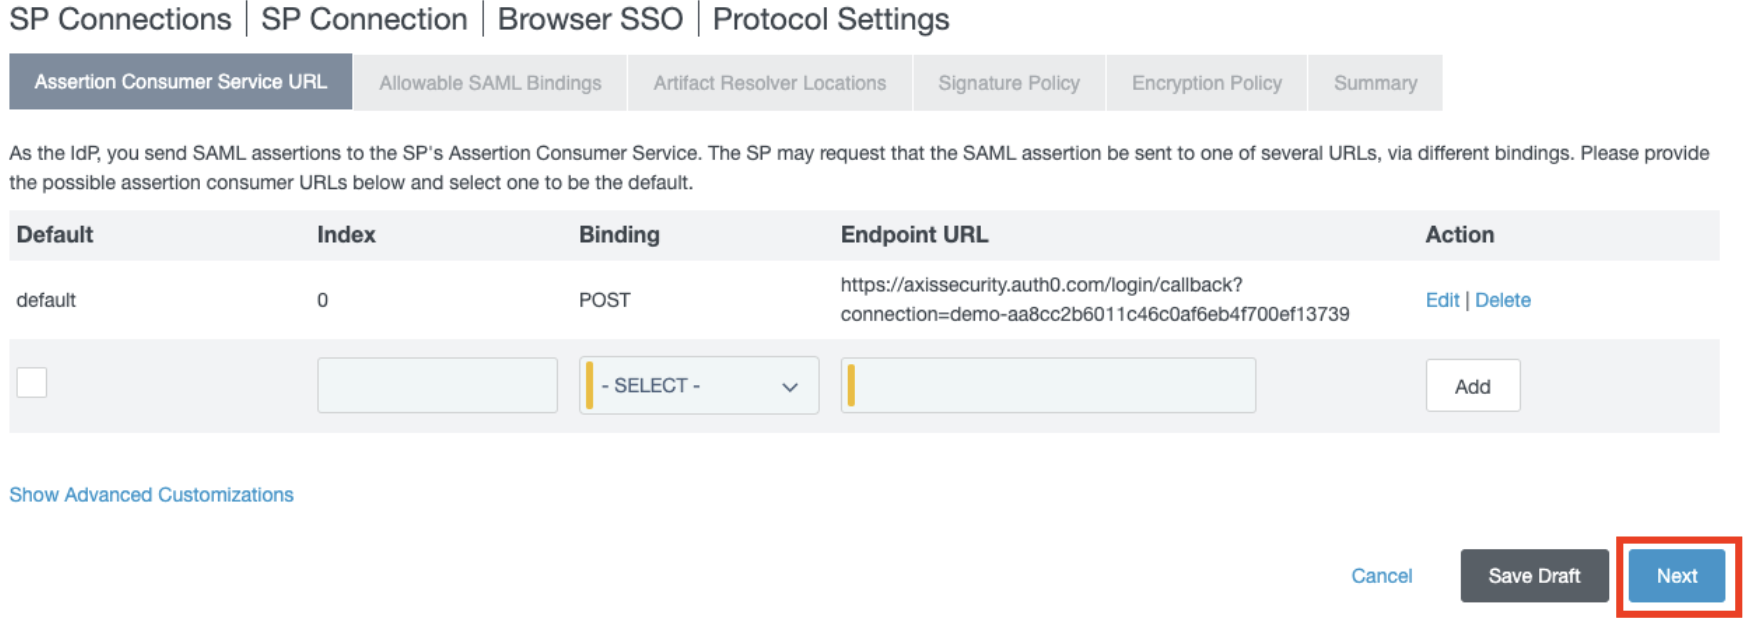
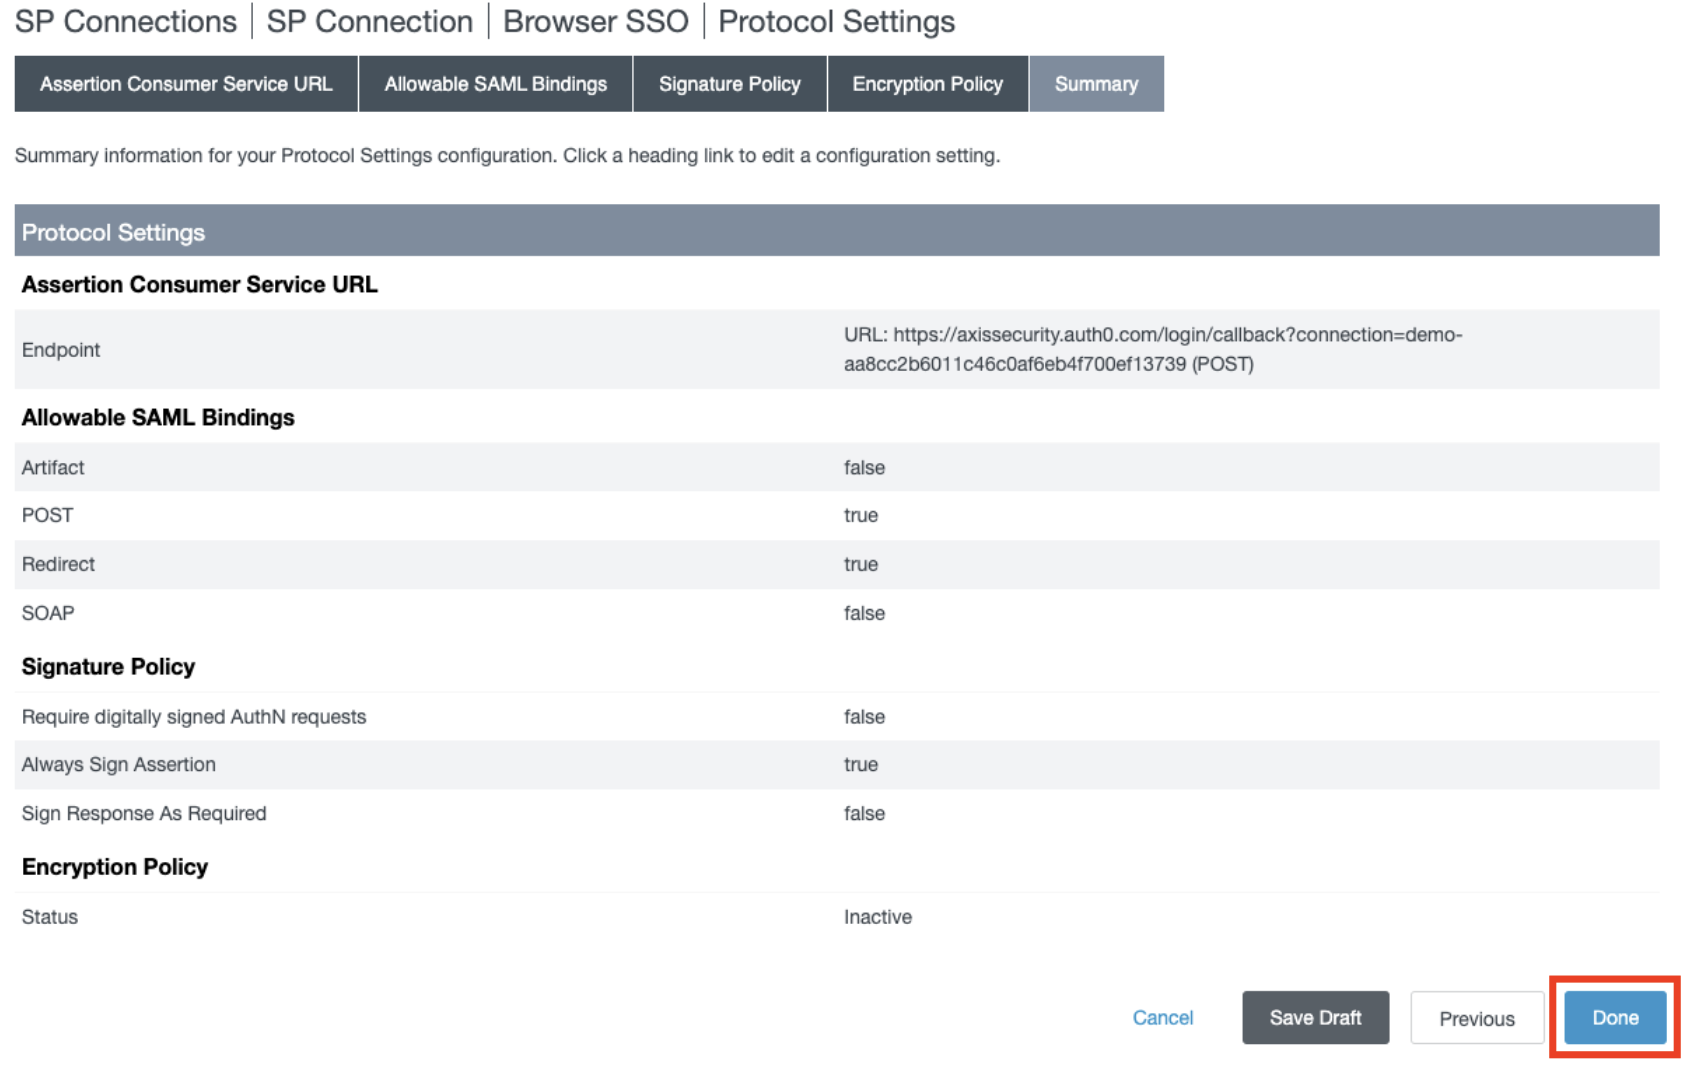
- In the Assertion Consumer Service URL section, under Binding, select POST, and under the Endpoint URL, paste the SP URL (ACS) that you obtained from Axis Management Console in step 2, and click Add.

- Click Next.
- In the Allowable SAML Bindings section, check only Post and Redirect options.

- Click Next.
- In the Signature Policy section, check ALWAYS SIGN ASSERTION, and click Next.

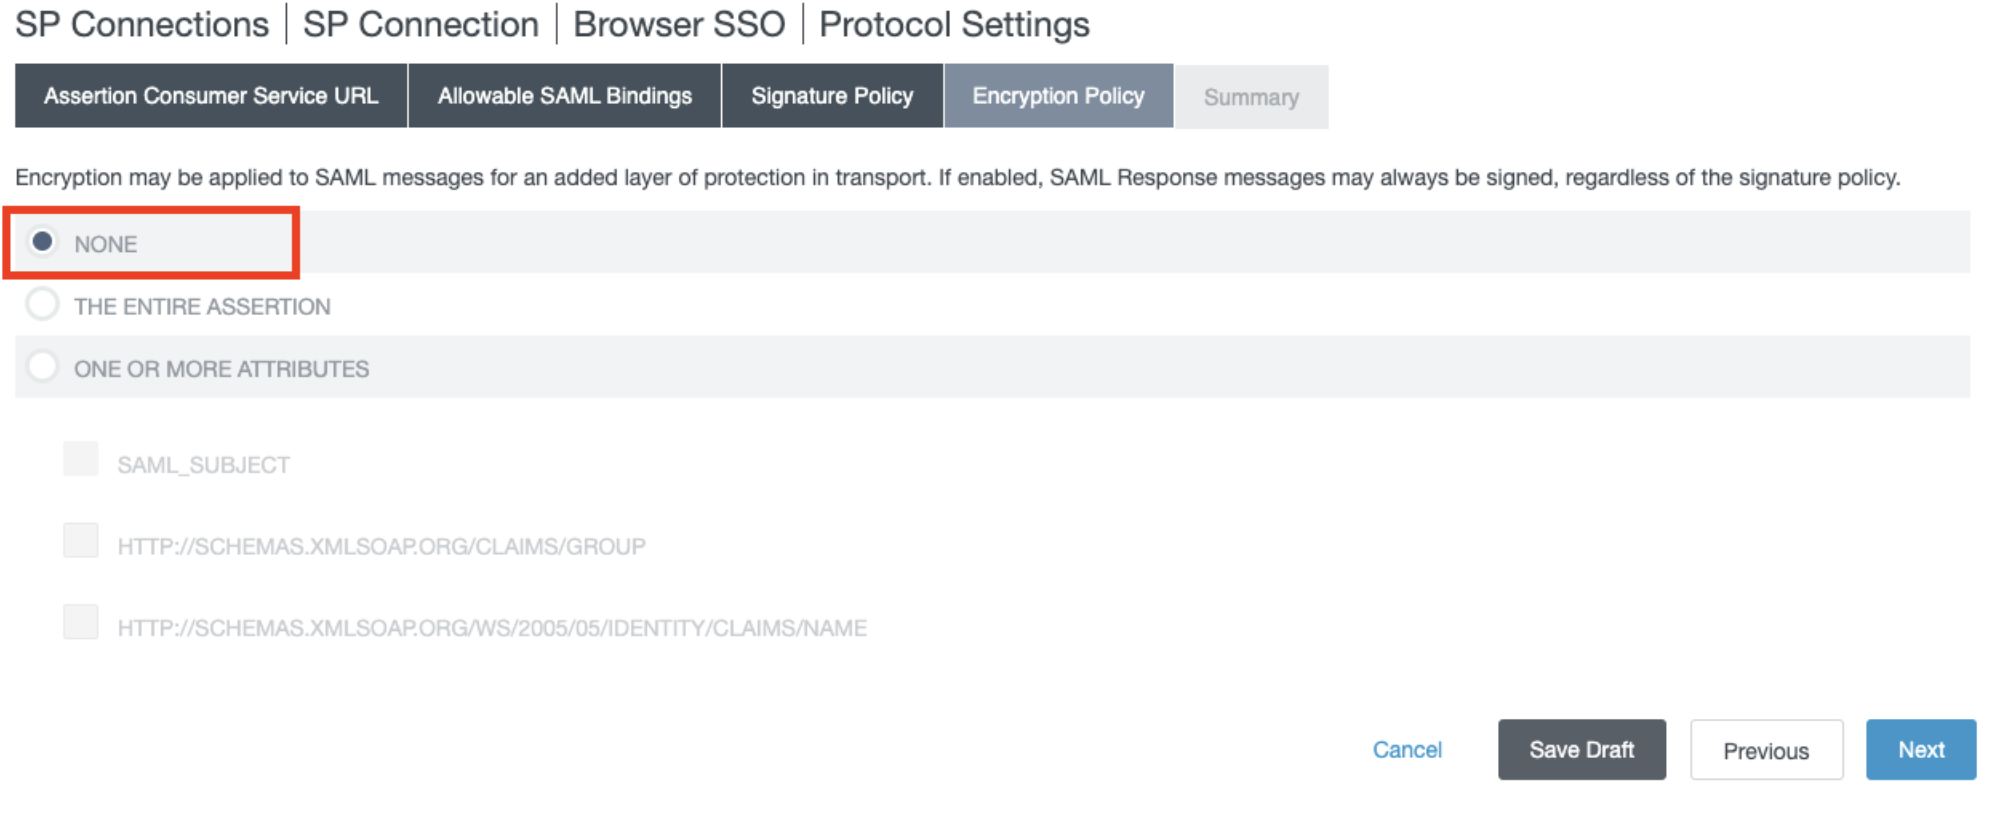
- In the Encryption Policy section, select NONE, and click Next.
- In the Summary section, click Done.
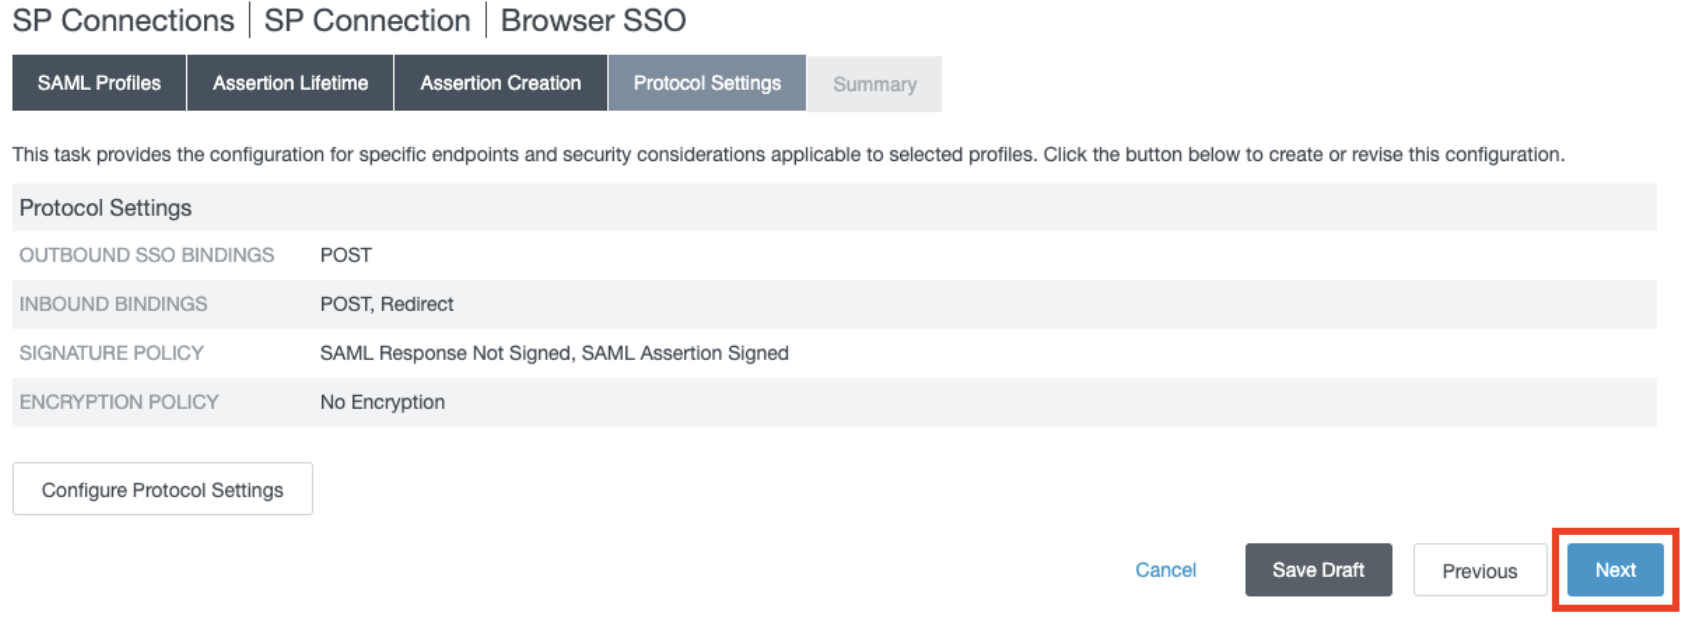
- In the Protocol Settings section, click Next.
- In the Summary section, click Done.
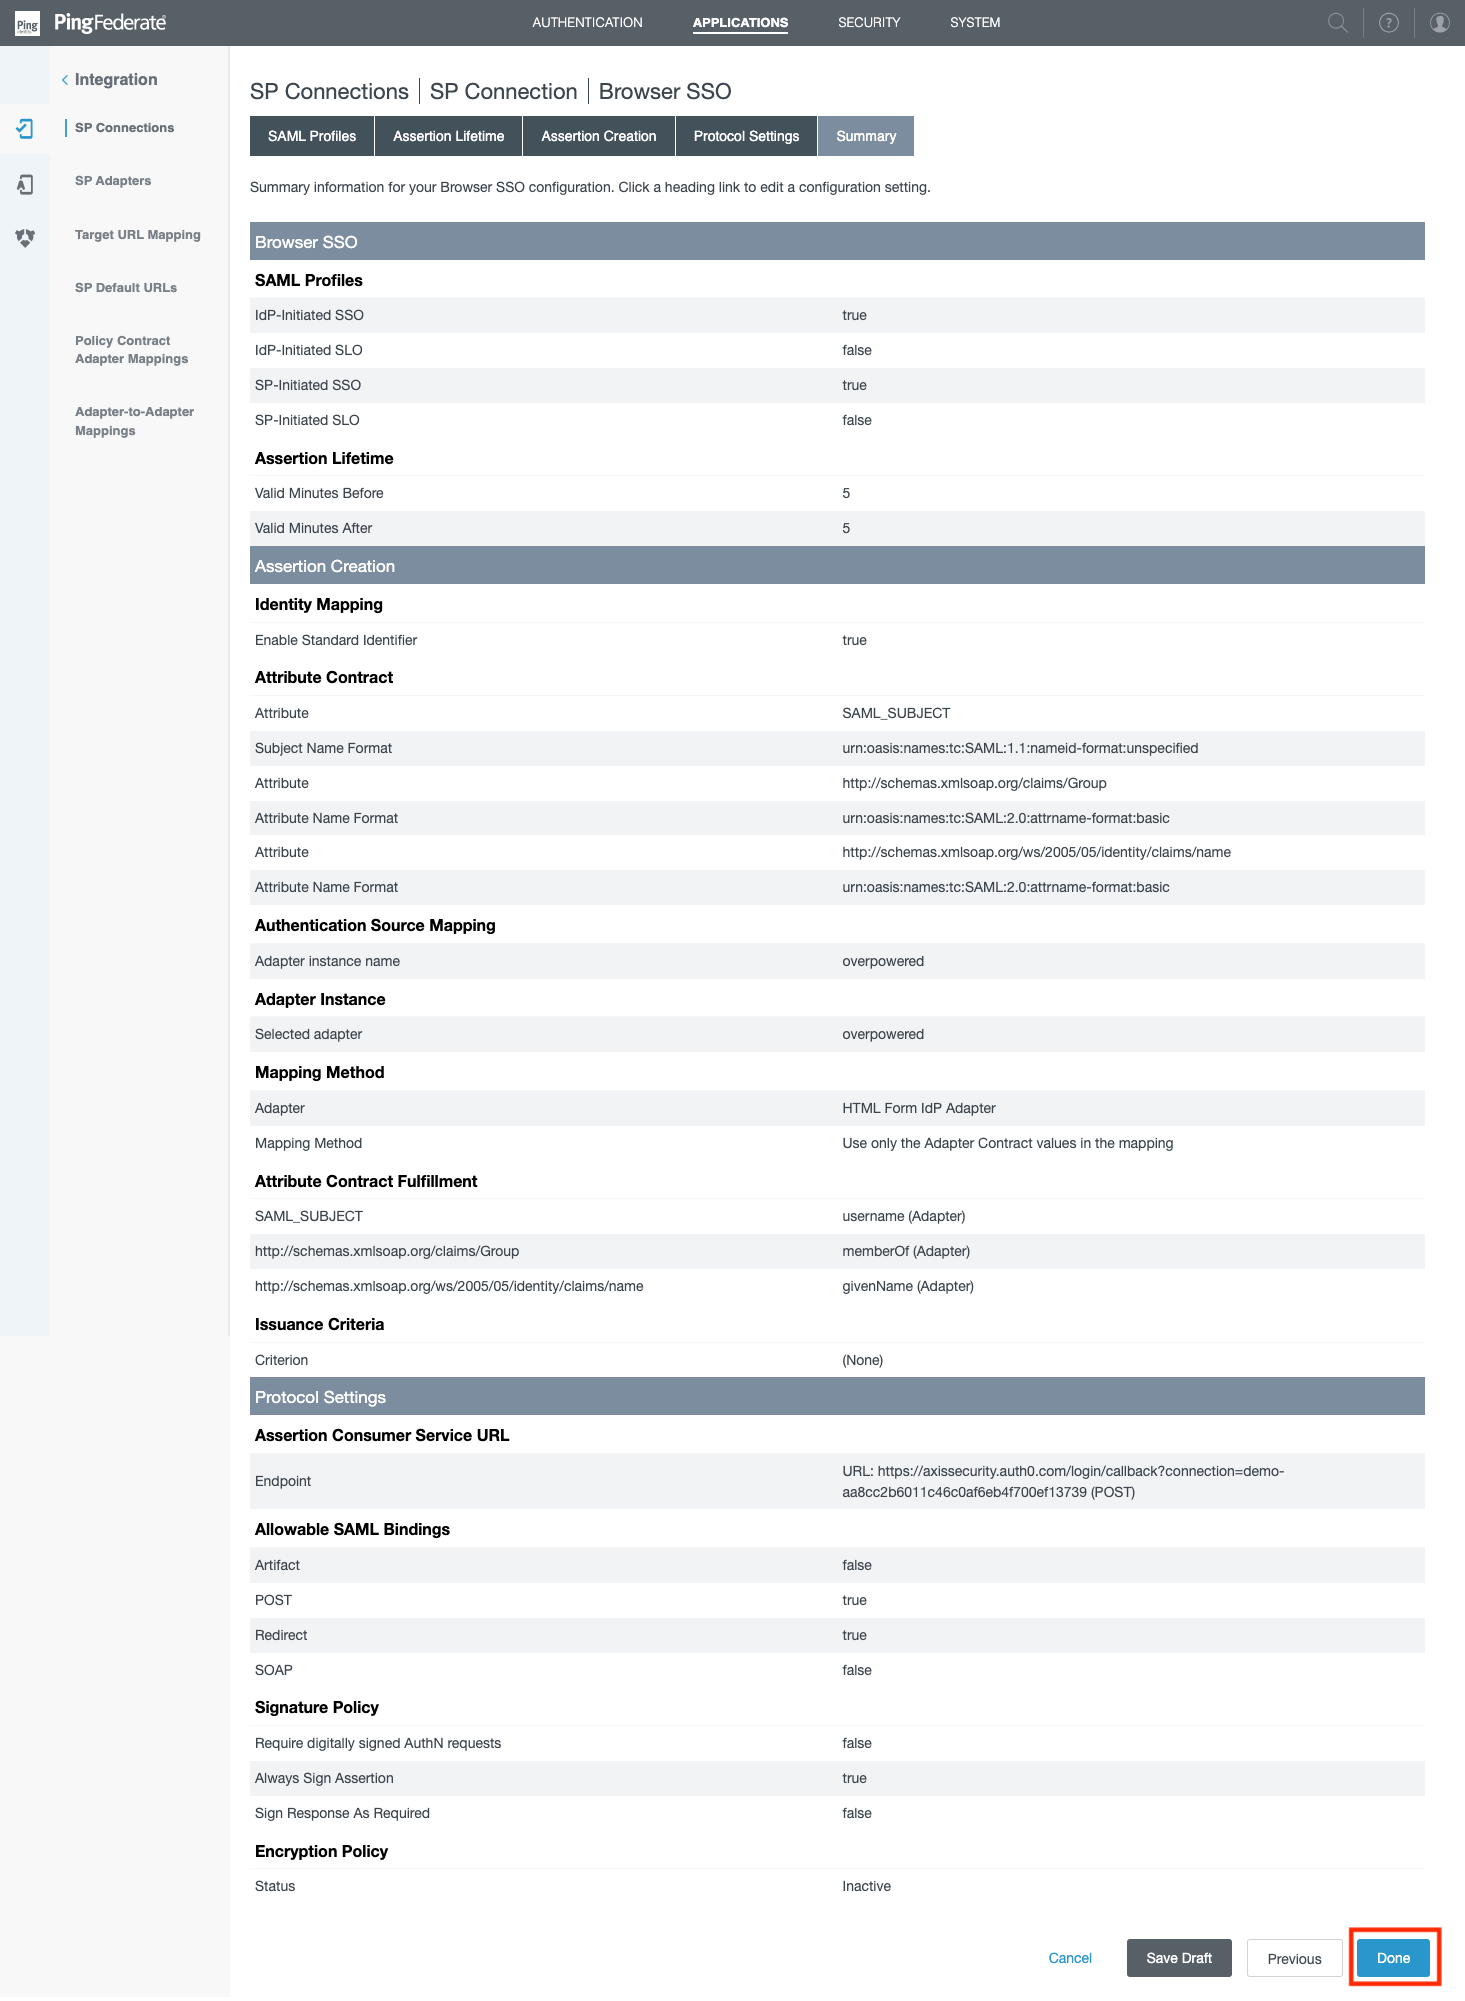
- In the Browser SSO section, click Next.

- In the Credentials section, click Configure Credentials.

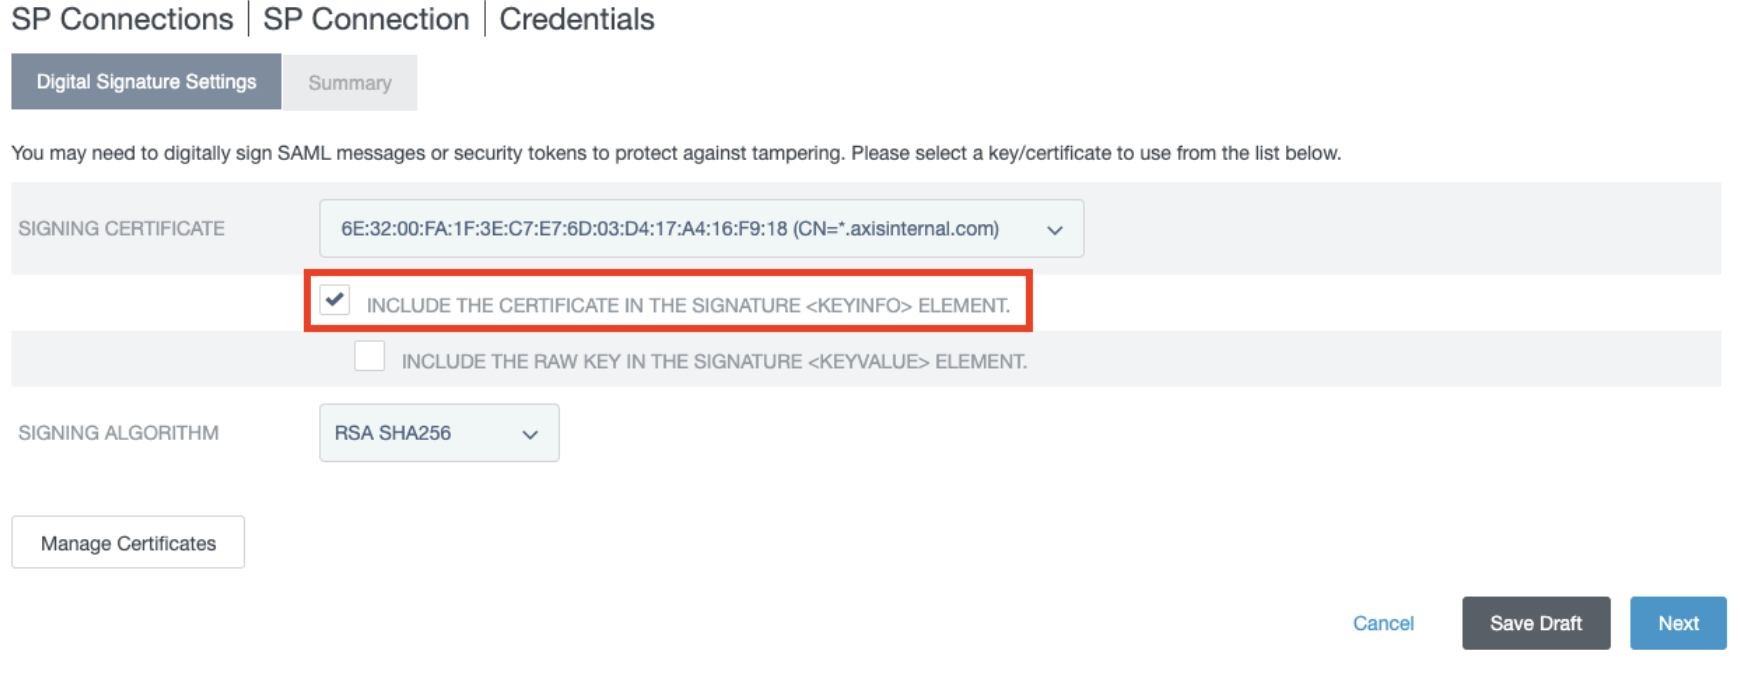
- In the Digital Signature Settings section, choose your signing certificate.

- Check the INCLUDE THE CERTIFICATE IN THE SIGNATURE ELEMENT option. Click Next.
- In the Summary section, click Done.
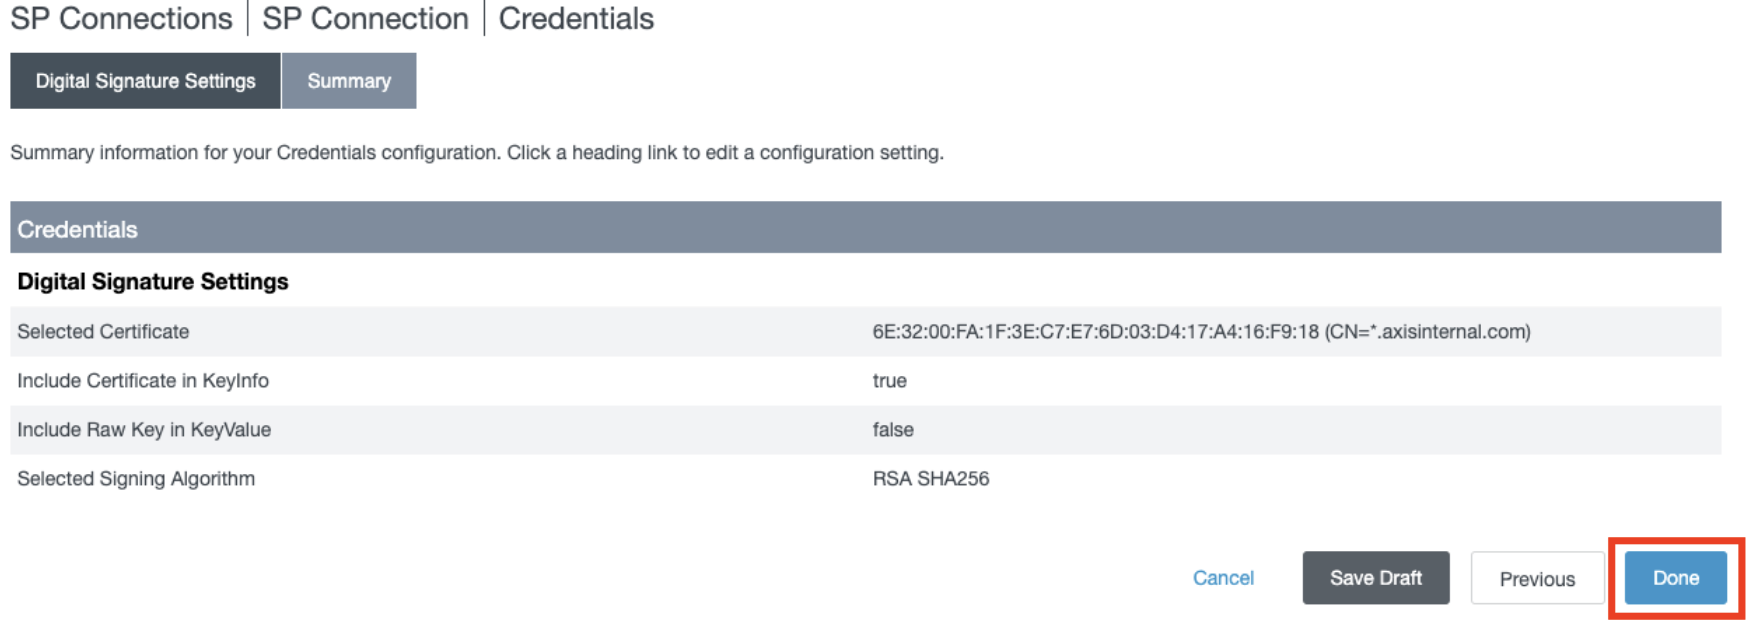
- In the Credentials section, click Next.

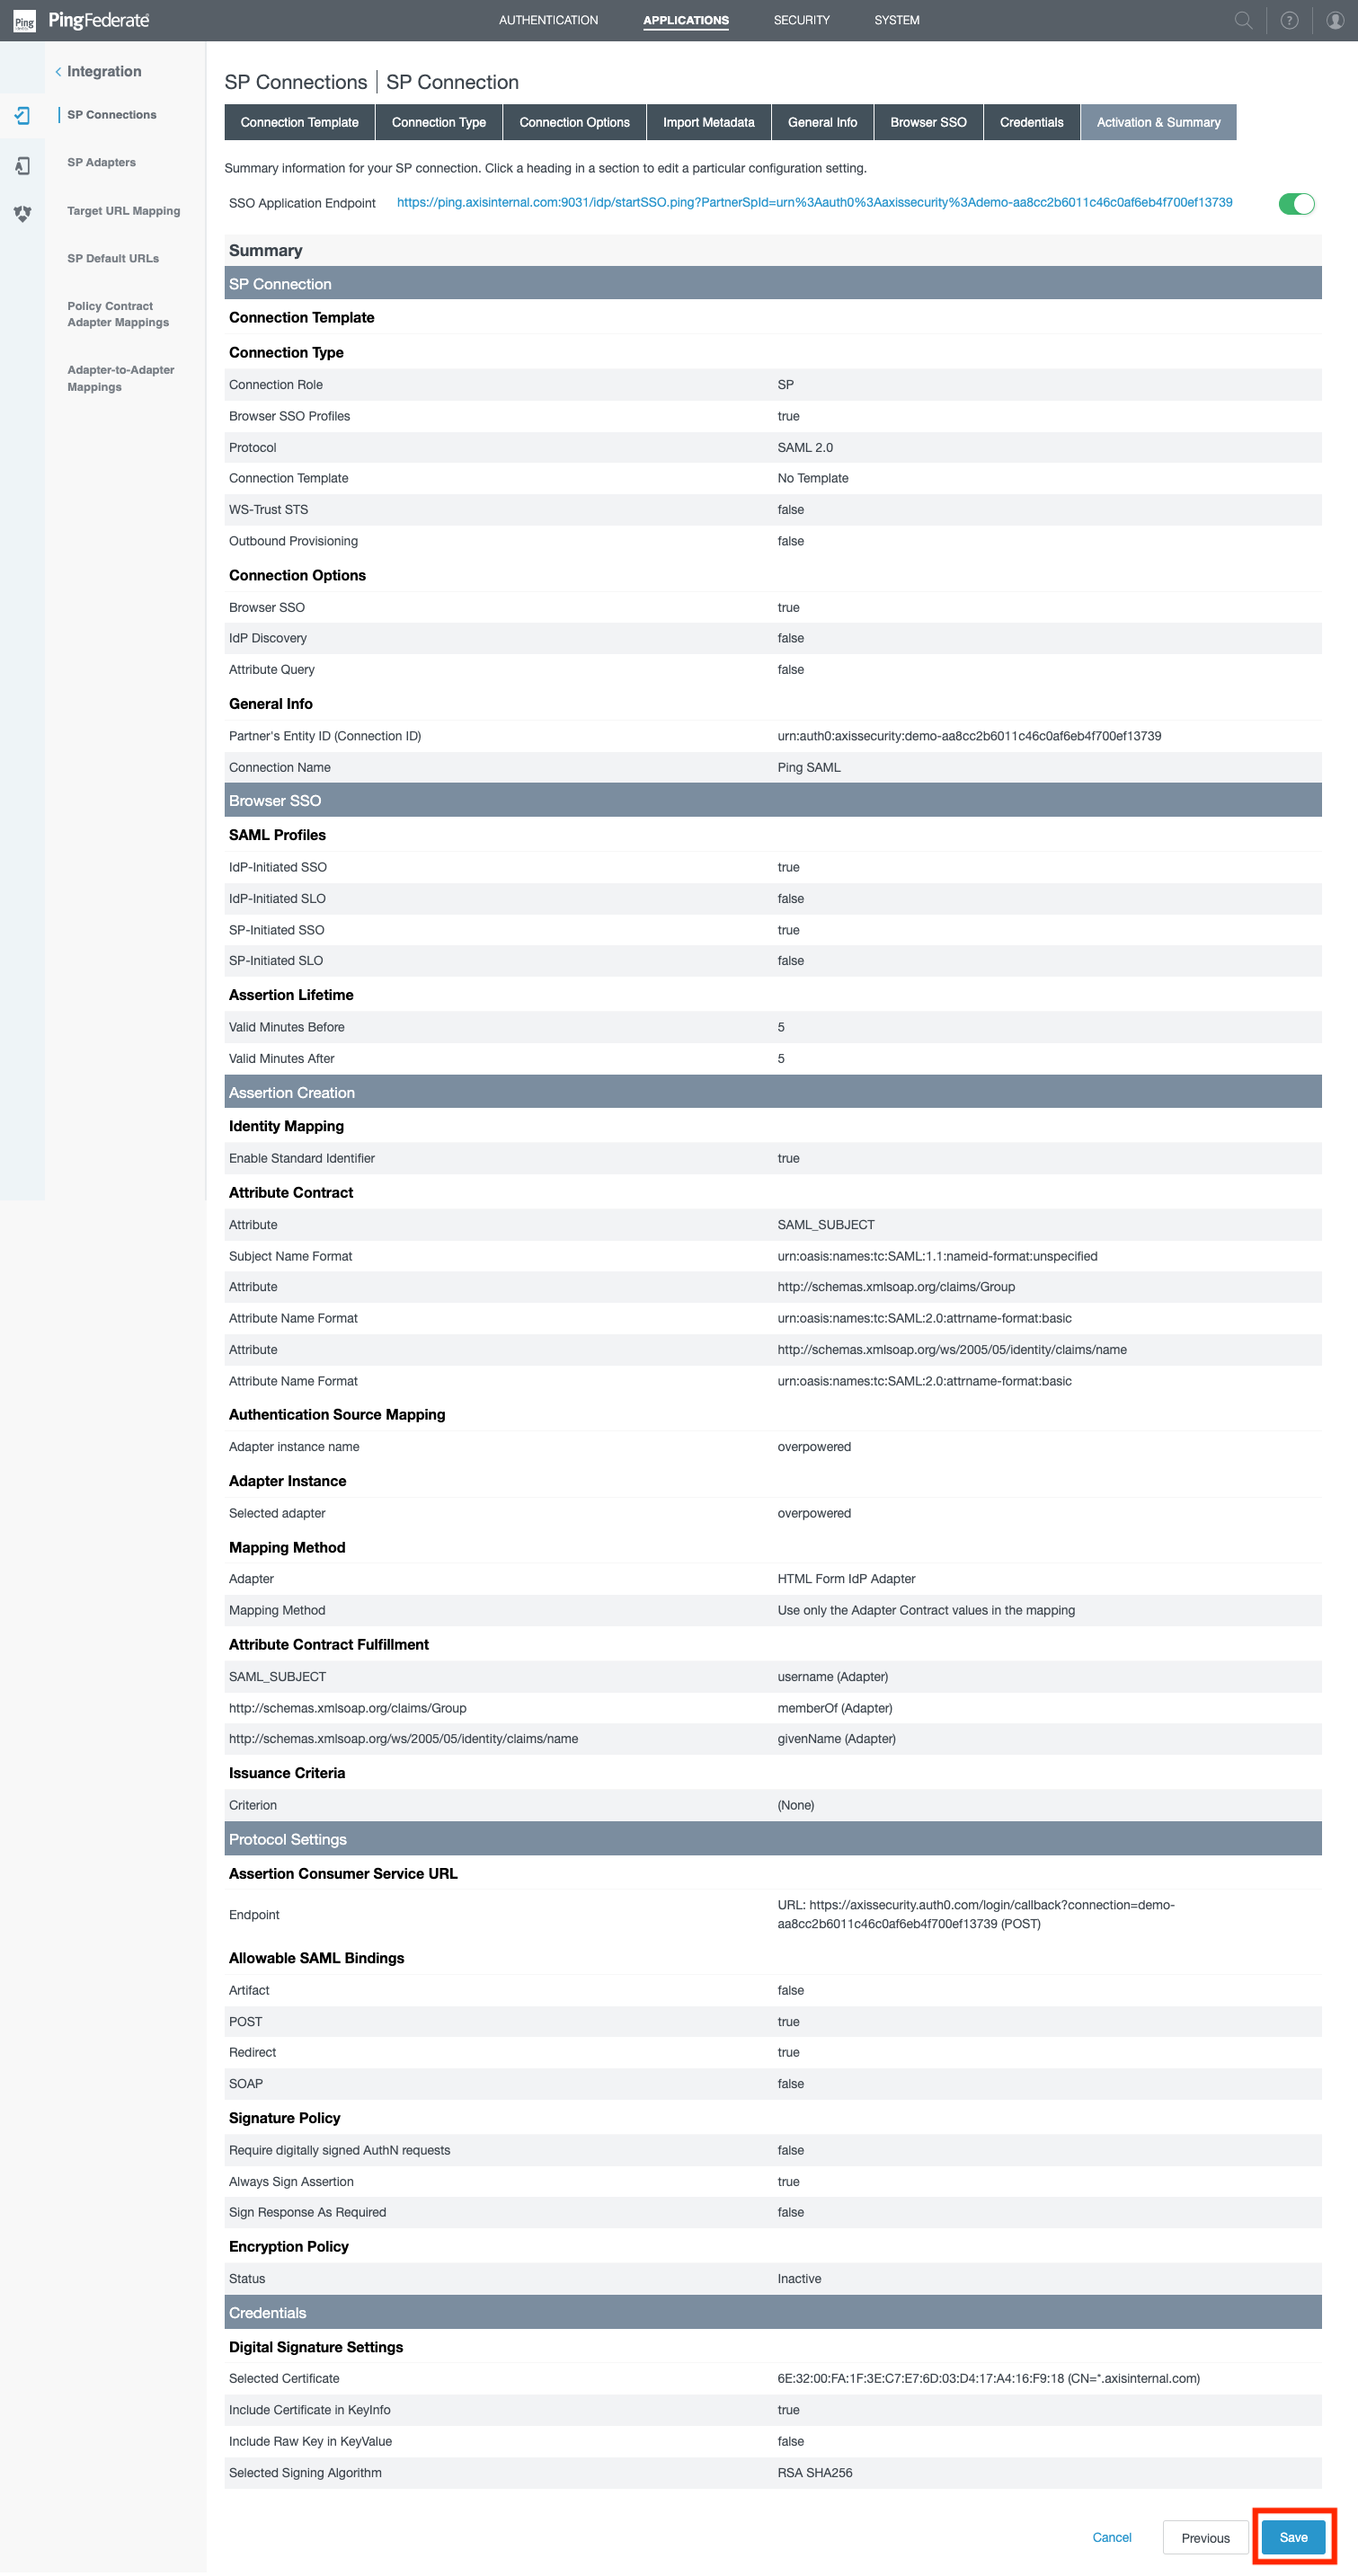
- In the Activation & Summary section, scroll to the bottom and click Save.
Updated about 3 years ago
