SCIM Provisioning with PingFederate
This article describes how to configure SCIM user provisioning with PingFederate as the identity provider. This will allow Axis to continuously synchronize user identity and group information from a user datastore configured in PingFederate.
Before you begin, you must configure an PingFederate as an Identity Provider.
Prerequisites
- PingFederate version 9.0 and later.
- The PingFederate server must have:
- A configured user datastore where user details and attributes are stored.
- SCIM Provisioner integration files deployed.
- Provisioning and single sign-on enabled on the user datastore.
Step 1: Enabling User Auto Provisioning with PingFederate in the Axis Management Console
- In the Management Console, go to Settings -> Identity Providers.
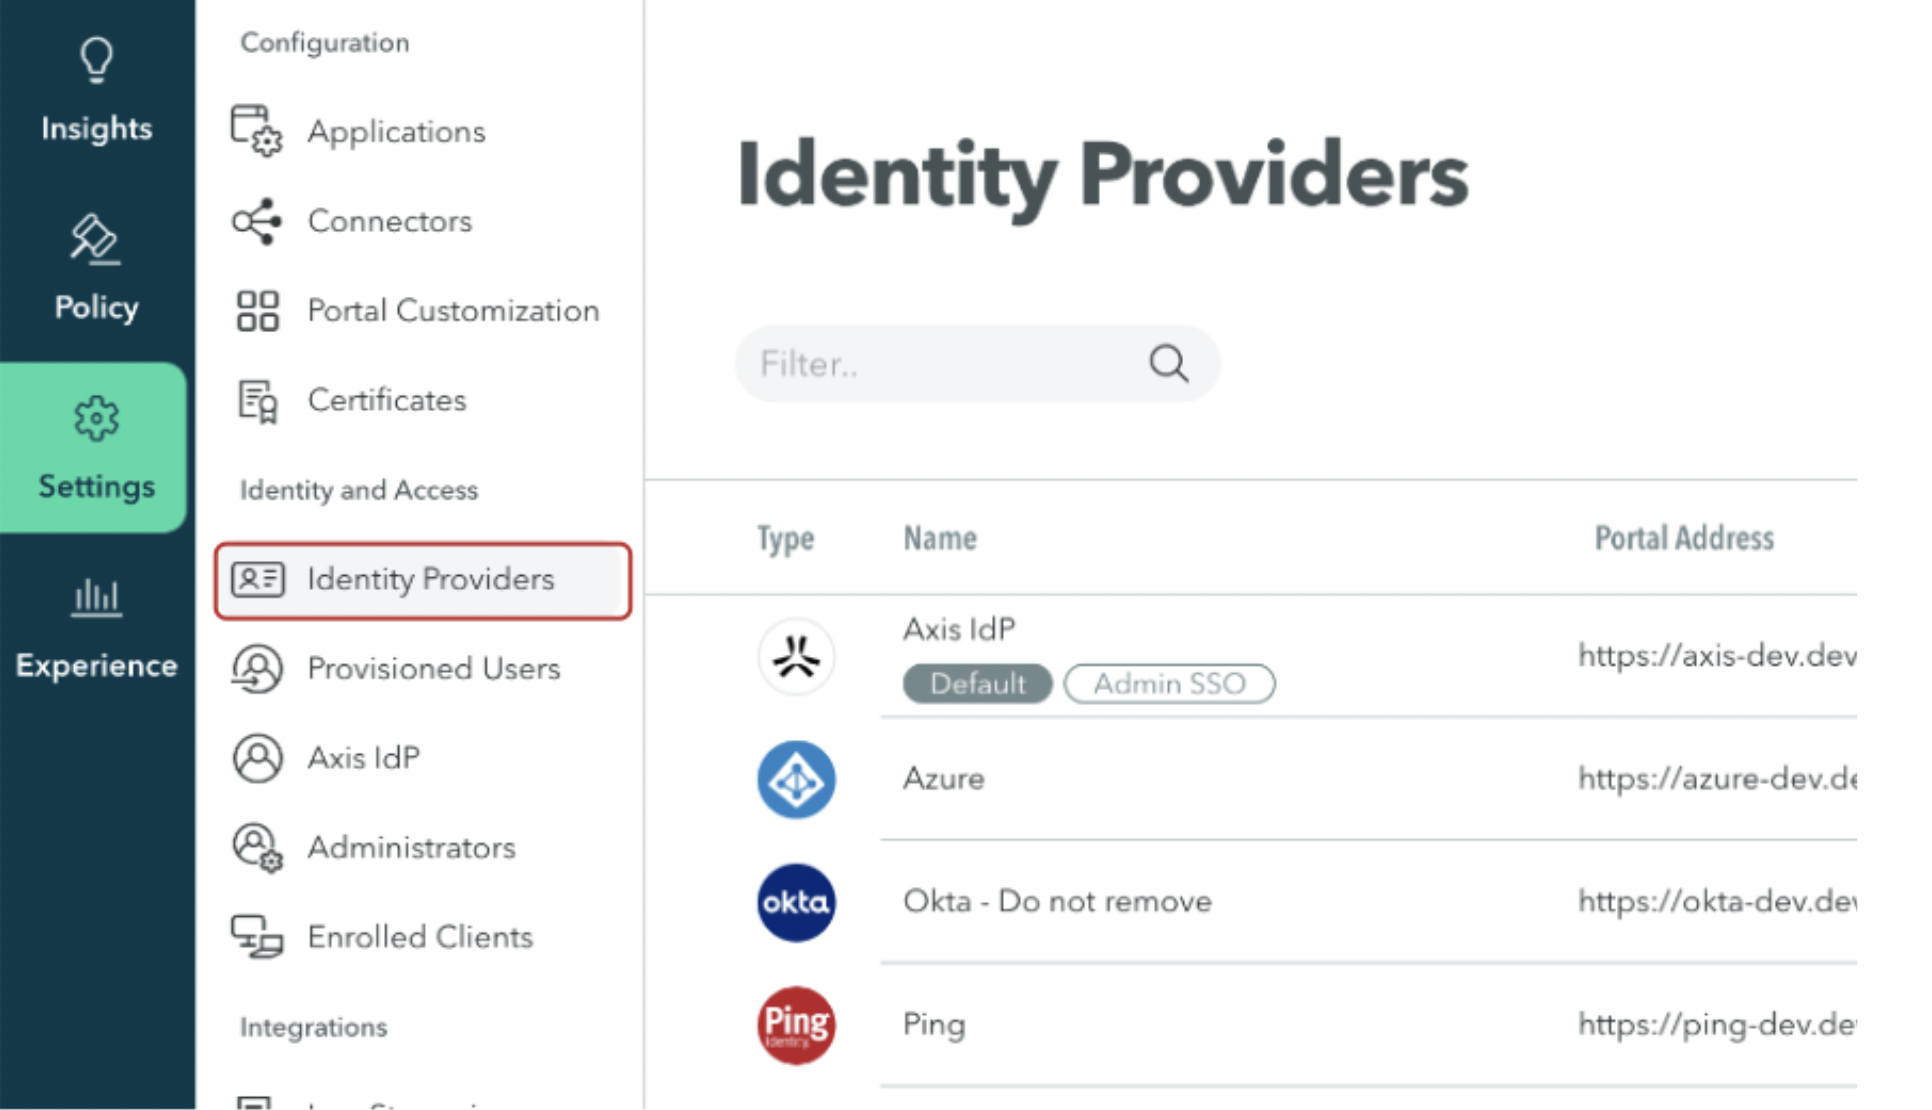
- Hover over the PingFederate Identity Provider and select Edit.
.png")
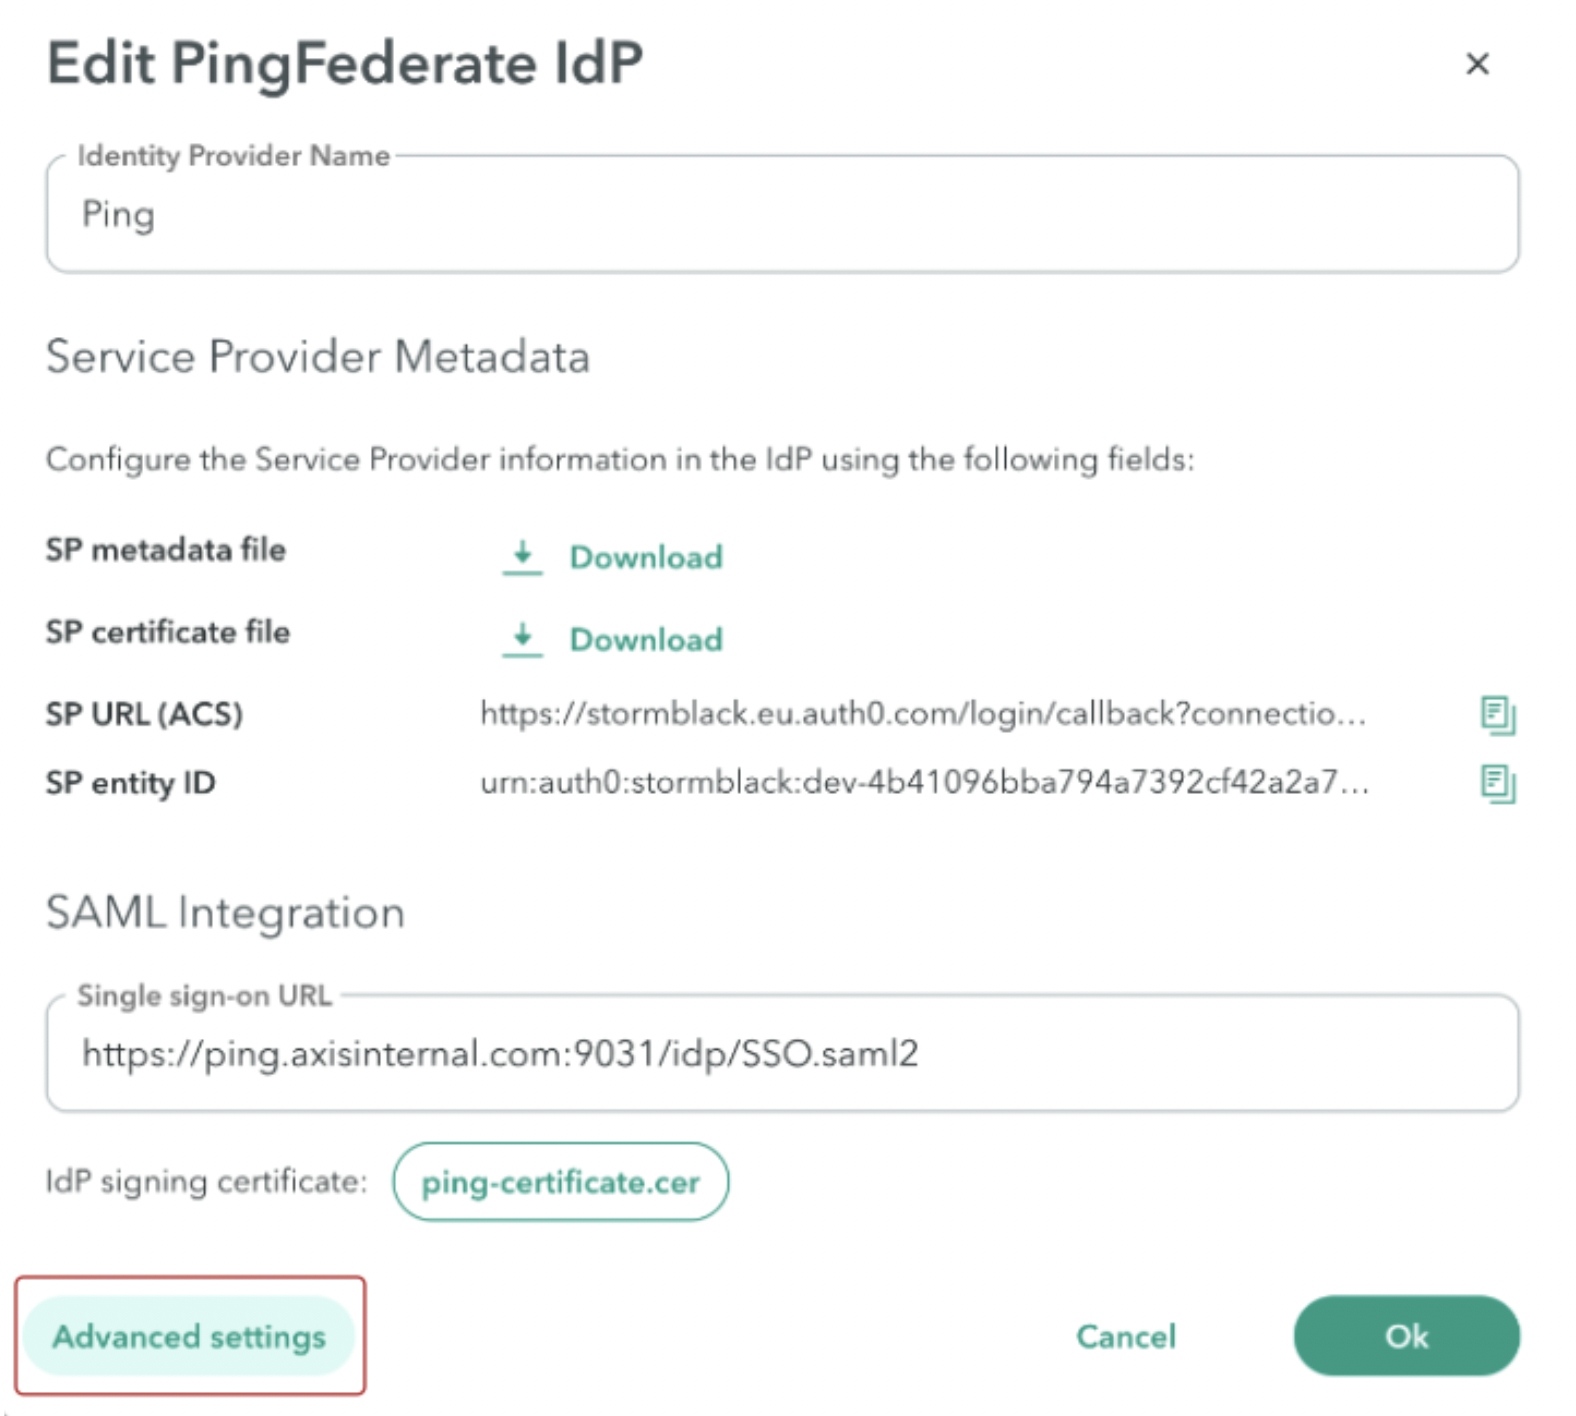
- Navigate to Advanced Settings.
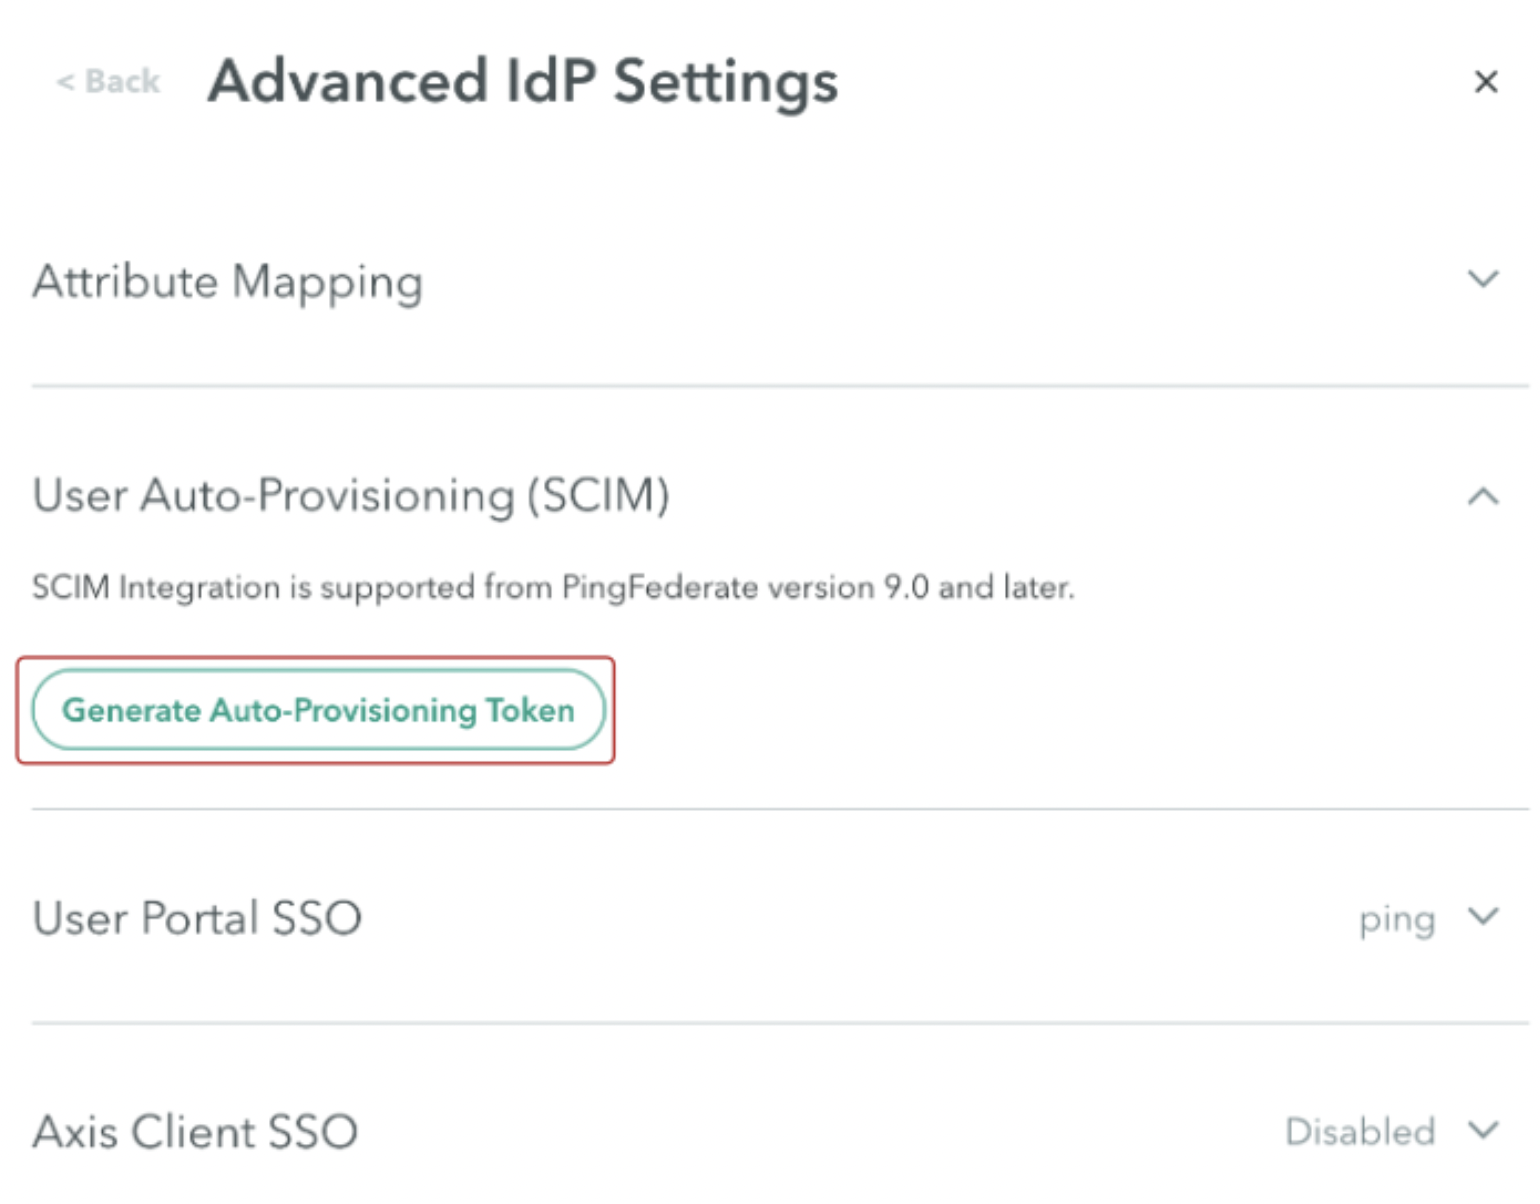
- Go to User Auto-Provisioning (SCIM).
- Click Generate new token.
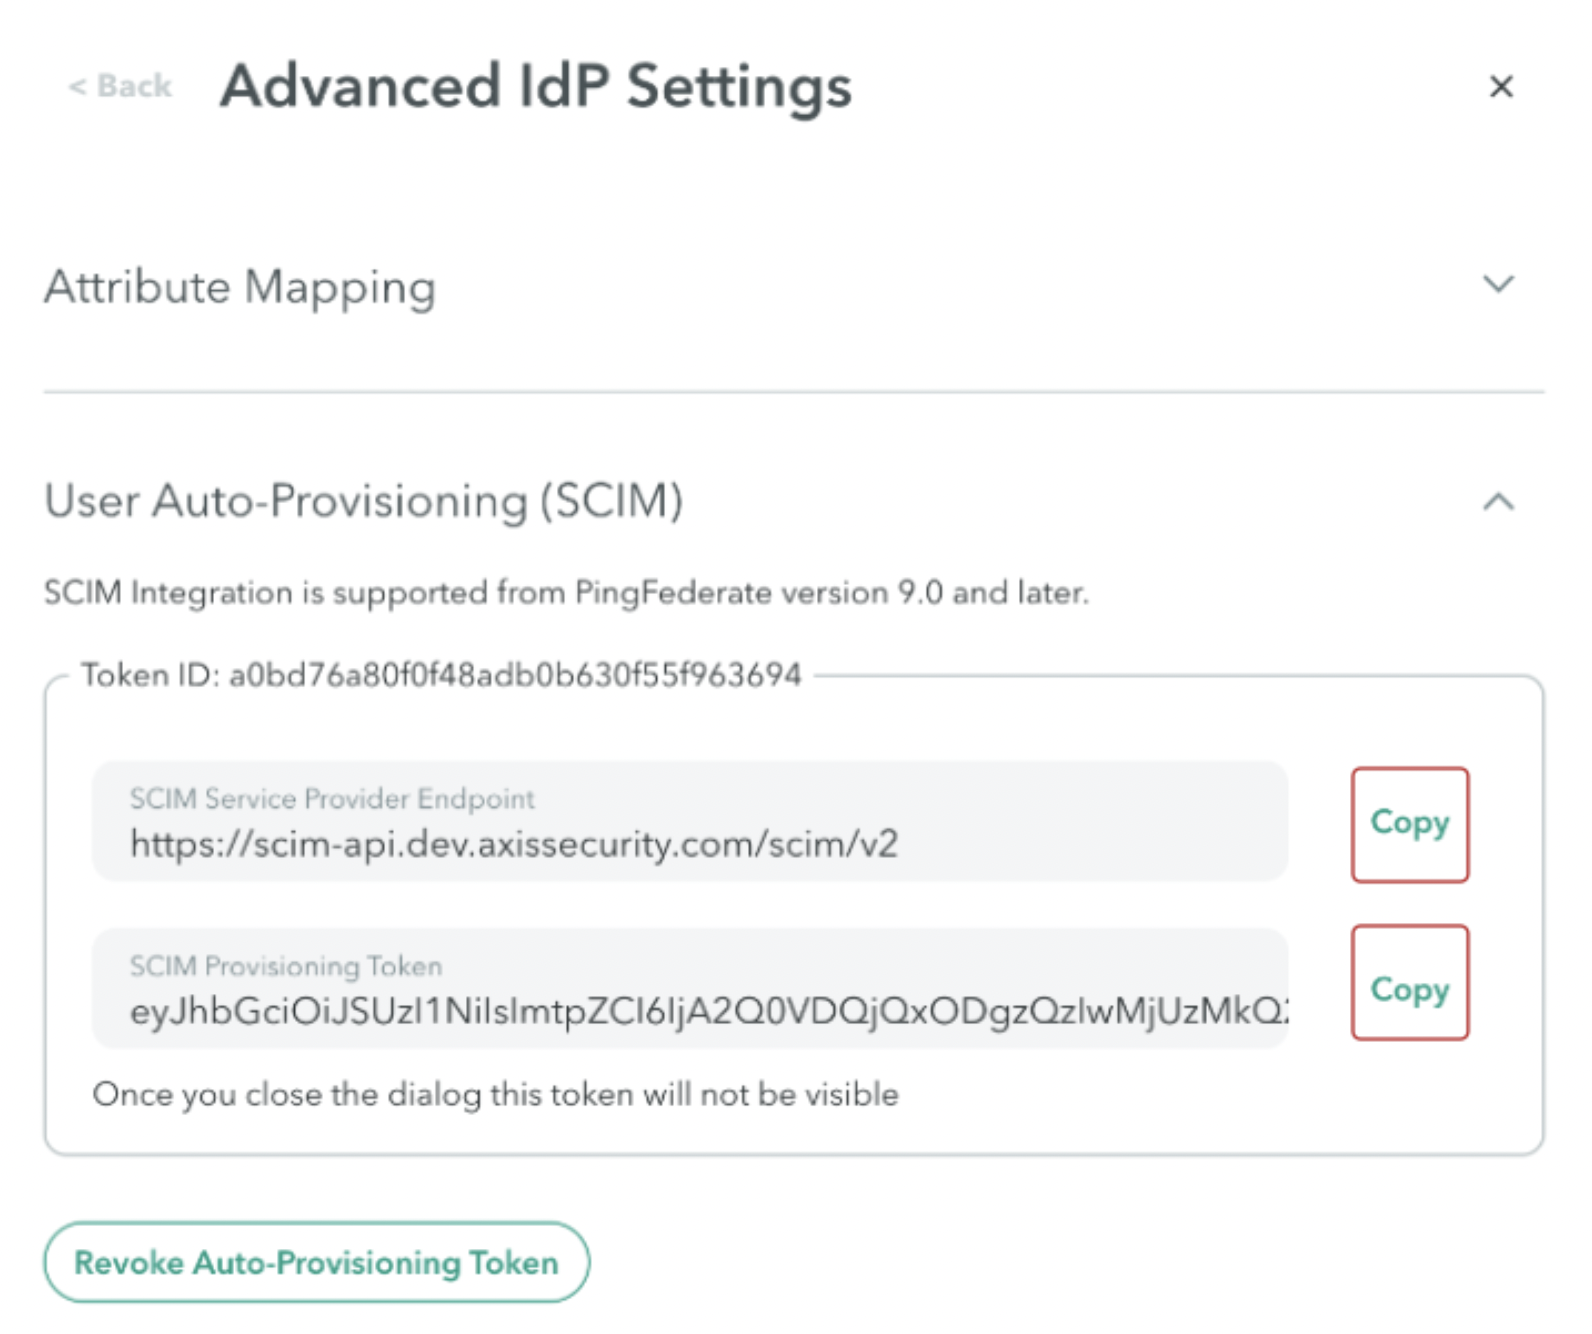
- Copy the SCIM Service Provider Endpoint and SCIM Provisioning Token and paste them into a text editor. You will need these details for Step 2: Creating a PingFederate SCIM Connector.
Step 2: Creating a PingFederate SCIM Connector
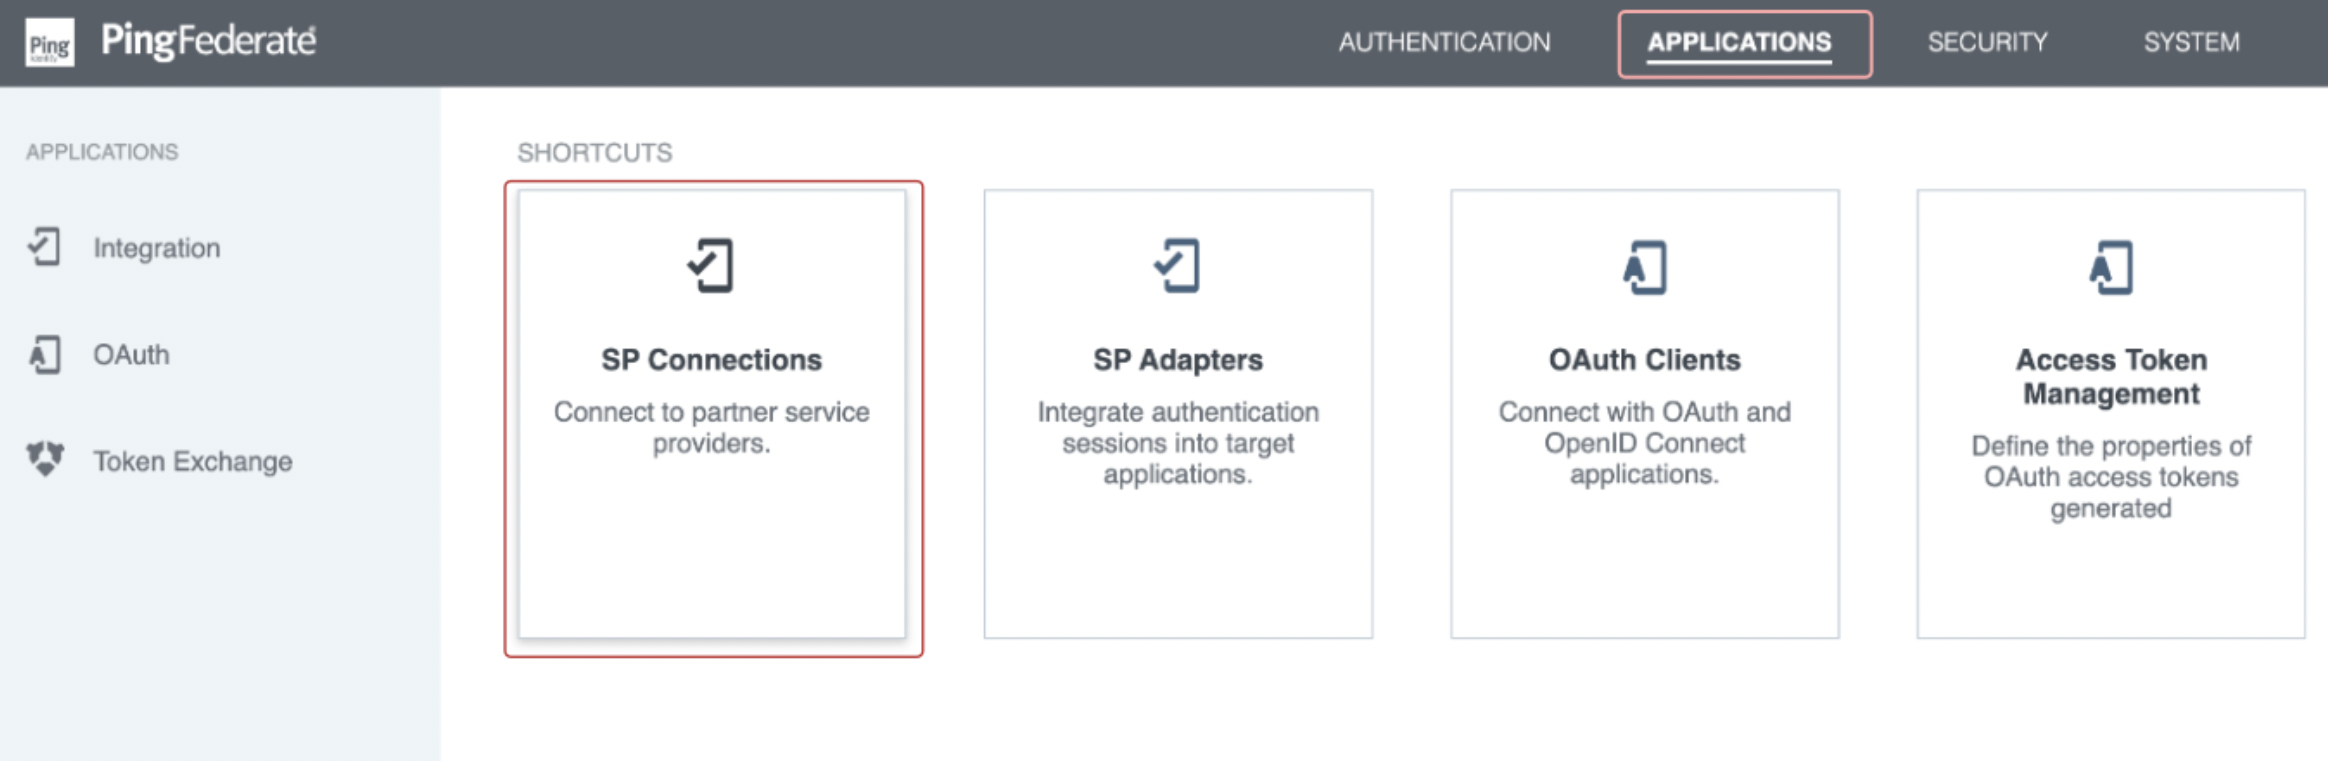
- Log in as an administrator to your PingFederate instance. Select Applications -> SP Connections.
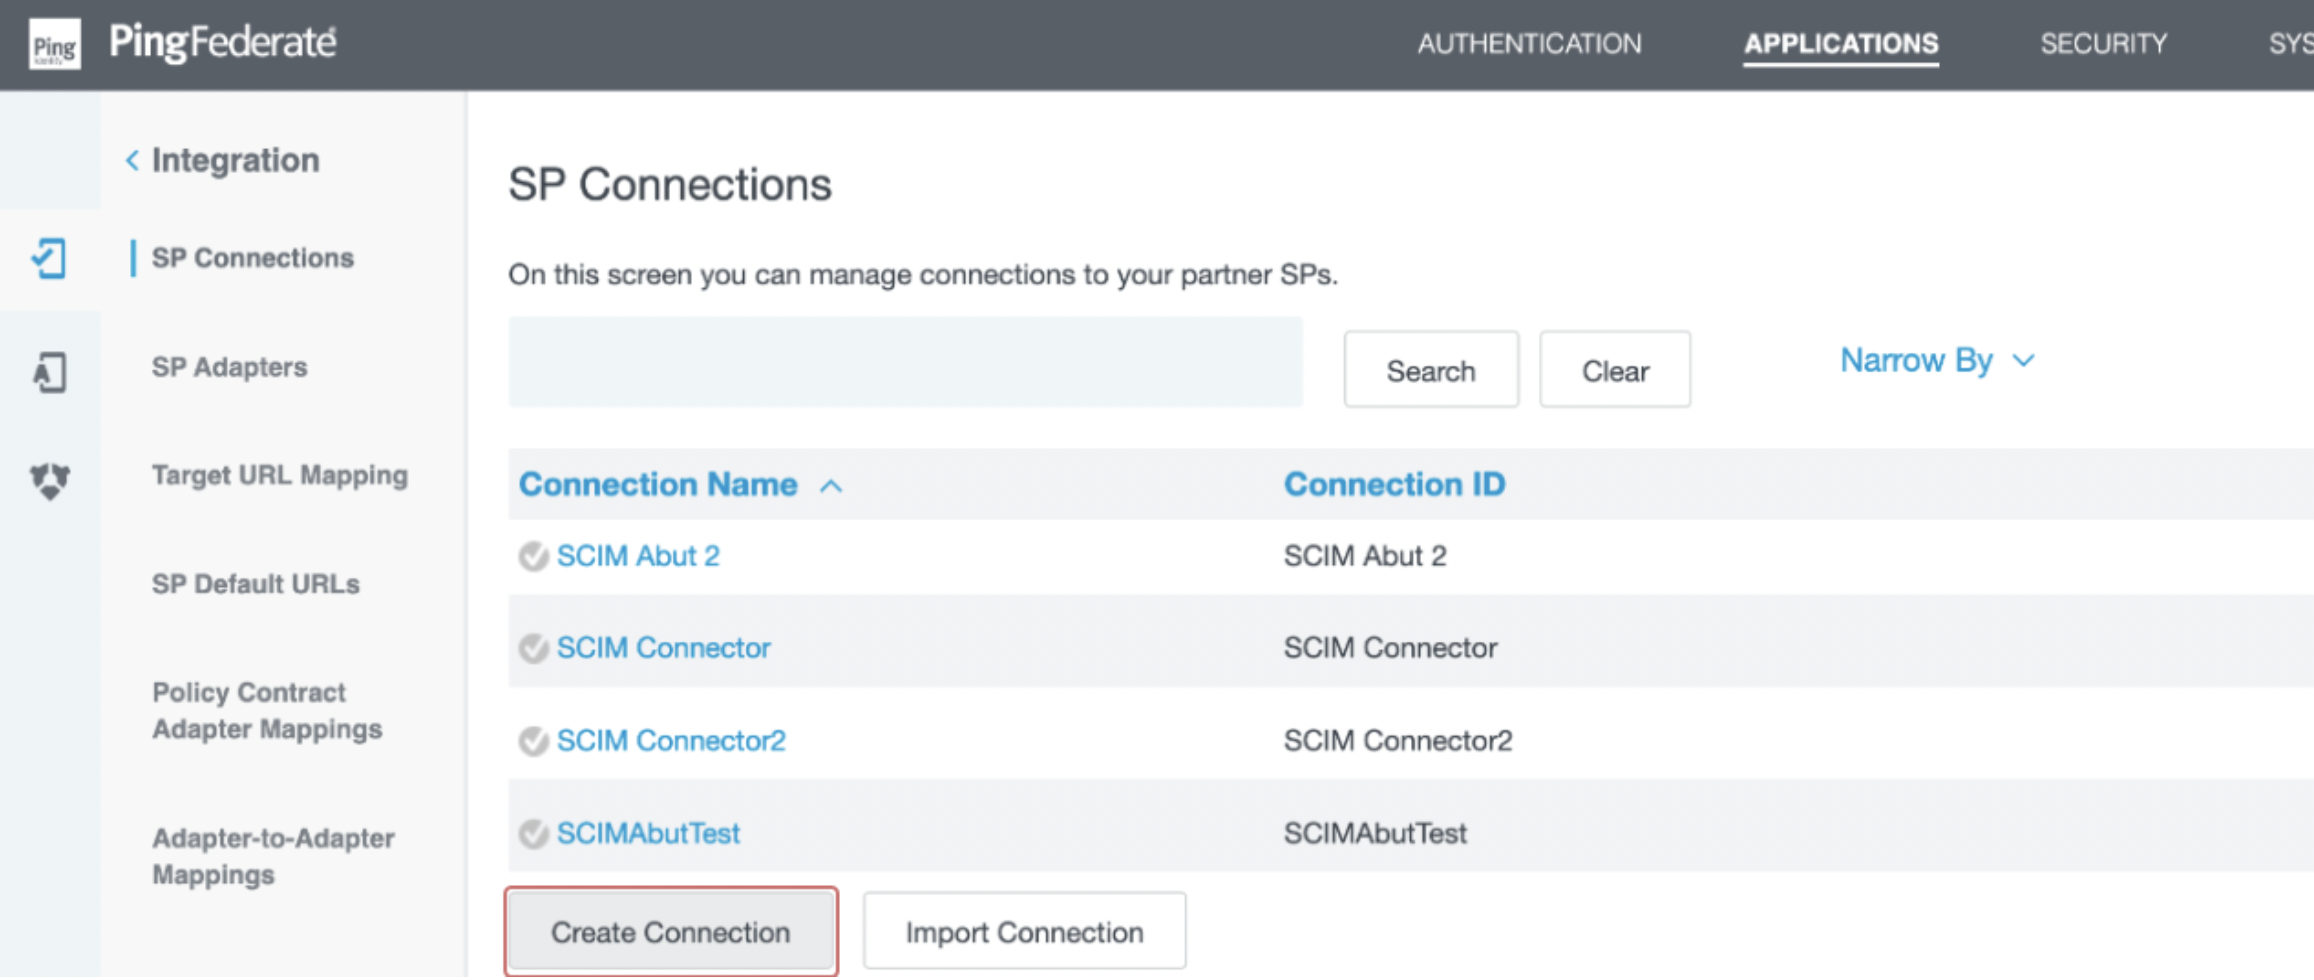
- Select Create Connection.
- In the Connection Template section, select Use a Template for this Connection. From the dropdown list, select SCIM Connector and click Next.
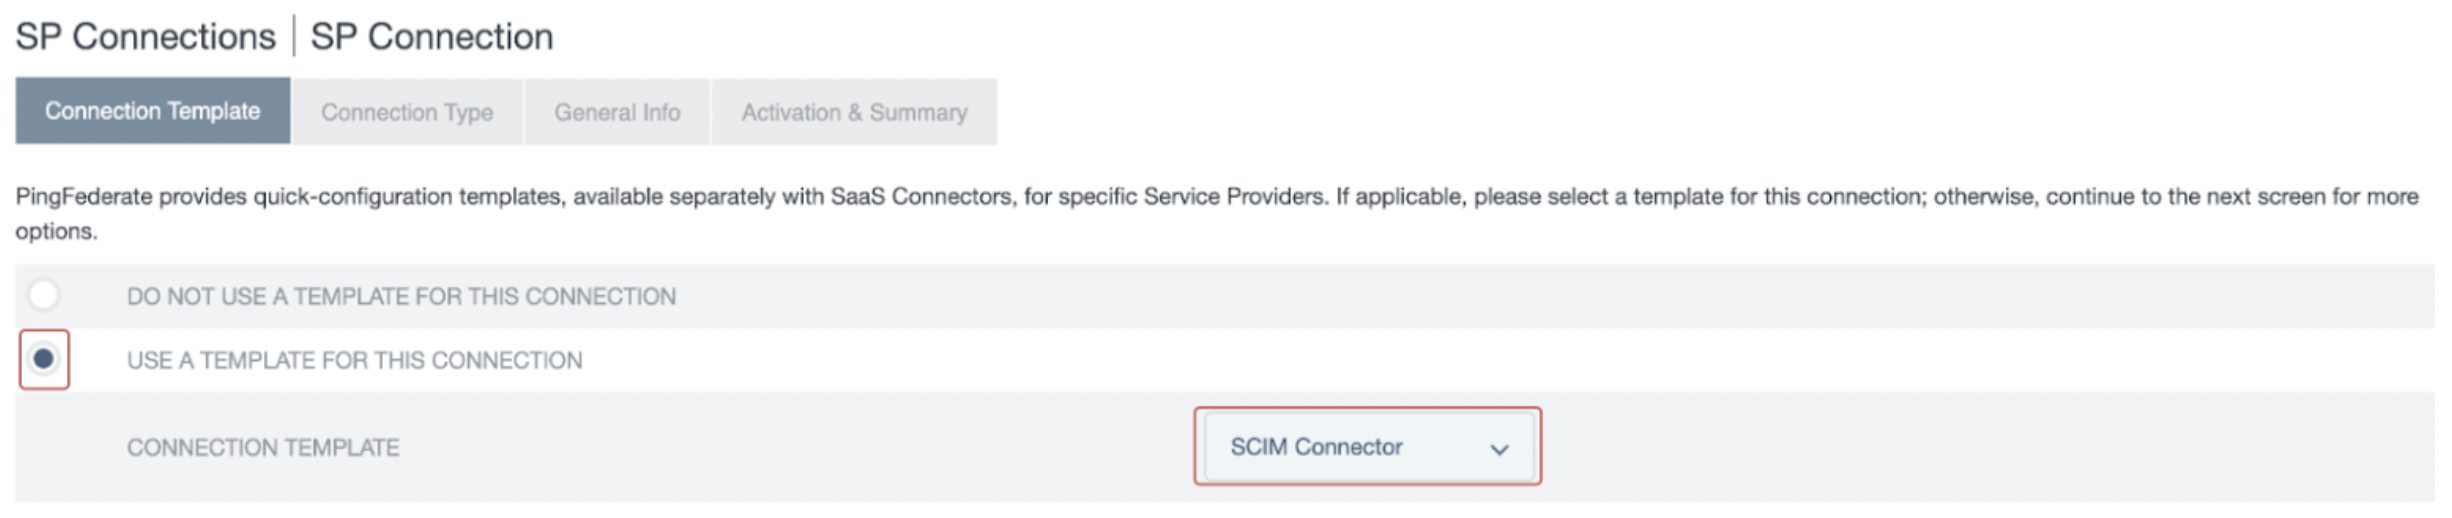
If you do not see the SCIM Connector option, please refer to the prerequisite section.
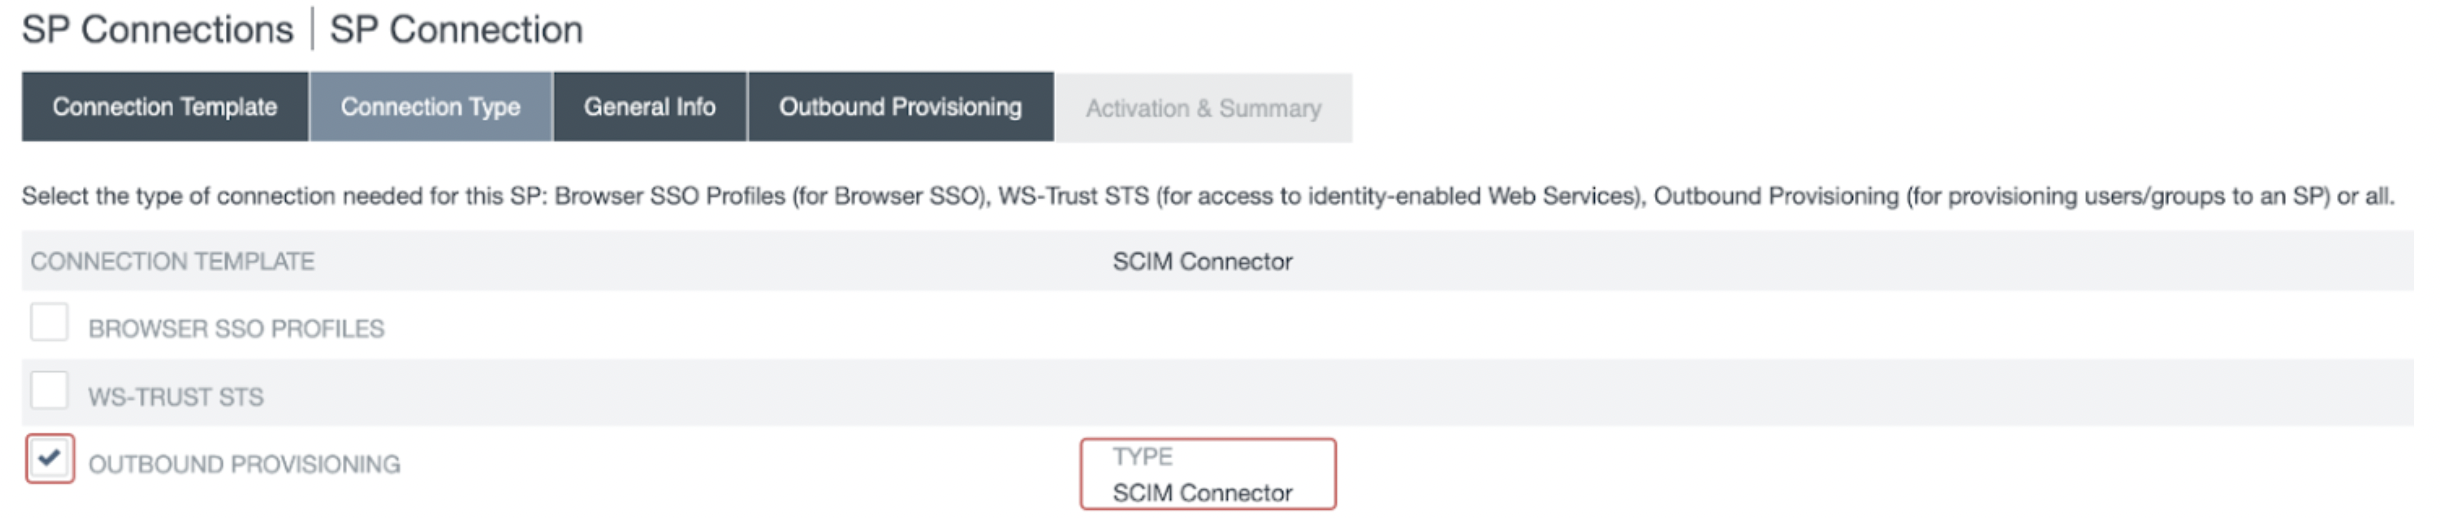
- In the Connection Type section, ensure that Outbound Provisioning is selected and Type is set to SCIM Connector. Click Next.
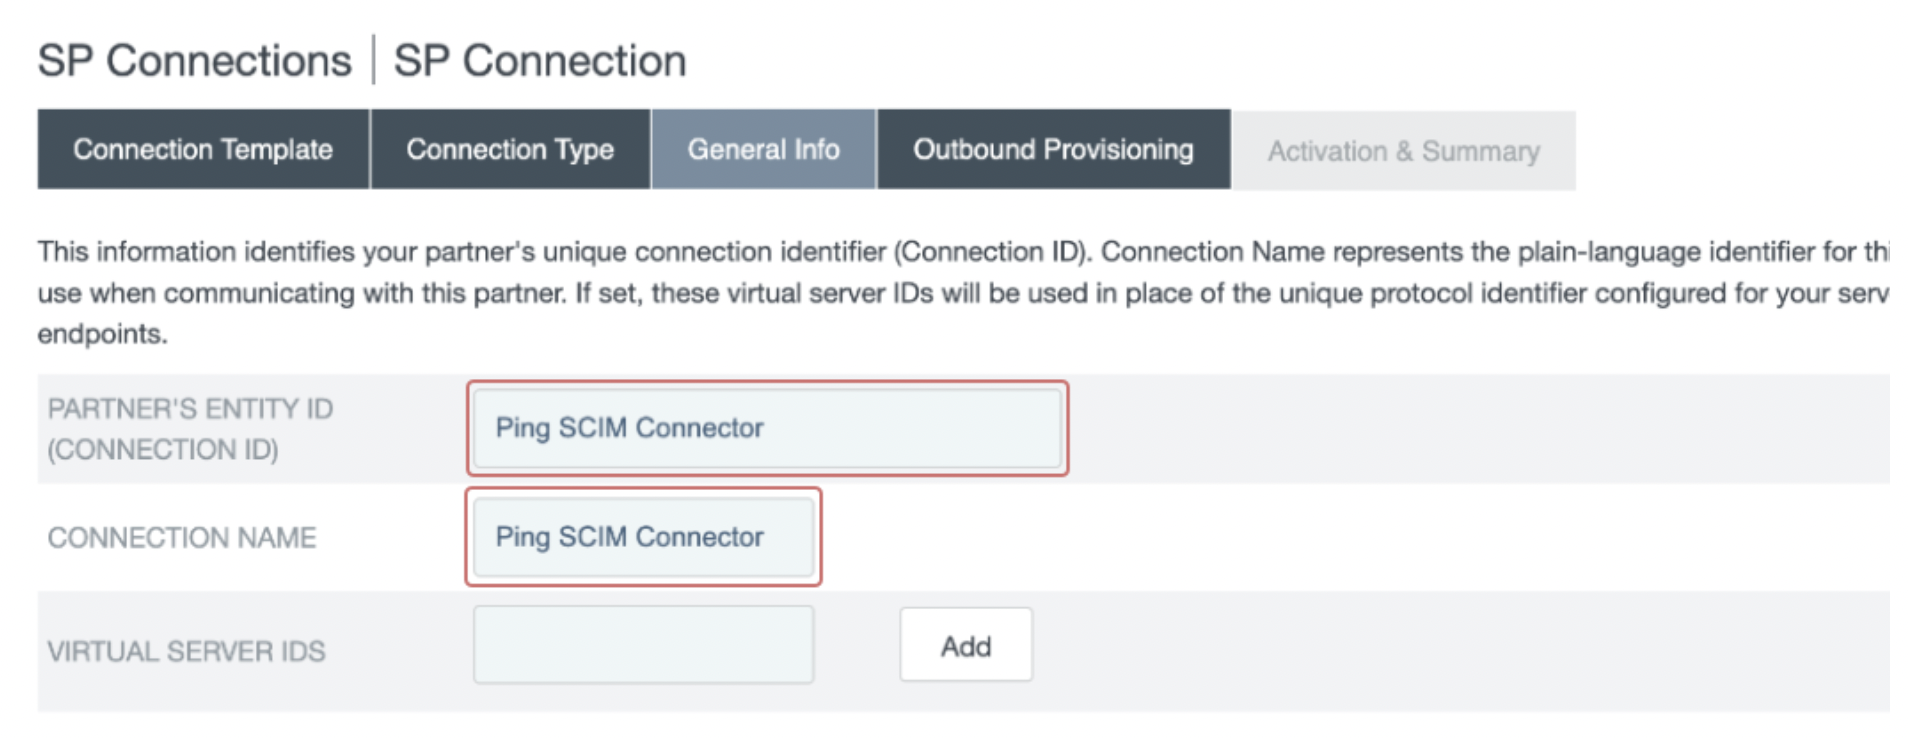
- In the General Info section, provide a descriptive name for Partner’s Entity ID and Connection Name. Click Next.
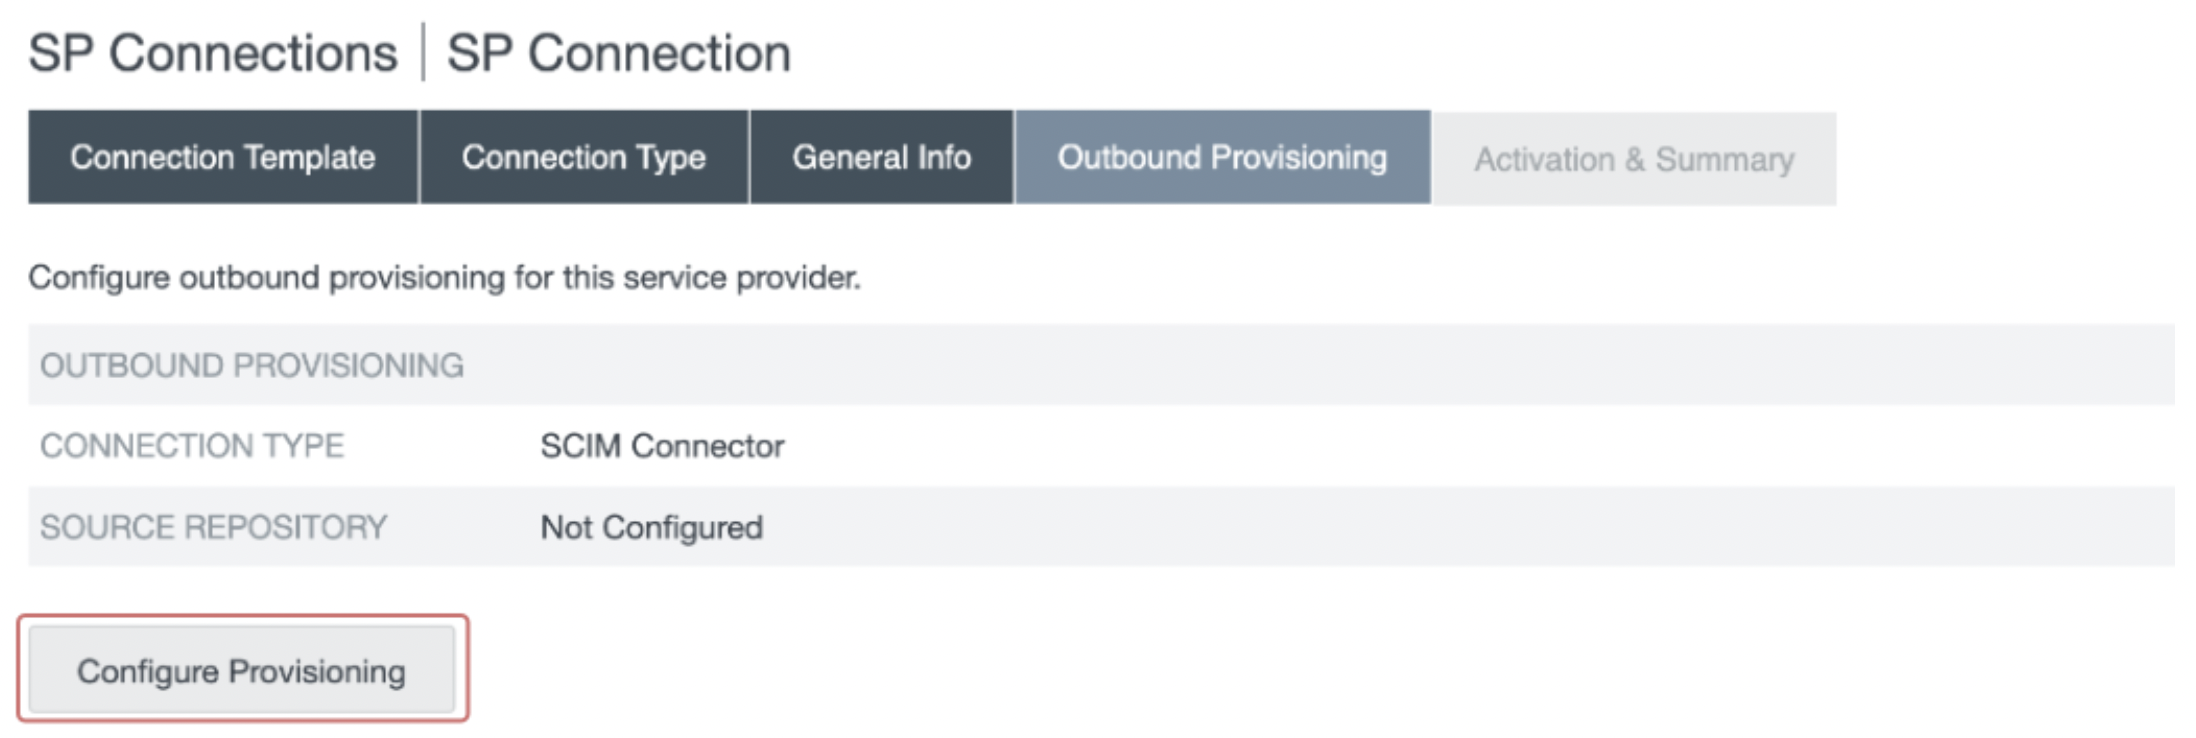
- In the Outbound Provisioning section, select the Configure Provisioning button.
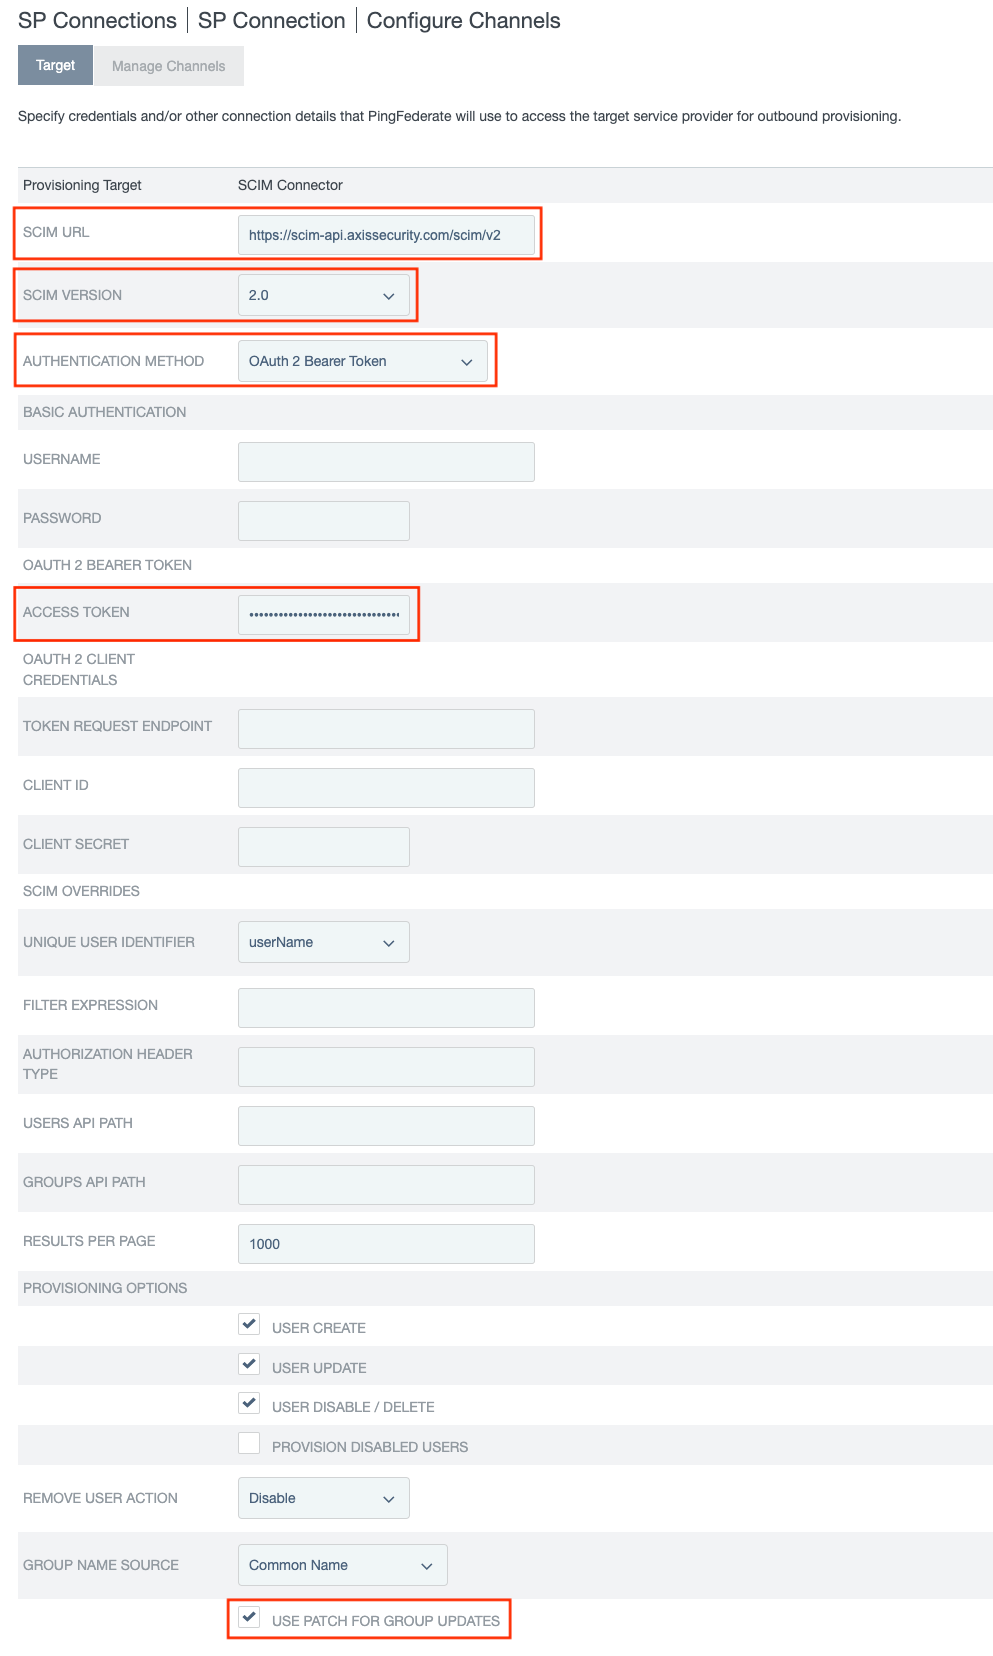
- In the Target section, we will leverage the User Auto-Provisioning (SCIM) values obtained in Step 1:
- Paste the SCIM Service Provider Endpoint in the SCIM URL field.
- Paste the SCIM Provisioning Token in the Access Token field.
- Ensure the SCIM Version is set as 2.0 and the Authentication Method is set as OAuth 2 Bearer Token.
- Check USE PATCH FOR GROUP UPDATES.
- Click Next.
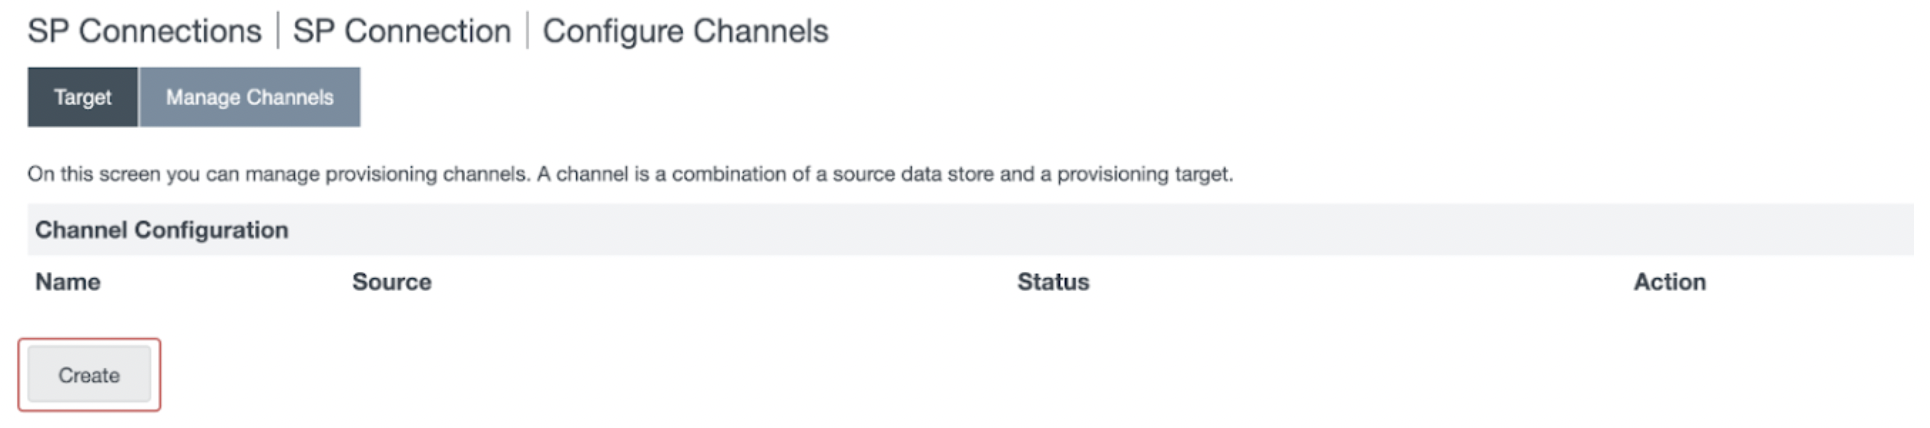
- Go to the Manage Channels table and select Create.
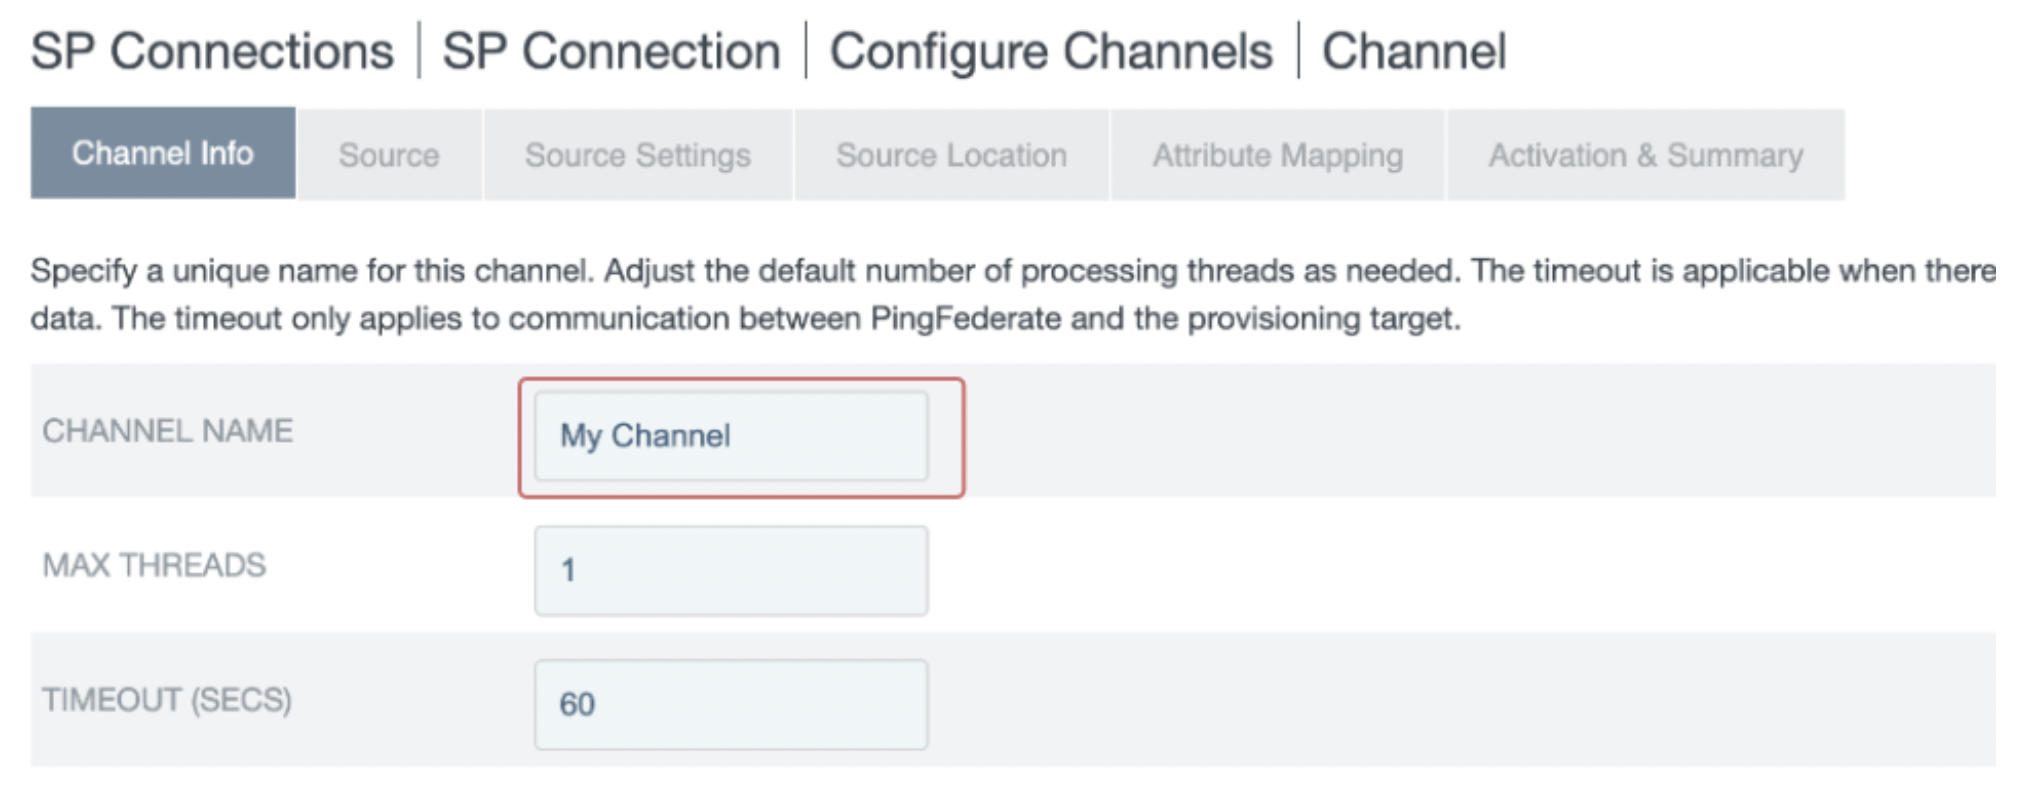
- In the Channel Info section, add a descriptive name at the Channel Name and click Next.
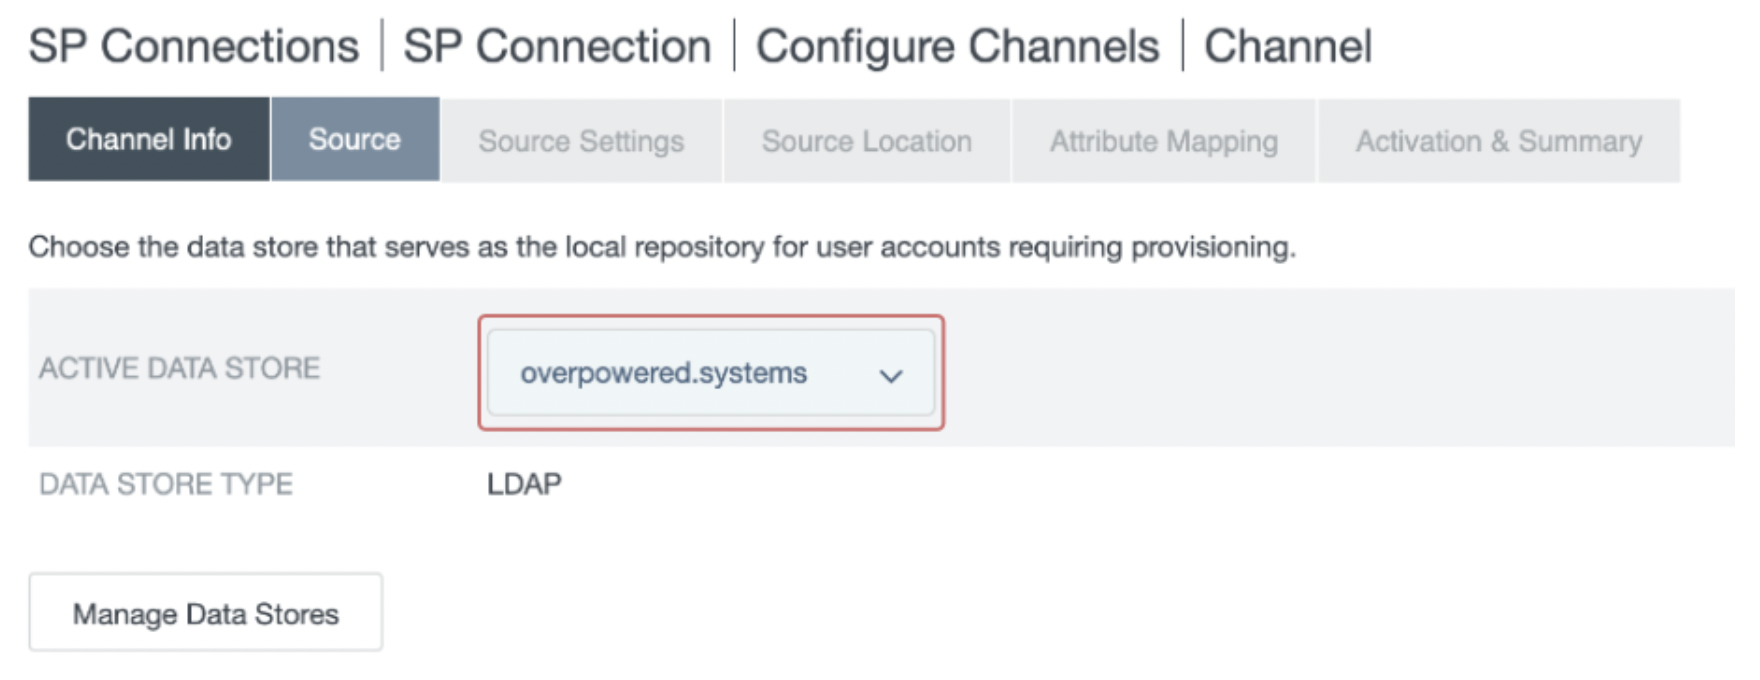
- In the Source section:
- Select an Active Data Store from the dropdown menu. The selected datastore is where the identity and group information will be synced from.
Note
The data store must be enabled for provisioning and single sign-on, as described in the Prerequisites.
- Click Next.
- In the Source Settings section, keep the default values. Click Next.
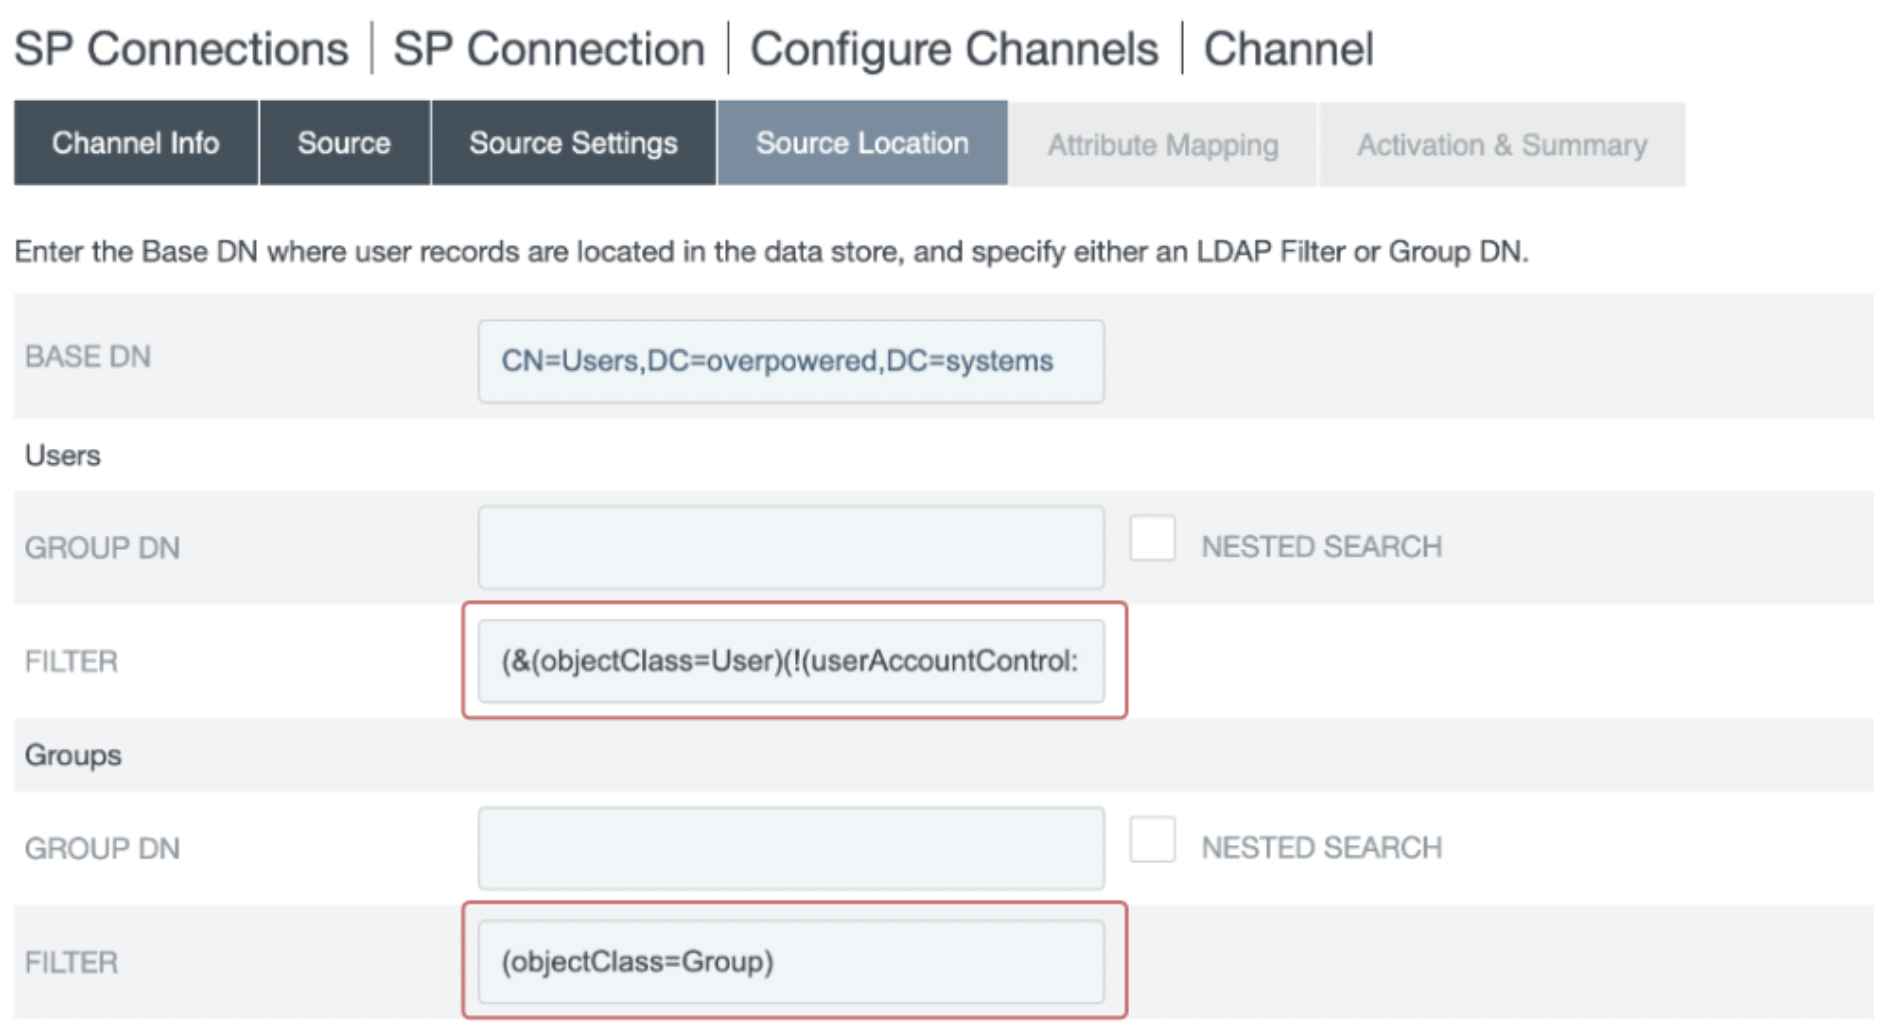
- In the Source Location section, select the location of the users/groups you want to sync from your active data store:
- Set a Base DN.
- Set either a Group DN or Filter for the Users and for the Groups.
Note: The setup may vary depending on the datastore type. The example below is based on an LDAP datastore. For further information, refer to the PingFederate documentation.
The following values are recommended
Users
| Field Name | Field Value |
|---|---|
| GROUP DN | (empty) |
| FILTER | (&(objectClass=User)(!(userAccountControl:1.2.840.113556.1.4.803:=2))) |
Note: The following expression MUST be included in the Users FILTER: !(userAccountControl:1.2.840.113556.1.4.803:=2)
Groups
| Field Name | Field Value |
|---|---|
| GROUP DN | (empty) |
| FILTER | (objectClass=Group) |
- Click Next.
- In the Attribute Mapping section, the attribute mapping should be as follows. Note this will require to delete some of the mappings, see the instructions below the image.

In order to delete an attribute mapping, click on Edit next to the attribute.

Then click on Remove. Make sure the DEFAULT VALUE is empty.

Make sure this is the final attributes mapping.

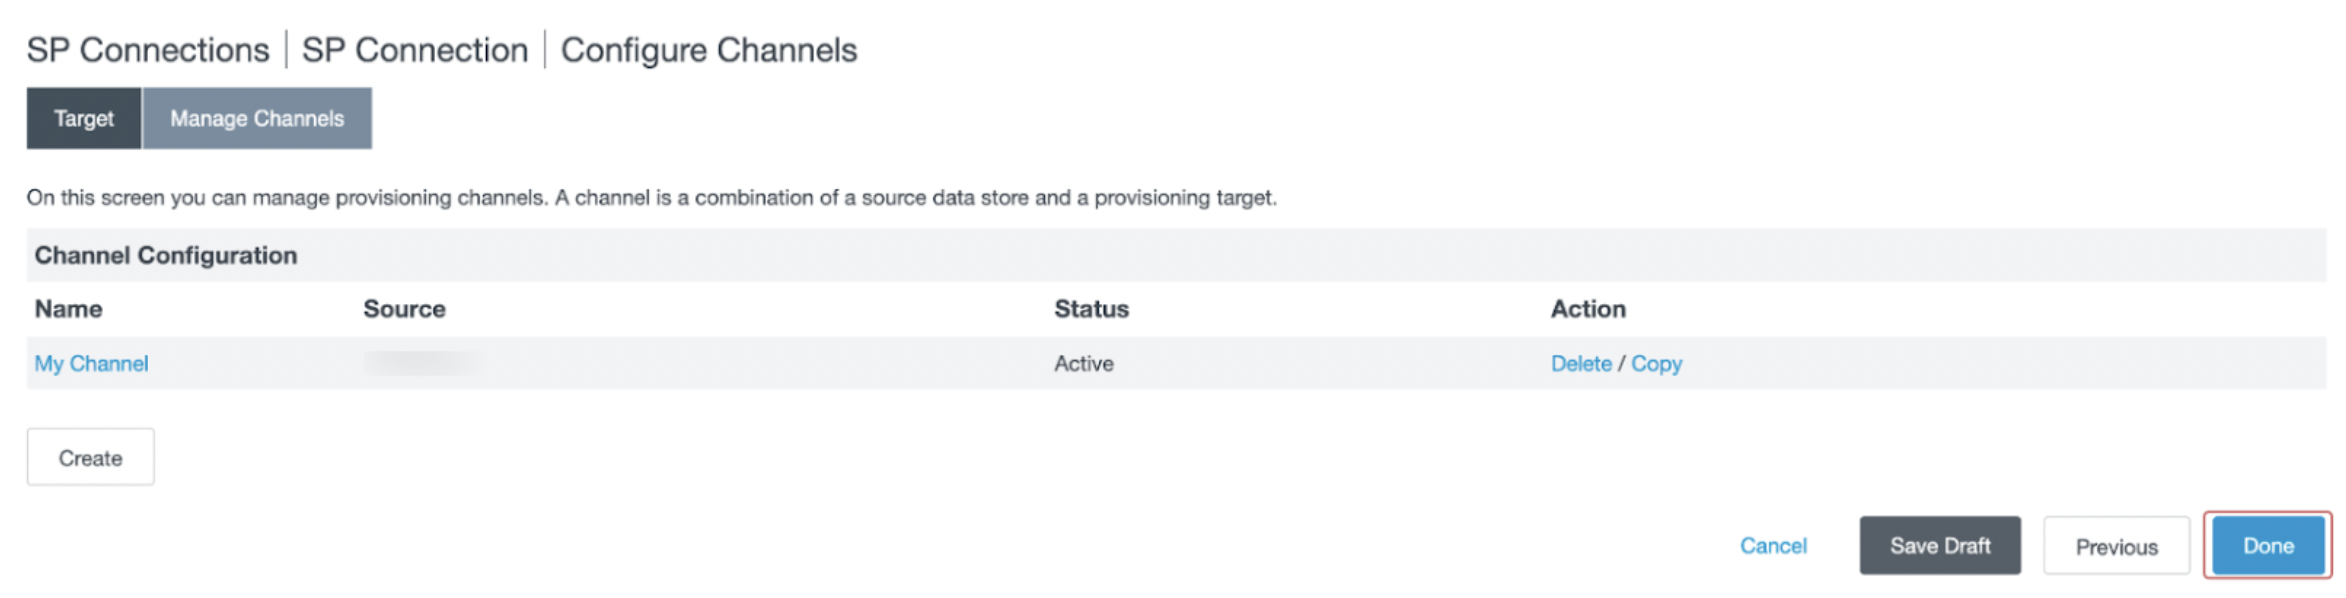
- In the Activation & Summary section, review the configured settings. Set the Channel Status as Active, and click Done.

- You will be redirected to the Manage Channels page. Click Done.
- You will be redirected to the Outbound Provisioning section. Click Next.
- In the Activation & Summary section, activate the SP Connection in PingFederate by toggling the connection status. Click Save.
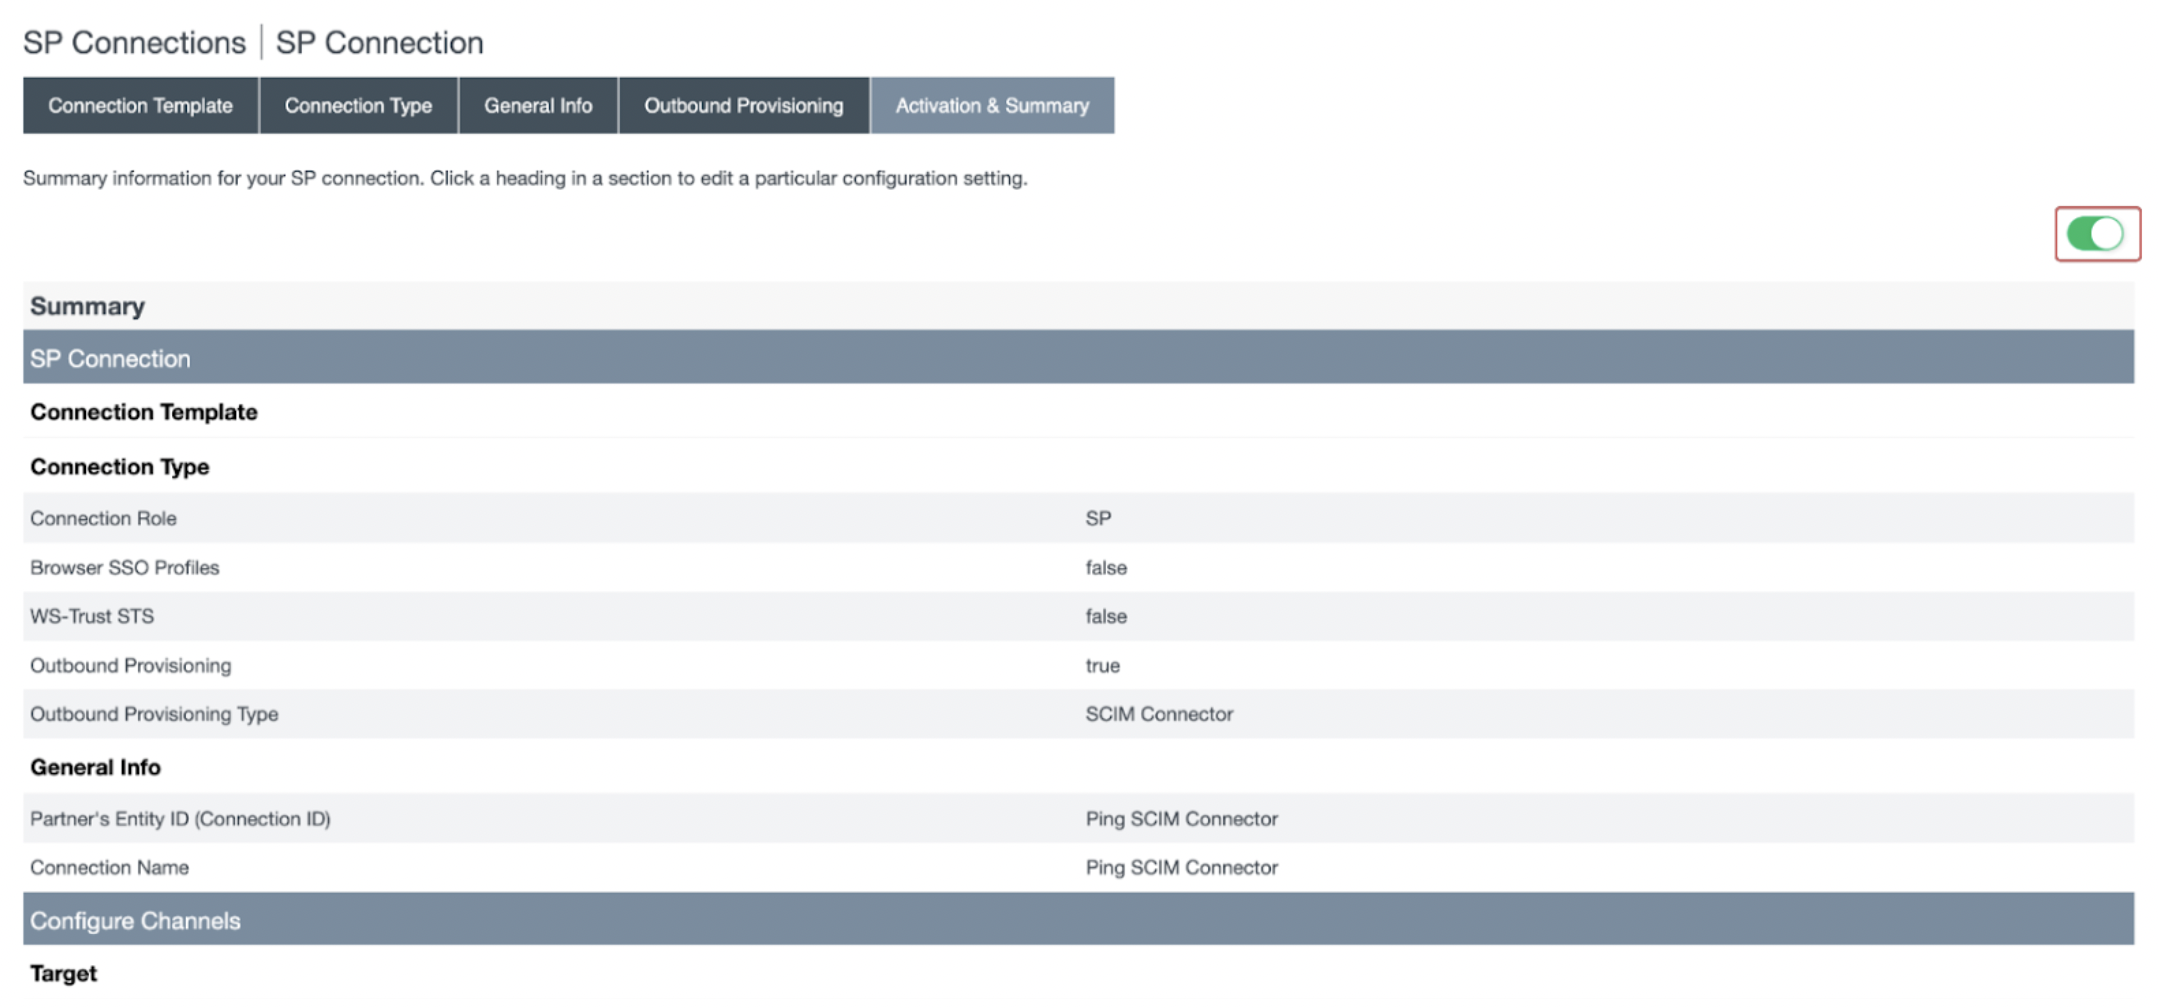
- Upon successful completion, the SCIM connector will be listed in the SP Connections page
Step 3: Verifying the SCIM Provisioning Integration
Provisioning will begin shortly after the SP connection has been activated. Note that the provisioning process can take several minutes to complete.
Log into the Axis Management console and follow the steps below to verify if the SCIM integration working:
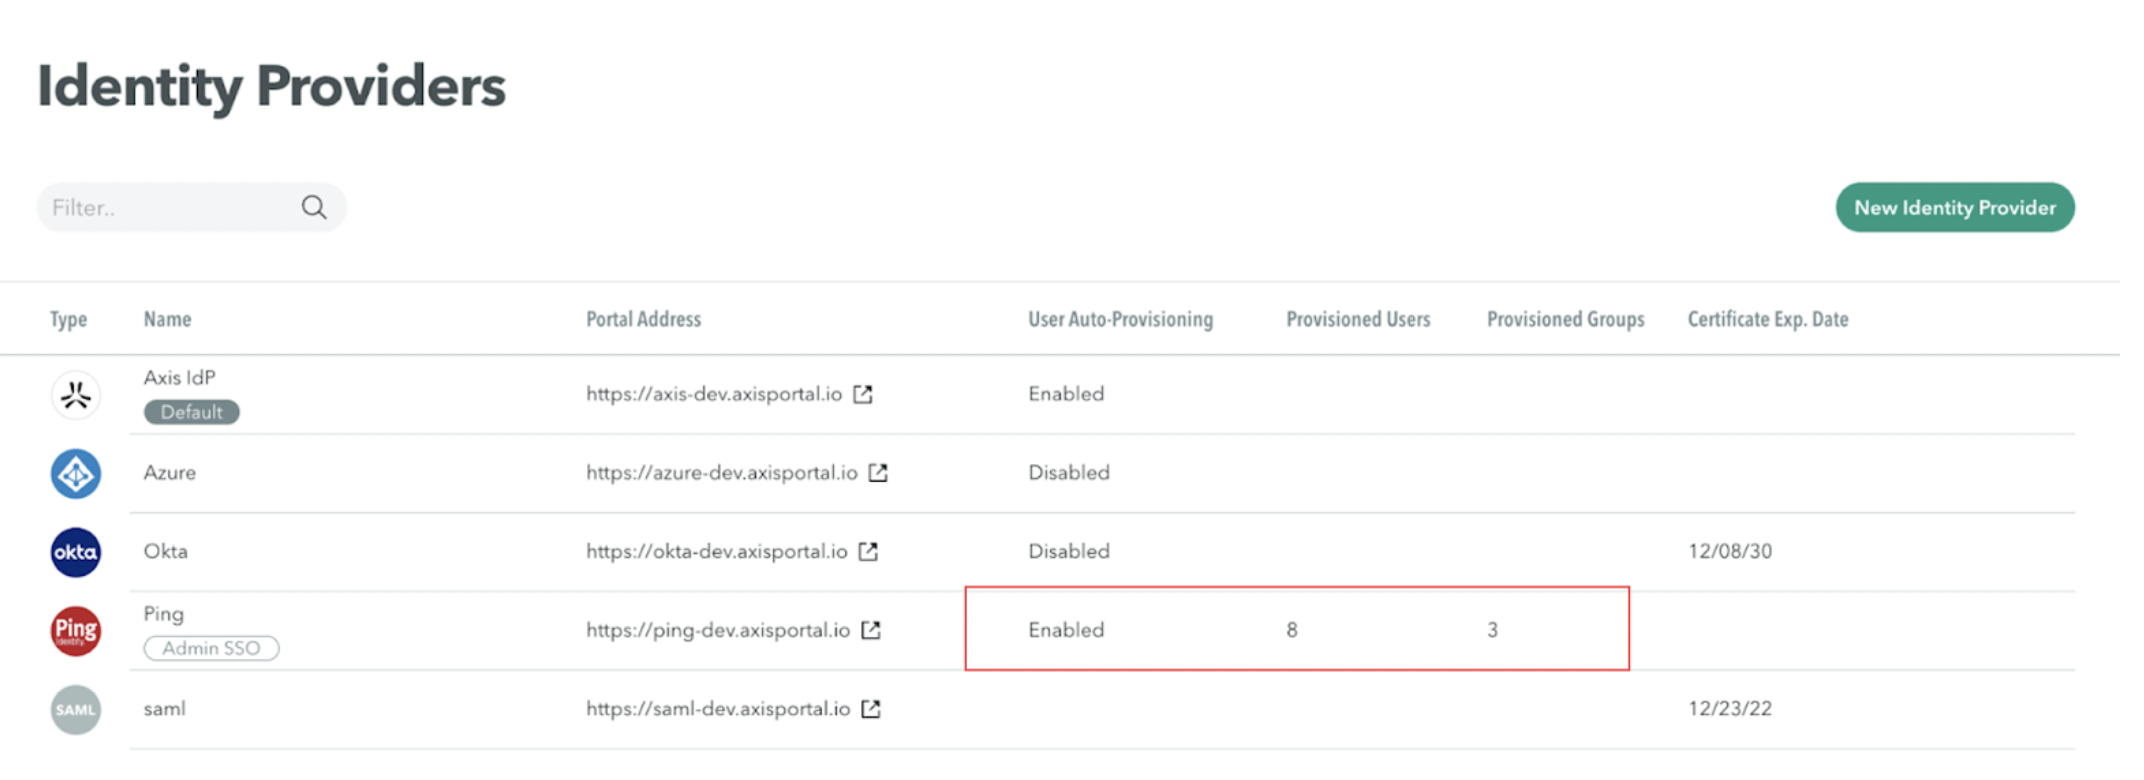
- Go to Settings -> Identity Providers. In the Identity Providers table, the configured PingFederate IdP will now show the number of synchronized users and groups.
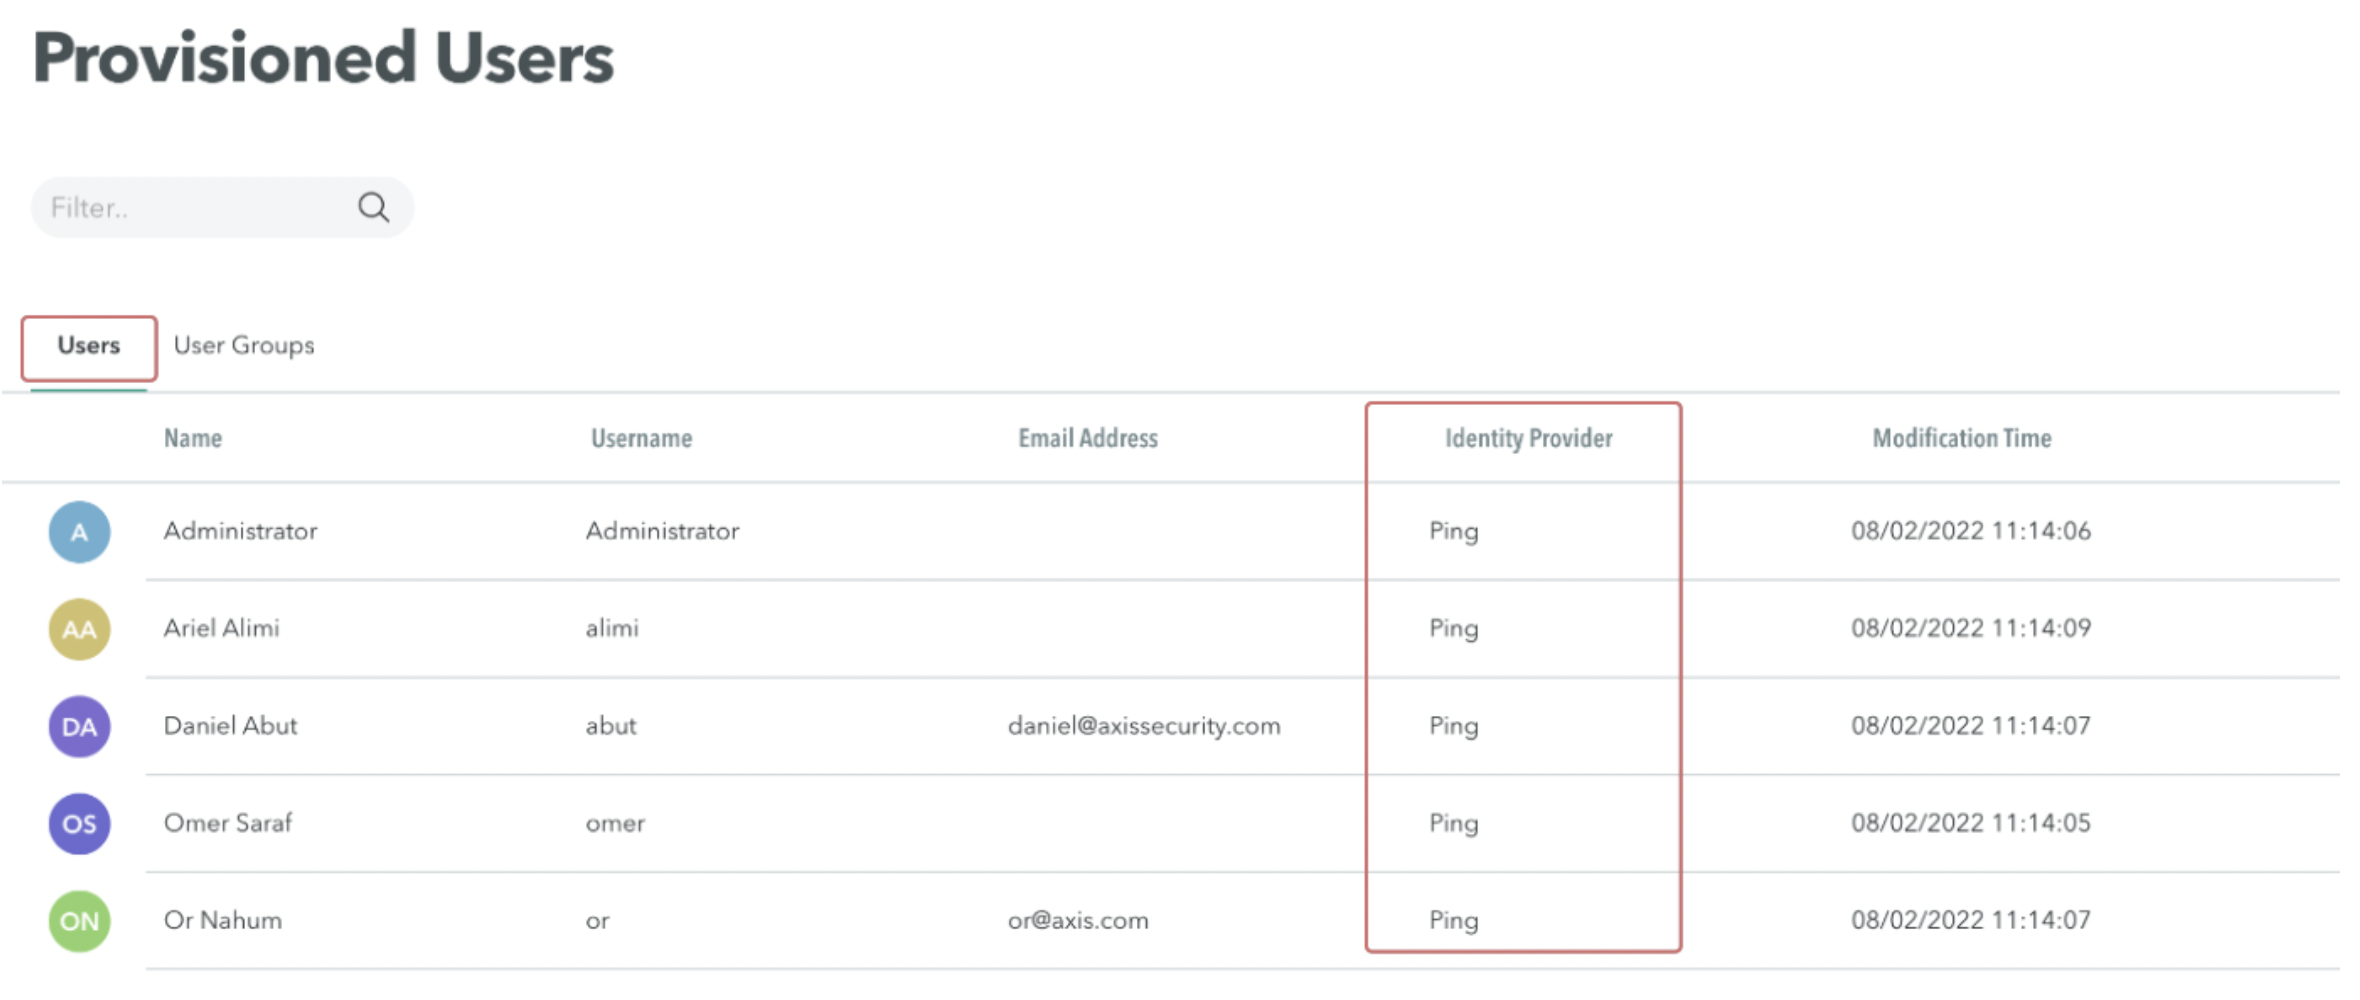
- Go to Settings -> Provisioned Users. On the Users tab, verify that the configured users have been synced from your PingFederate Identity Provider.
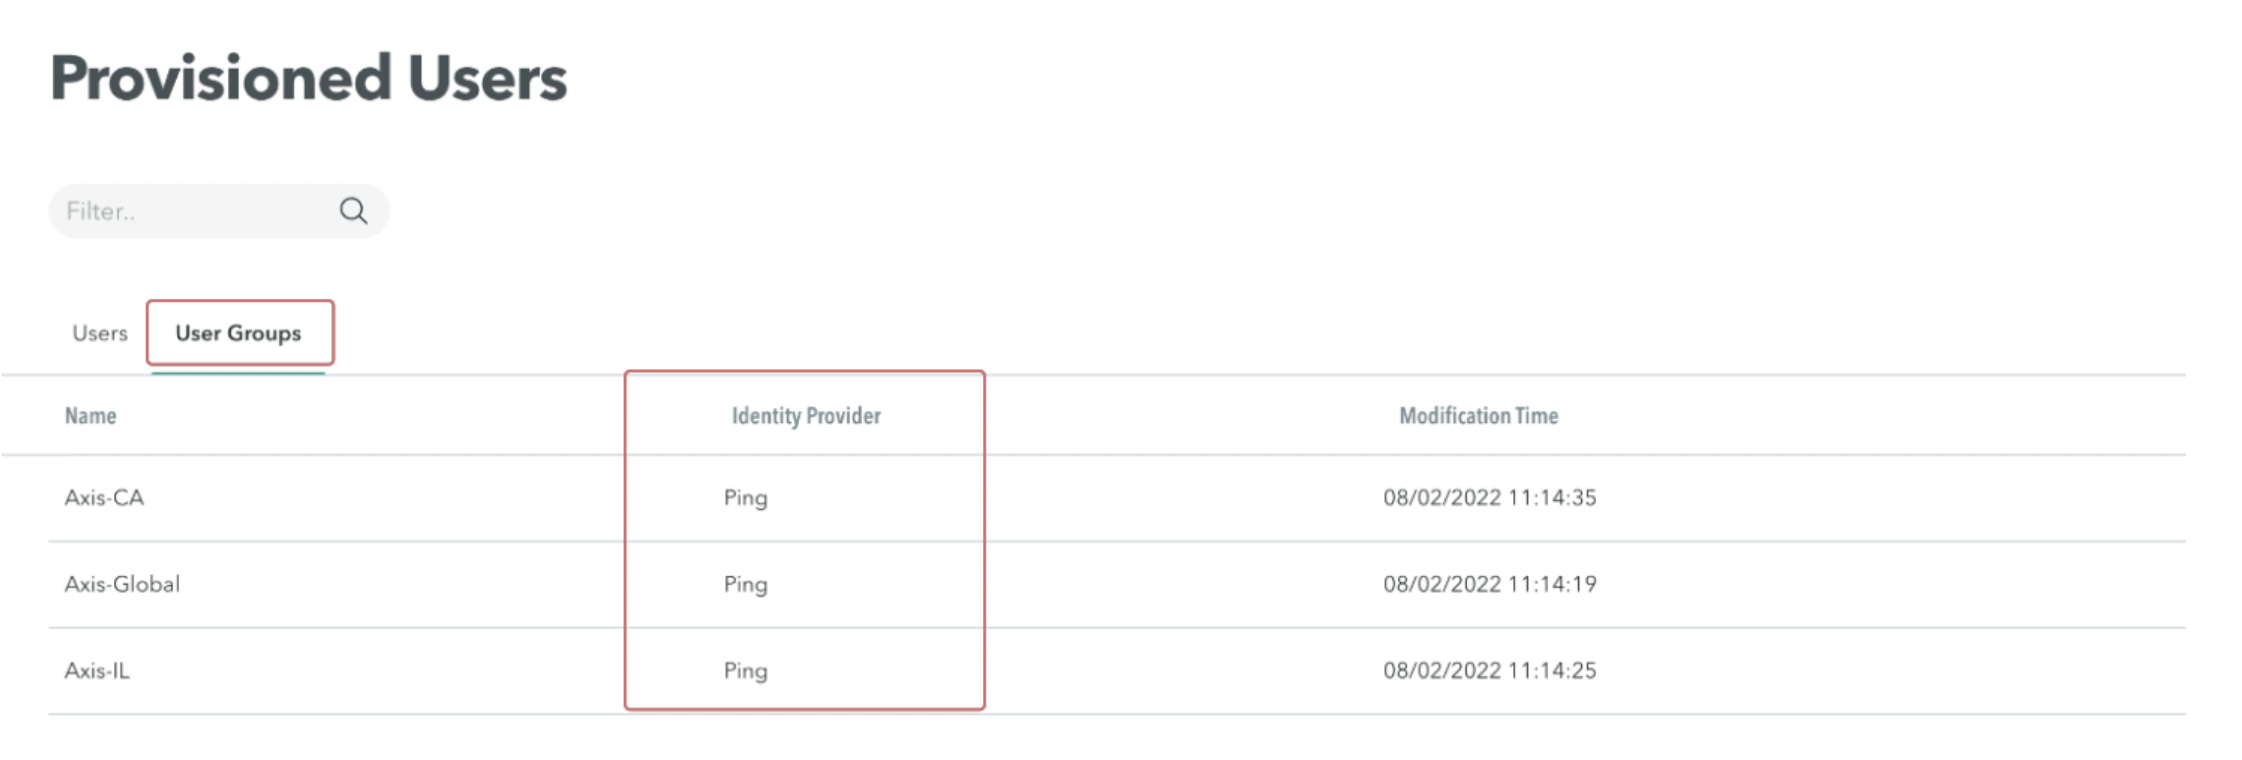
- Select the User Groups tab. Verify the configured groups have been synced from your PingFederate Identity Provider.
Updated about 1 month ago