SCIM Provisioning with JumpCloud
This article describes how to configure SCIM user provisioning with JumpCloud as the identity provider. This will allow Axis to continuously synchronize user identity and group information from a user datastore configured in JumpCloud.
Before you begin, you must configure an JumpCloud as an Identity Provider.
Step 1: Enabling User Auto Provisioning with JumpCloud in the Axis Management Console
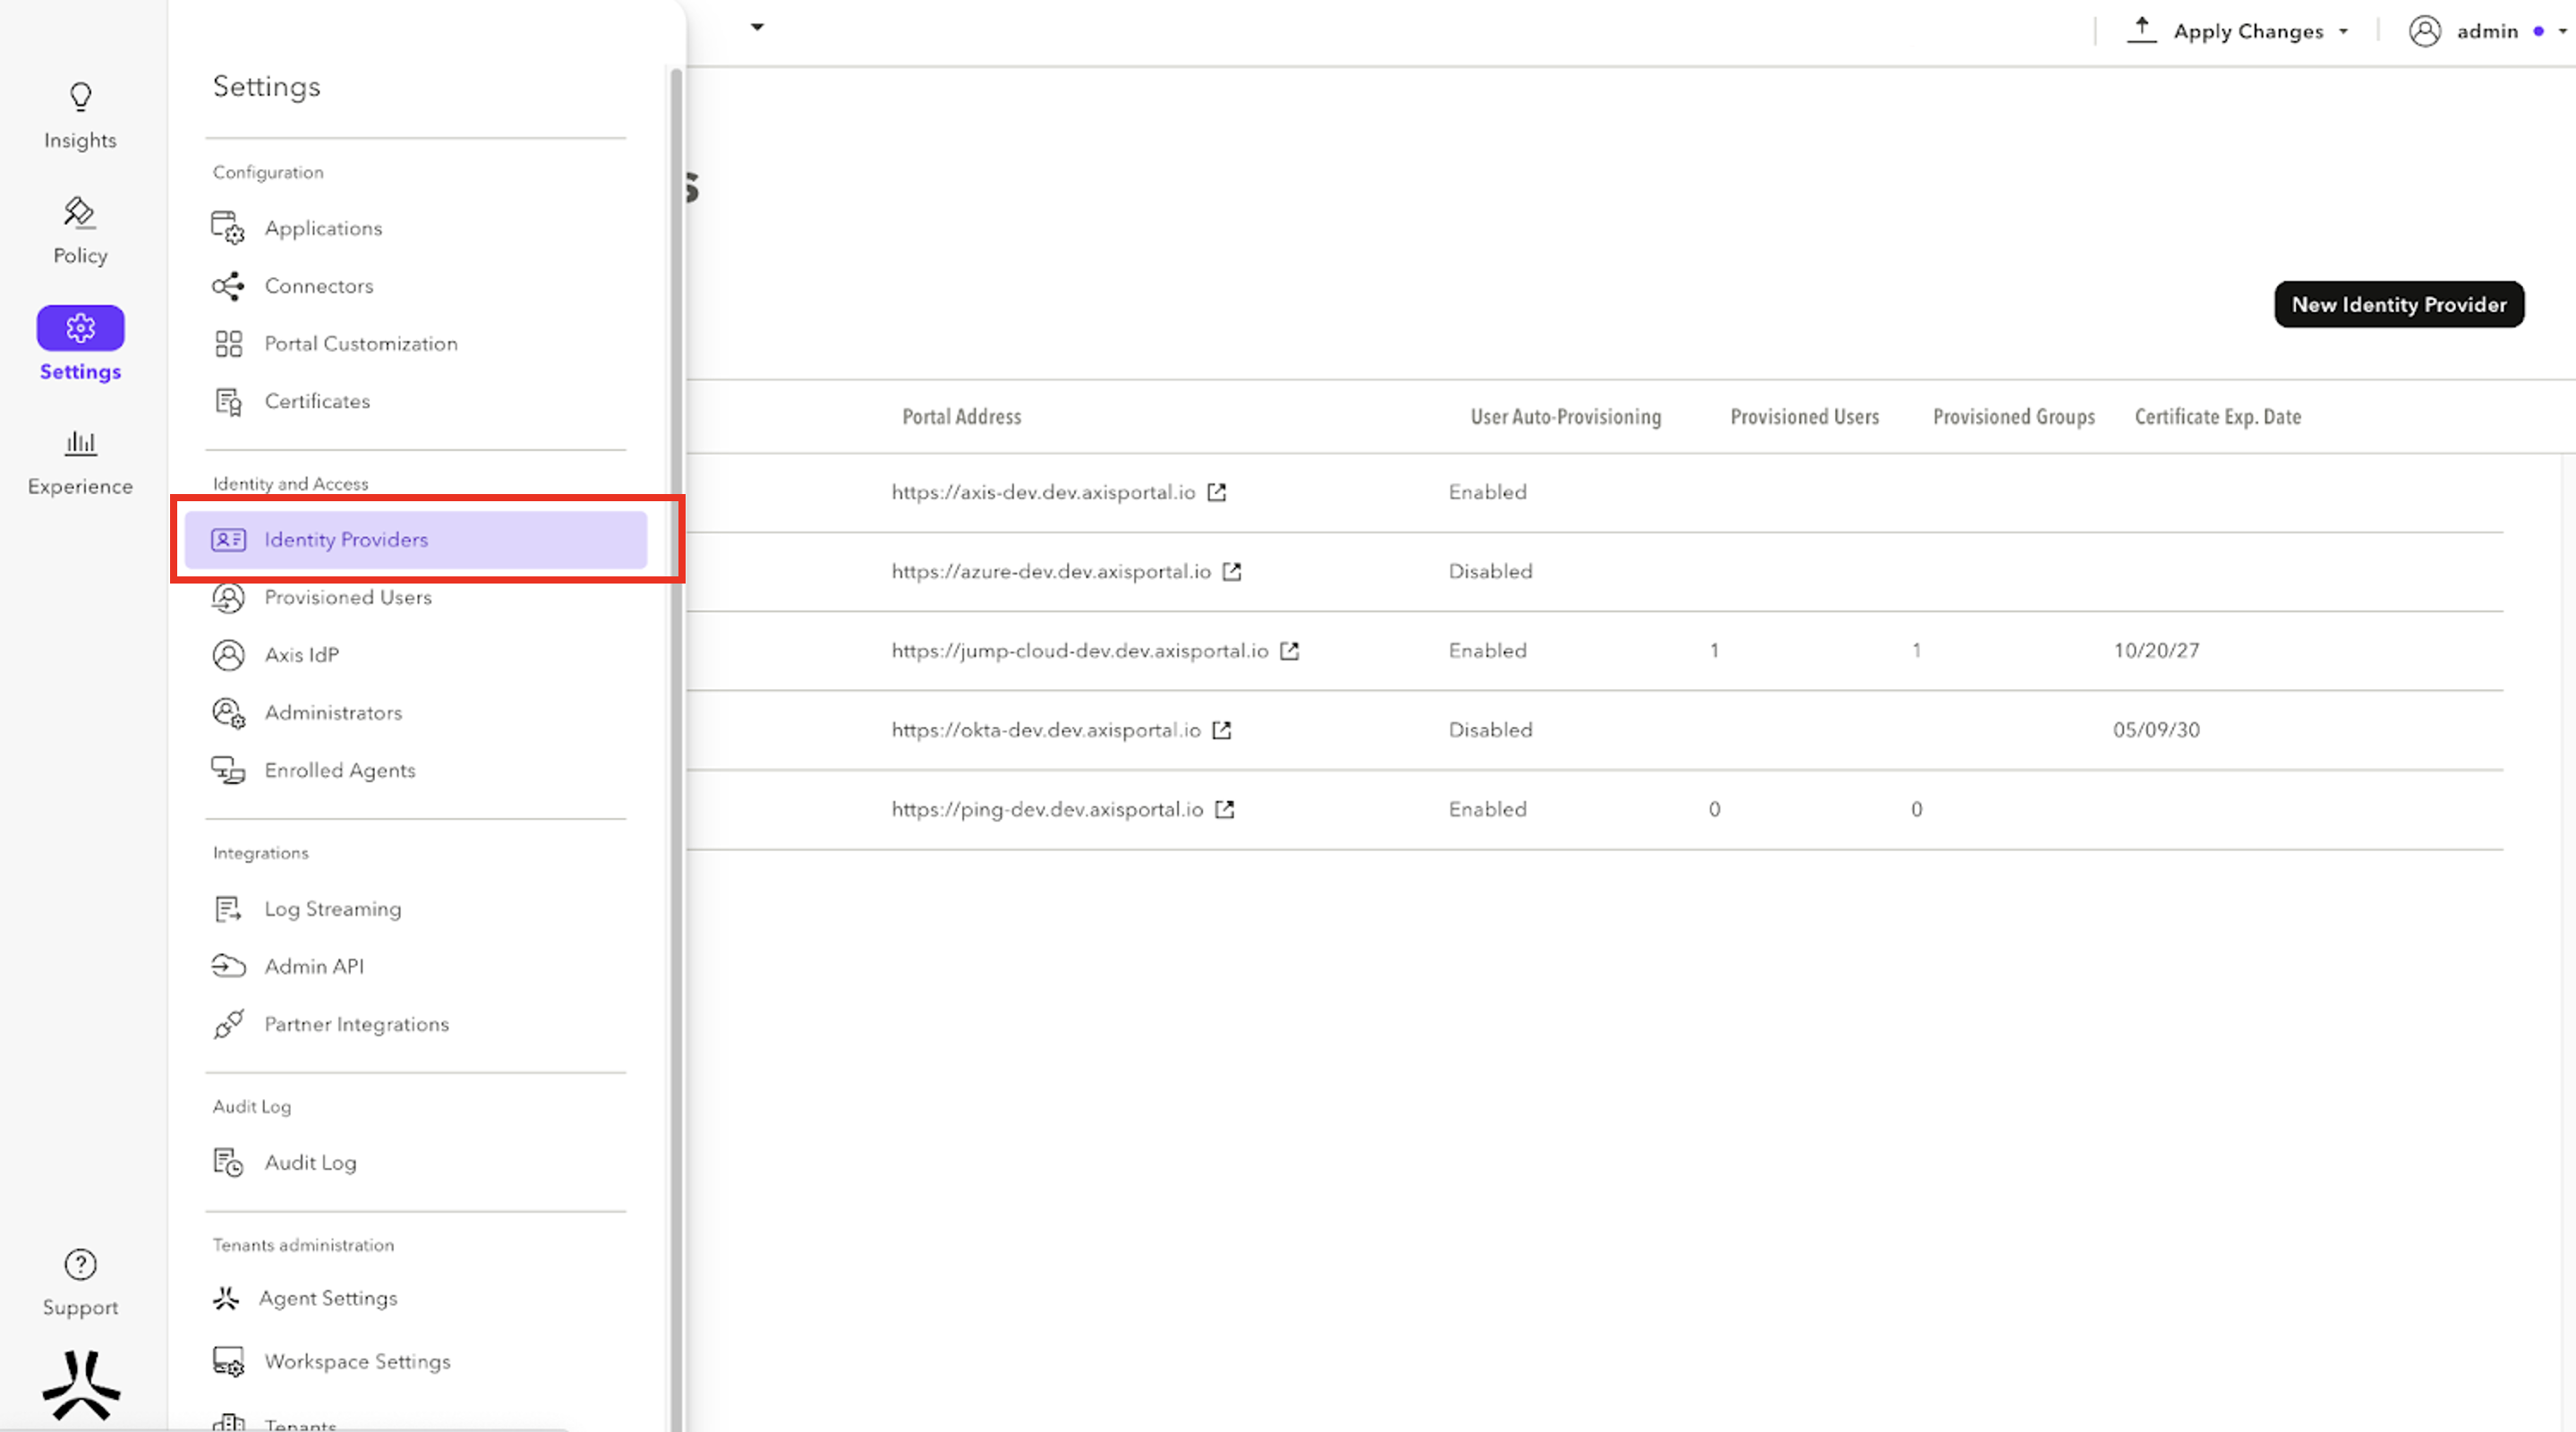
- In the Axis Management Console, go to Settings -> Identity Providers.
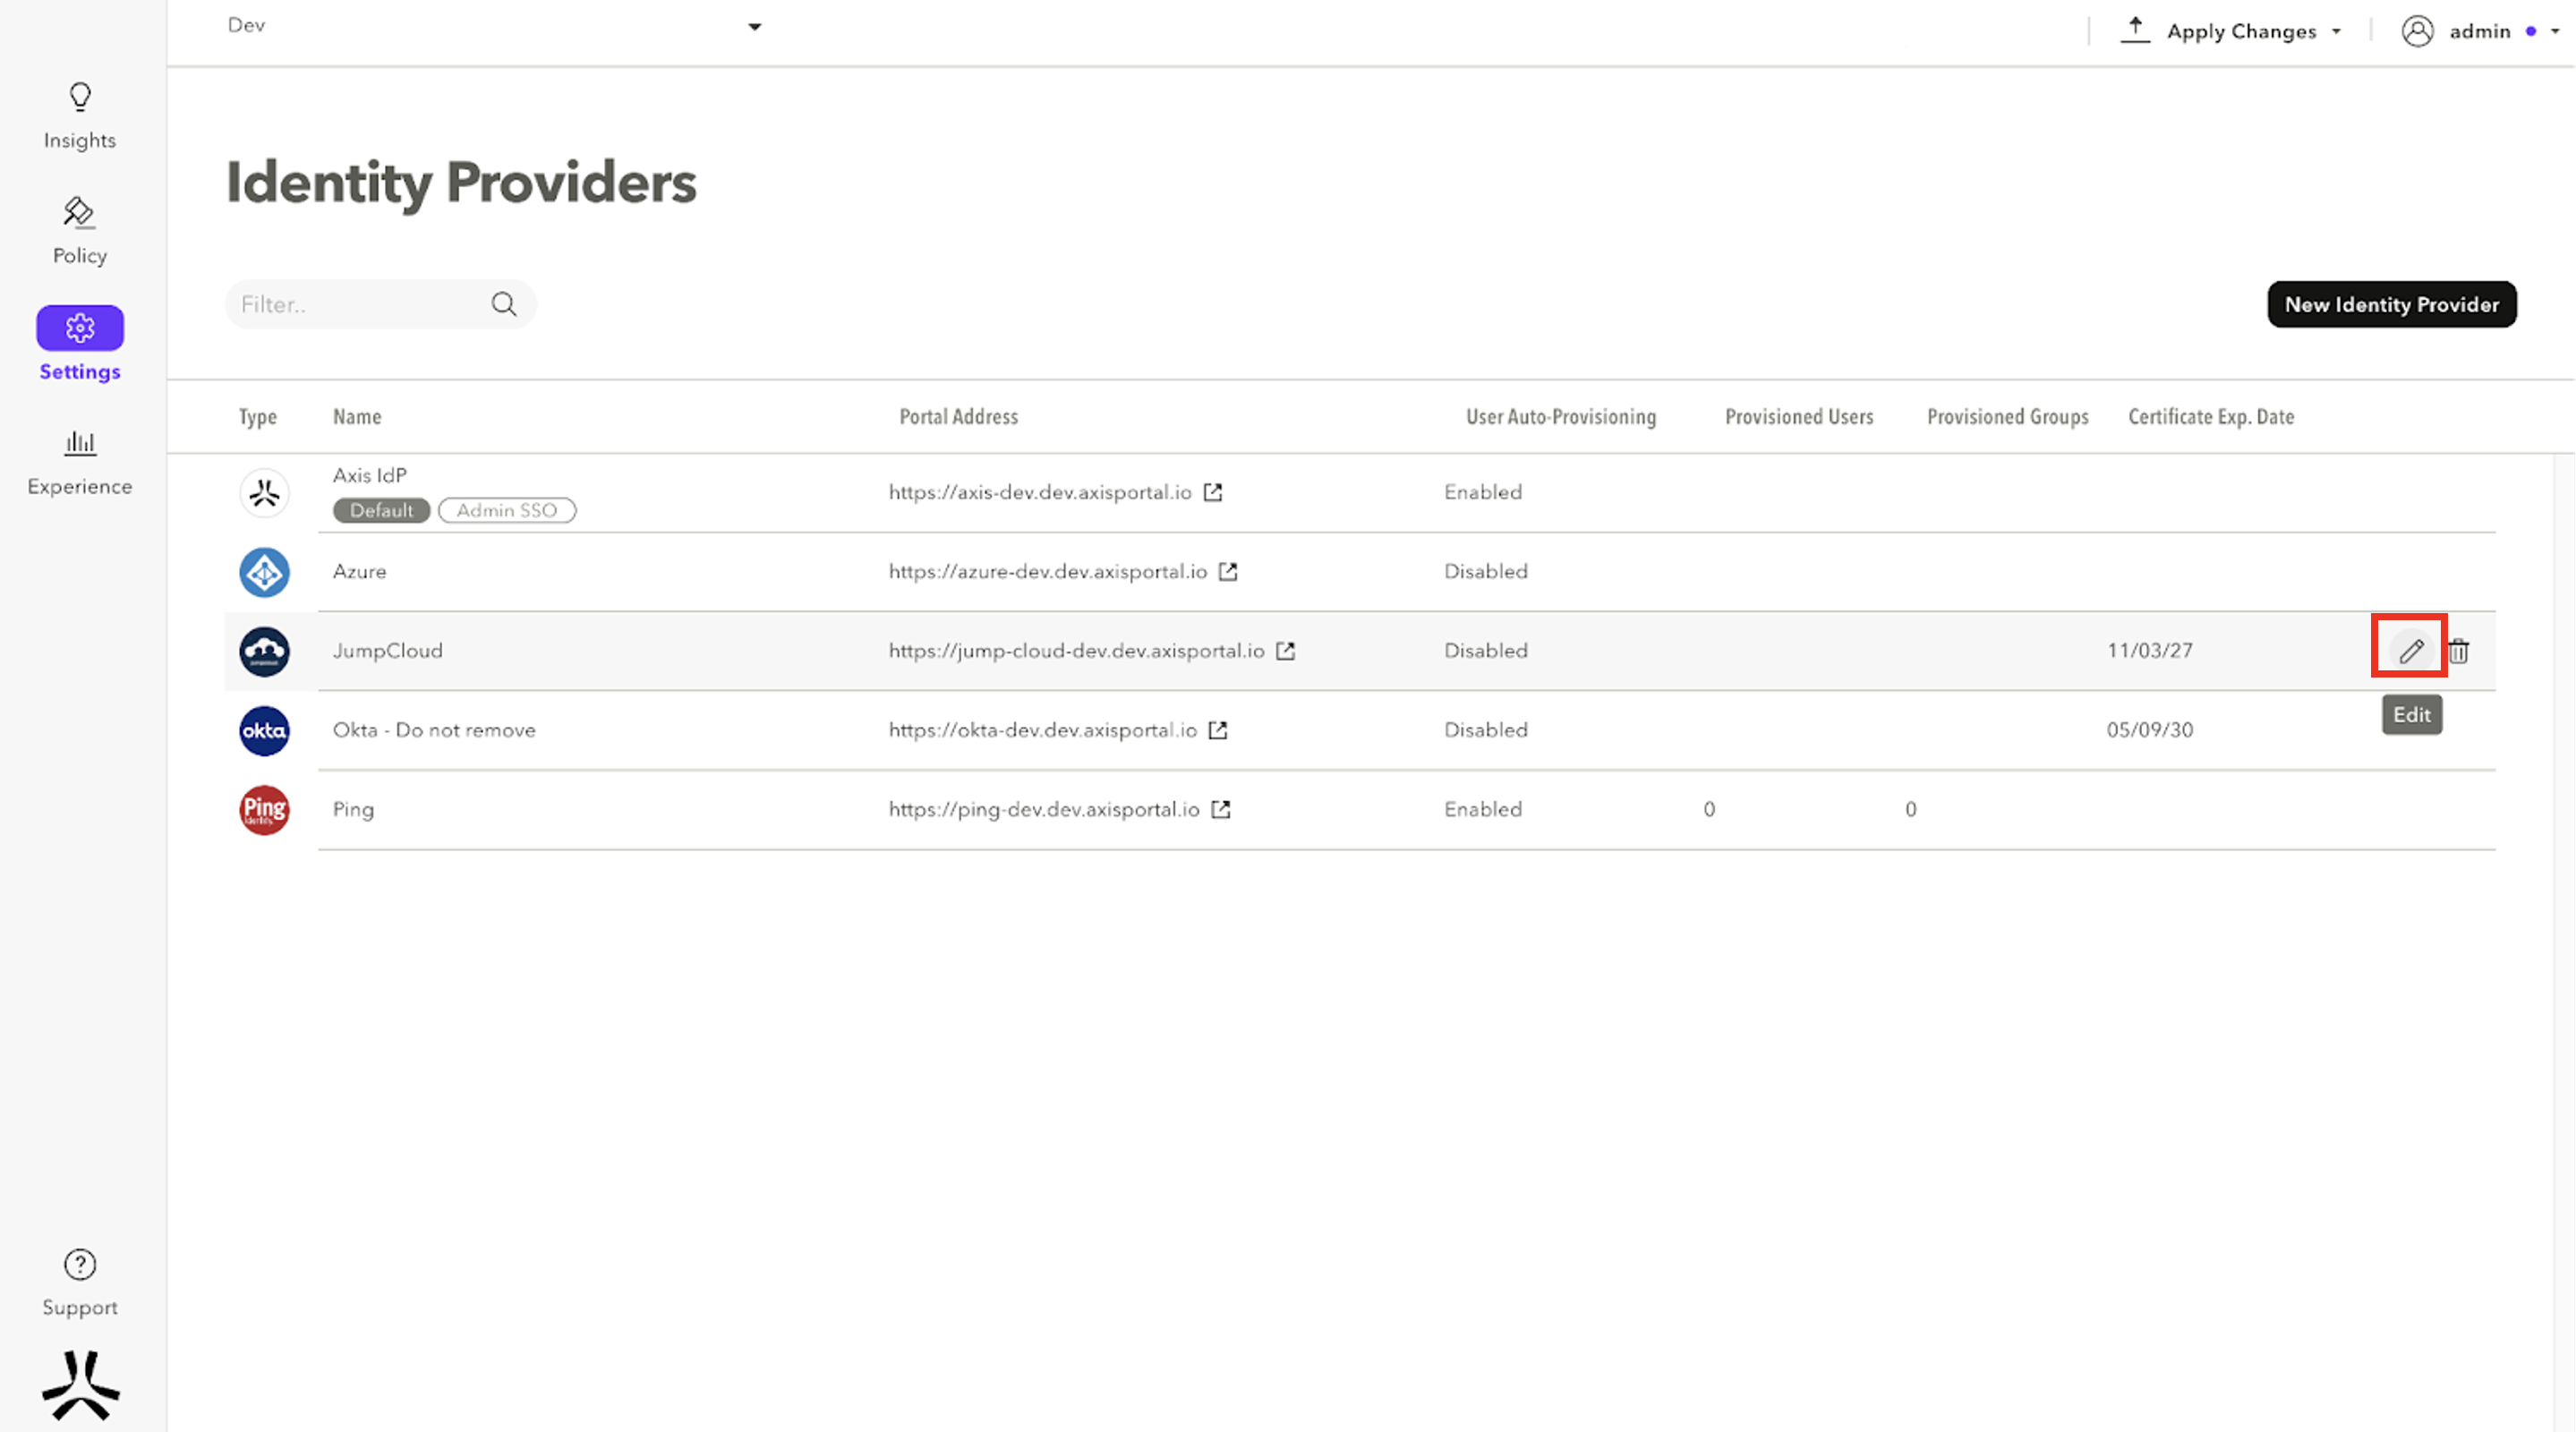
- Hover over the JumpCloud Identity Provider and select Edit.
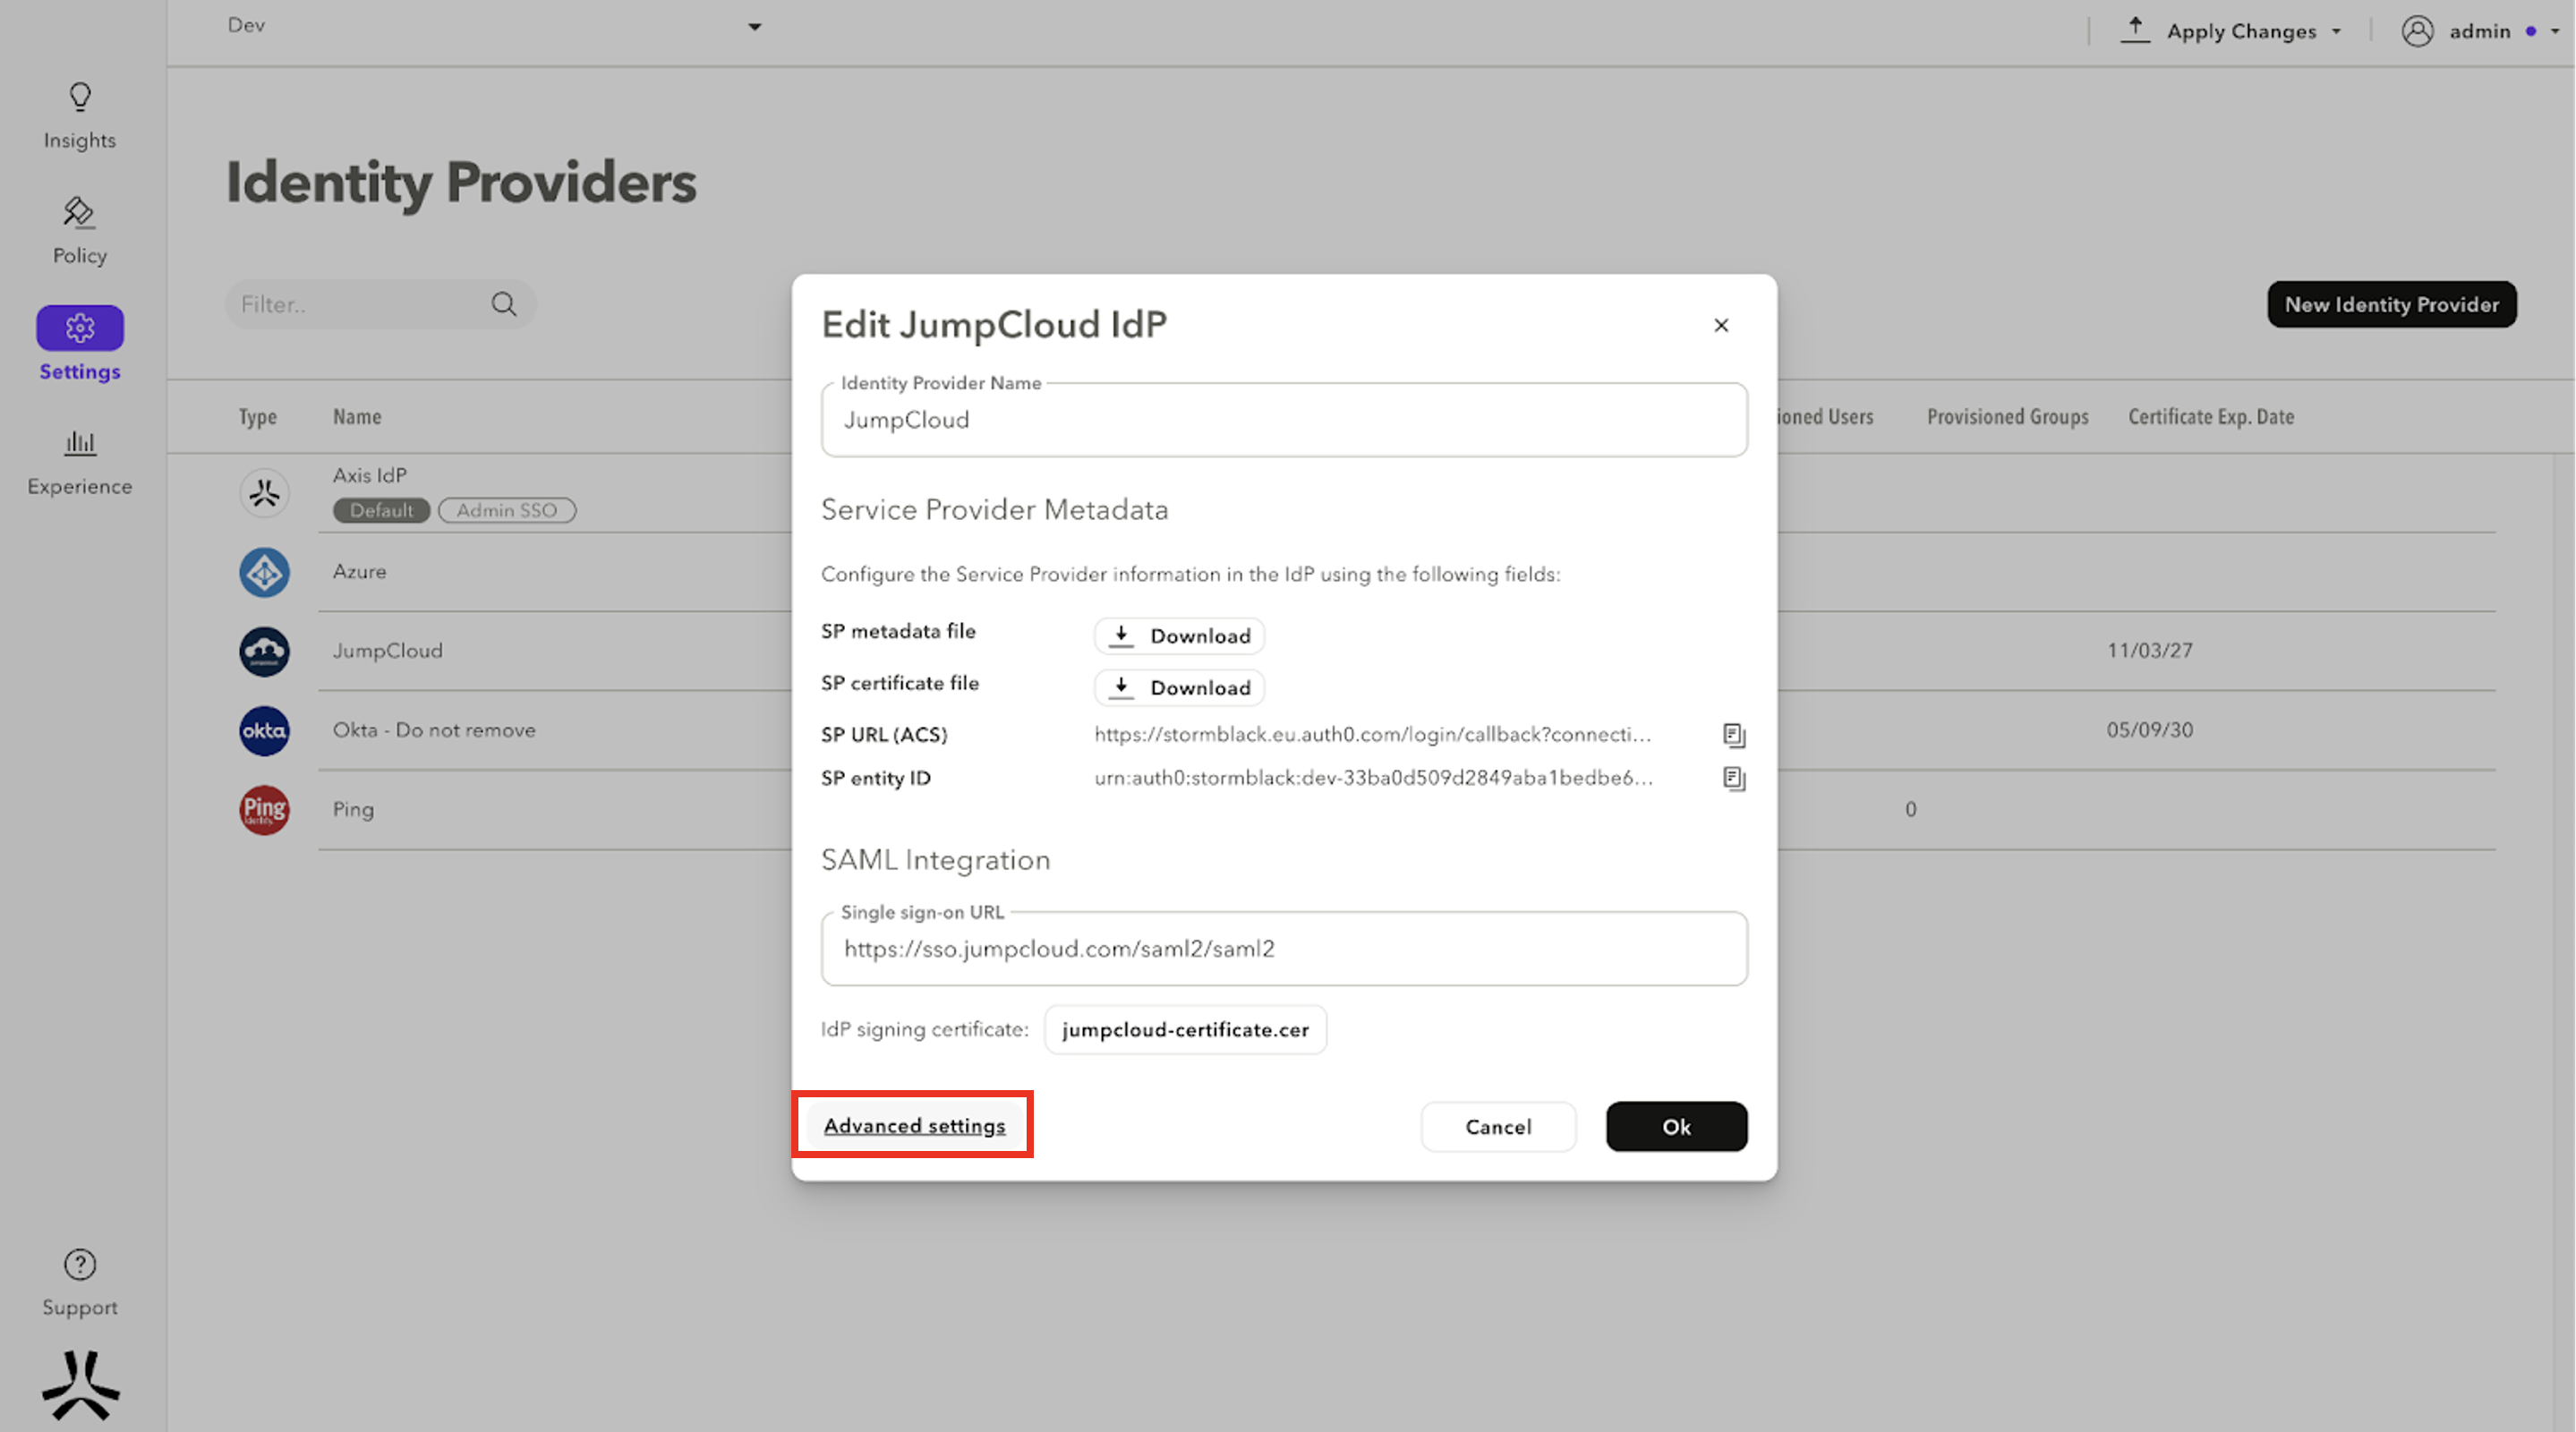
- Navigate to Advanced Settings.
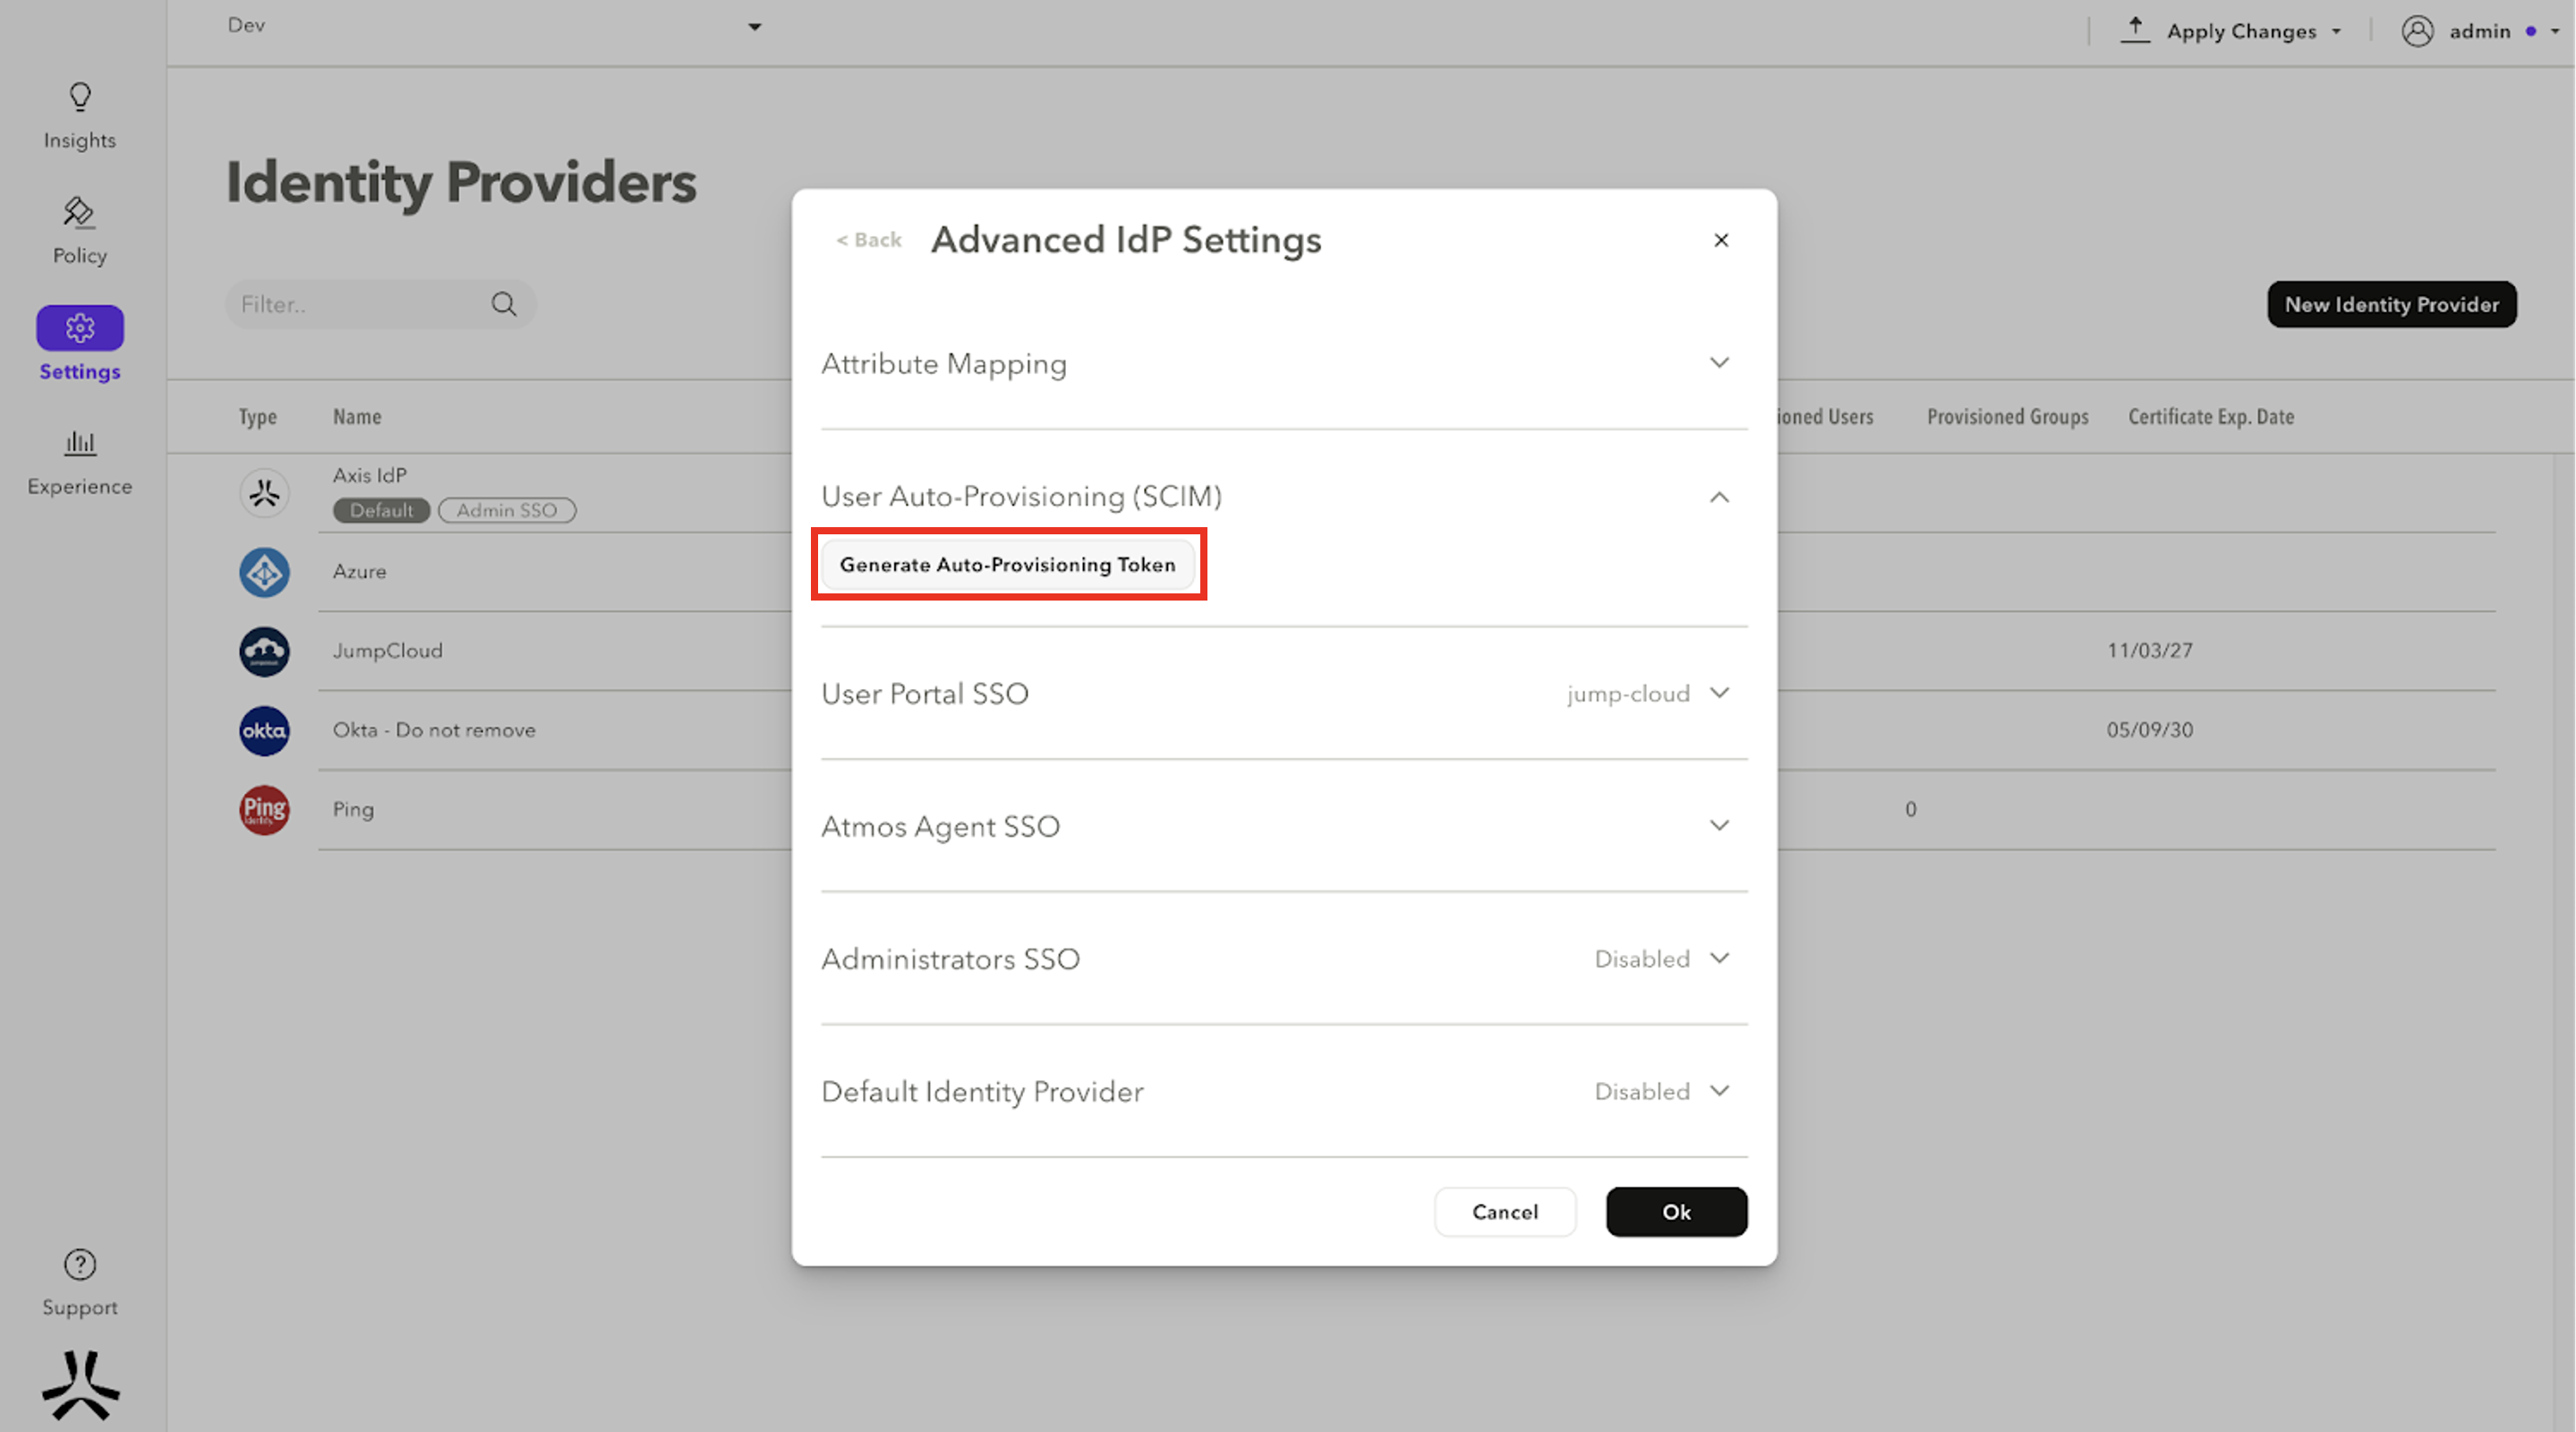
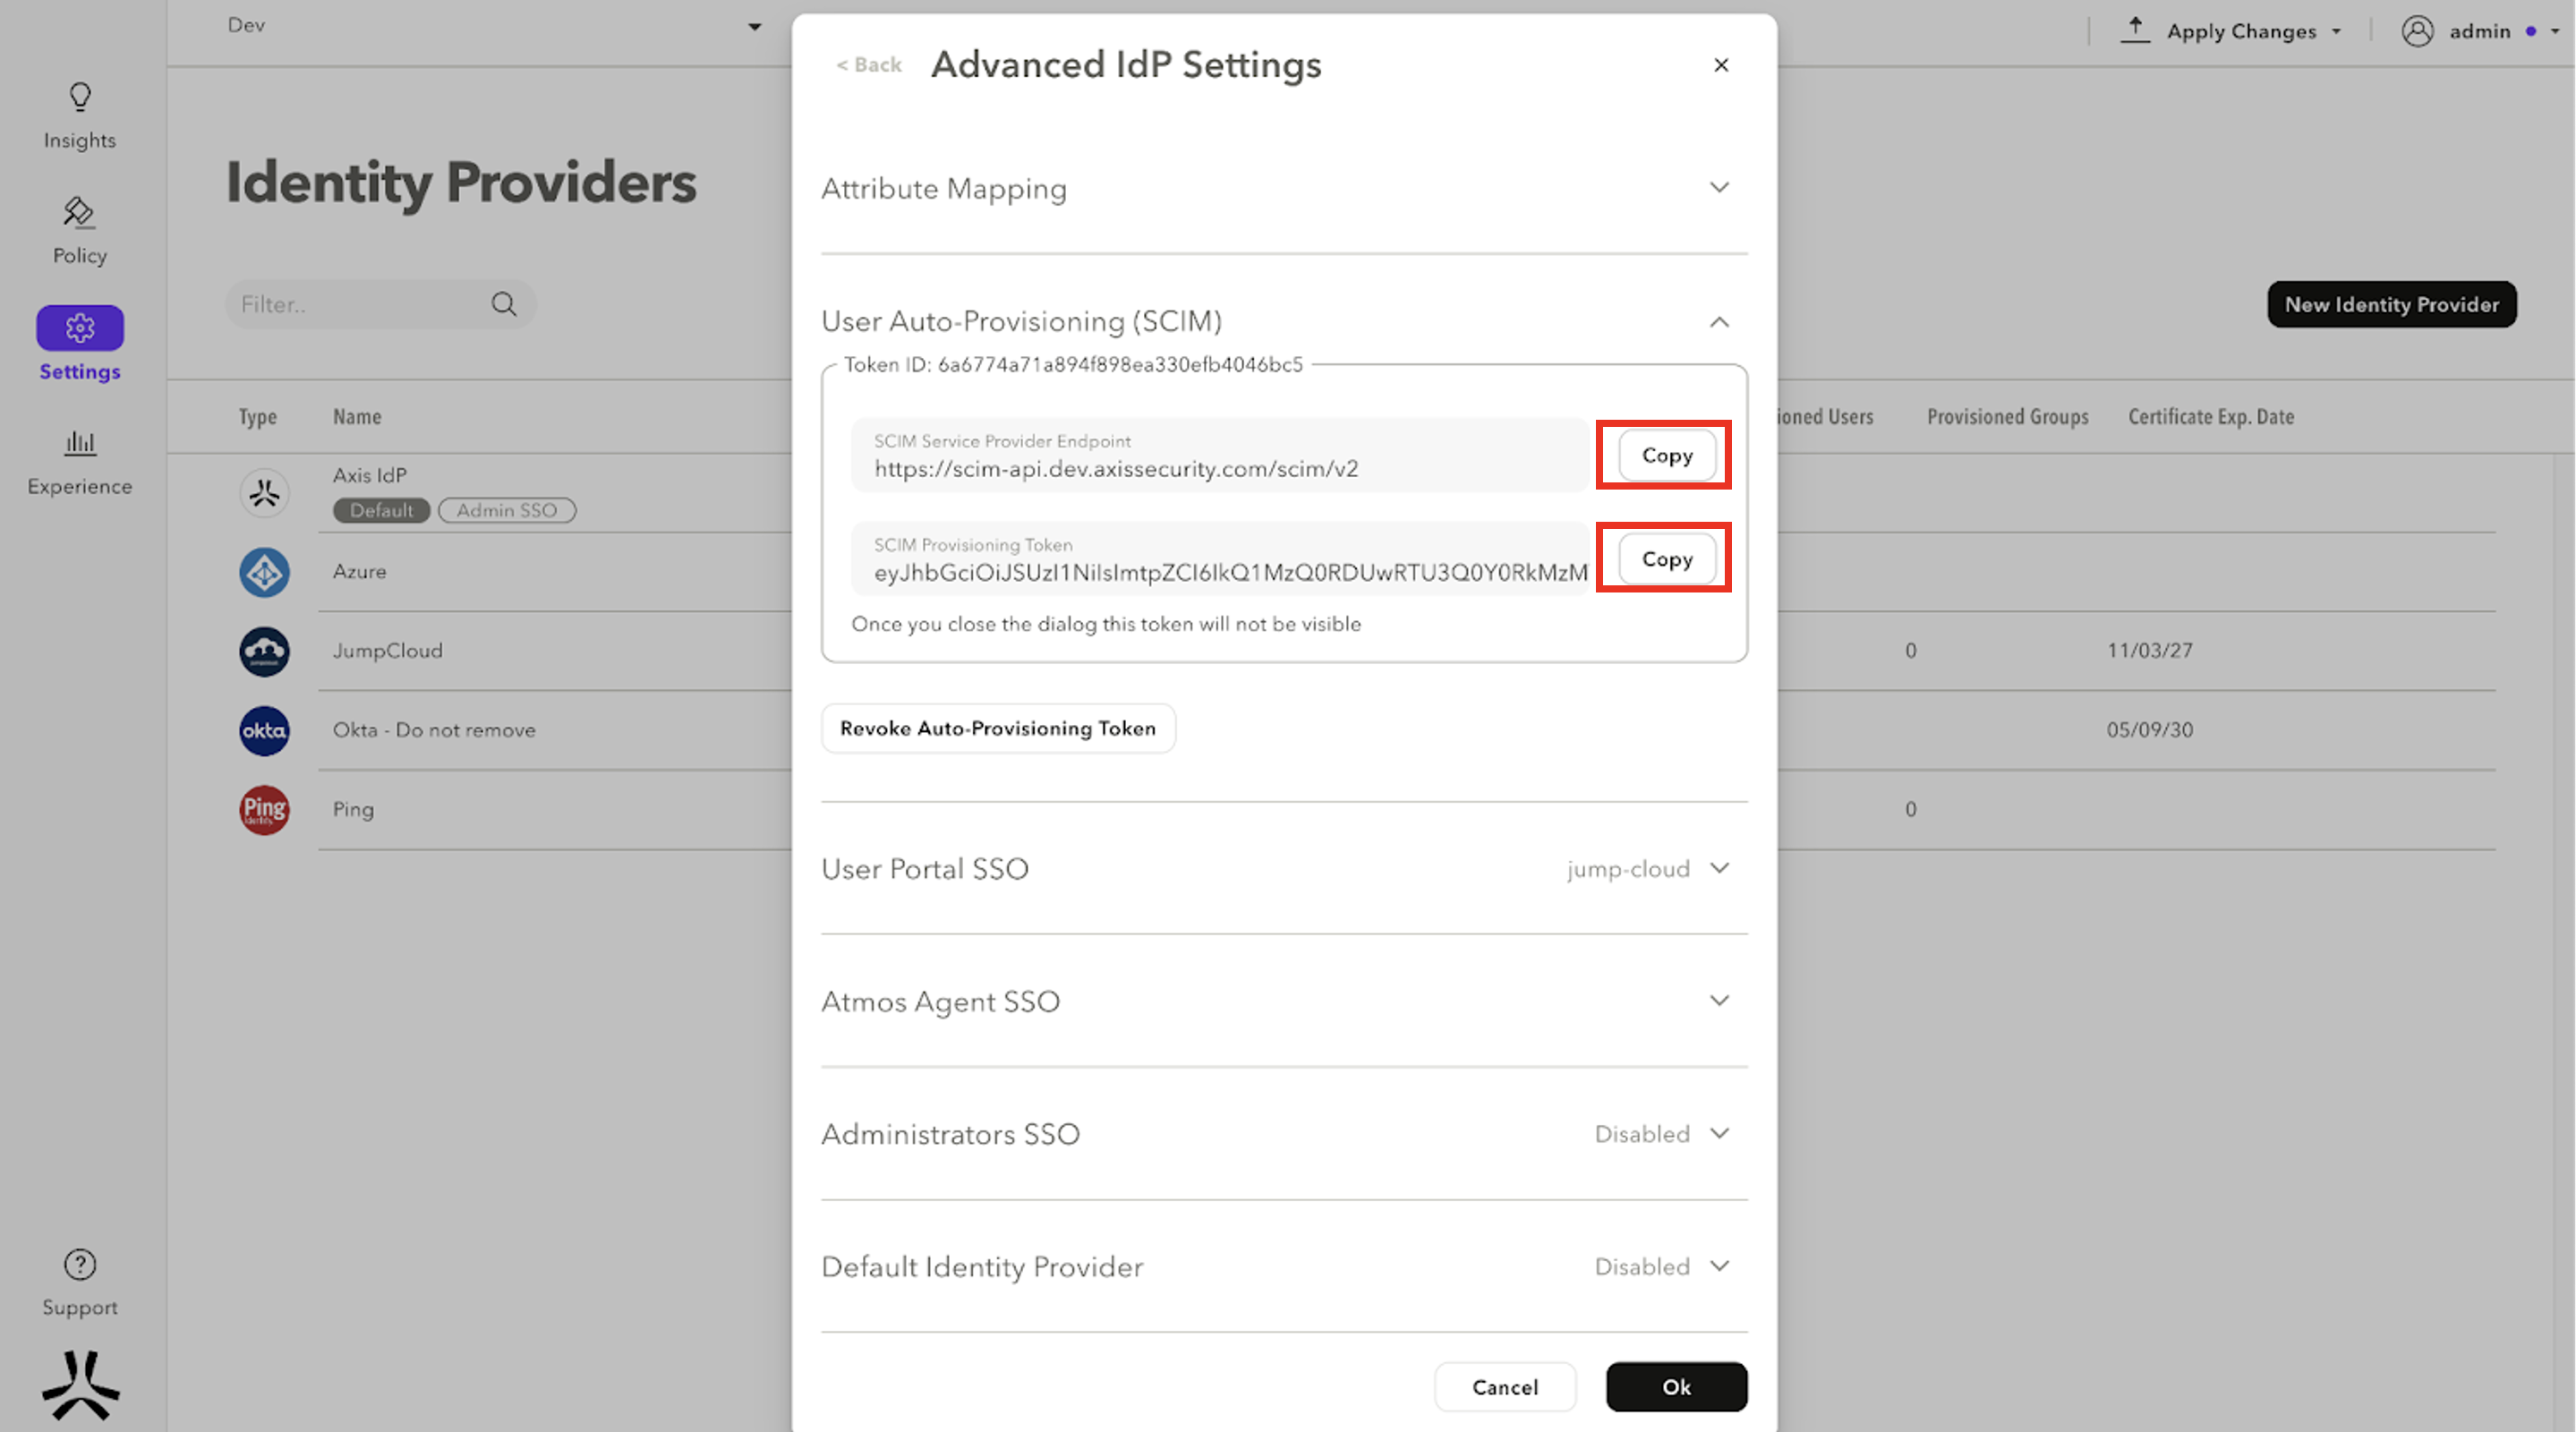
- Go to User Auto-Provisioning (SCIM).
- Click Generate new token.
- Copy the SCIM Service Provider Endpoint and SCIM Provisioning Token and paste them into a text editor. You will need these details for Step 2: Configure SCIM in the JumpCloud Console.
Step 2: Configure SCIM in the JumpCloud Console
- In the JumpCloud Console, go to SSO, and click on the JumpCloud SSO instance that corresponds to the one on the Axis Management Console.
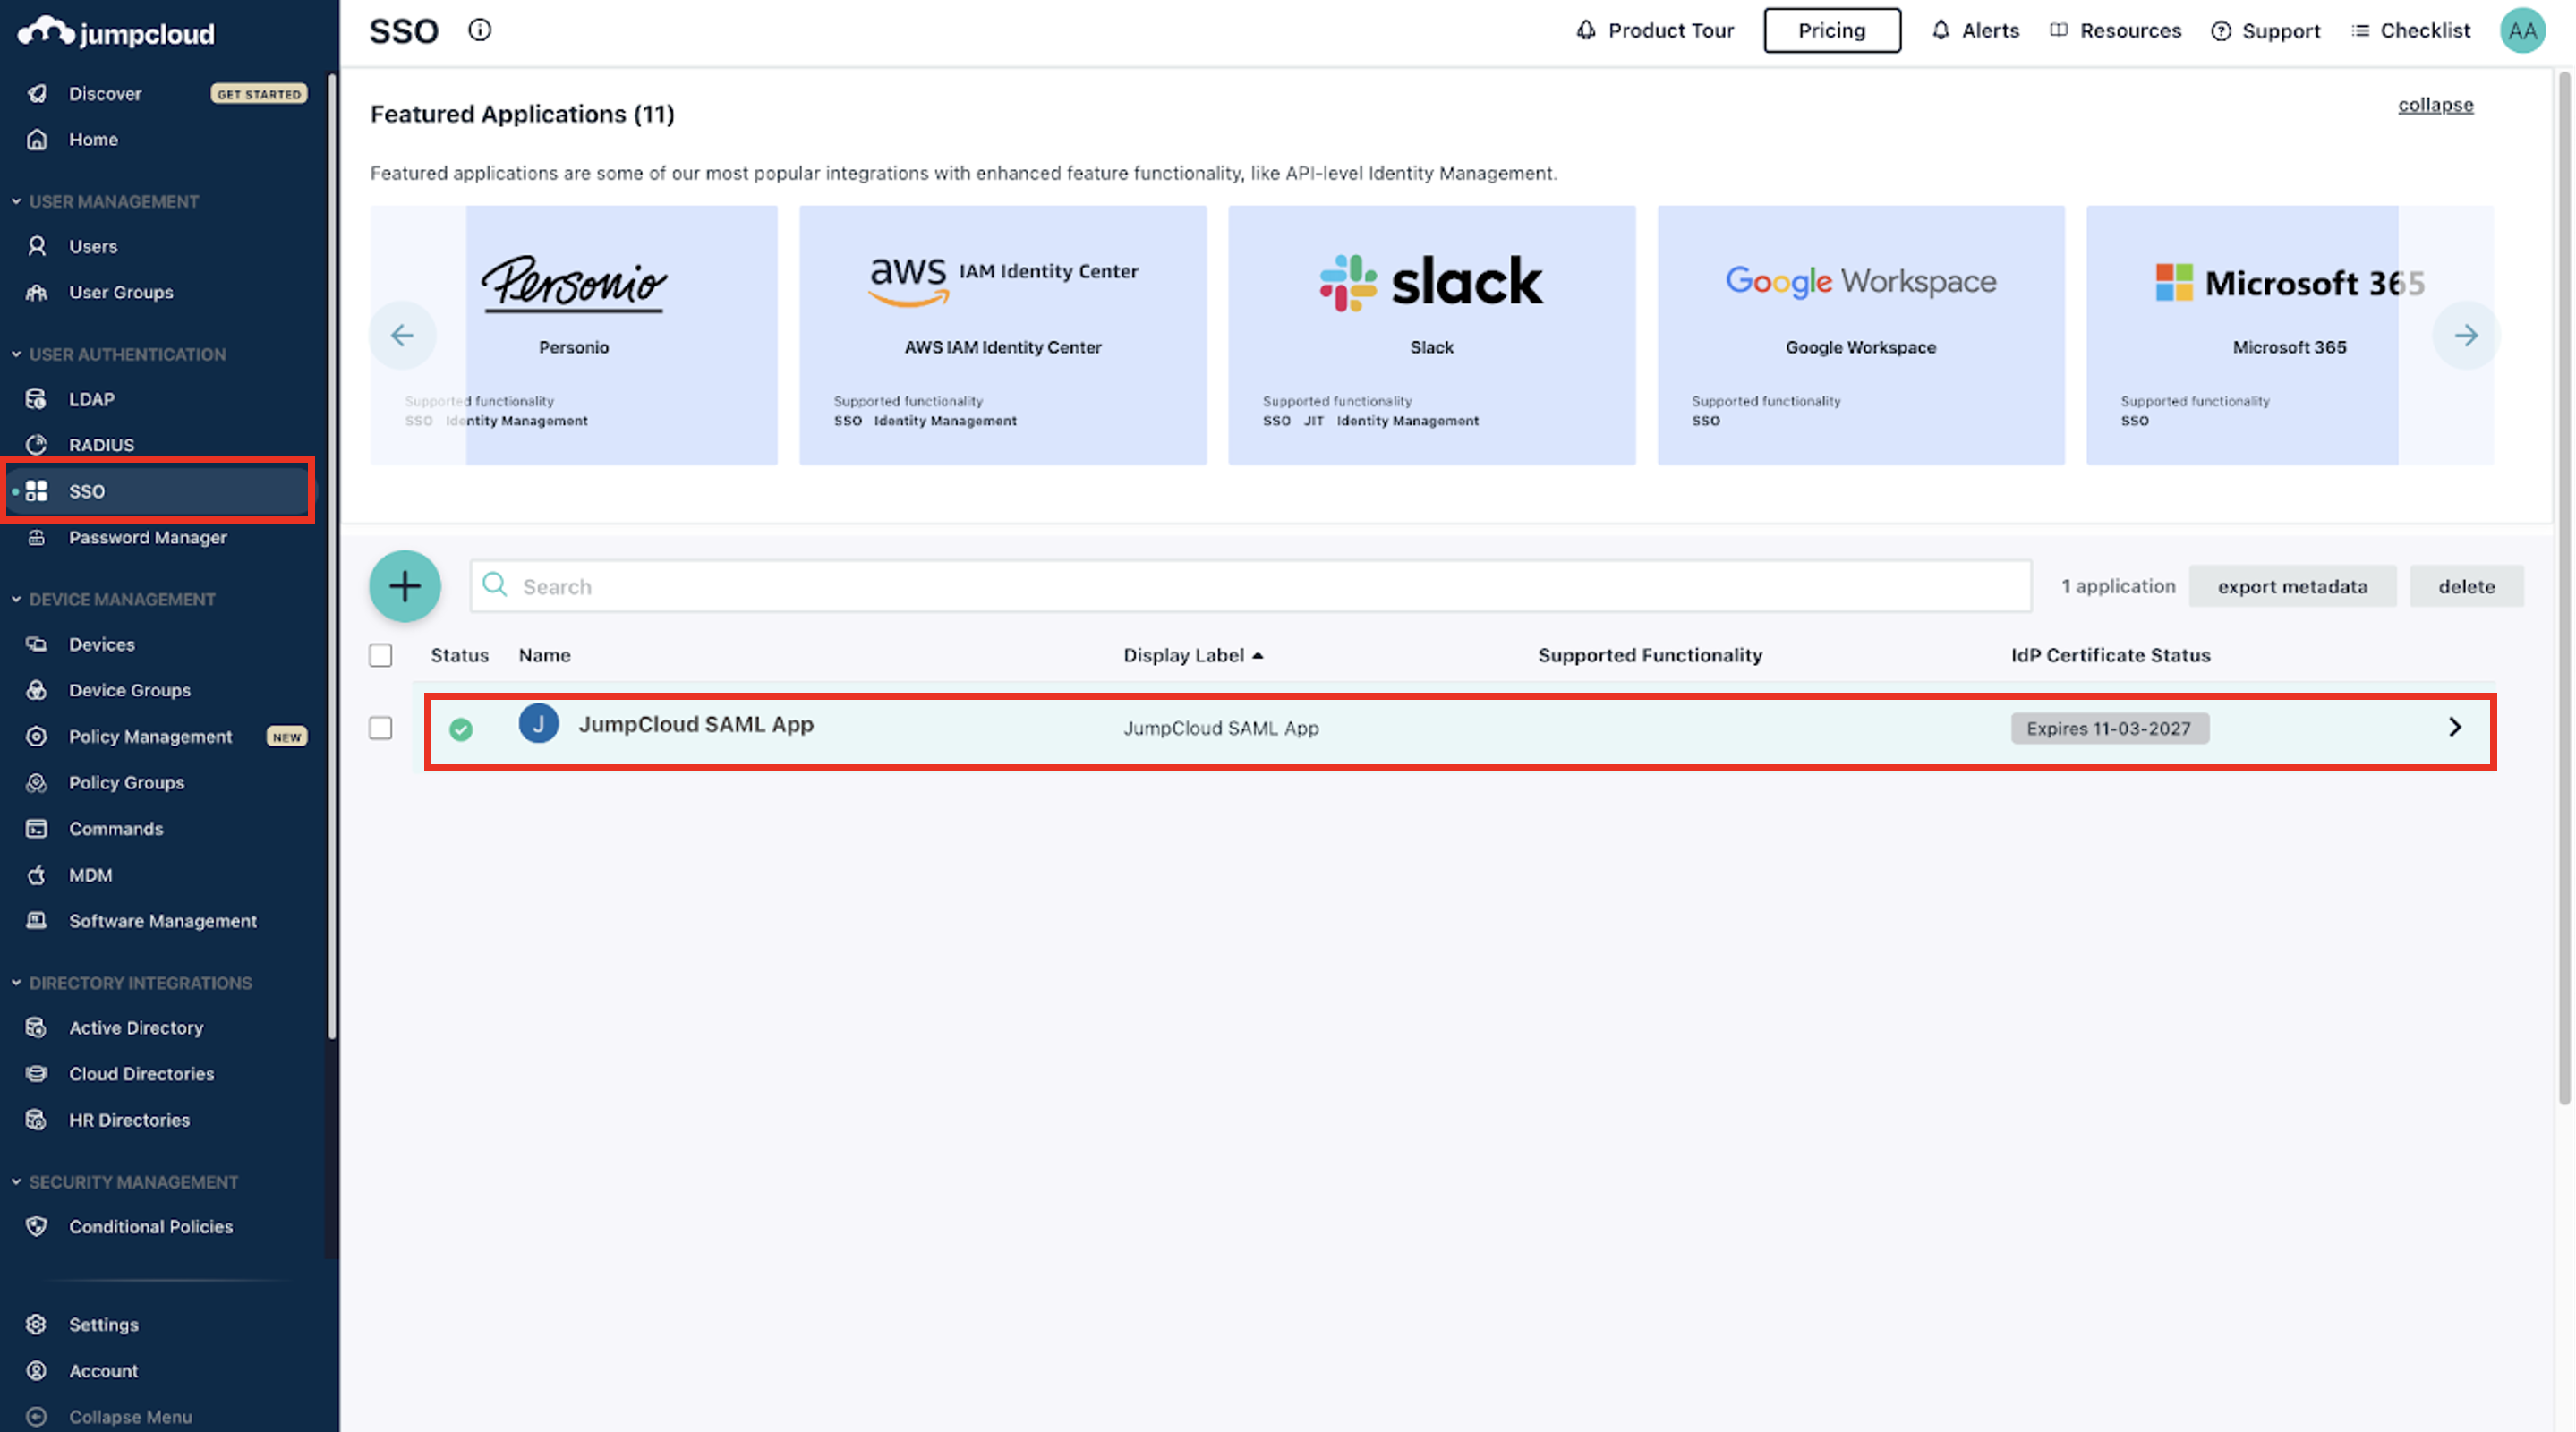
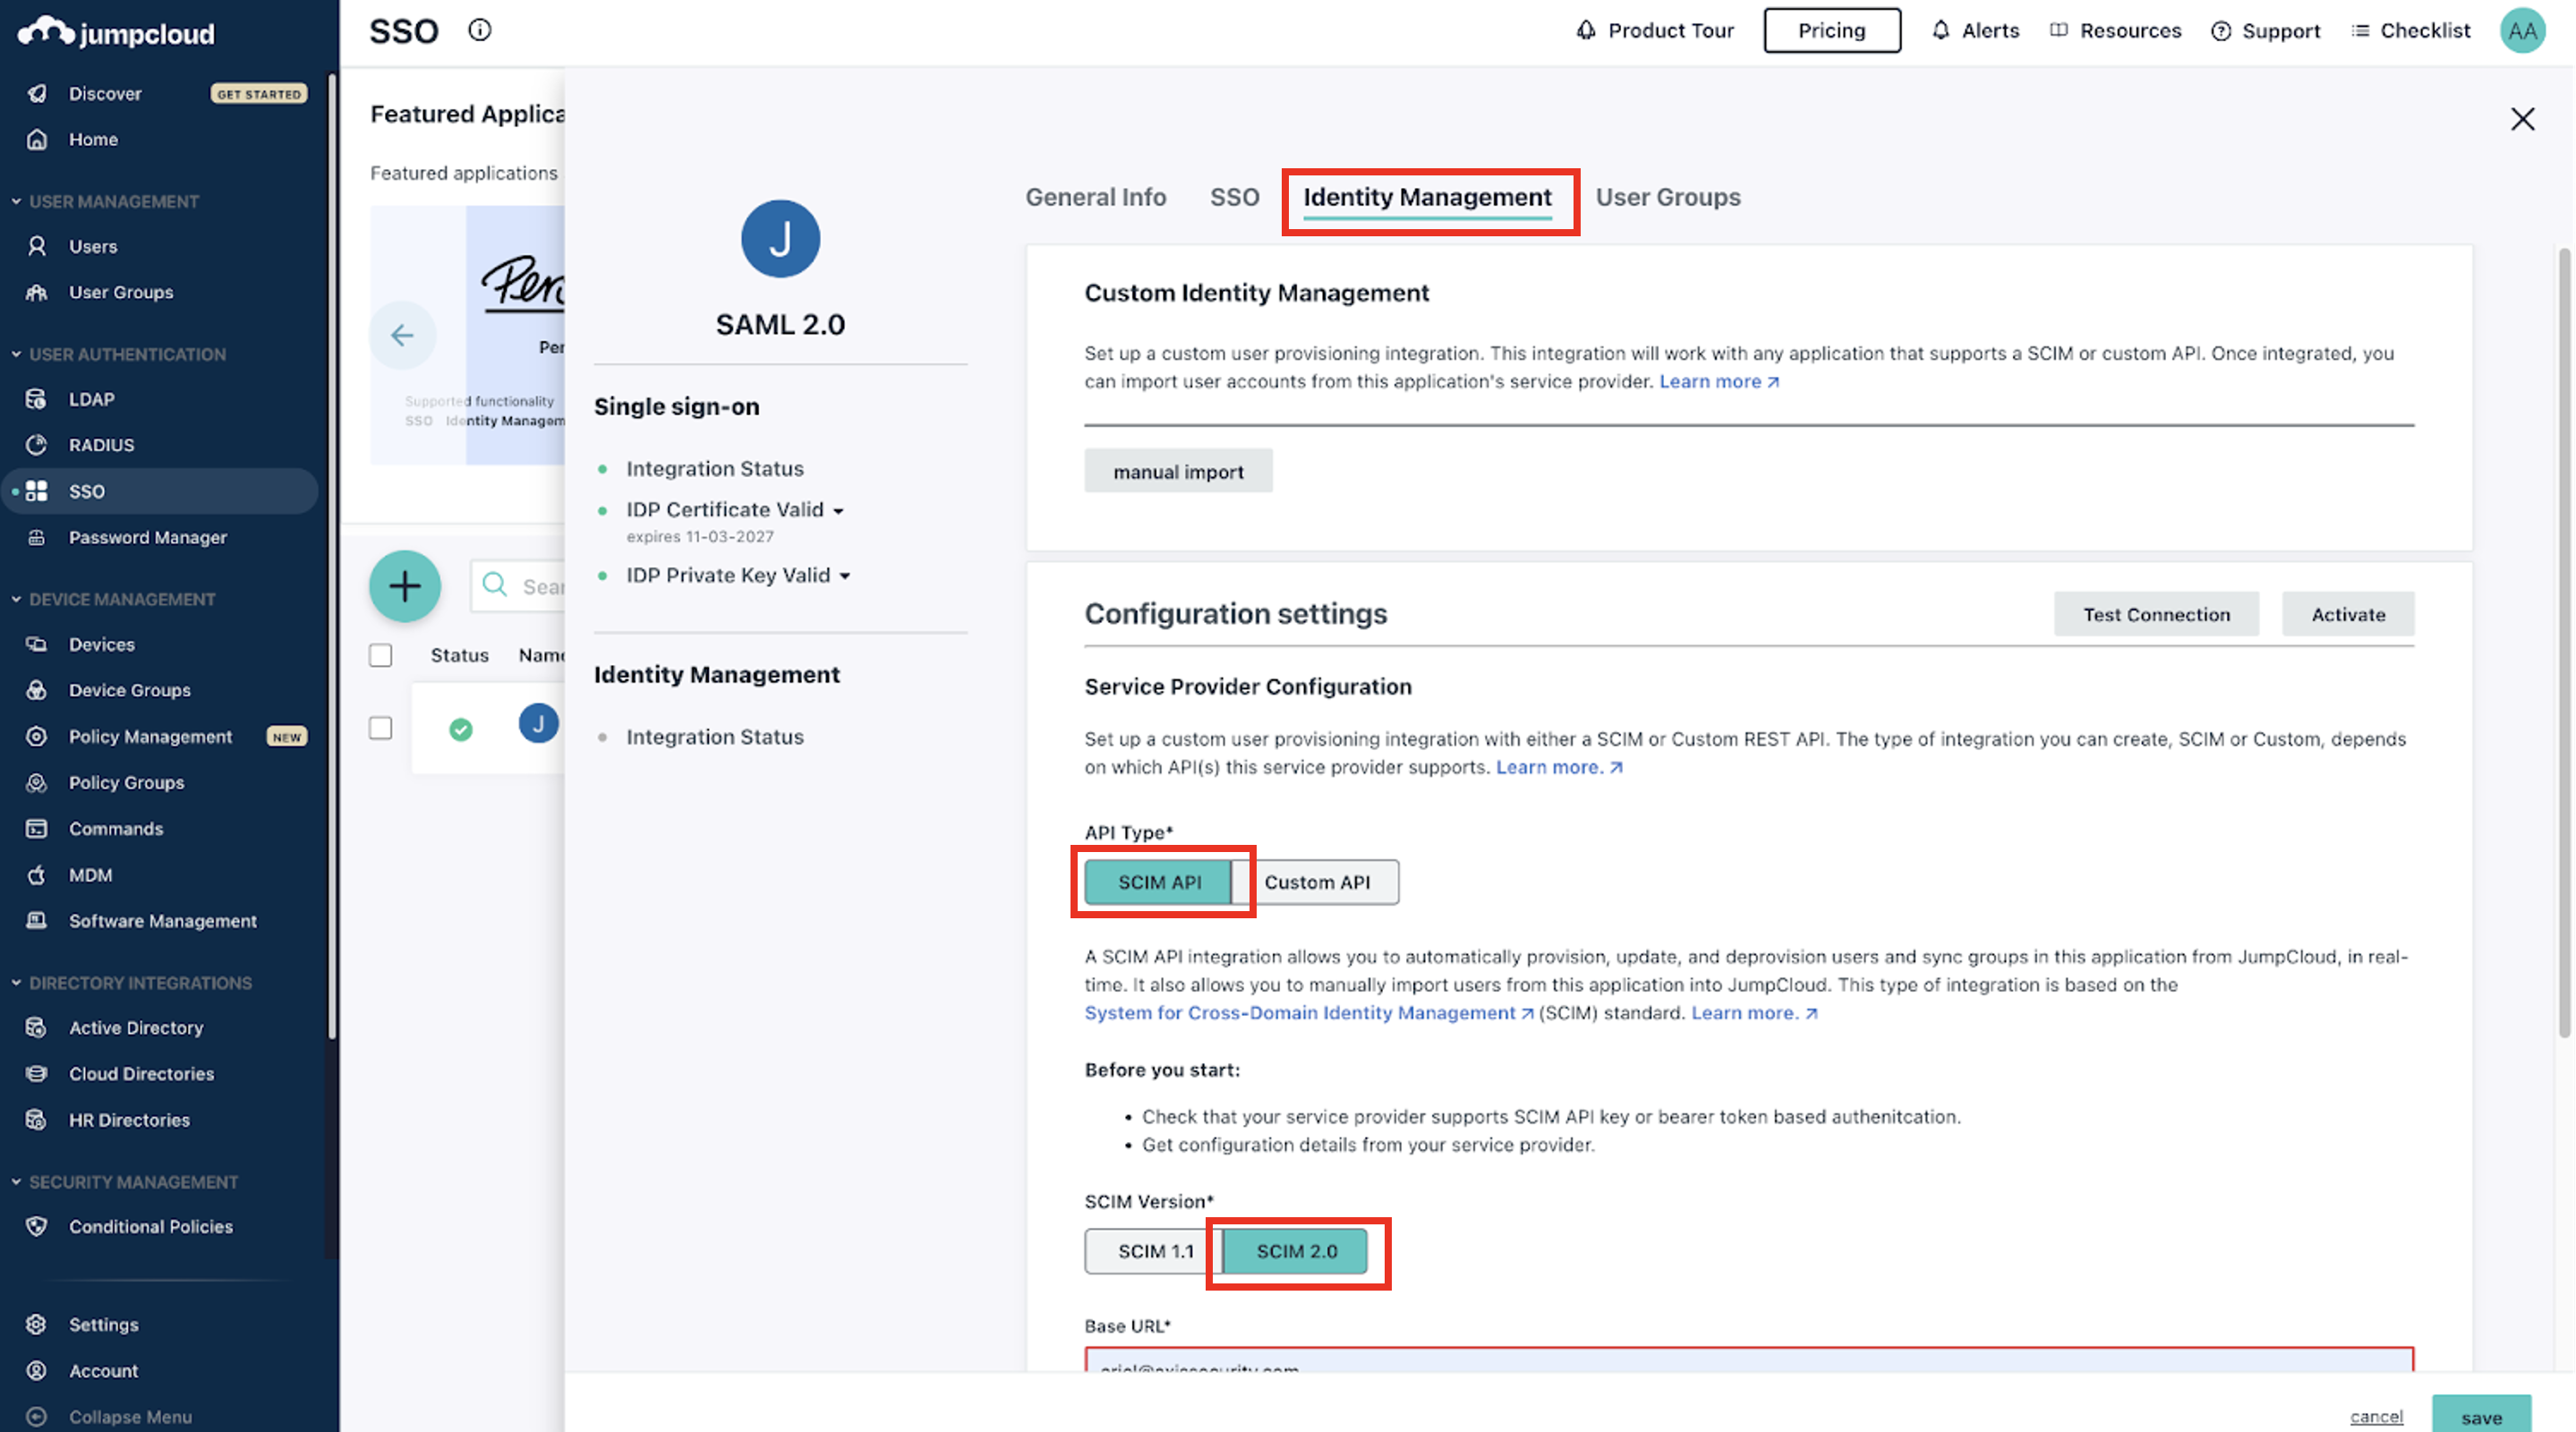
- Go to Identity Management tab. Make sure that SCIM API is selected under API Type and SCIM 2.0 is selected under SCIM Version.
- In Base URL paste the SCIM Service Provider Endpoint you copied from the Axis Management Console and in Token Key paste the SCIM Provisioning Token you copied from Axis Management Console. Type in Test User Email some email, it is used for testing only and won’t be provisioned.
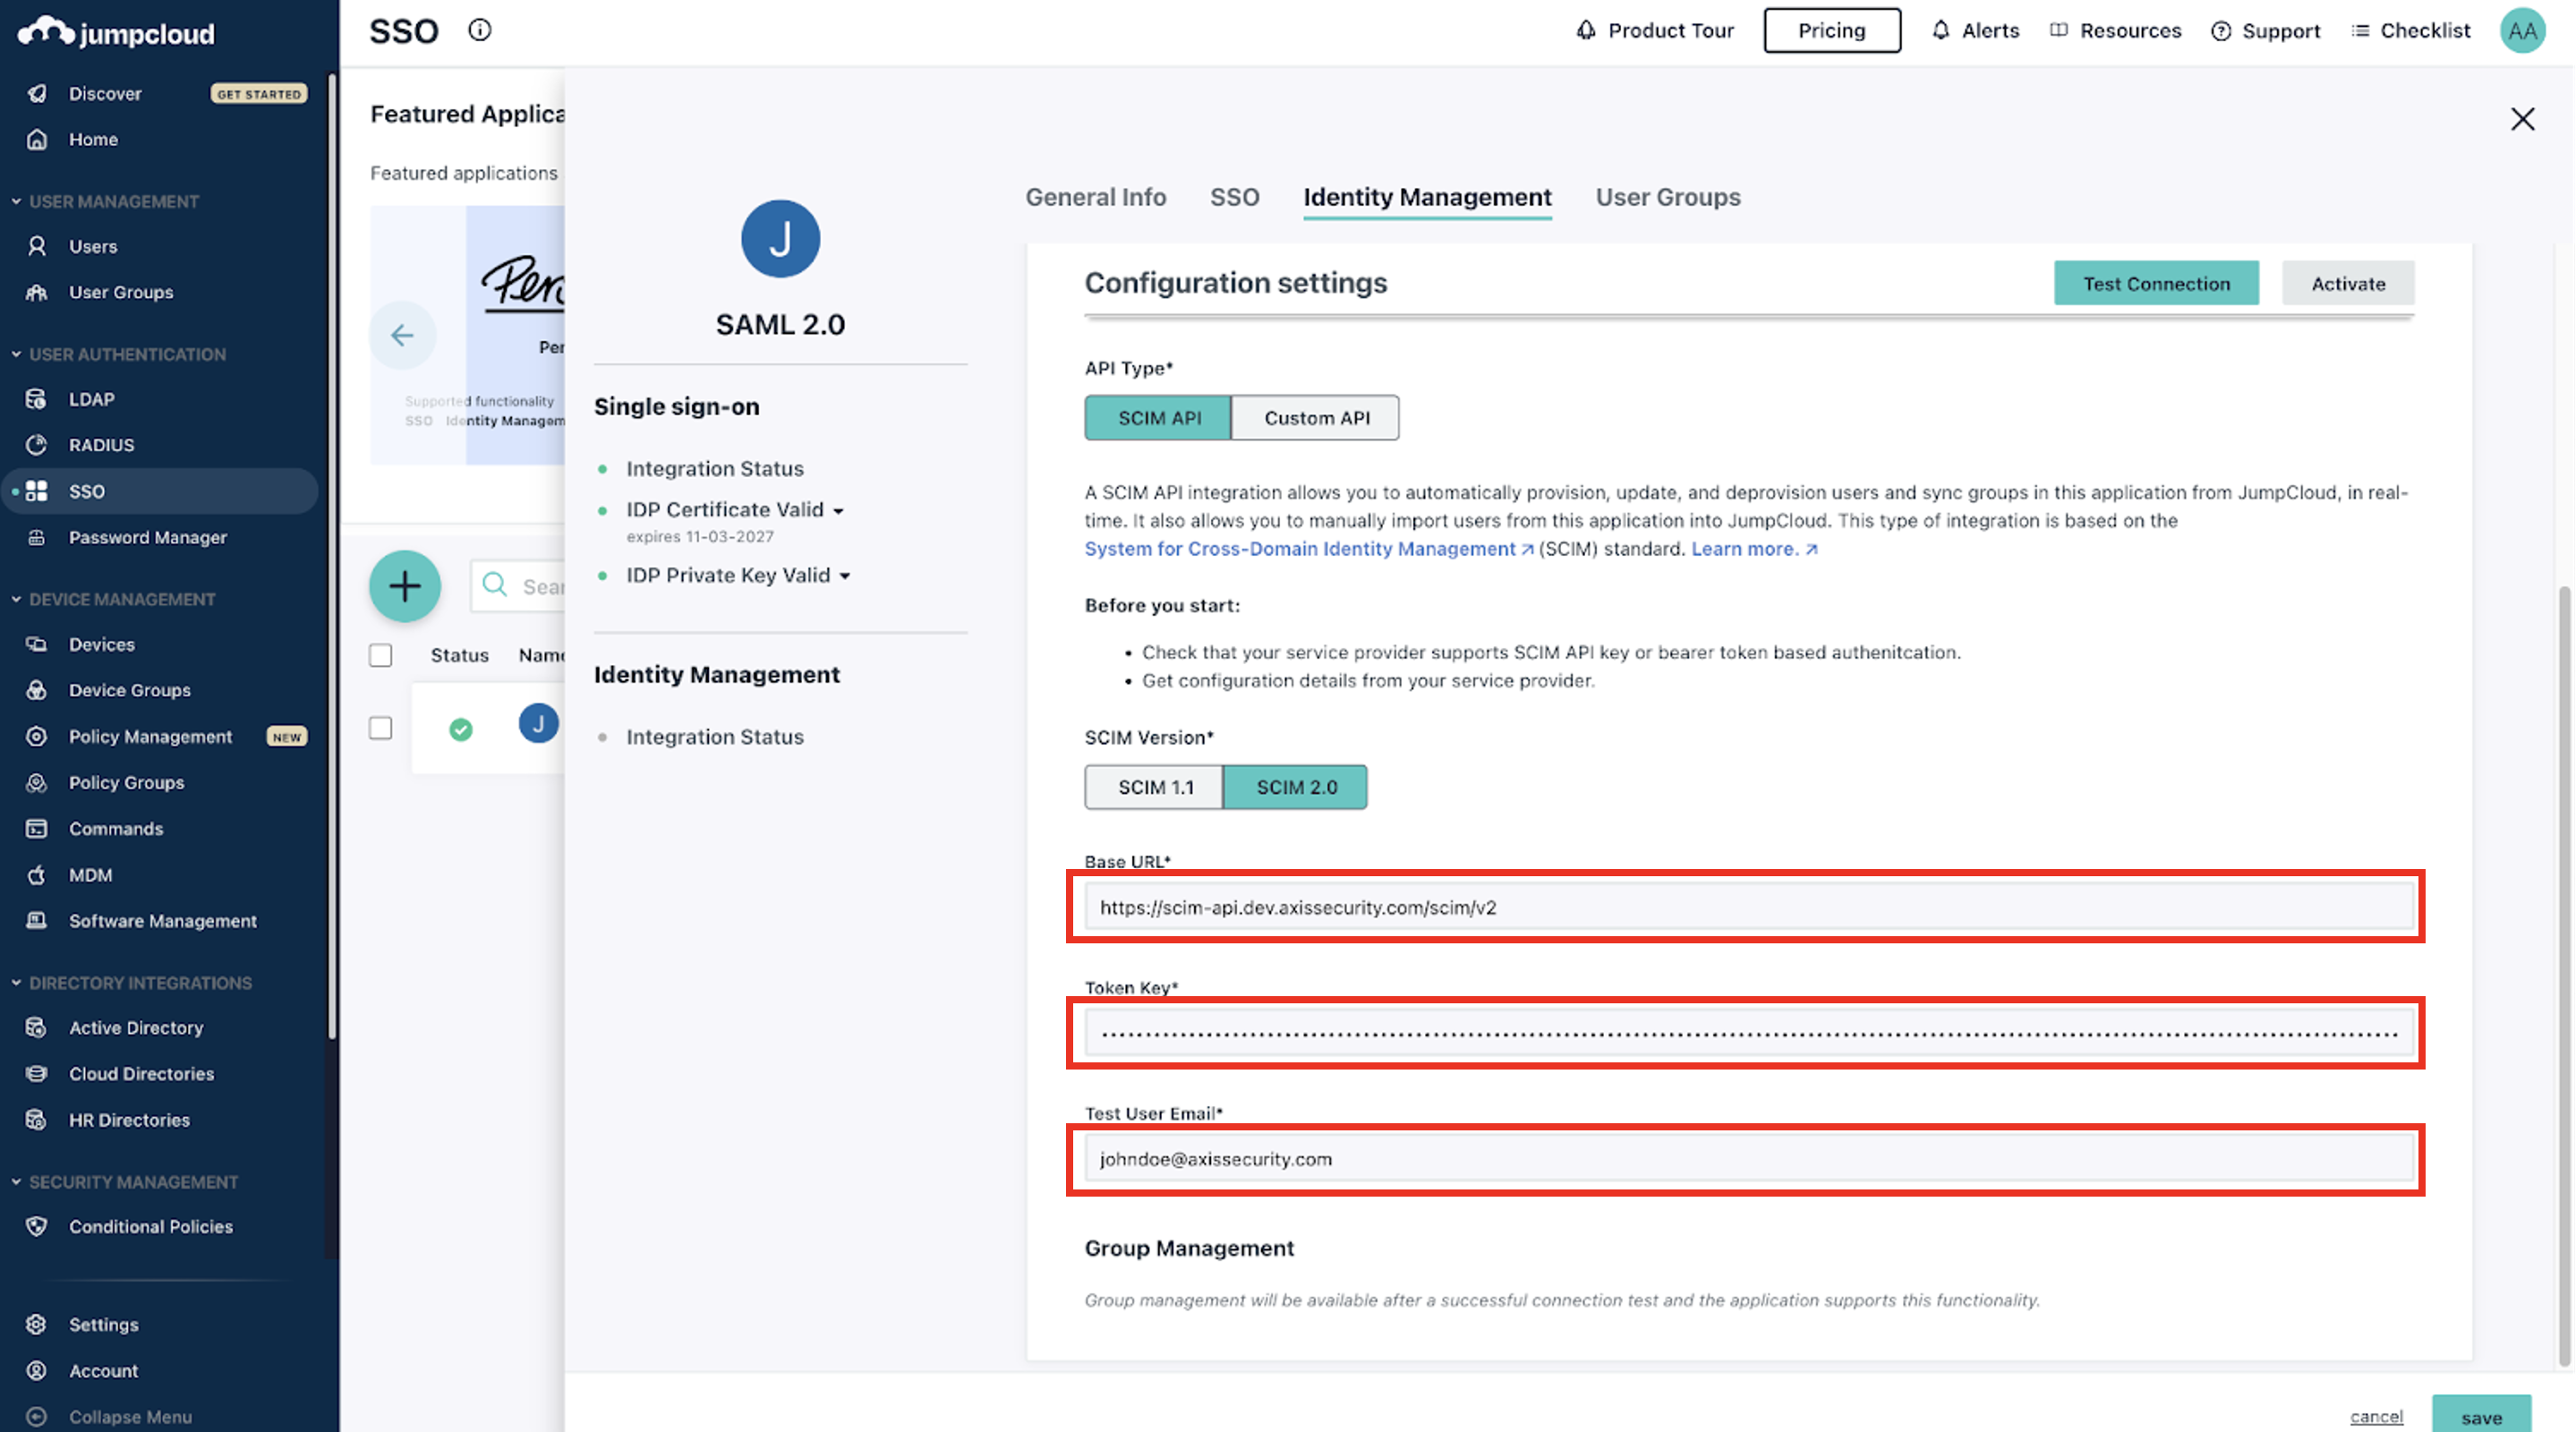
- Click on Test Connection.
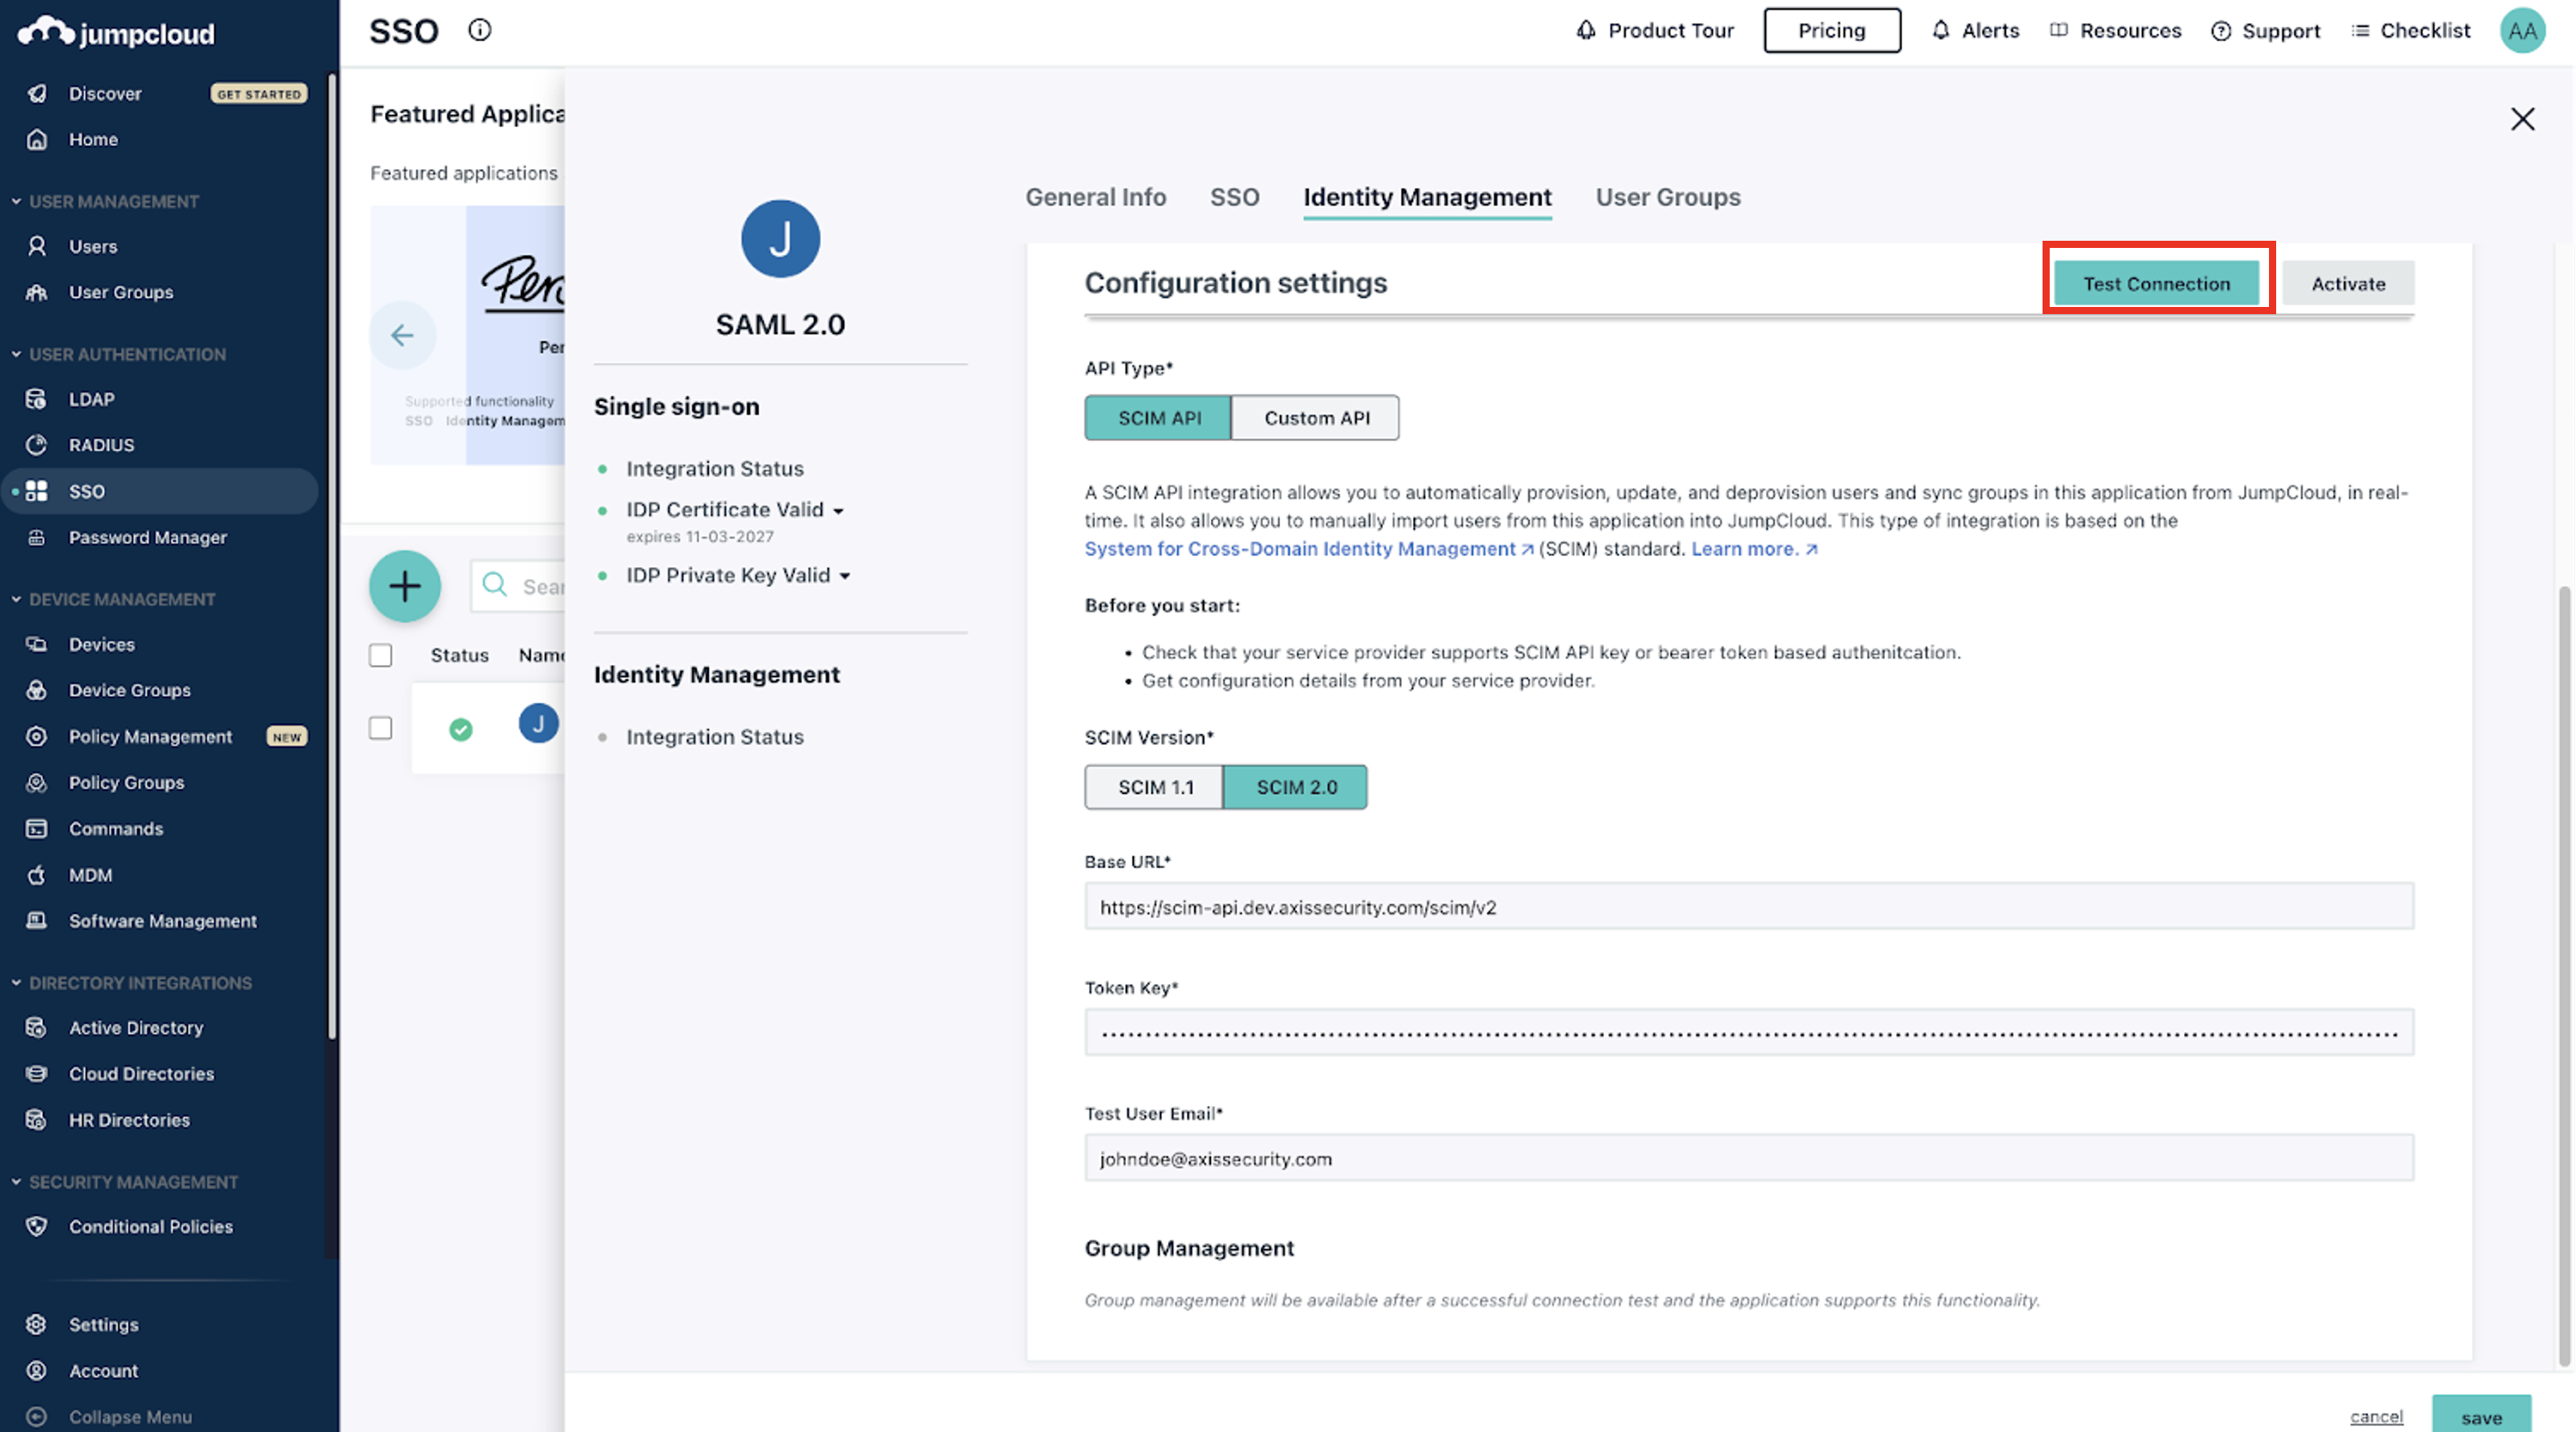
After the connection has been verified successfully, you should receive the following notification:
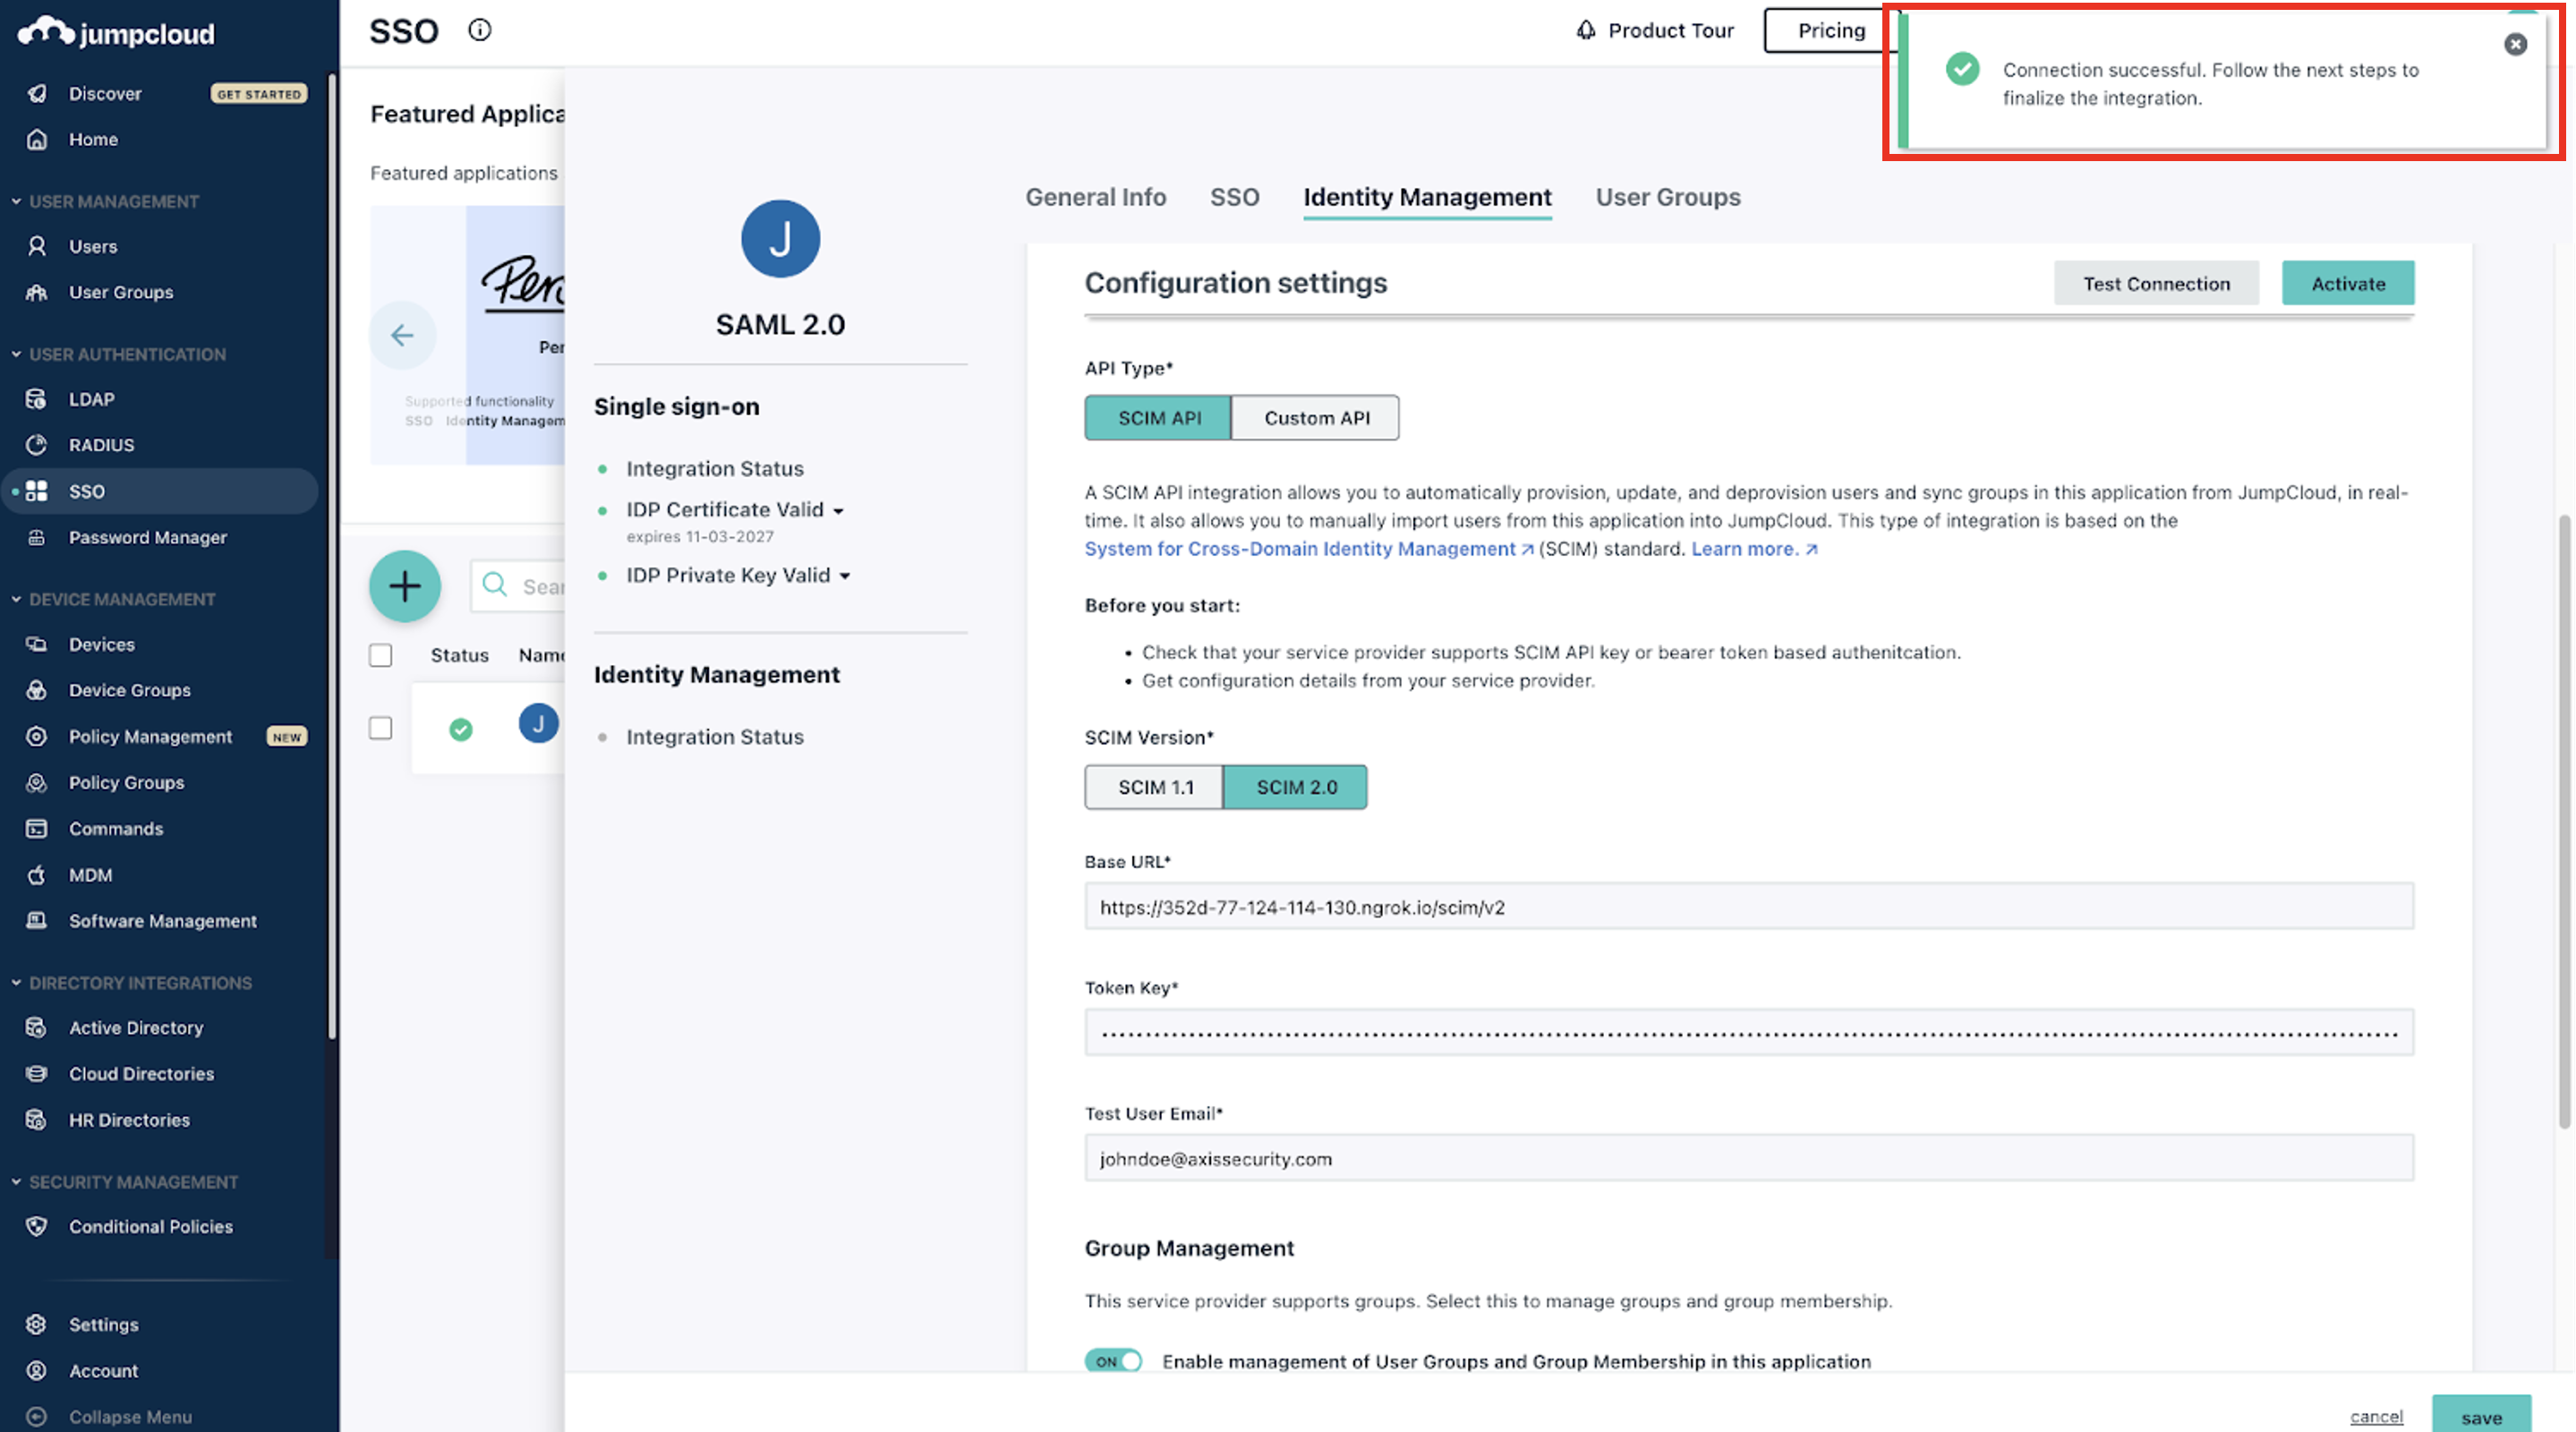
- Click on Activate
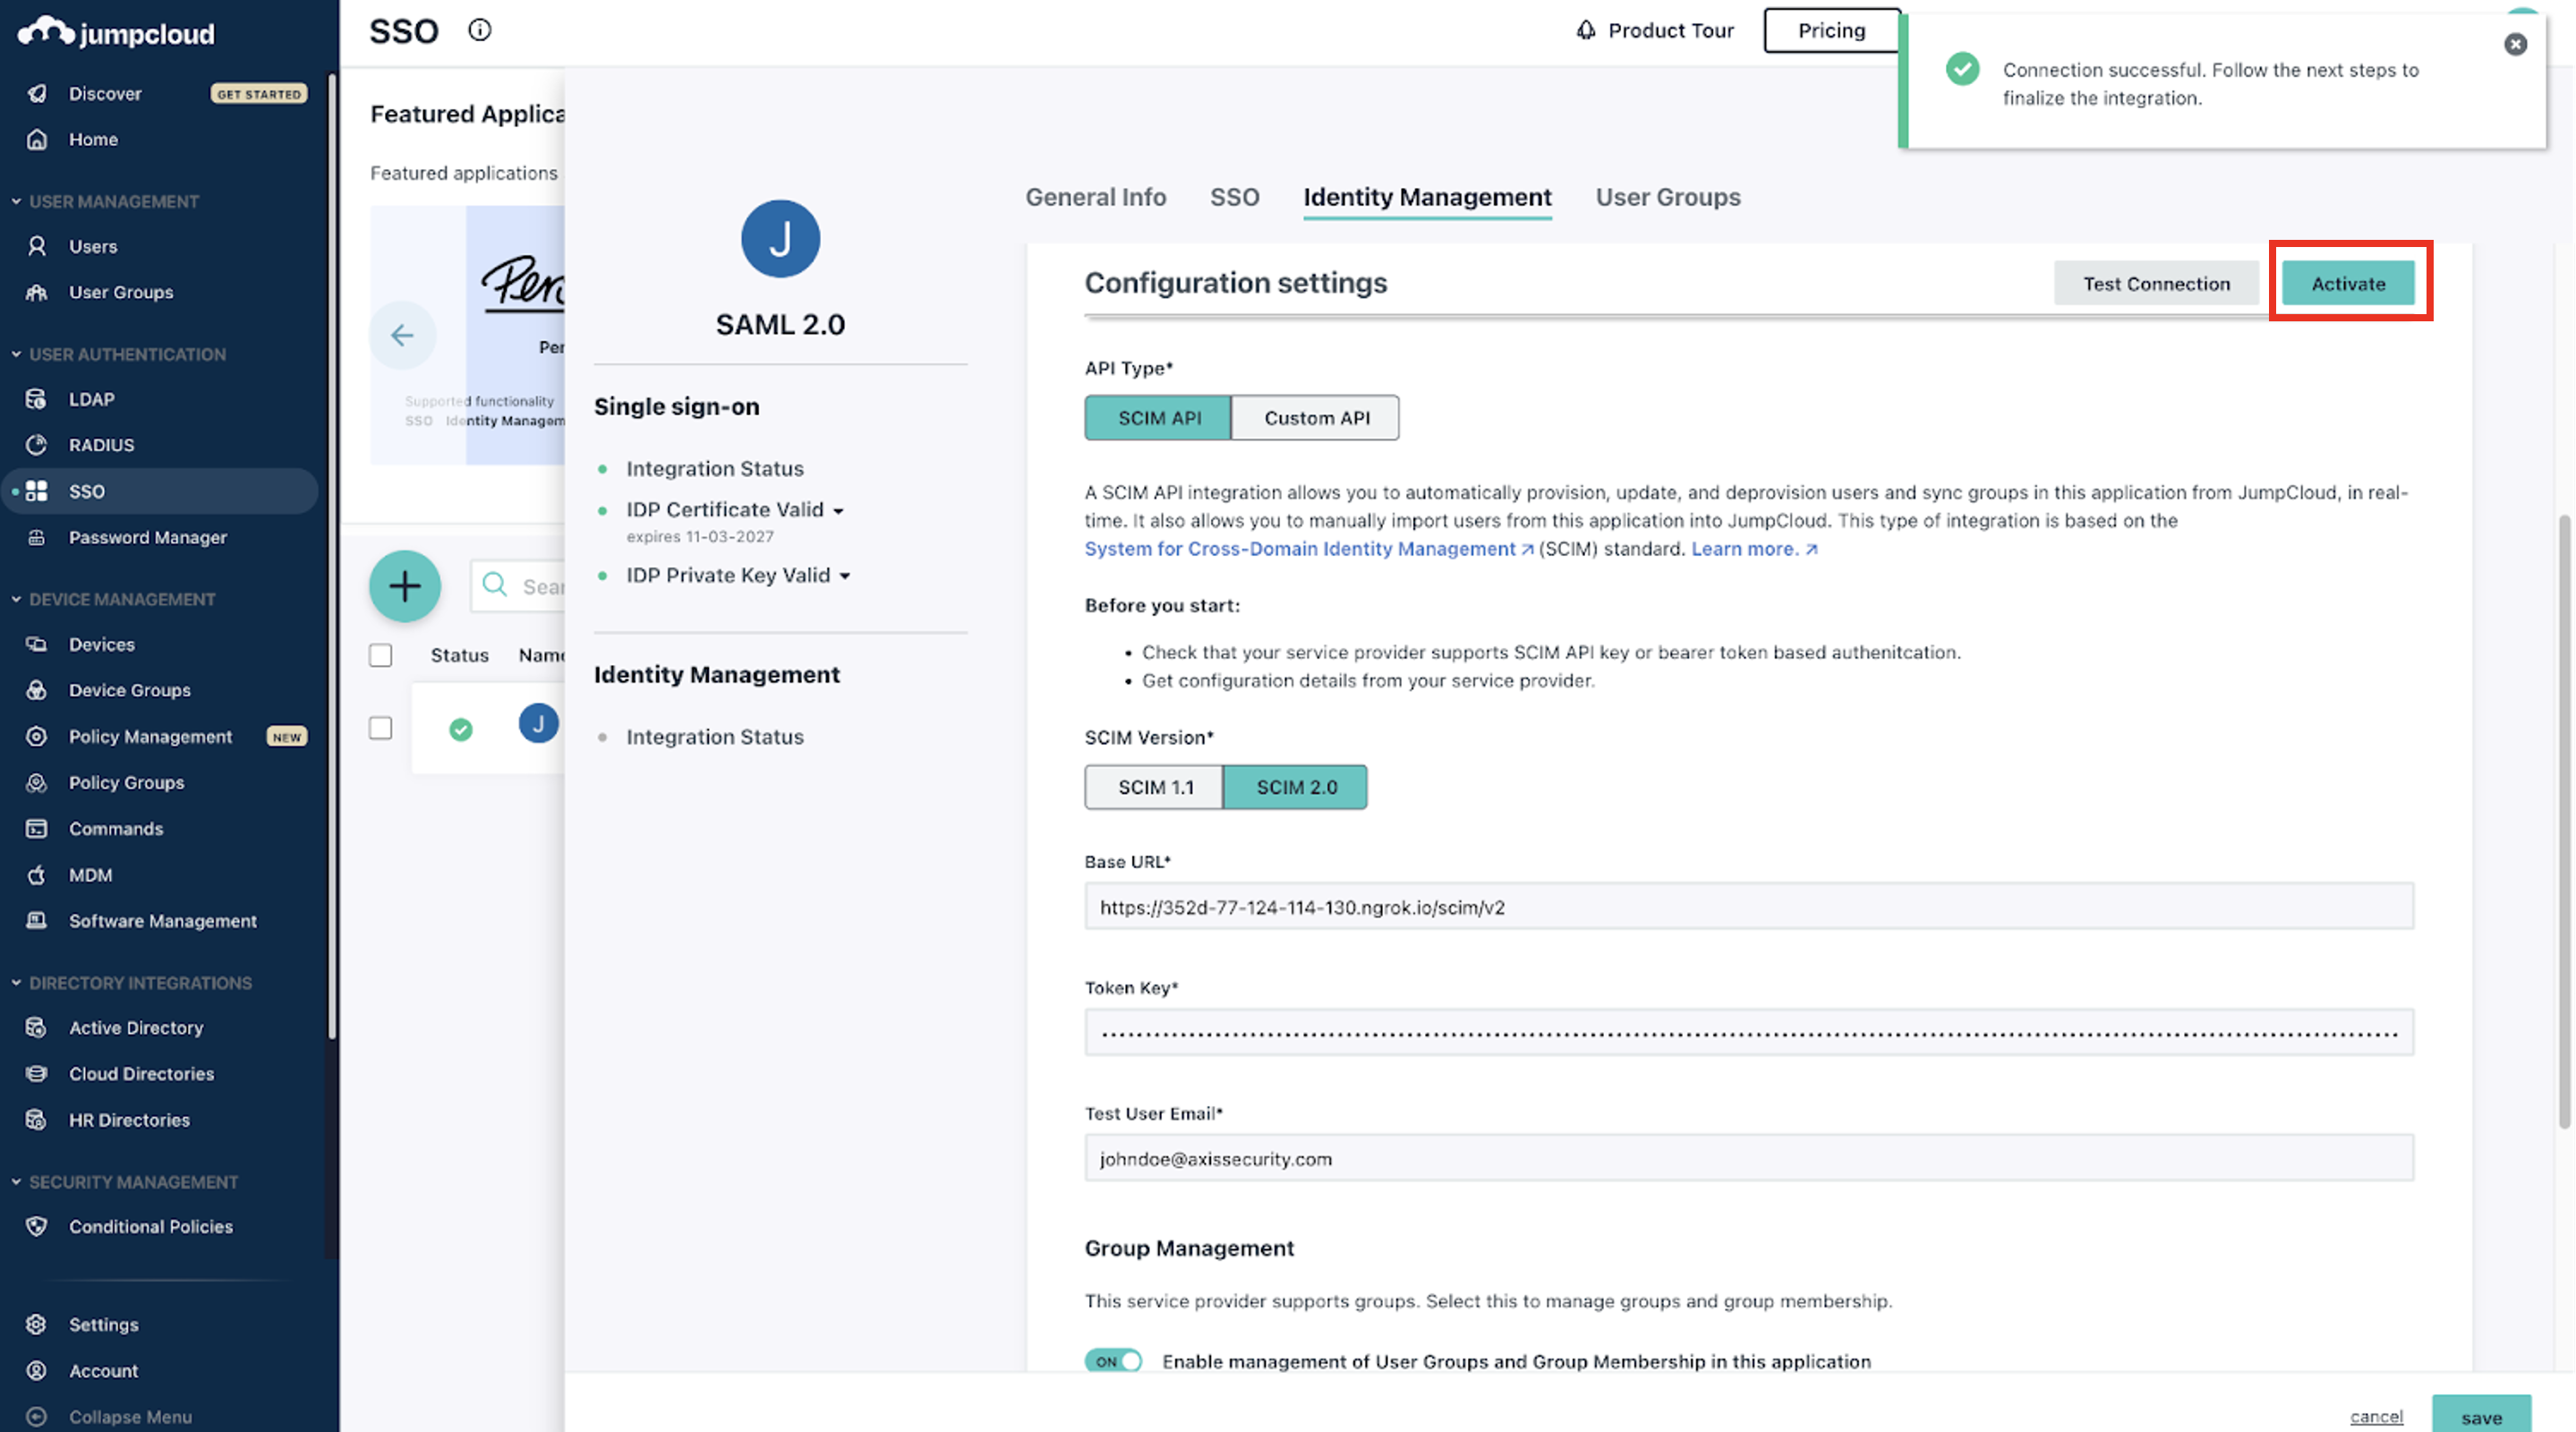
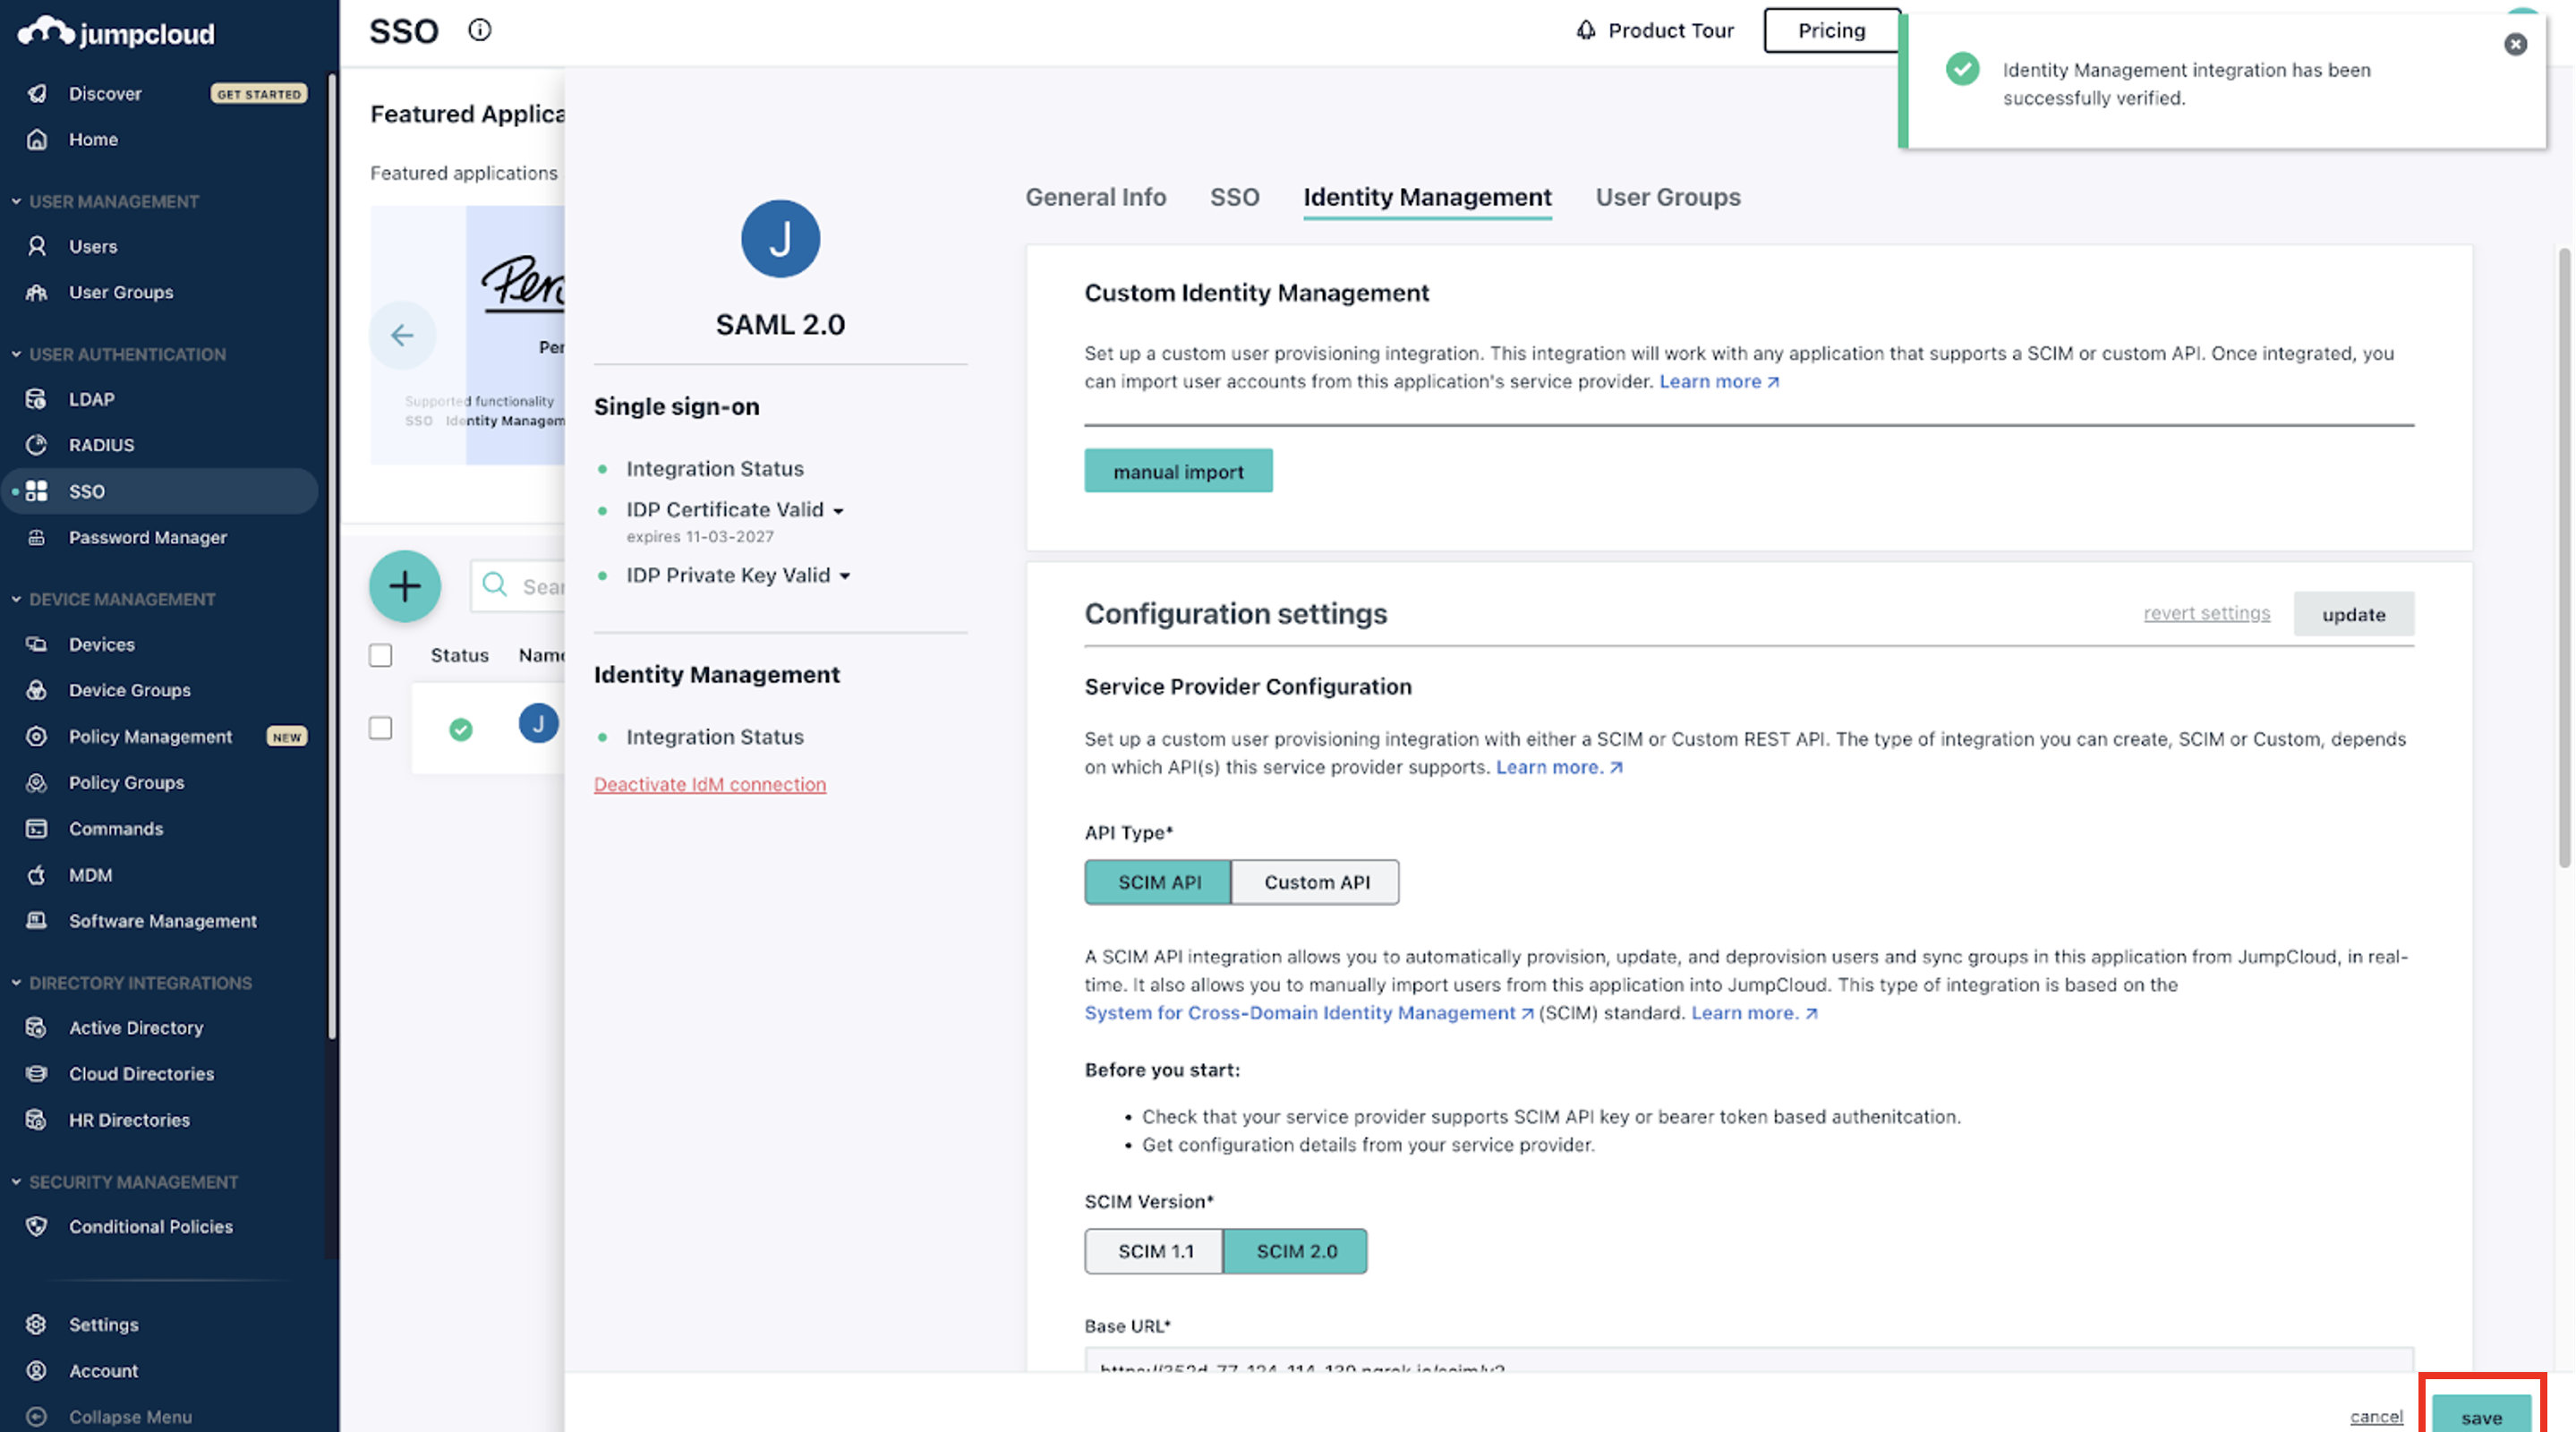
After the integration has been verified successfully, you should receive the following notification:
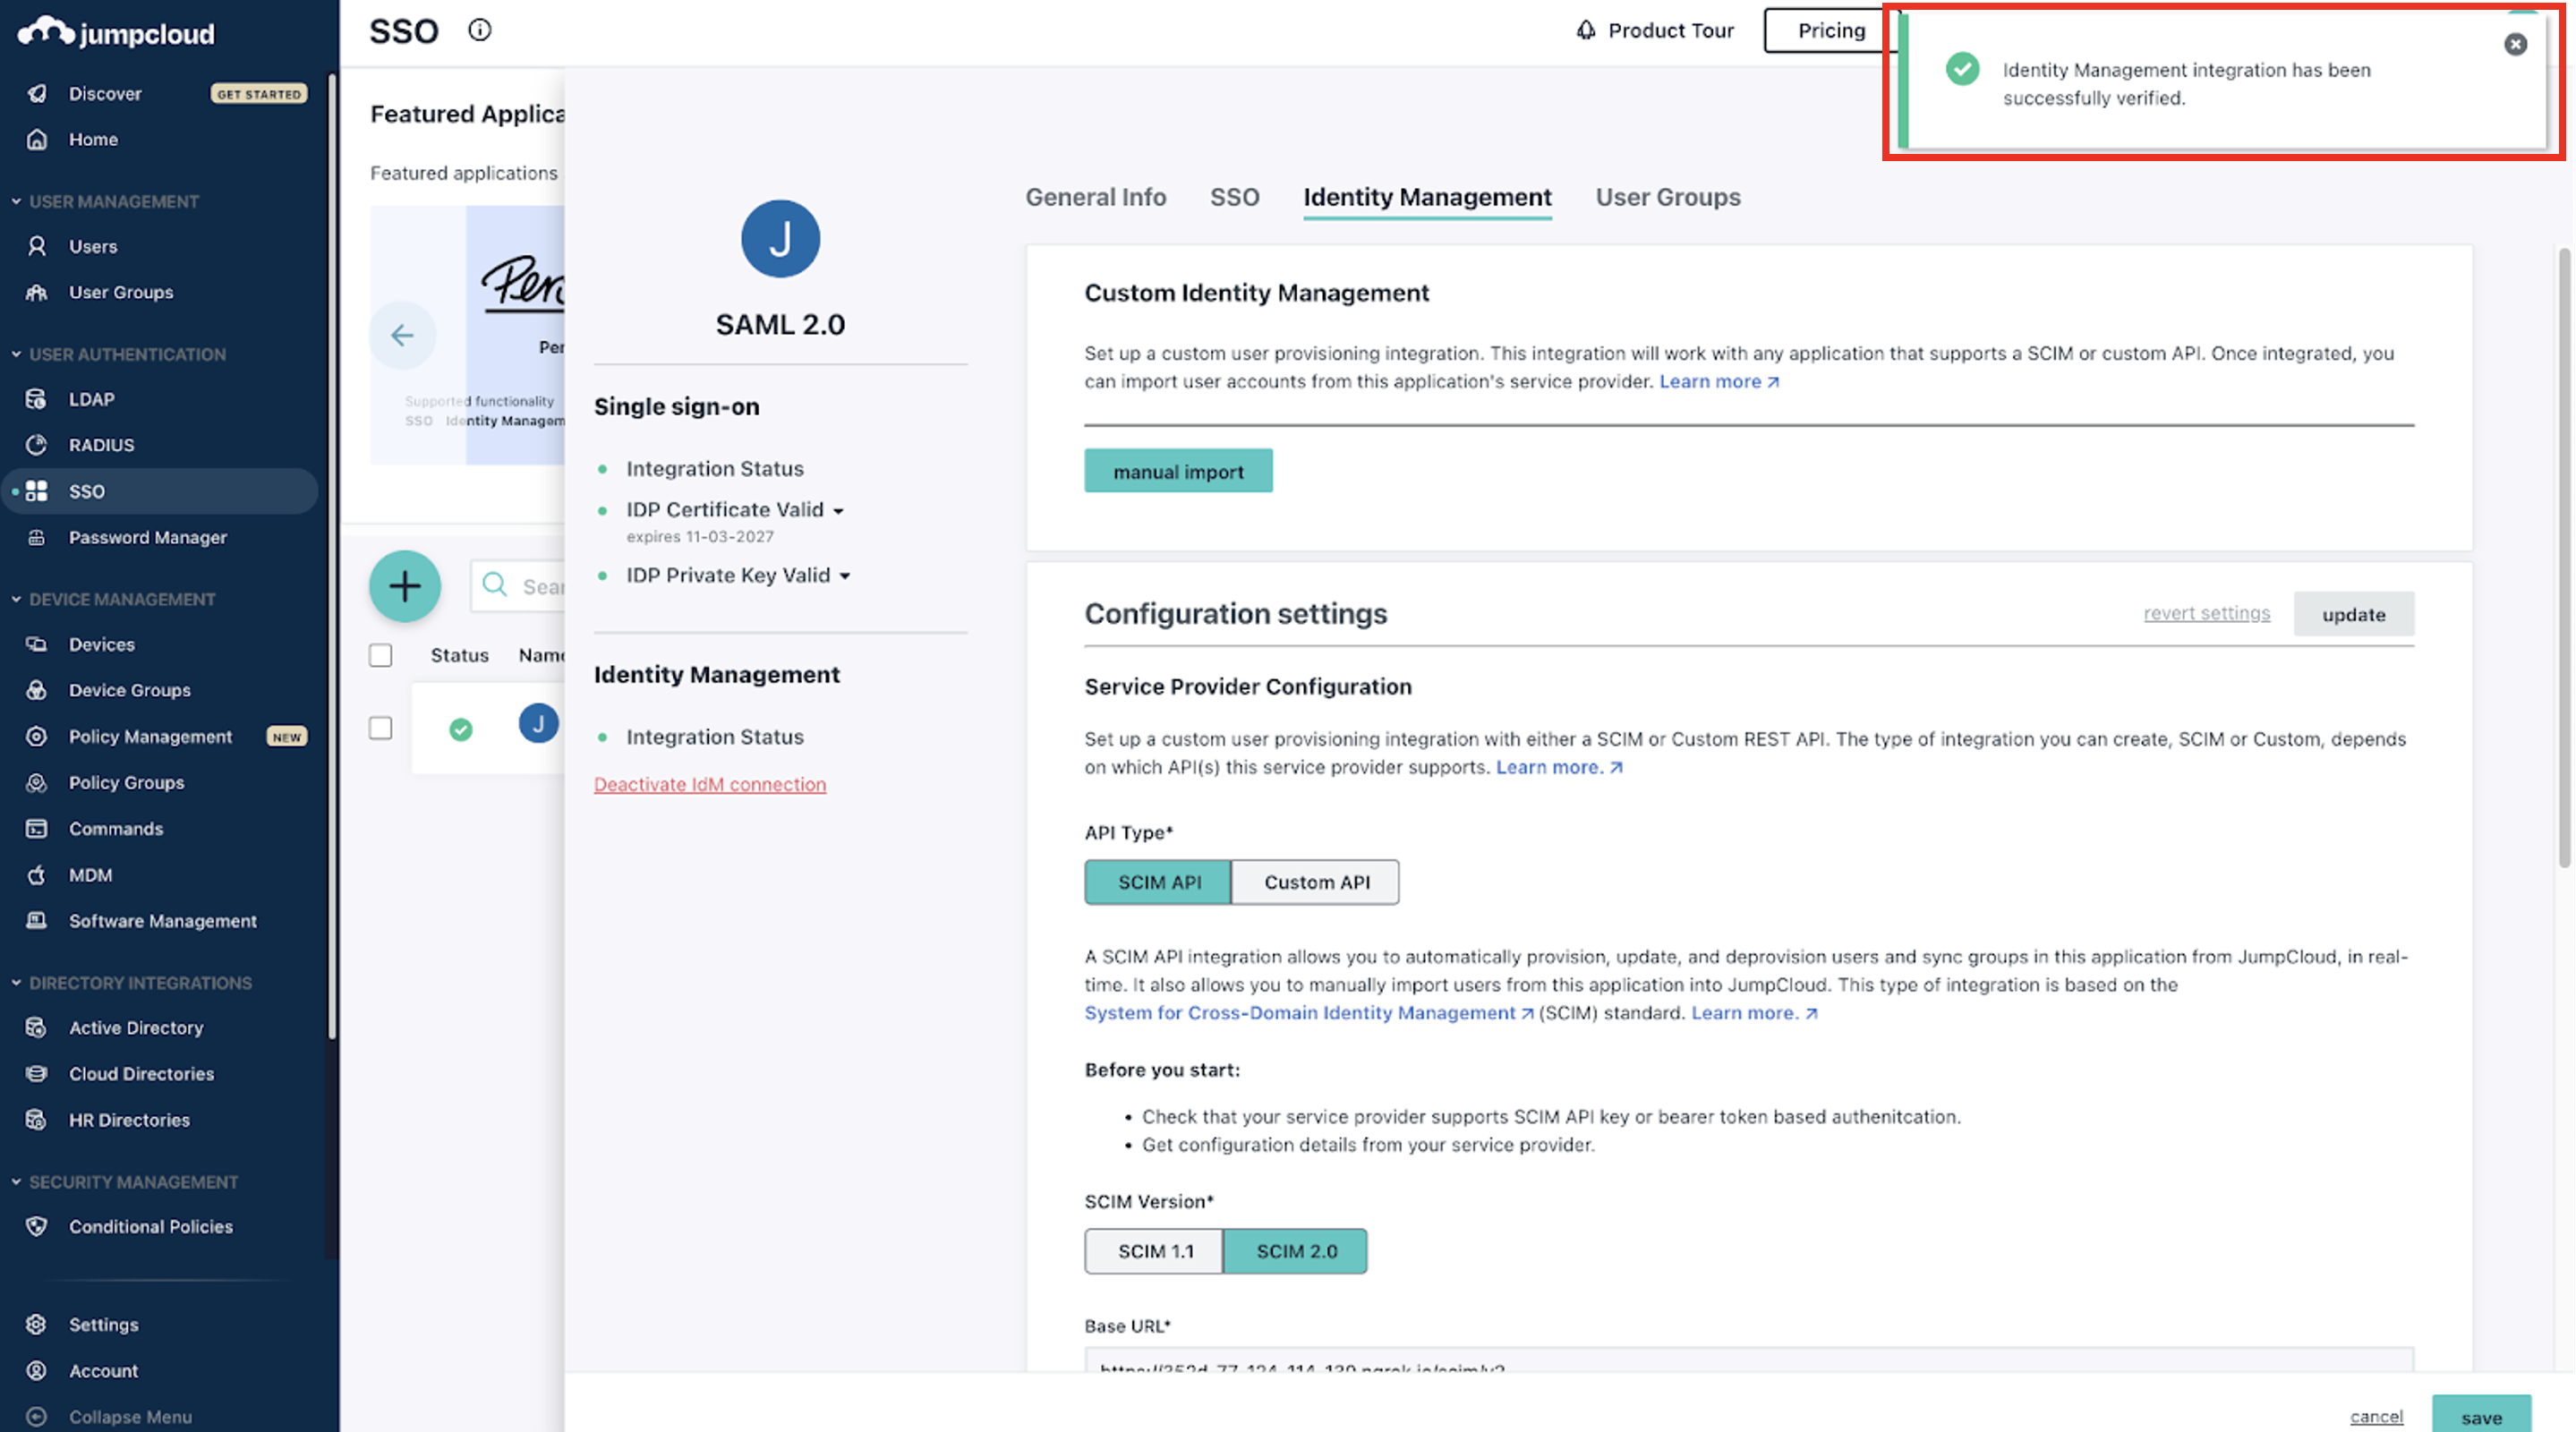
- Click on Save.
Step 3: Verifying the SCIM Provisioning Integration
Provisioning will begin shortly after the SP connection has been activated. Note that the provisioning process can take several minutes to complete.
Log into the Axis Management console and follow the steps below to verify if the SCIM integration working:
- Go to Settings -> Identity Providers. In the Identity Providers table, the configured PingFederate IdP will now show the number of synchronized users and groups.

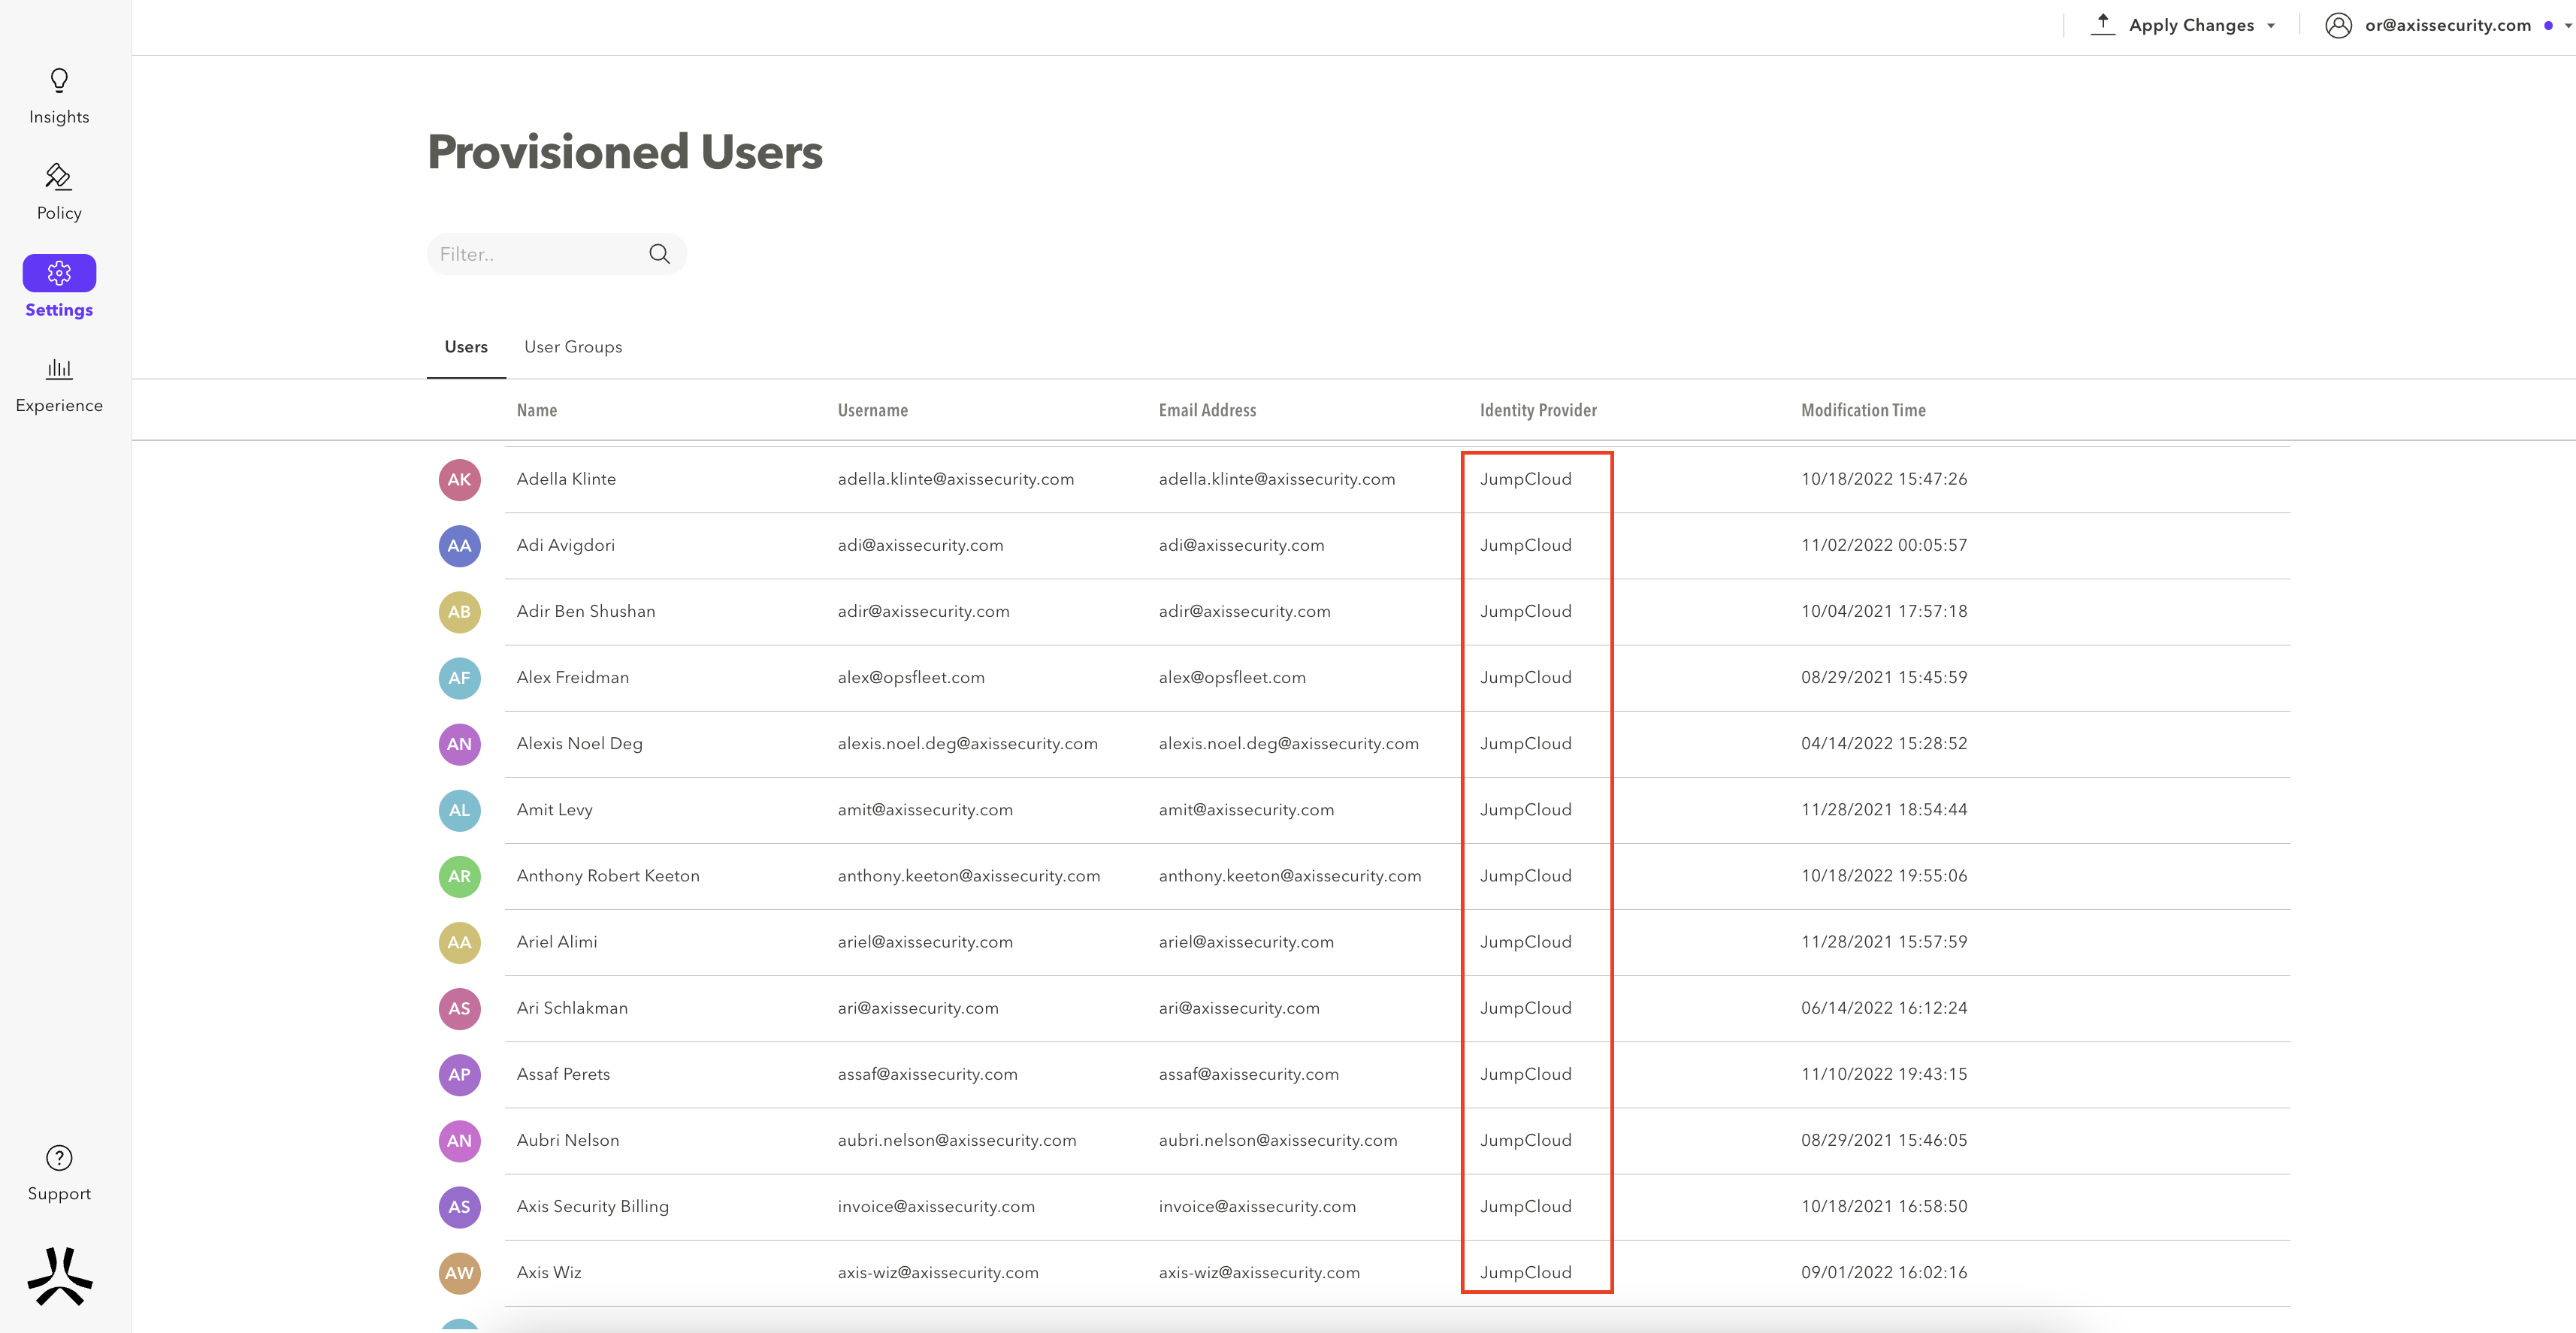
- Go to Settings -> Provisioned Users. On the Users tab, verify that the configured users have been synced from your JumpCloud Identity Provider.
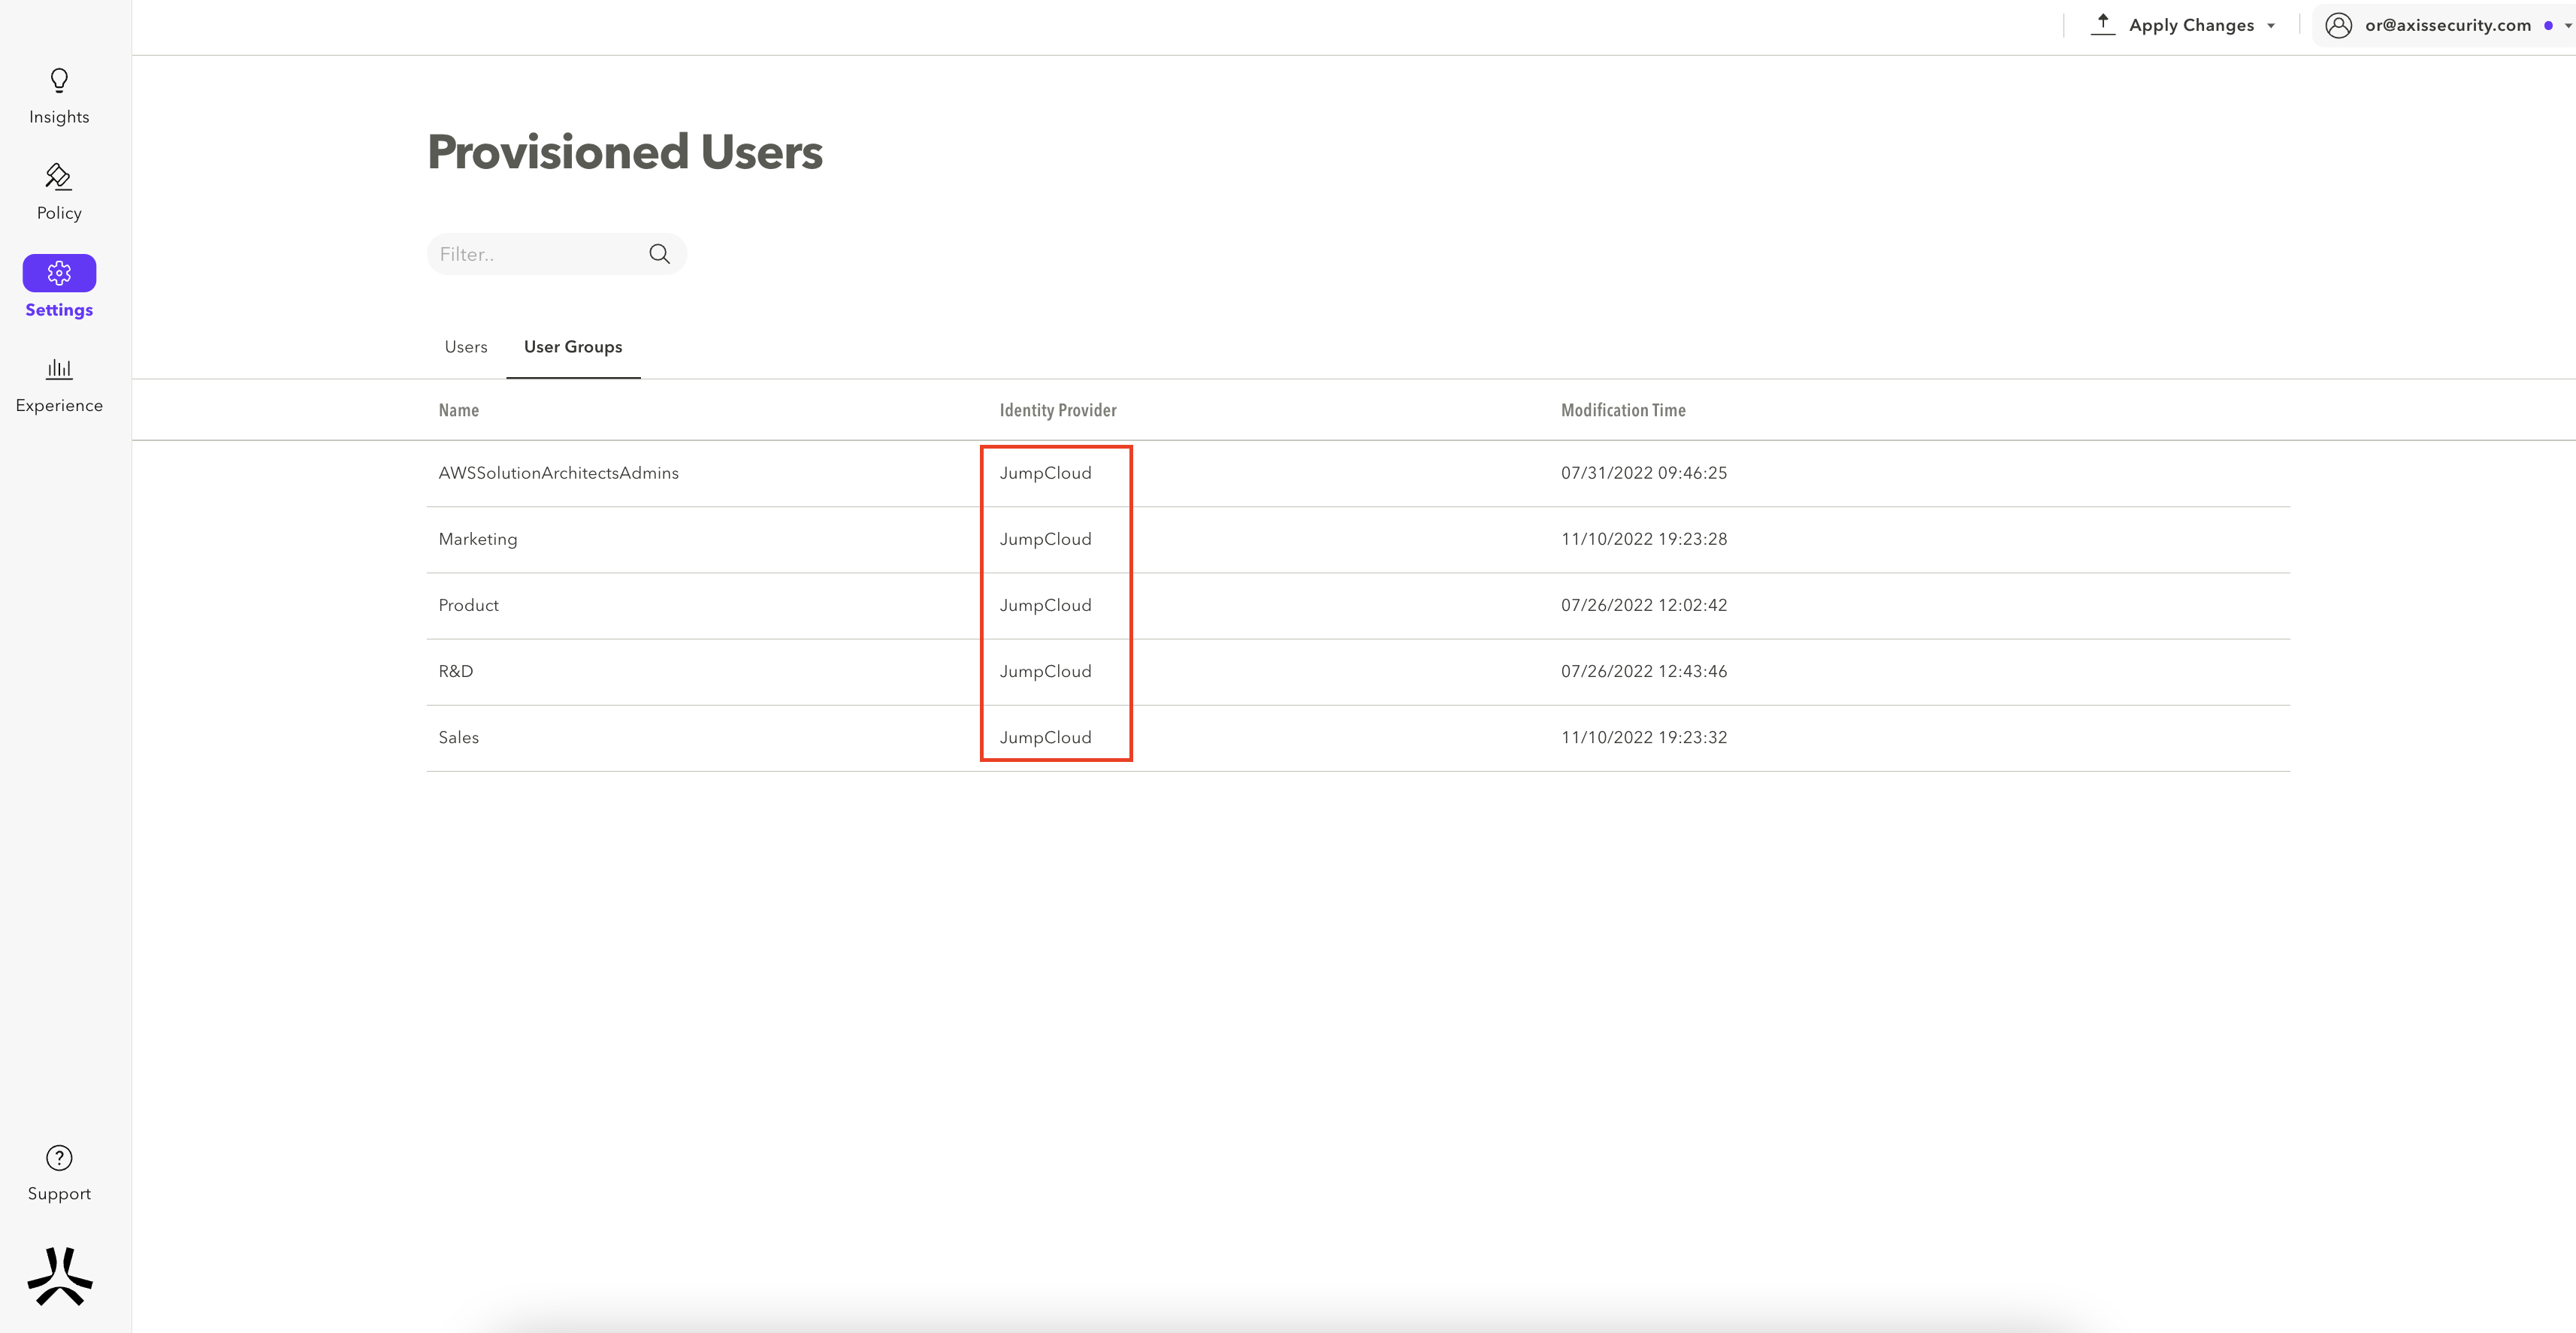
- Select the User Groups tab. Verify the configured groups have been synced from your JumpCloud Identity Provider.
Updated about 3 years ago
