Configuring a Server Initiated Flows
This section contains the following topics:
- Workflow for Server Initiated Flows
- Configuring an IP Pool for a Connector
- Configuring a Server-Initiated Flow in a Network Range Application
Workflow for Server Initiated Flows
The process for enabling a server initiated flow is as follows:
-
Create a connector and select an unused IP pool. The connector uses this IP pool to assign addresses to the {user.Axis Client}. This step requires Axis Support [email protected] assistance to complete the connector configuration.
The connector will act as a NAT gateway for this IP Pool. This requires that customers configure their network to have an internal route that points to the IP Pool via the Axis Connector.
For example, an administrator deploys an Axis Connector to use for the server-initiated flows. The
administrator assigns the Axis Connector an internal IP address of 192.168.1.50. The administrator then
selects 10.50.50.0/24 as the IP pool that the connector uses to assign to clients. A route must be
created that specifies that 10.50.50.0/24 is reachable via 192.168.1.50. See also Configuring an IP
Pool for a Connector.
- Create a Network Range application at the Settings > Applications > New Application->Network Range.
- Enable the Server Initiated Flow option and specify the ports the {user.Axis Client} uses for listening for incoming connections from the network address range.
- Select a connector zone that has a connector with an IP pool.
- Save the application and allow users access to the new application in the Policy > Rules section.
Configuring an IP Pool for a Connector
To configure an IP pool for a connector:
- Reserve an unused IP pool (CIDR or range) for each connector so that the connector can use it to assign IP addresses to the clients. Each connector has one IP pool and each IP pool can include up to 1024 IP addresses.
- Create a route on your network to ensure that traffic destined for the Connector’s IP Pool is routed via the Connector’s internal IP Address. This would typically be configured on your default gateway for your application servers.
ImportantThis needs to be done on the customer’s network, not the Axis Cloud.
- Contact Axis Support at [email protected] to configure your IP pool on the connectors.
Configuring a Server-Initiated Flow in a Network Range Application
This section shows you how to configure a Network Range application with the server-initiated flow enabled.
To configure a server-initiated flow Network Range Application:
- In the Management Console, go to Settings > Destinations > New Application > Network Range.
The Add Network Range form displays.

-
In the Name, enter an entity name that easily identifies the application; for example, Server initiated flow network range.
-
In the Local Address Range, specify the addresses of the servers and endpoints that the client needs to access.
For example, the IP address of the VoIP server.
-
In the Server Initiated Flow section, enable the **Allow this range to initiate connections with {user.Axis Client} **toggle.
-
Click Add a Port Range.
The Port Range option is displayed.
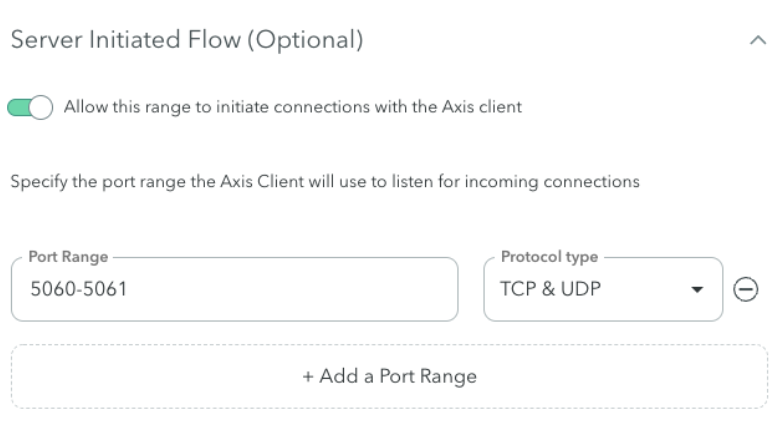
5.1. Specify the ports that the {user.Axis Client} will listen to for incoming sessions.
ImportantUse only the specific ports that your application uses for incoming traffic.
5.2 In the Protocol drop-down menu, select the protocols TCP/UDP.
For example, VoIP applications will typically leverage SIP (port 5060-5061).
- In the Connector Zone, select a connector zone with an IP pool enabled Connector.

If there is no connector zone with a connector that is configured with an IP pool, the following
message is displayed: No IP pool is configured in any of the connectors in this Zone.
Server initiated flow will be disabled.
- In Application Tags (Optional), select the Application tags that you want to associate with
this application.
Updated 20 days ago