Adding a Web Application
Step 1: Add a Web Application
- In the Management Console, click Settings -> Destinations -> New Application.
- Select Web Application.
- Enter a name for the application.
Enter a name that you can easily identify.
Step 2: Configure the Local Address and Port
Specify the address (domain or IP) and port that will be used to access the application through your organization's local network. To facilitate access, select a connector zone that can reach the address.
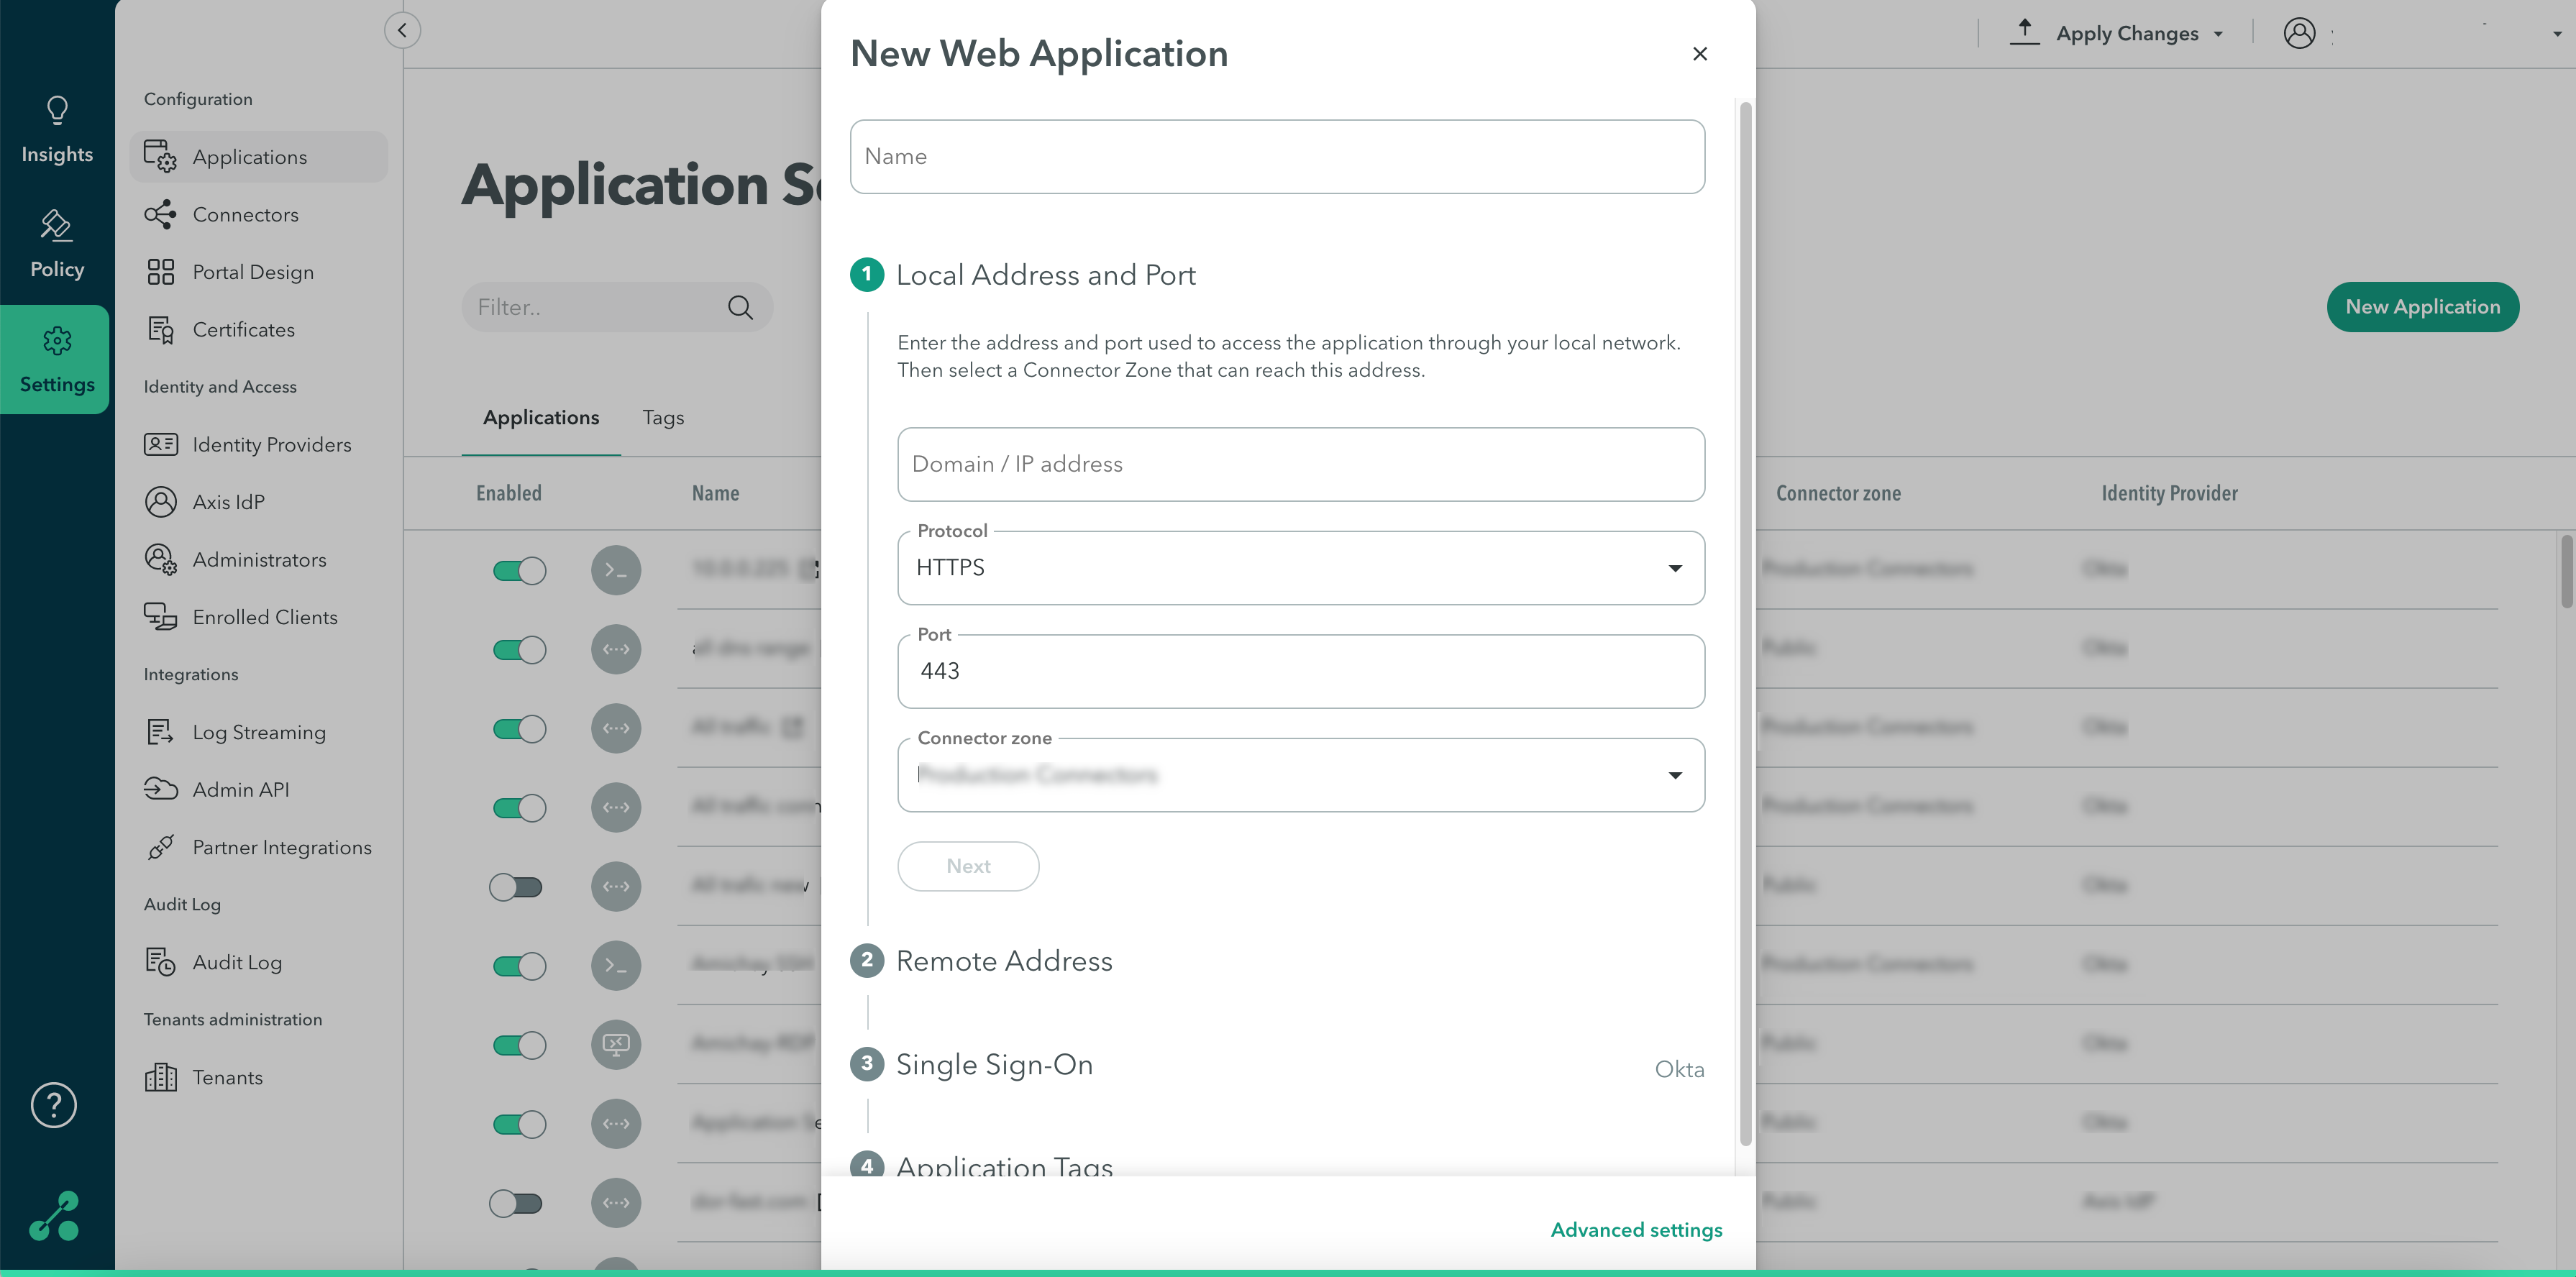
Configure the following options and then click Next.
| Option | Description |
|---|---|
| Domain/IP address | Enter the address. If the application requires more than one domain, enter the additional domains in Advanced Settings (see below). |
| Protocol | Select HTTP or HTTPs. |
| Port | Enter the port number. |
| Connector zone | Select a connector zone (the network that you want to provide access) that has access to the application. |
Step 3: Configure Remote Address
Axis supports two types of URLs to access applications from outside the internal network. This section describes these URLs and which option to select for your environment.
- A URL to access the applications with the Axis subdomain (ex: app-acme.axisapps.io).
If you have this type of URL, select the Using the Axis Subdomain option. This option is useful when you do not have your custom domain. - A URL to access the applications with a custom domain (ex: www.acme.com).
If you want to use your own URL (custom domain), select the Use a domain you own option. This option requires a domain certificate and configuring the DNS server administrator (for instance GoDaddy, R53, or AWS) to point the domain to the application’s CNAME.
See Using a Custom Domain and Ensuring the DNS routes to Axis when using a custom domain.
Using the Axis Subdomain
Use the Axis subdomain when you do not have your custom domain.
To use an Axis subdomain:
- In the Remote Access section, select the Use an Axis subdomain option.
- In the Subdomain field, locate add the subdomains reached by the application
- Click Advanced Settings to add the subdomains.
NoteIf some domains do not share the same protocol or port as defined in the Local Address and Port screen, contact Axis Support: [email protected].

Using a Custom Domain
Use the Custom domain option when you have an internal domain (your own domain).
This section lists the following use cases and their options.
- The internal domain is the same as the external domain
Upload the domain certificate and change the DNS configuration: Application domains should use the Axis Cloud DNS CNAME, as it appears in the web application screen.

- If the internal domain differs from the external domain Contact Axis Support: [email protected].
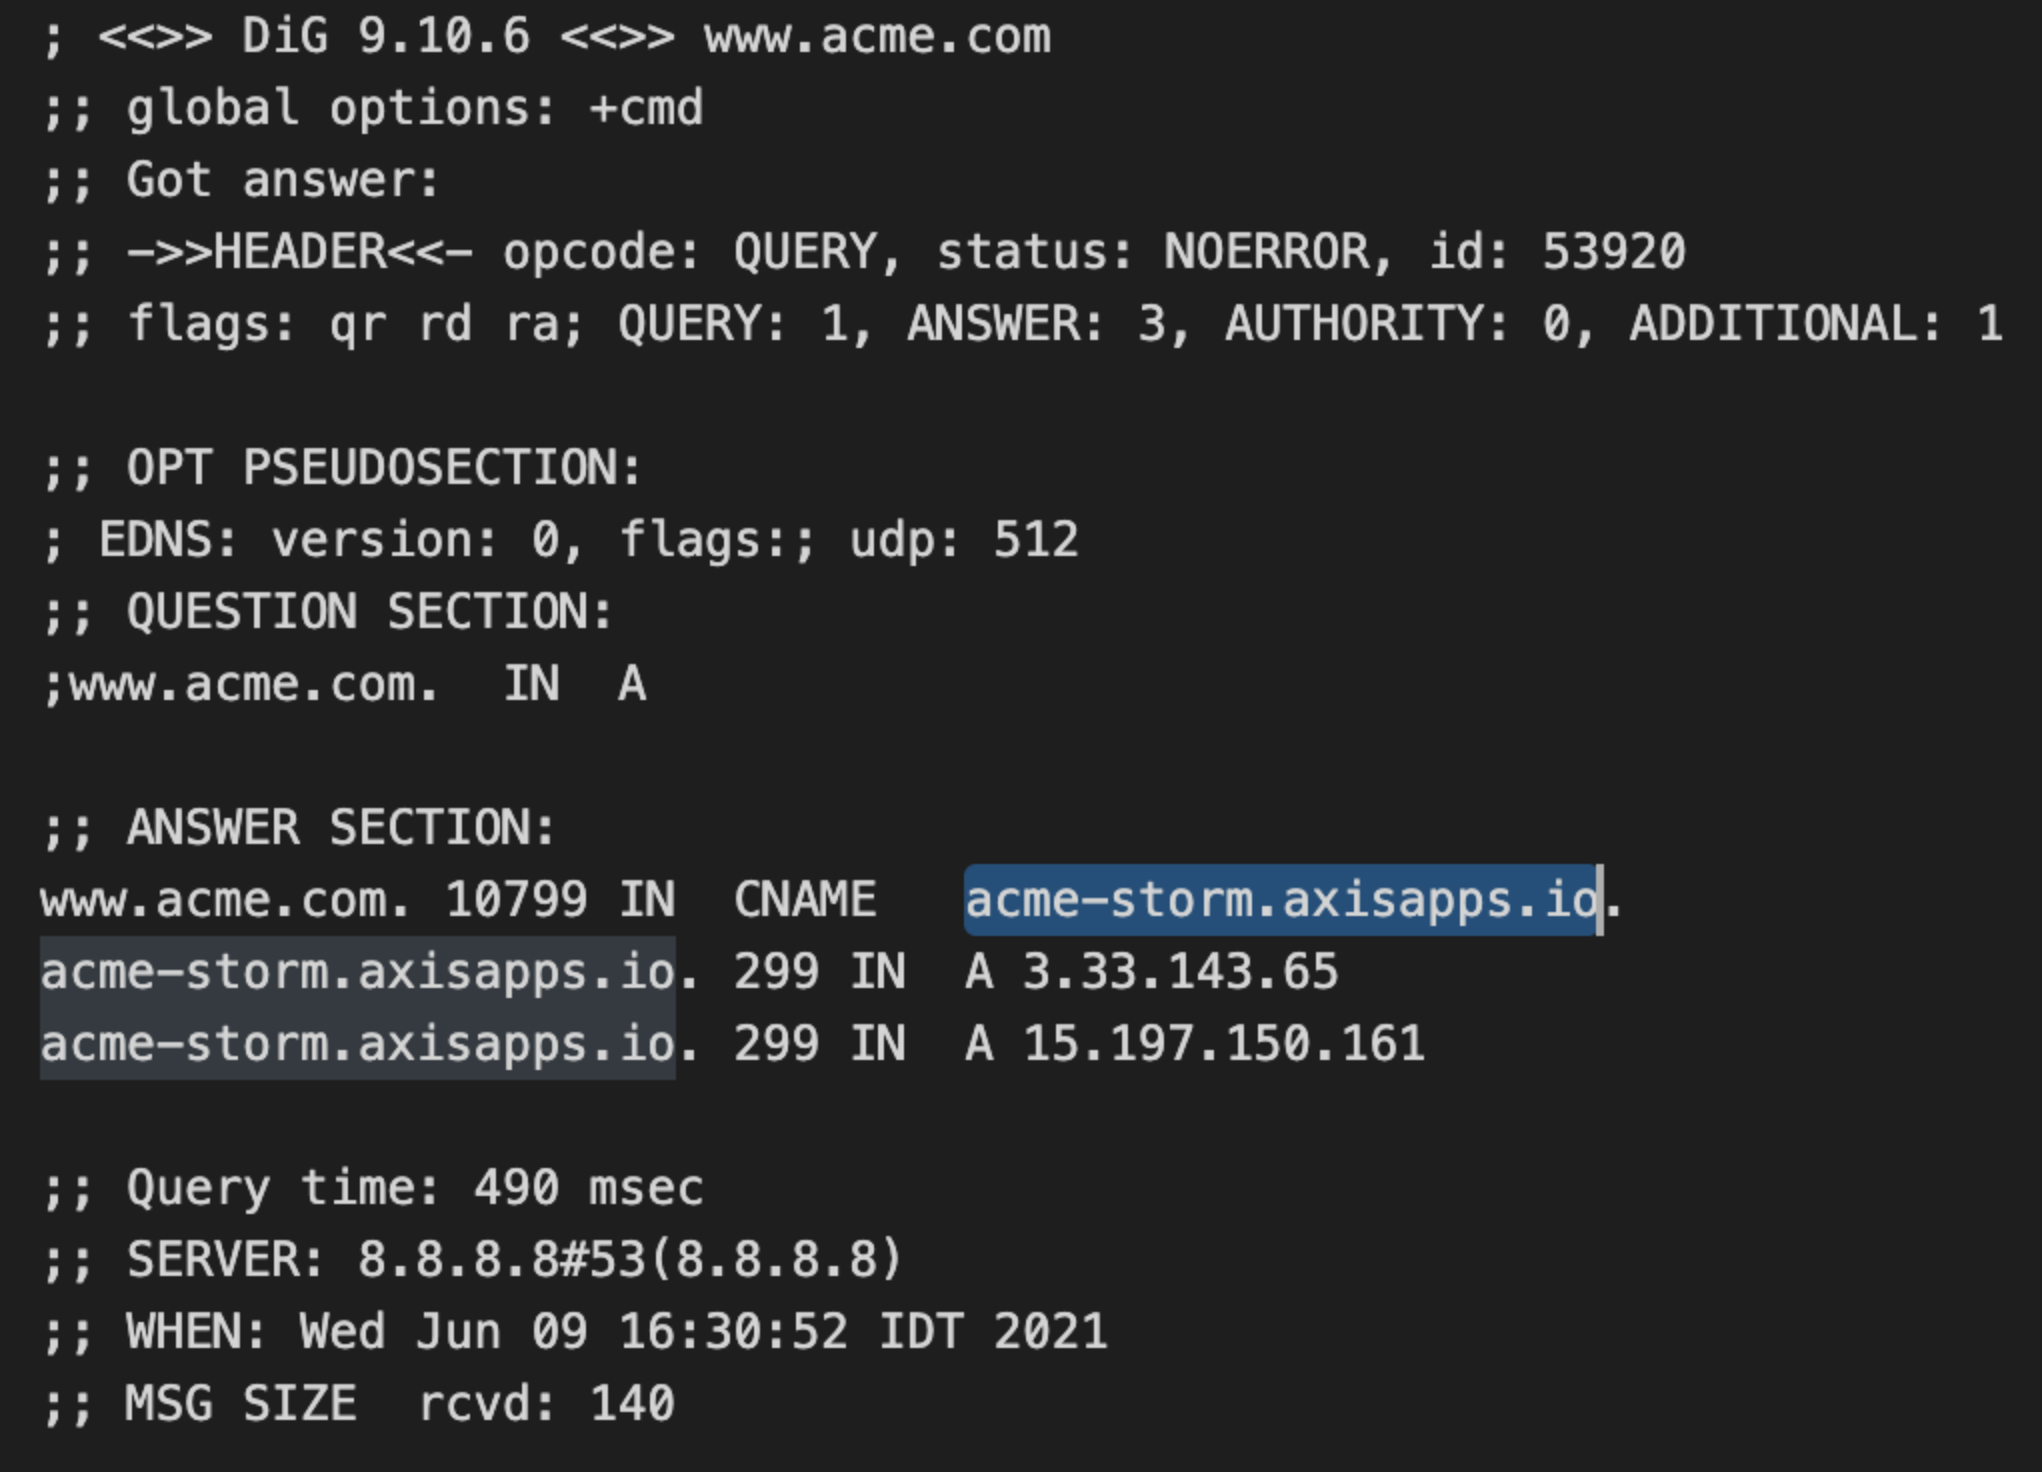
Ensuring the DNS routes to Axis Application Access Cloud when using a custom domain
To check whether the DNS was configured correctly, the administrator should ensure that the custom domain routes to the Axis Application Access Cloud is using the "DiG" action.
- Go to the command line
- enter: dig
Step 4: Configure Single Sign-On
Ensure that your users' activity is secure by having an authentication requirement in place.
To configure single sign-on:
- In the Single Sign-On section, select an Identity Provider; for example, Okta, to manage user authentication for this application.
- Click Next.

Step 5: Configure Application Tags (Optional)
Tags help to create policy rules fast and efficiently for groups of applications. Click here to learn about creating application tags.
To configure application tags:
- In the Application Tags section, start typing to create new tags, or choose the available tags from the drop-down menu.
- Click Finish.
NoteTo commit your changes, navigate to the top-right menu, click Apply Changes, then select Commit Changes.
Step 6: Configuring a Web Application's Advanced Settings
After adding a new web application, you can configure its advanced settings and API Application Access
NoteThis is a limited release feature.
Use the Advanced Settings screen to configure:
- Additional Local Domains
- Default Root Path
- Trusted Sources Authentication Exemption
- Custom HTTP Headers
- API Application Access
Additional Local Domains
To add local domains that are used by the application:
- Click Add Domain.
- For the domain configuration, enter the following:
Protocol: select the web protocol to access the domain: HTTP or HTTPS.
Domain field: Enter the domain name.
Port: Add the port to access the domain. - Click Finish.
Default Root Path
Select a default root path to use for applications where there is no page for the root path.
Trusted Sources Authentication Exemption
For more information, see Adding a Trusted Sources Authentication Exemption.
Custom HTTP Headers
Specify SAML attributes to pass to your web application as an HTTP header.
An Axis user logging into an application is authenticated by an Identity Provider (IdP). The information is then sent by the IdP to Axis. Such information includes usernames, emails, and more. The protocol for communication between Axis Security and the IDP is SAML.
At times, the application requires information from the IdP. Axis sends that information to the application's HTTP Header fields. Specify the HTTP Header and SAML claim to be used by the application. A claim is information that an IdP provides about a user inside the token they issue for that user.
To configure Custom HTTP Headers:
- Click Advanced Settings -> Add SAML Header.
- Enter the value (SAML claim) to send under key (HTTP header).

Step 5: API Application Access
NoteAPI access can only be enabled once the “Add Application” process is complete.
To configure API Application Access:
- Click Generate Access Token.
- Click Finish.

NoteTo commit your changes:
- Go to the top-right menu, click Apply Changes.
- Review your changes.
- Select Commit changes.
Manual Customizations
To avoid application breakage, when the rewrite configuration was manually changed, admins will not be able to edit addresses.
To make changes to the application's domains and addresses, contact Axis Support: [email protected].
Updated 25 days ago