SCIM Provisioning with Azure (Entra)
This article describes how to provision users with an Azure Active Directory (AAD) custom System for Cross-domain Identity Management (SCIM), an open standard that allows for automated user provisioning.
Prerequisites
Before you begin, you must create an Azure IdP SSO Integration.
Step 1: Generating an Endpoint and SCIM Token
To synchronize users and groups provisioned for the Axis Security application, Azure requires two pieces of information:
- An Endpoint to which AAD makes requests.
- A Bearer token for AAD to authenticate its endpoint requests.
To Generate an Endpoint and a SCIM Bearer Token:
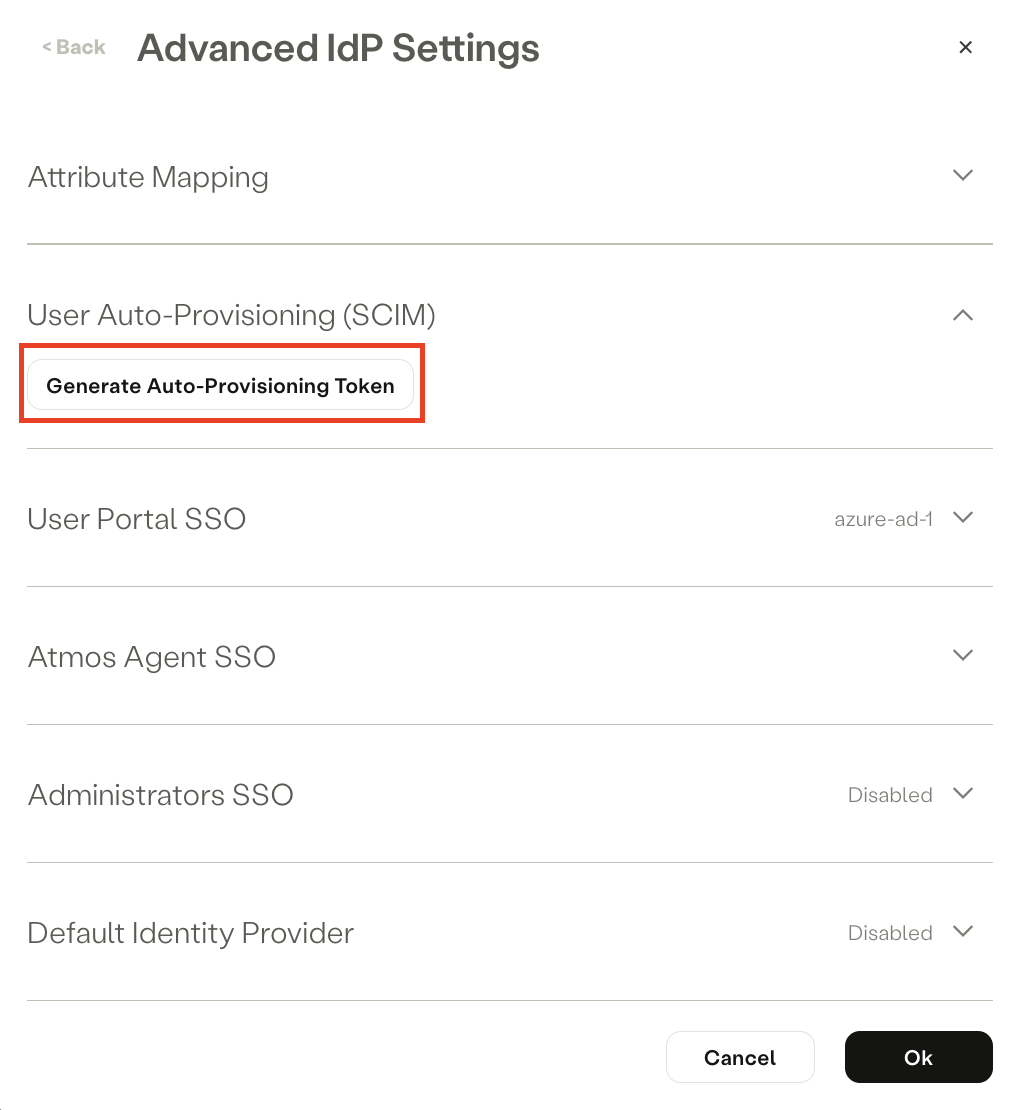
- In the Management Console, go to the Settings-> Identity Providers screen.
- Hover over the Azure Identity Provider and select edit.
- Navigate to Advanced Settings.

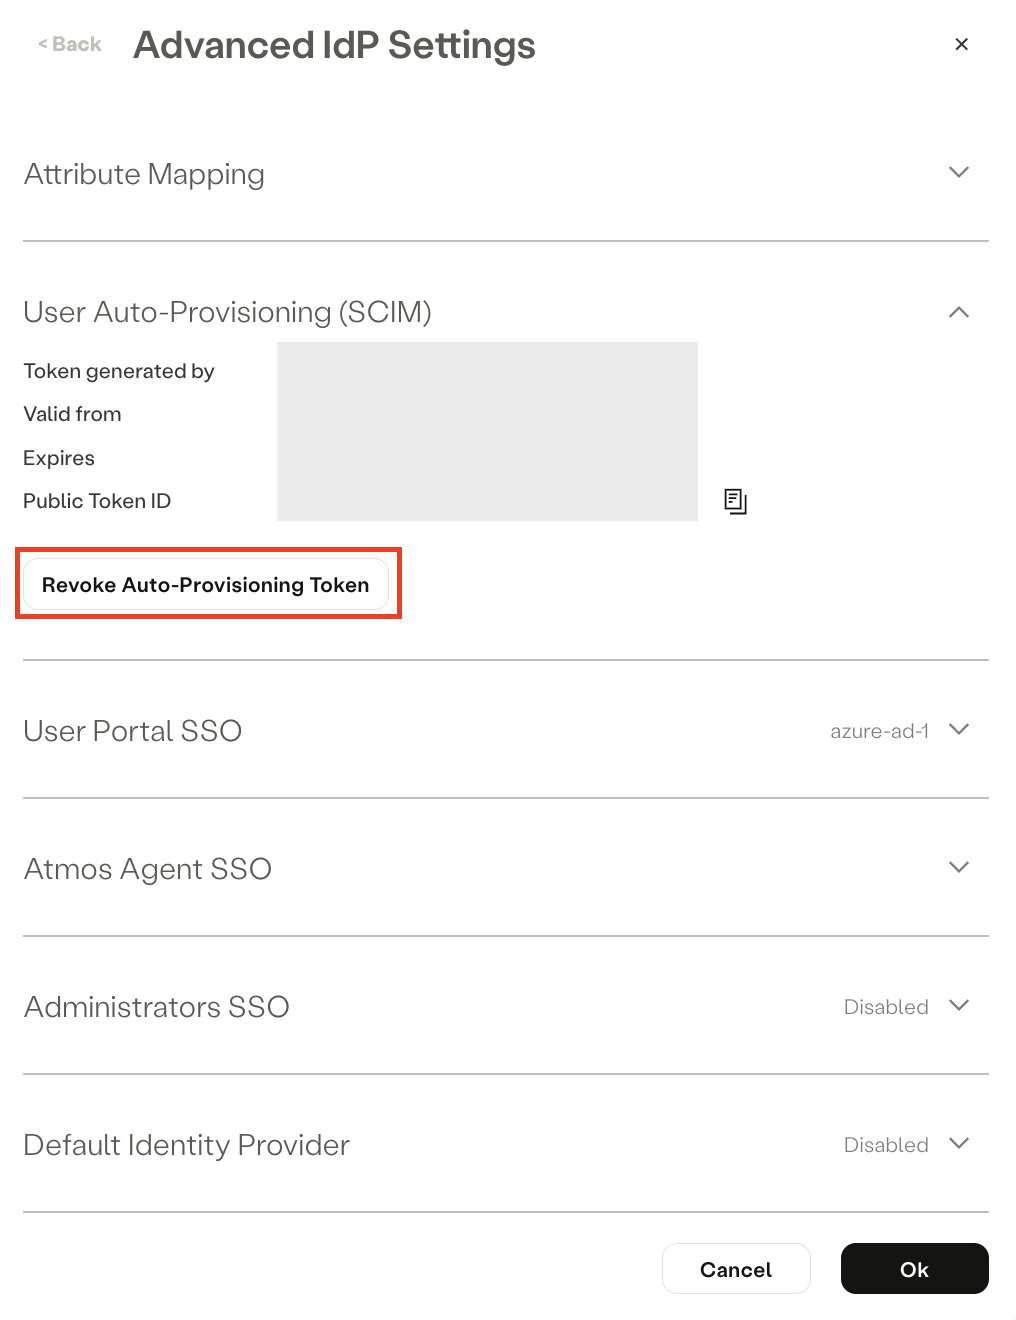
- Go to User Auto-Provisioning (SCIM).
- Click Generate new token.
- Copy the SCIM Service Provider Endpoint and SCIM Provisioning Token and paste them into a text editor. You will need them for Step 3: Configuring the Integration.
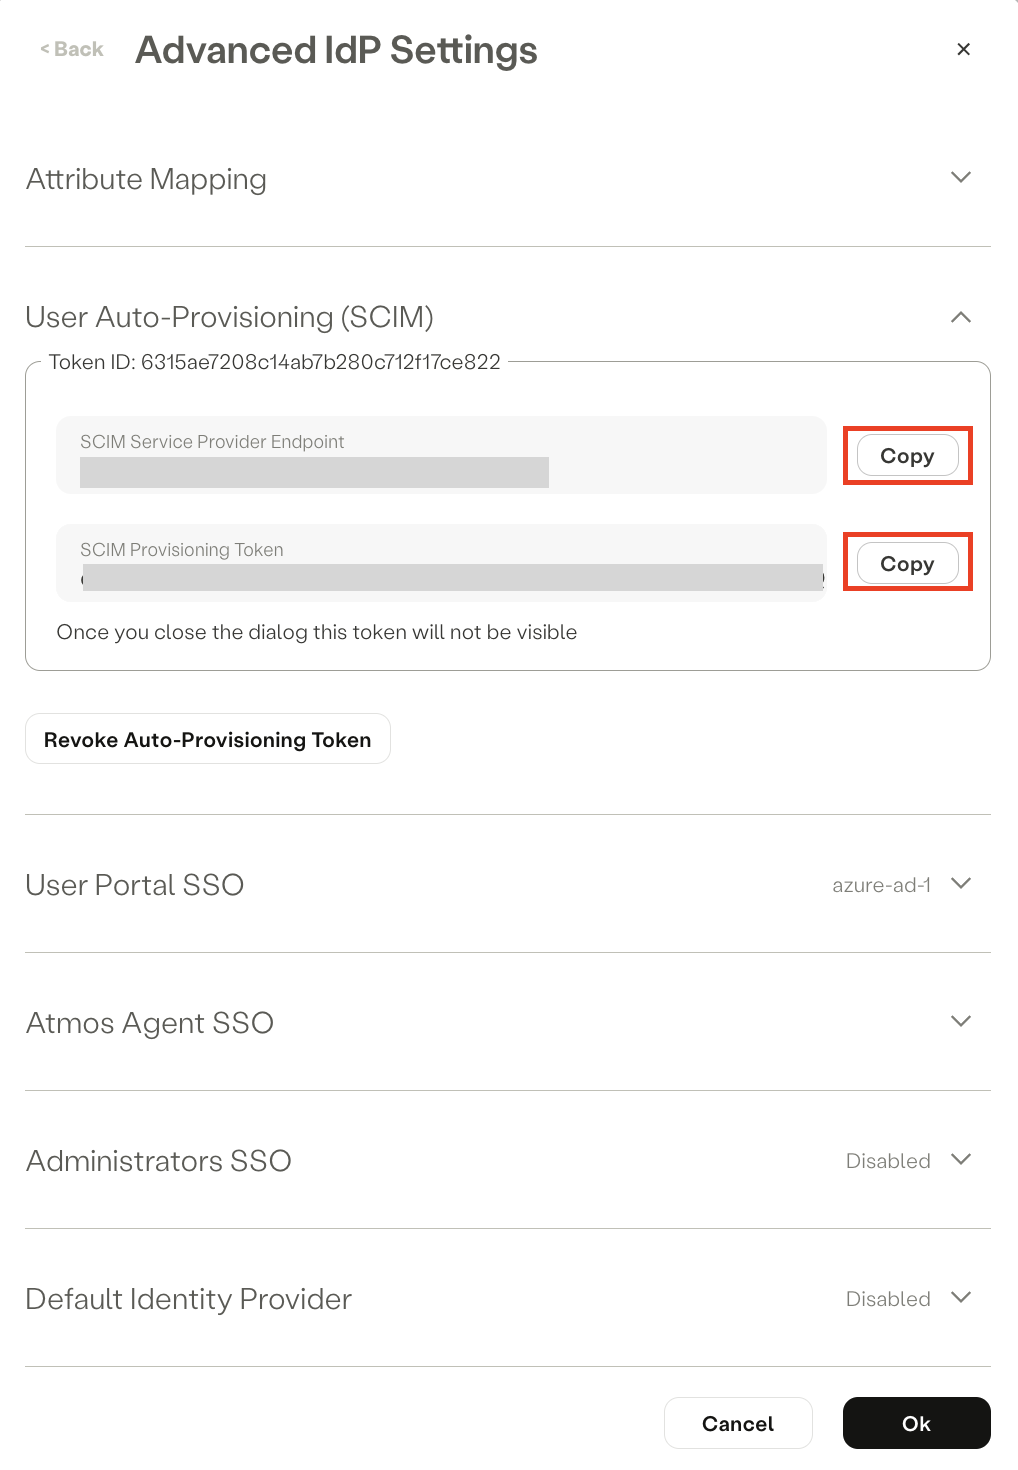
- Click on Ok, and then click on Submit.
- Click on Commit Changes.

Step 2: Configuring the Integration
Since you have an existing SSO application, you can use it to configure the SCIM provisioning (Instead of "SCIM Test" in the screenshots).
- In Azure, go to the navigation menu.
- In the Manage section, select Provisioning.

- Click the Get Started button.

- Under Provisioning Mode, select Automatic.
- Under Admin Credentials enter the Tenant URL and Secret Token obtained from the Axis SCIM configuration (step 1):
- Paste the SCIM Service Provider Endpoint in the Tenant URL field.
- Paste the SCIM Provisioning Token in the Secret Token field.

- Click Save.
- Click Test Connection to confirm that the connection is set up correctly.
Step 3: Setting and Enabling Attribute Mappings
To set and enable attribute mappings in Azure:
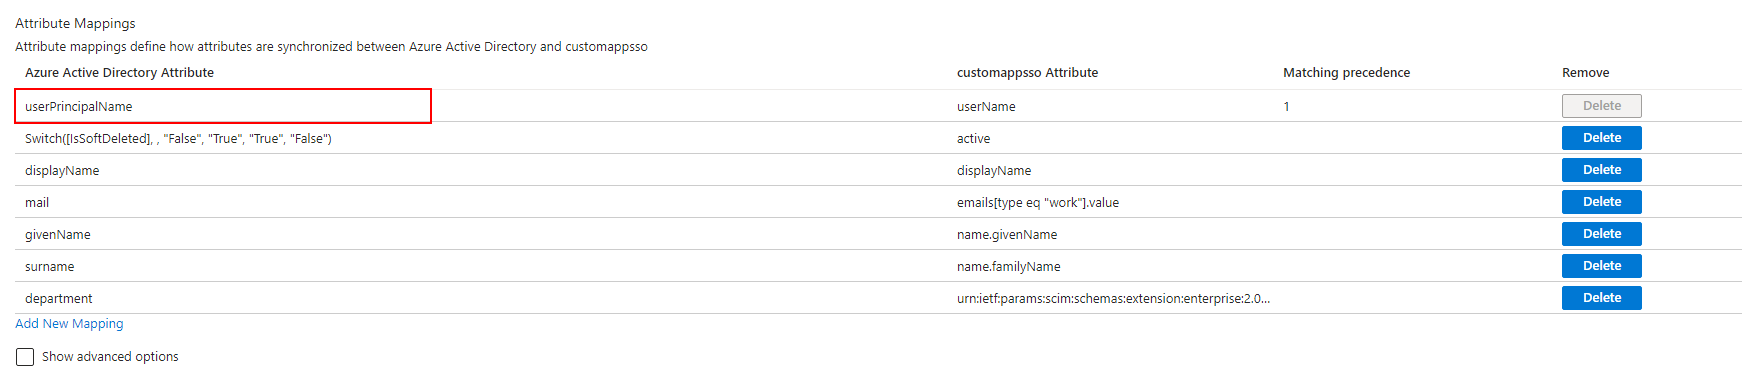
- Expand the Mappings section.

- In the Attribute Mappings section, enable group and user attribute mappings.
To allow external users to use the Original UPN:
Adjusting the UPN mapping to the original UPN resolves the mismatch by using the invited tenant's UPN instead of the home tenant's. This change does not impact native users of the tenant.
- Click on: userPrincipalName.
- Click on the Source attribute drop down list and pick : OriginalUserPrincipalName, and click Ok.
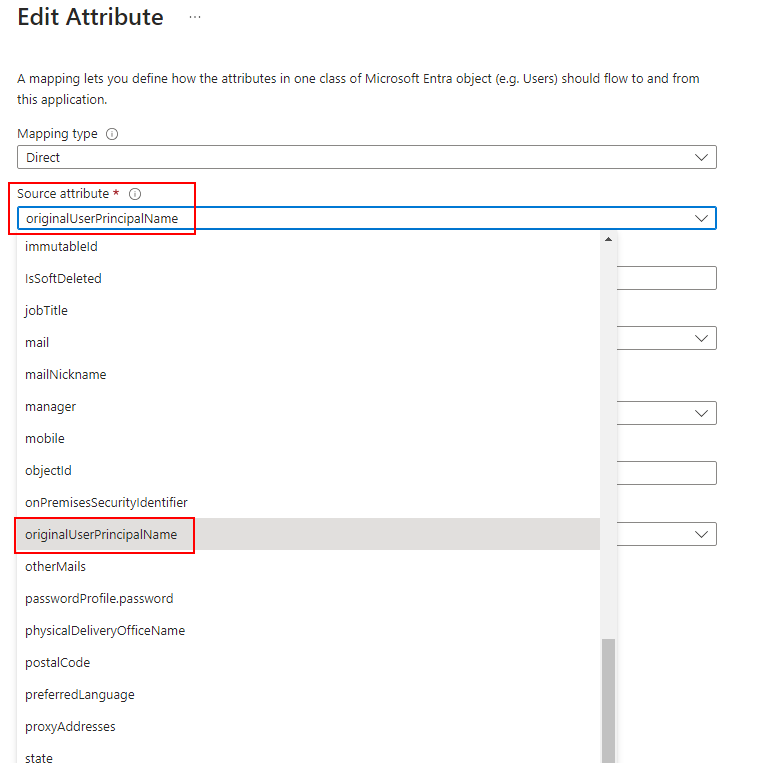
Changing this value after initial deployment will cause a re-provisioning of all users to update the new value. Best performed in maintenance window
To complete the attribute mapping:
- Make sure the user mapping only maps the attributes below, otherwise you will not be able to complete the provisioning:
Note: All fields are required except Department which is optional.

Step 4: Disable Nested Groups Provisioning
- Go to Your application-> Provisioning-> Edit Provisioning.

- Go to Groups Mapping-> Provision Azure Active Directory Groups.

- Select Show advanced options and Edit attribute list for customappsso.

- In Members-> Reference deselect the Group scheme as seen below to prevent the provision of nested groups.

- Click Save.
Step 4: Assigning users and groups to the application
To sync users and groups, you must assign them to the AAD SCIM application.
To assign users and groups to the AAD SCIM application:
- Go to Manage in the navigation menu.
- Select Users and groups.

- Select Add user/group

- Under Users and Groups, select None selected.

- In the Users and Groups window, select the users and groups you want to add to the SCIM application.
- Click Select.
- Select Assign at the bottom of the screen.
- In the Users and groups area, add the selected users and groups to the SCIM Application.

Step 5: Enabling provisioning for the SCIM application
- Navigate to Provisioning page in the side menu on the left.
- Select Provisioning in the side menu on the left.
- In the Settings section:
- Set Scope to Sync only assigned users and groups
- Set Provisioning Status to On.
- Click on Save.

Step 6: Validate SCIM
In the Axis Management Console, go to Settings -> Provisioned Users.
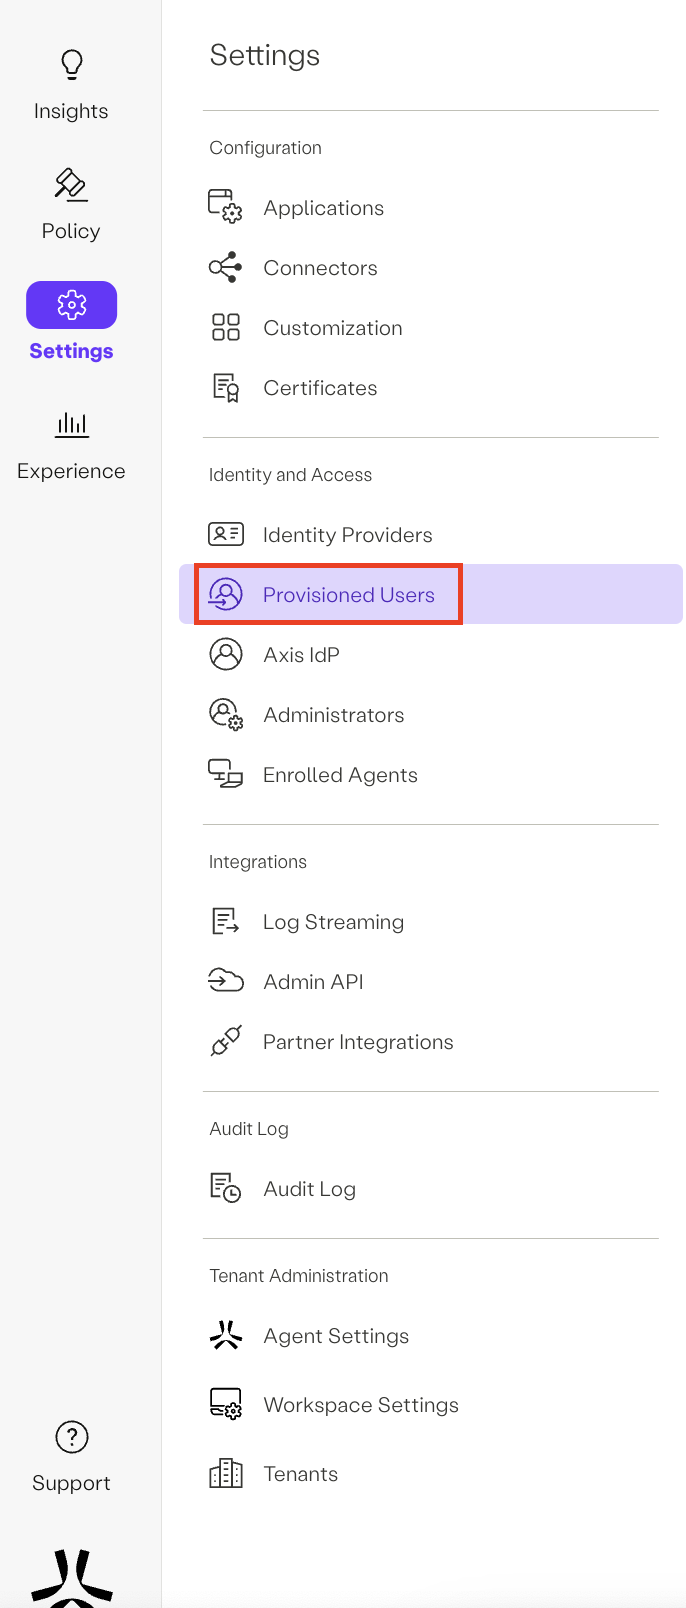
You should see the users and groups provisioned from your Azure account.
Revoking the Auto-Provisioning Token
To revoke an Auto-Provisioning token:
- Go to Settings -> Identity Providers
- Hover over the relevant Azure AD IdP and click Edit .
The Edit Azure Active Directory IdP window appears.
- Navigate to the Advanced settings section.
- In the User Auto-Provisioning (SCIM) section, click Revoke Auto-Provisioning Token.
Updated 5 months ago