Adding Users to Axis IdP
Axis Application Access Cloud integrates with your existing Identity Provider (IdP) service, and also provides an internal IdP (Axis IdP) to manage identity information and authentication. The Axis IdP has an application portal that users can access to see their applications.
Note: Some of the features are limited release. For more information contact Axis Security Support: [email protected]
To add users to an Axis IdP:
Step 1: Add Users
Step 2: Add a Group of Users
Step 3: Assign Users to a Group
Step 4: Temporary Users
Step 1: Adding Users
To add an identity provider user:
- In the Management Console, go to Settings Settings.png-> Axis IdP and
Click New User. - In the New User screen, enter a Username.
- Enter the user's first name, last name, and email address.
- Enter and confirm a password.
Note: The admin can leave the password field blank, and the users will receive an email with a link to create their own password. - In the Advanced Settings, configure the following:
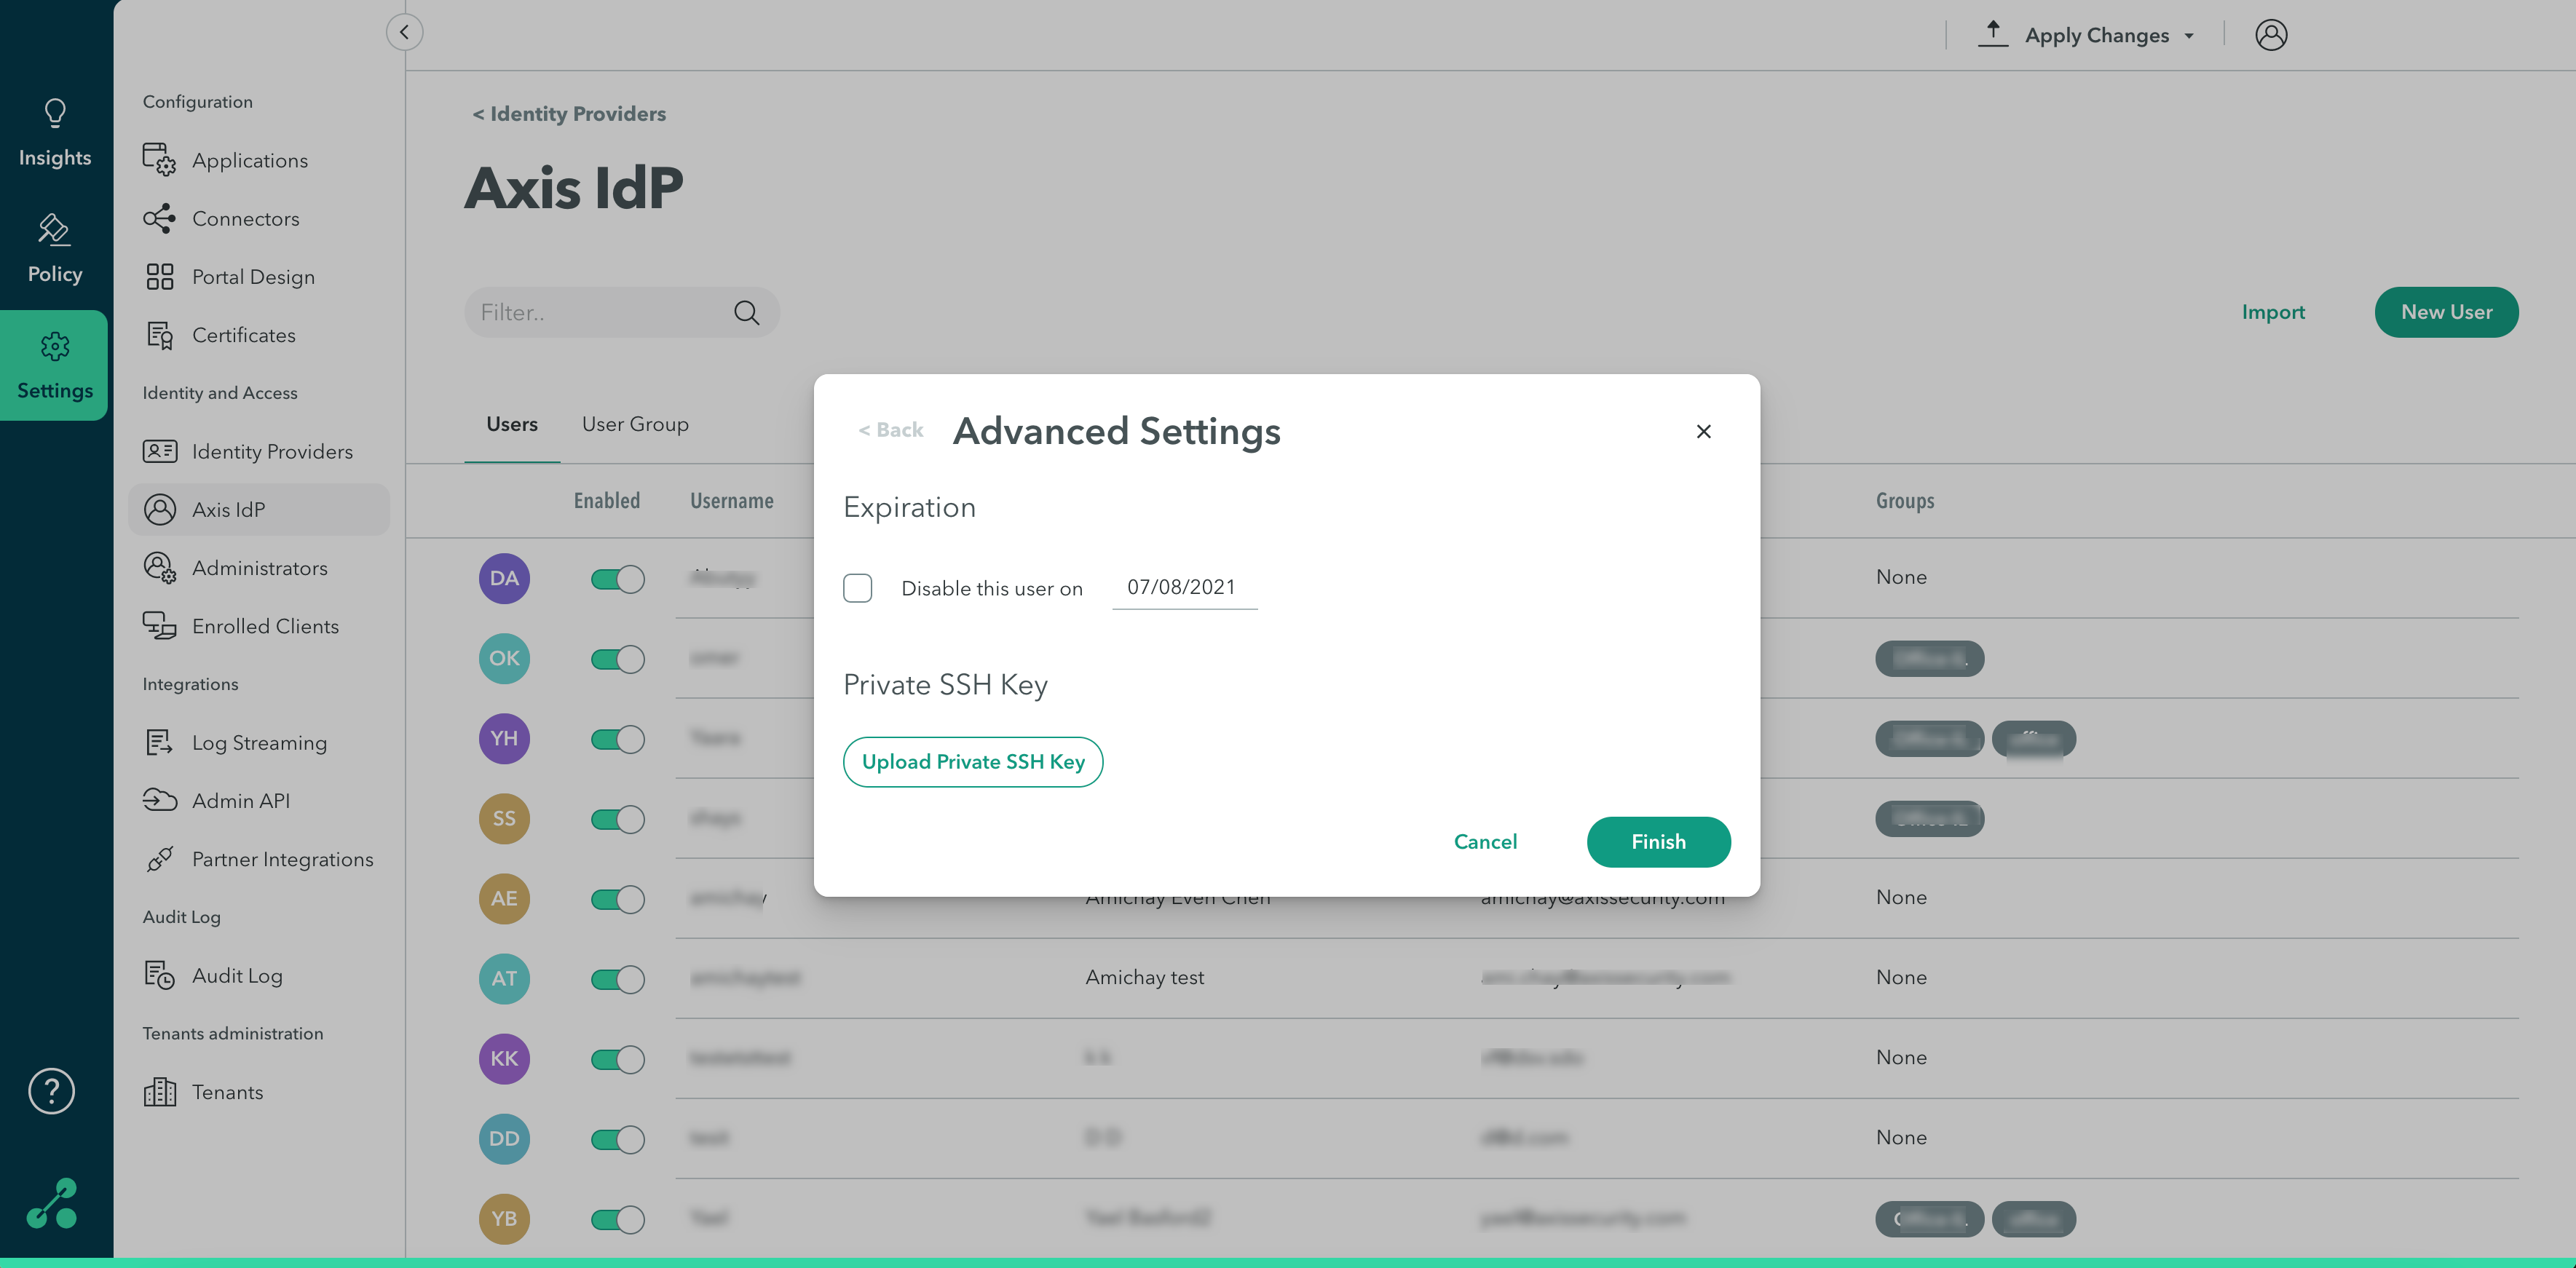
- Expiration Date: The admin can set an expiration date for a user, after which the user's account is disabled.
- Private SSH Key (Limited Release): The admin can upload a private key on behalf of the user to be used in user provisioning for SSH. Click here to learn more about SSH user provisioning. To use this key, the admin must first configure an SSH Server Application that will use the Axis IdP personal private key.
NoteThe user is not exposed to the key itself at any stage of the connection.
Step 2: Adding a Group of Users
You can add a group of users by importing a group of users from a CSV file.
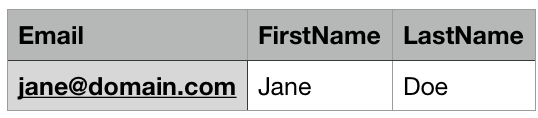
The format to add users in the CSV is the following:
To add a group of users :
- In the Management Console go to Settings-> Axis IdP.
- Click Import.
The Import Users screen is displayed. - Click Download CSV Template.
- Open the CSV file.
- Add users to the CSV file.
- Save the CSV file.
- Upload the CSV file to Axis Application Access Cloud.
Step 3: Assigning Users to a Group
To assign users to a group:
- Select user groups to assign all the added users to a group.
- Start typing to create new user groups or select from the drop-down menu.
Step 4: Adding Temporary Users
To add temporary users:
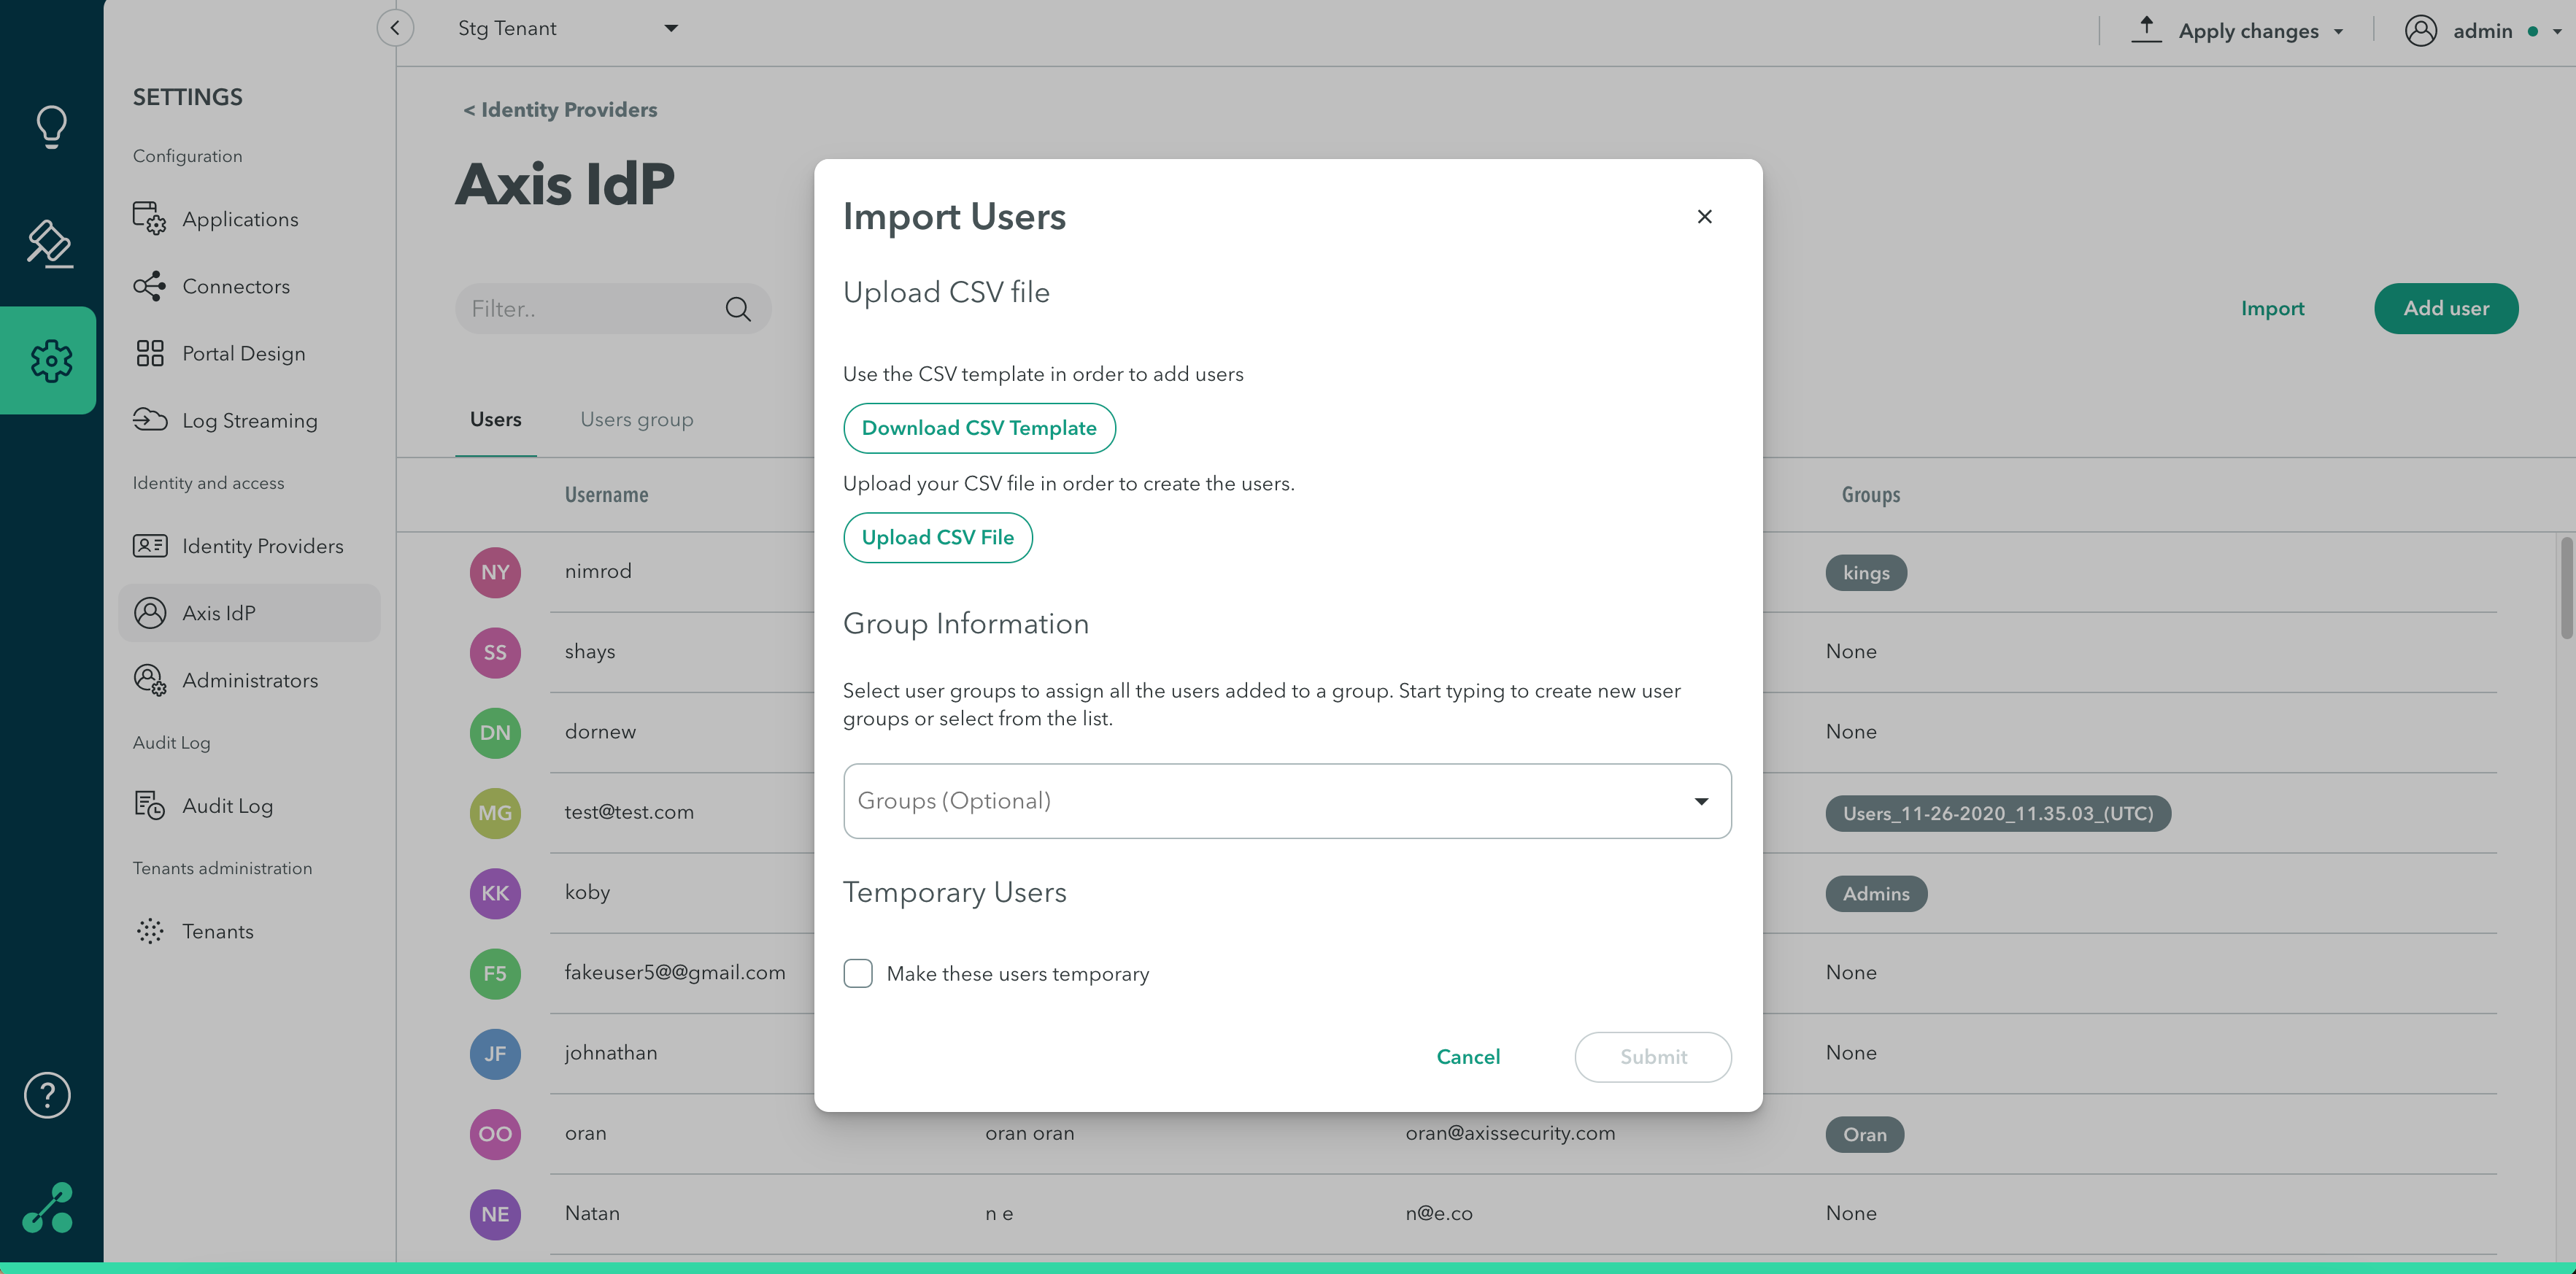
- Check the Make these users temporary option to delete the users after a certain time in days, weeks or months.
- Click Submit.
- Click Apply Changes in the top menu bar.

NoteTo commit your changes, navigate to the top-right menu, click Apply Changes, then select Commit Changes.