Connector Deployment using a Launch Template
The Admin API is an incredibly powerful tool for automating various tasks within your cloud infrastructure. One of its most useful applications is in the auto-creation and deployment of connectors when launching AWS, Azure and GCP templates.
By leveraging the Admin API, you can streamline the process of deploying connectors on a machine, making it faster and more efficient than ever before. With just a few simple commands, you can automate the creation and deployment of connectors, freeing up valuable time and resources.
To take advantage of this feature, all you need to do is follow a few simple steps:
Step 1: Copy the Connector Deployment Script to Your Editor
The following script will be used as the User data / Custom data when launching a new template on your cloud provider. When executed, this script will use the Admin API to create a new connector in the management console and then run the installation script for the connector.
The host name will serve as the connector name, providing a clear identifier for the machine within the cloud provider.
#!/bin/bash

connector_zone_id="CONNECTOR ZONE ID"
api_token="YOUR API TOKEN"
base_uri="YOUR BASE URI"

echo "Creating the connector..."

base_uri="https://${base_uri}"
connector_name="$(hostname -f)"

payload=$(cat <<EOF
{
    "name": "$connector_name",
    "connectorZoneID": "$connector_zone_id"
}
EOF
)

response=$(curl -X POST \
            -H "Authorization: Bearer ${api_token}" \
            -H "Content-Type: application/json" \
            -d "${payload}" \
            -w "\n%{http_code}\n" \
            "${base_uri}/connectors")

http_code=$(echo "${response}" | tail -n 1)
body=$(echo "${response}" | sed '$d')

if [ "${http_code}" -ge 200 ] && [ "${http_code}" -lt 300 ]; then
    echo "$(date): Request successful. Response body: ${body}."
else
    echo "$(date): Request failed with HTTP status code ${http_code}. Response body: ${body}."
    exit
fi

echo "Running installation command..."

command=$(echo "$response" | sed -n 's/.*"command":"\([^"]*\)".*/\1/p')
sudo bash -c "$command"
Step 2: Create Admin API token
Before launching the template and using the connector deployment script, you will need to add your API Token and Base URI to the script. Ensure that you have already created an API token with the appropriate permissions to create a connector. Next, replace the placeholders in the script with your actual API token and Base URI.
- Open the management console and navigate to Settings > Admin API.
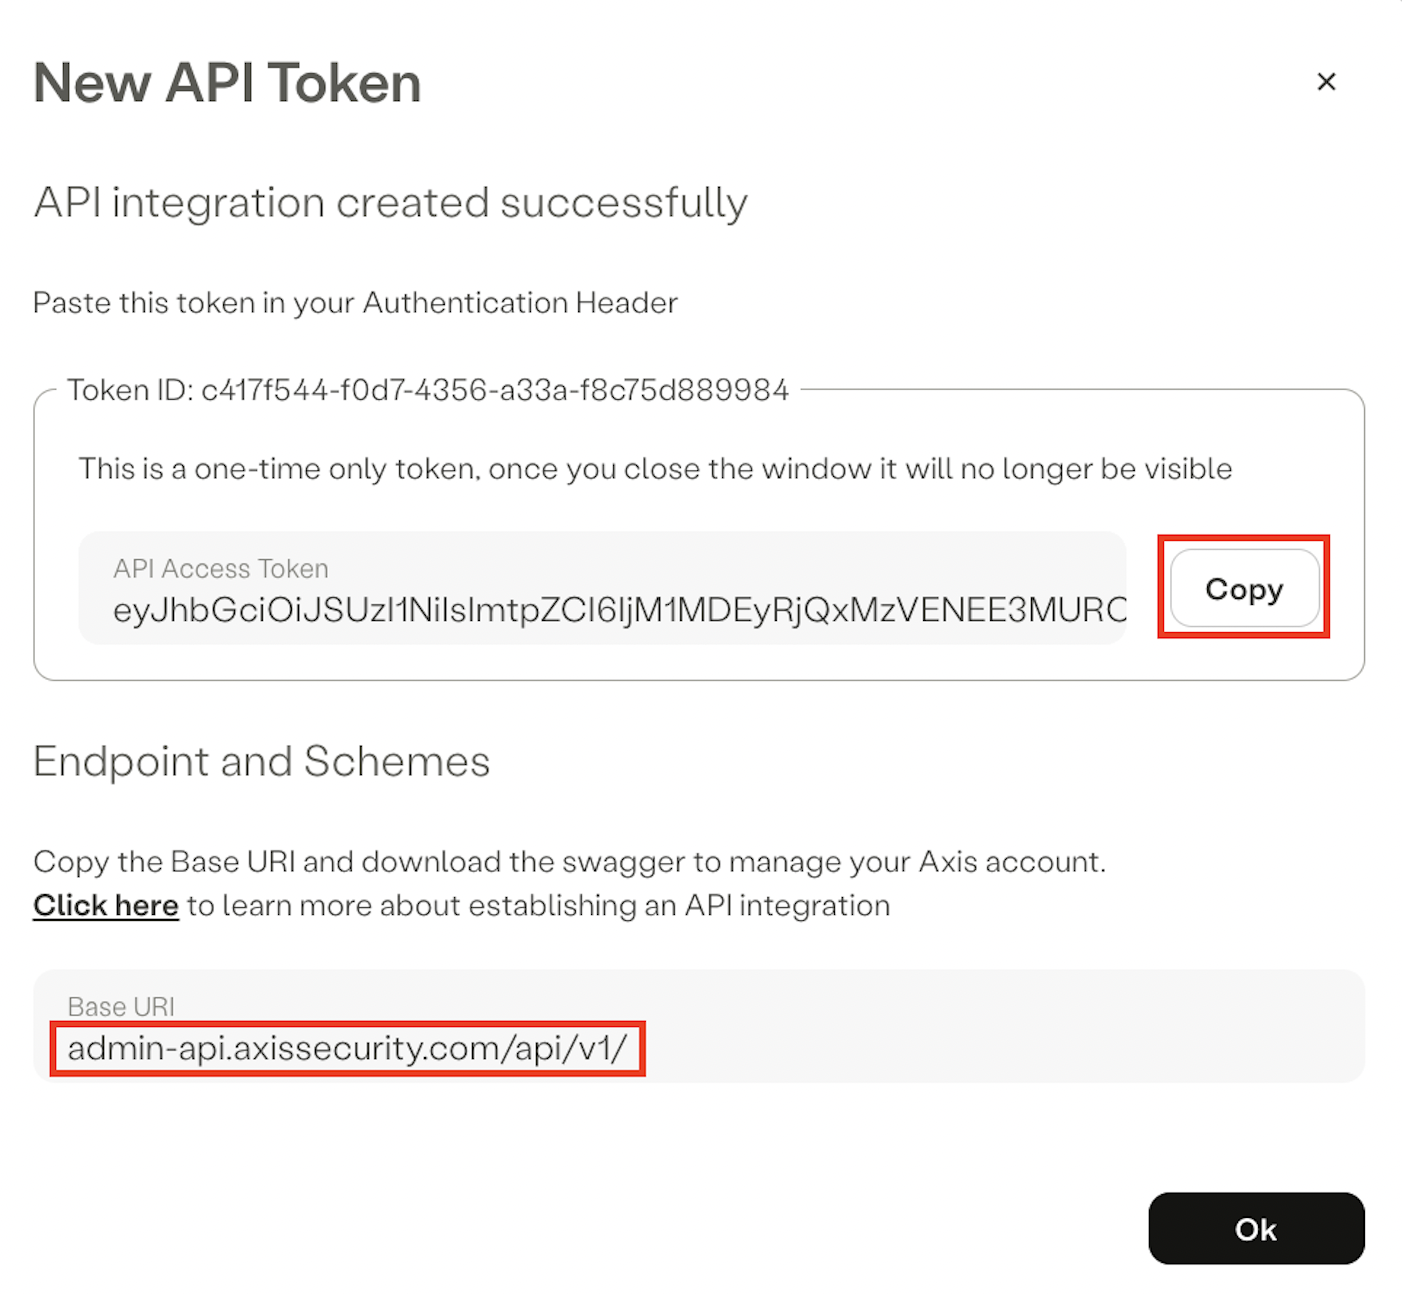
- Click on the New API Token button. Make sure to grant Read and Write permissions, and select the Connectors scope. Click on Submit.
- Copy the API Access Token and put it as YOUR API TOKEN in the editor. Copy Base URI and put it as Your Base URI in the editor.
Step 3: Obtain a Connector Zone ID
Before launching the template and using the connector deployment script, you will need to add the relevant Connector Zone ID to the script where you want to deploy the connector.
- Open the management console and navigate to Settings > Connectors.
- Go to the Connector Zones tab.
- If you need to create a new connector zone, click on the New Connector Zone button.
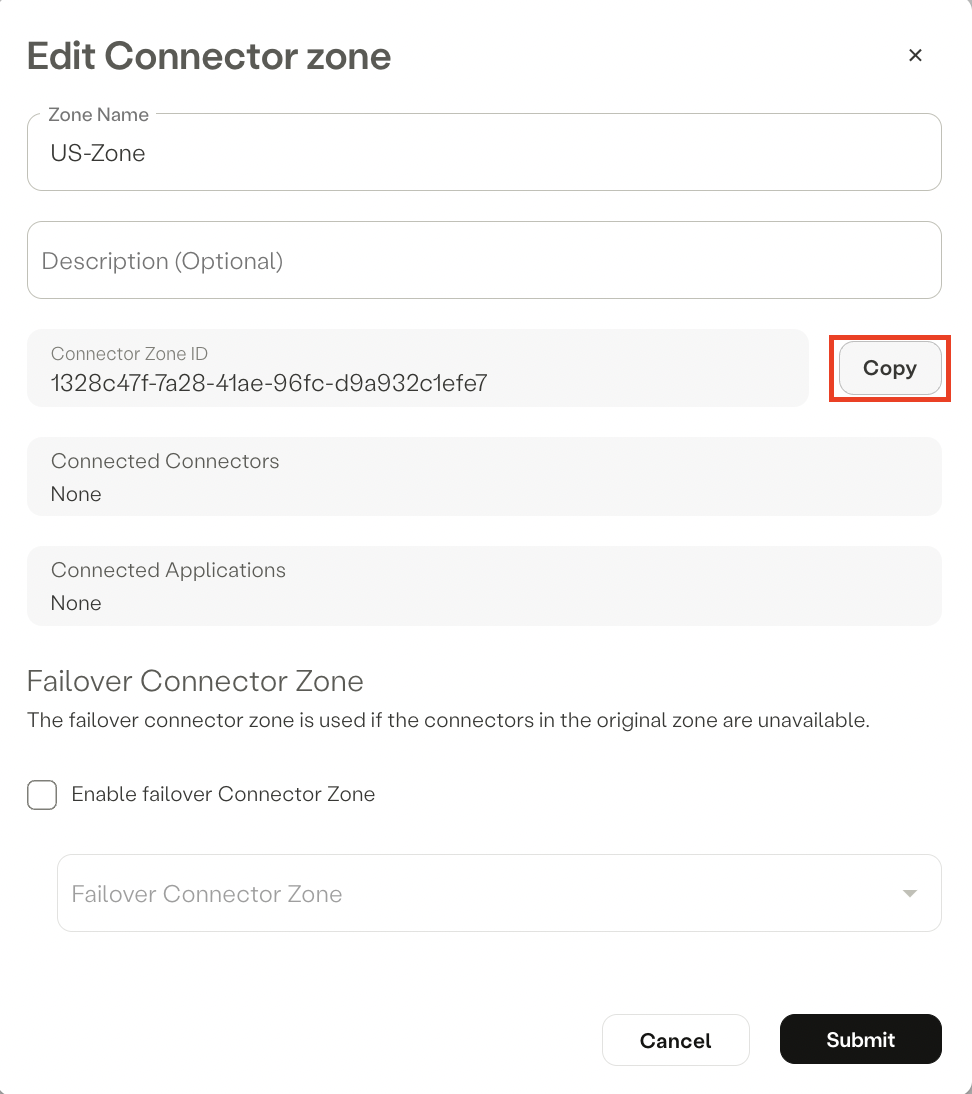
- Locate the connector zone where you want to deploy the new connectors and click on Edit.
- Copy the Connector Zone ID by clicking on the Copy button, and put it as CONNECTOR ZONE ID in the editor.
Step 4: Launching a New Template with the Connector Deployment Script
To deploy a connector machine on your cloud provider, copy the edited script from your editor and paste it in the relevant location when launching a new template. This will trigger the creation of a connector in the management console through the API and execute the installation script.
Before beginning
Ensure you added the API Token, Base URI, and the relevant Connector Zone ID to the script before launching the template.
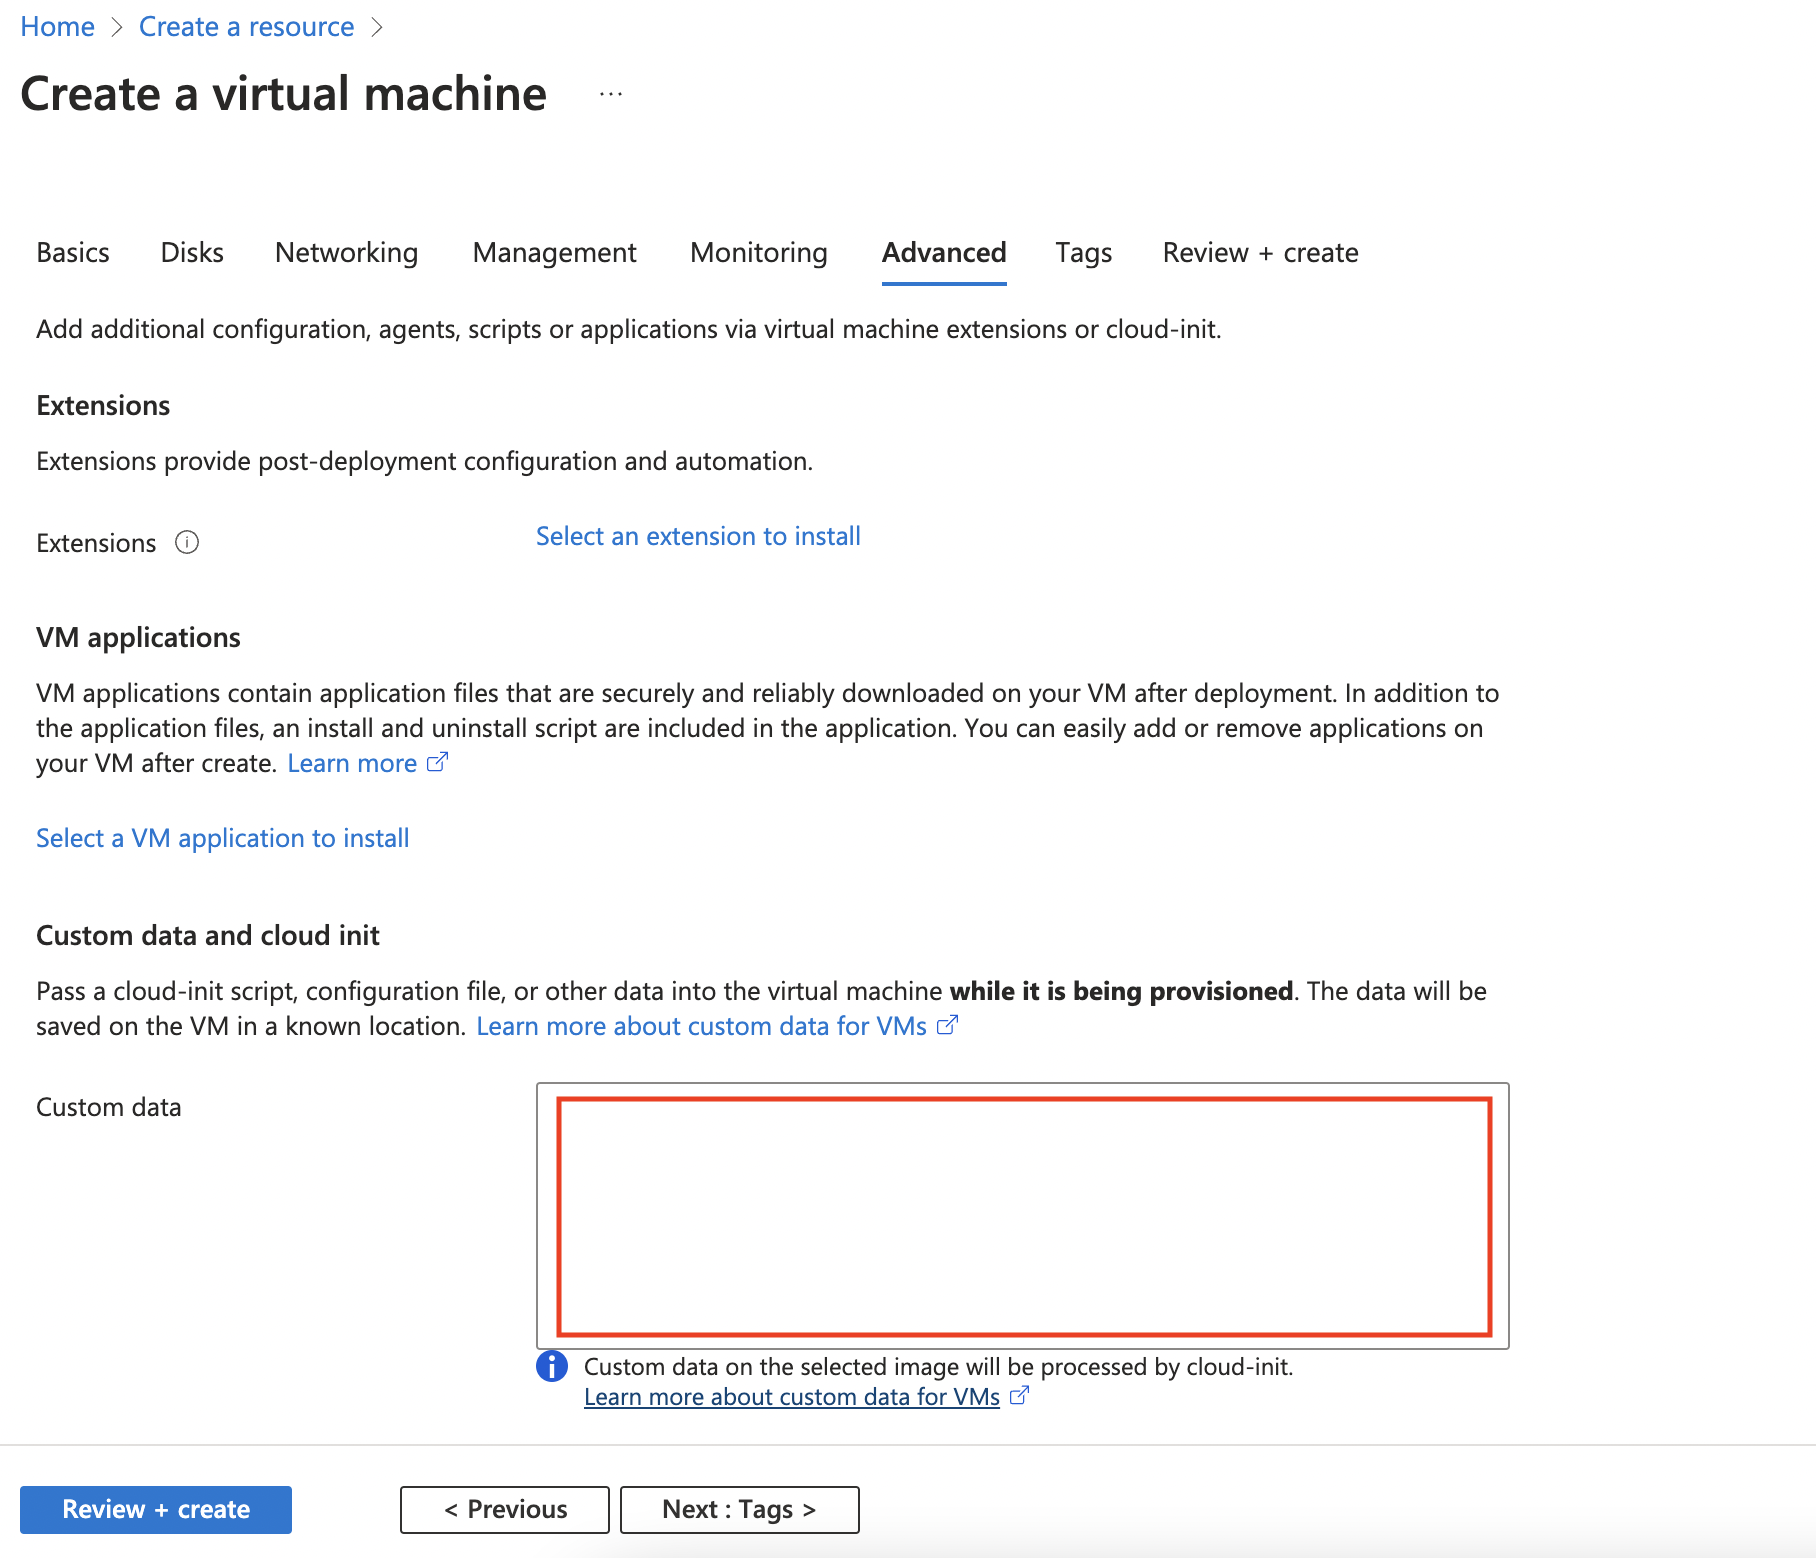
If you're using Azure
To deploy the connector using the script, you can copy the edited script from the editor and paste it into the Custom data field when launching a new template.
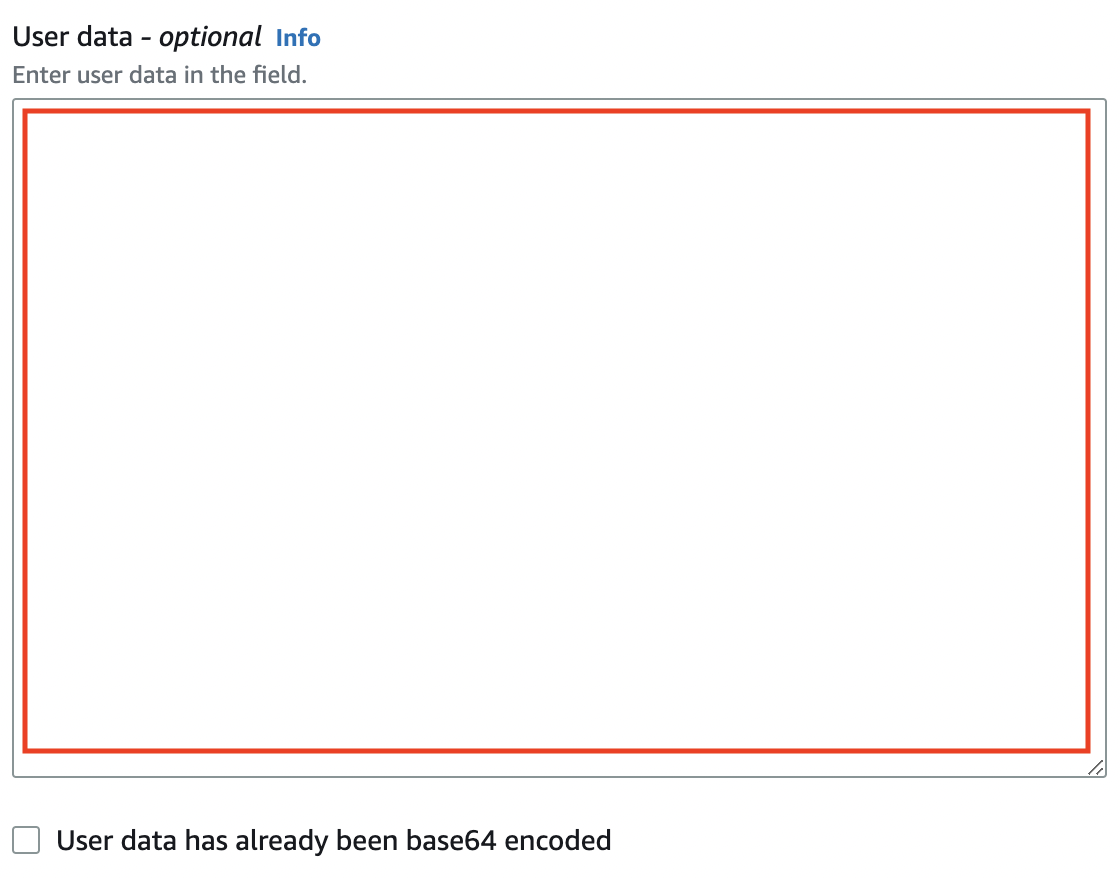
If you're using AWS
To deploy the connector using the script, you can copy the edited script from the editor and paste it into the User data field when launching a new template.
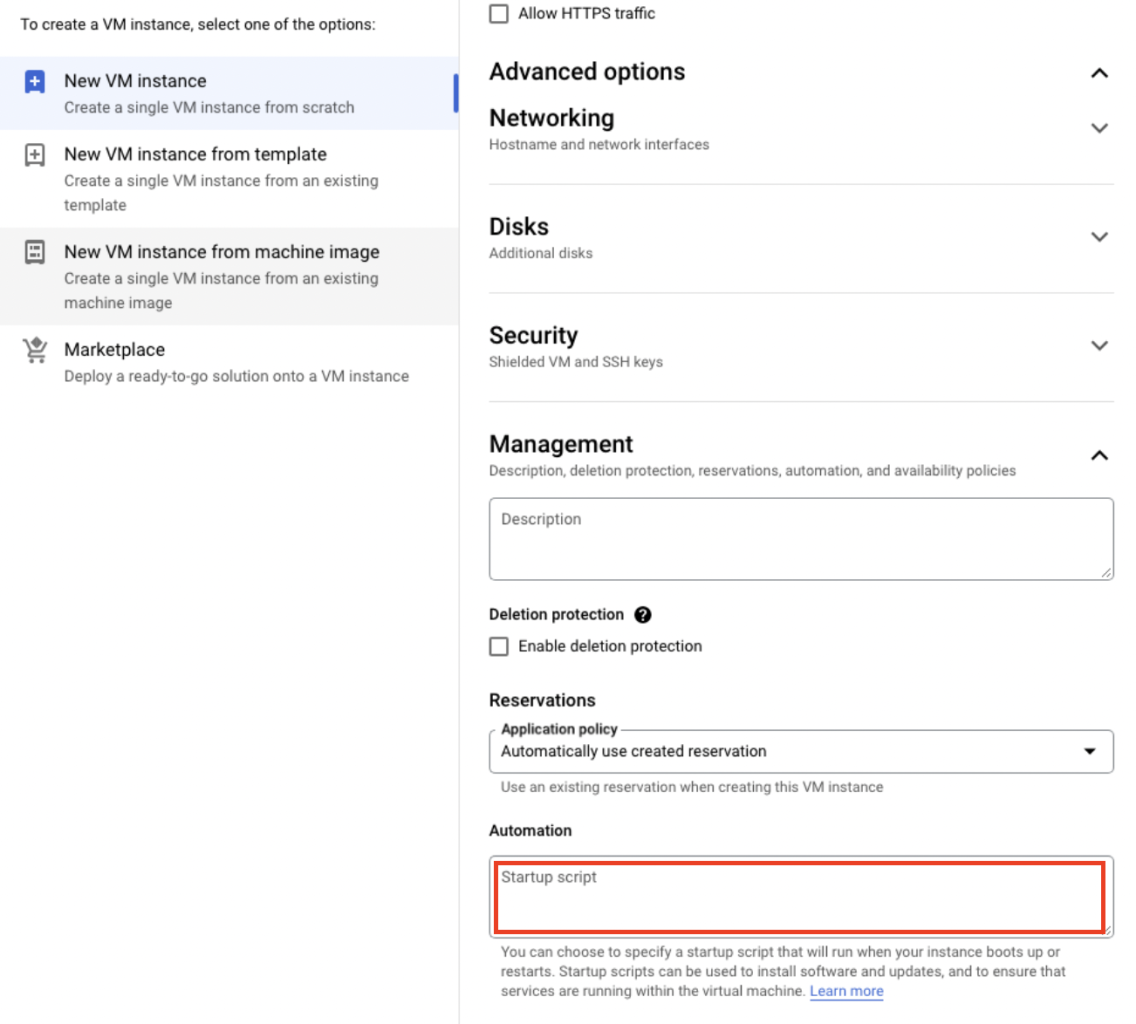
If you're using GCP
To deploy the connector using the script, you can copy the edited script from the editor and paste it into the Automation field when launching a new template.
Note: The startup script on GCP is designed to run on every boot. However, if the connector has already been created, the script will detect this and stop itself from running.
Tracking the Connector Deployment Progress
Please note that your connector deployment may take a few minutes to complete. You can monitor the progress of the deployment by checking the Connectors page in the management console. The connector should appear there shortly after deployment begins, and its status should change to Available once the deployment is complete.
To check the output of the script as it runs, you can run the following command in the machine:
sudo tail -f /var/log/cloud-init-output.log