Azure (Entra) IdP Integration
The Azure Active Directory (Azure AD) is an Identity Provider that maintains and manages identity information while providing authentication services to applications. This article describes how to integrate Azure AD as an IdP in HPE Aruba Networking SSE.
The process of connecting Azure as an IdP in Axis Security is comprised of several steps:
- Begin creating an IdP in HPE Aruba Networking SSE
- Creating an Axis Security application in Azure
- Completing the IdP creation in HPE Aruba Networking SSE
Begin Creating an IdP in HPE Aruba Networking SSE
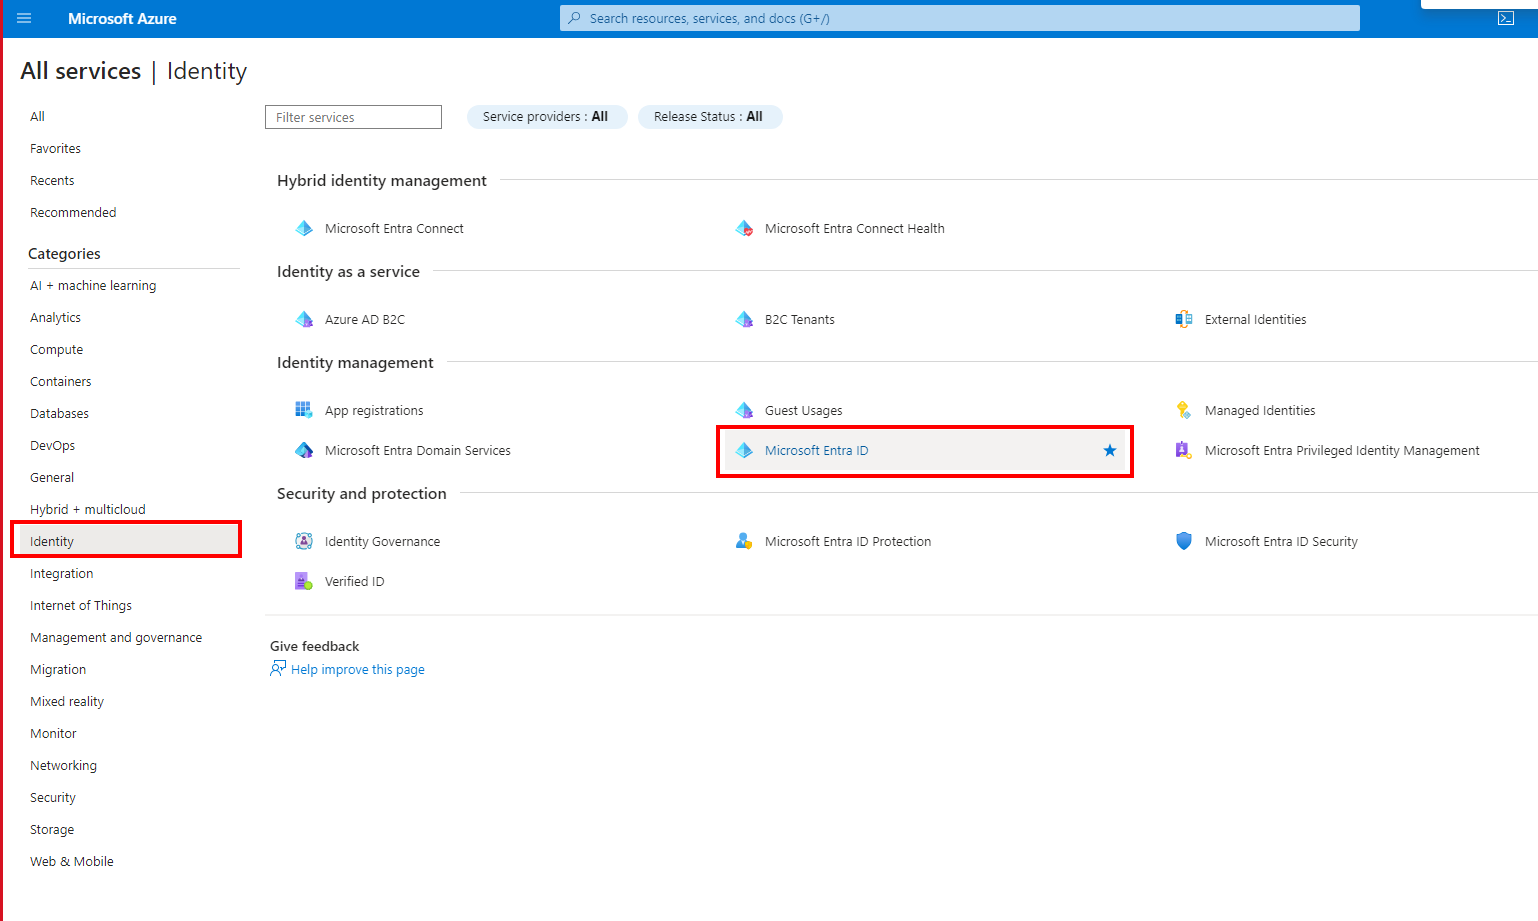
- In the Management Console, go to Settings -> Identity Providers -> New Identity Provider.
- Select Azure AD.

Creating an Azure IdP in the Axis Management Console
- Enter a Name for the IdP.
Creating an HPE Aruba Networking SSE Application in Azure
Microsoft Active Directory has been recently renamed to Microsoft Entra ID.
Step 1: Obtaining the Primary Domain Address
- Go to Identity-> Microsoft Entra ID-> Overview.
Microsoft Entra ID in the Azure Portal
- Copy the Primary domain and paste it in the corresponding field in the Azure IdP form in the Axis Management Console.
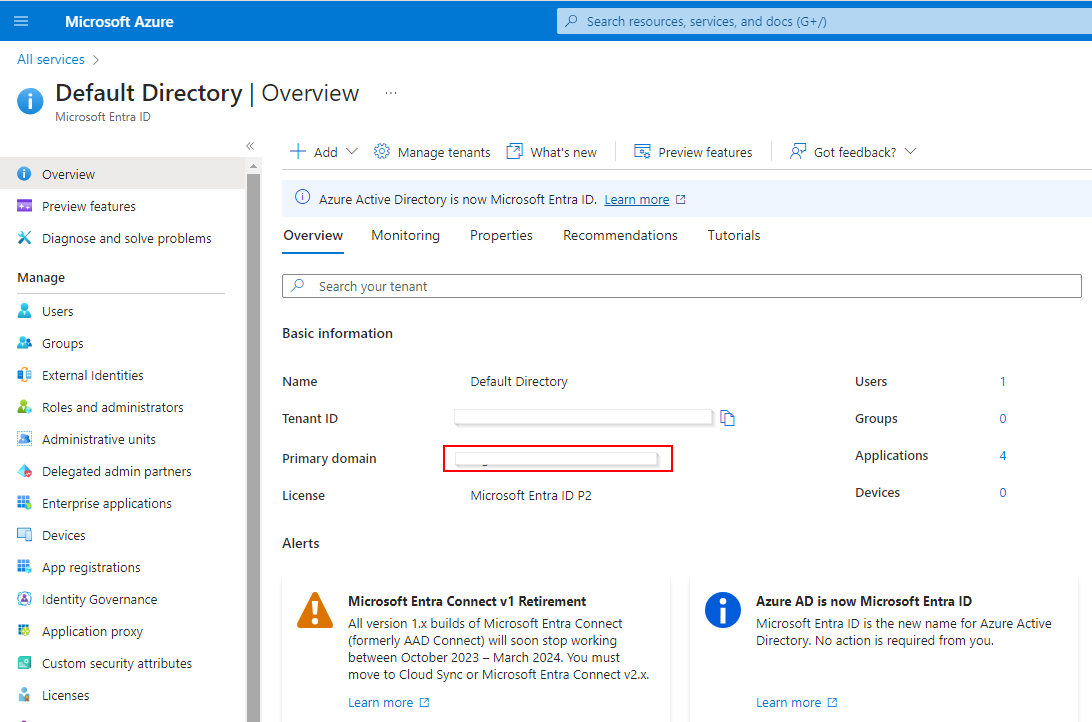
Obtaining Primary Domain from the Microsoft Entra ID in the Azure Portal
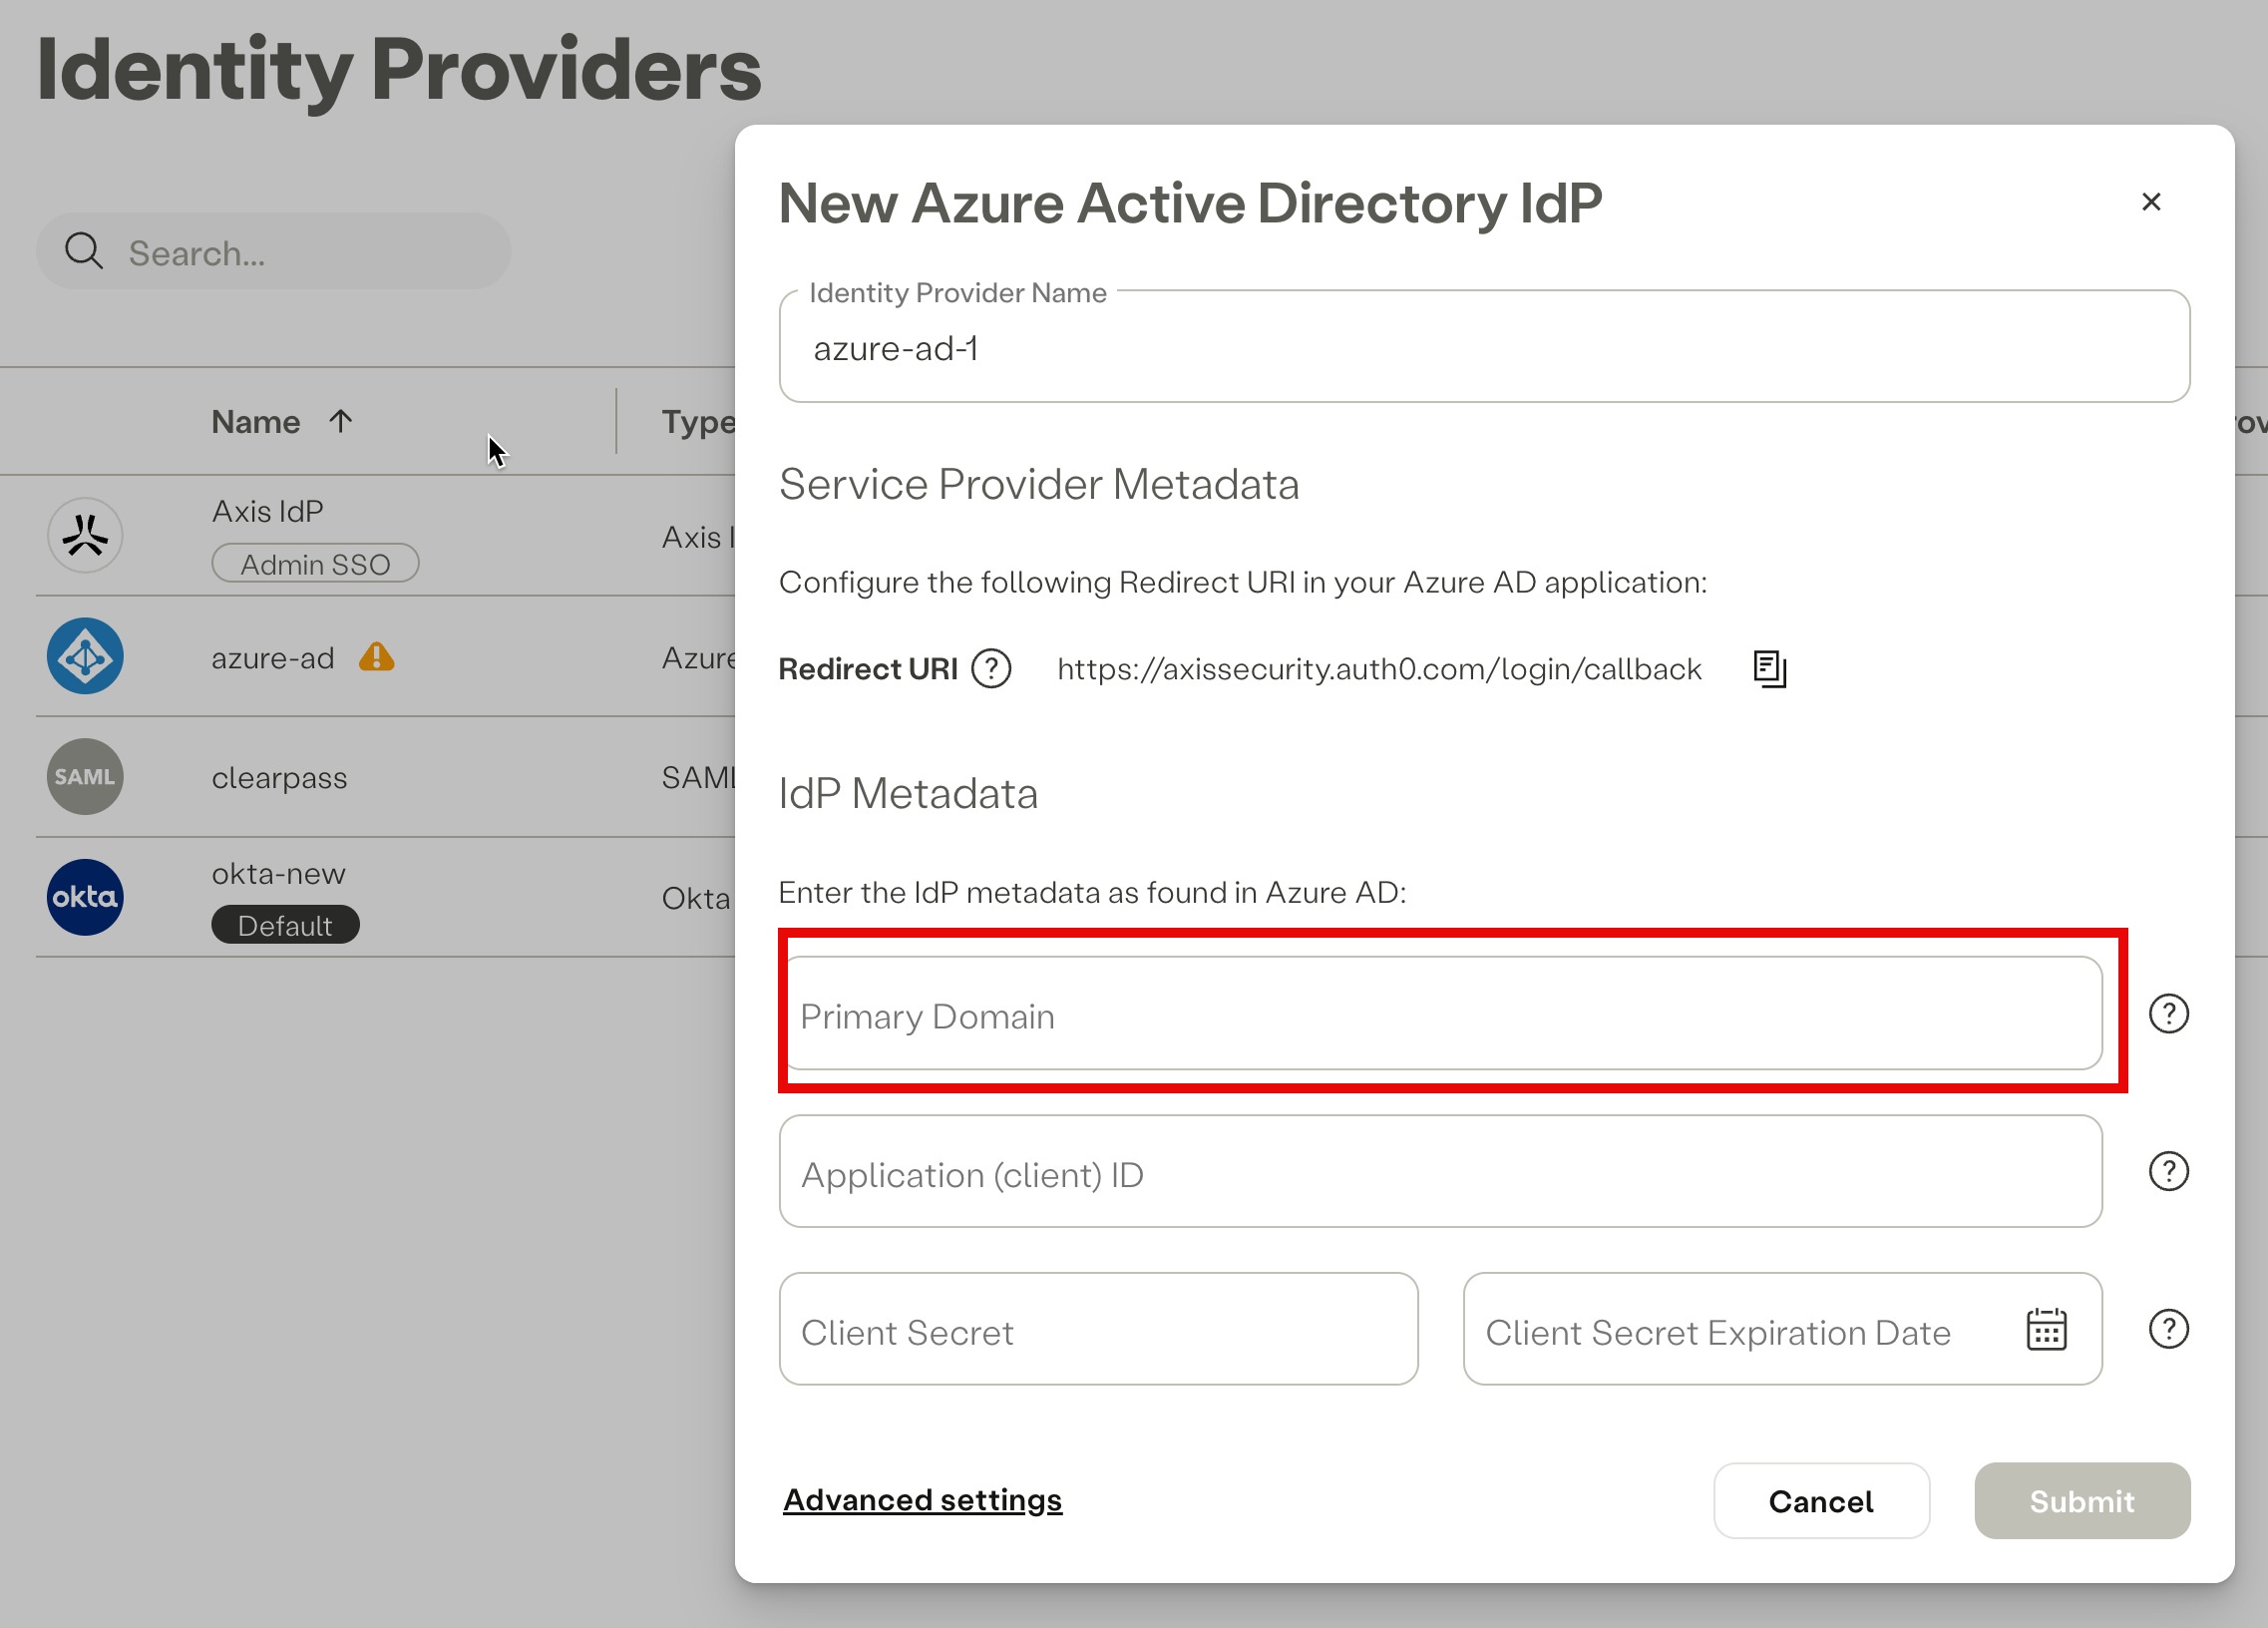
Pasting Primary Domain in the IdP form in the Axis Management Console
Step 2: Creating an HPE Aruba Networking SSE Application in Azure
In the Microsoft Entra ID menu in the Manage section, Select Enterprise Applications.

- Click on Create your own application.
- Enter a name for the application.
- Select Integrate any other application you don't find in the gallery (Non-gallery).
- Click Create.
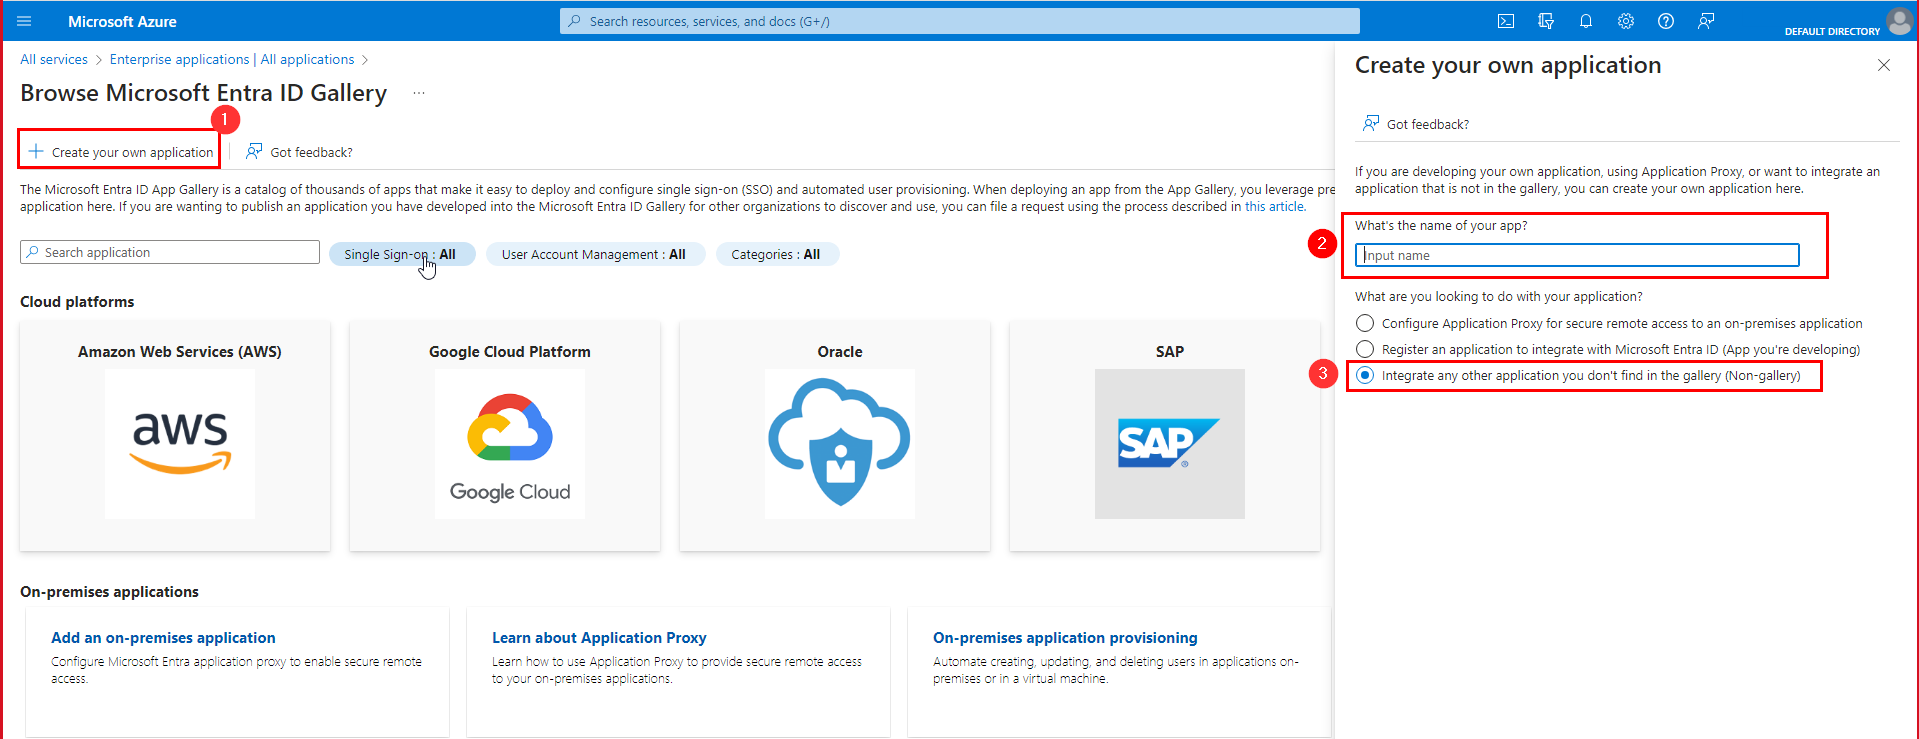
Creating an Axis application in the Azure Portal
Step 3: Setting Up the Application
- In the menu on the left select App registrations.
- Select the All application tab.
- Select the application you've been created in step 2 (e.g. AXIS OAuth).
You can enter the application's name in the search field.
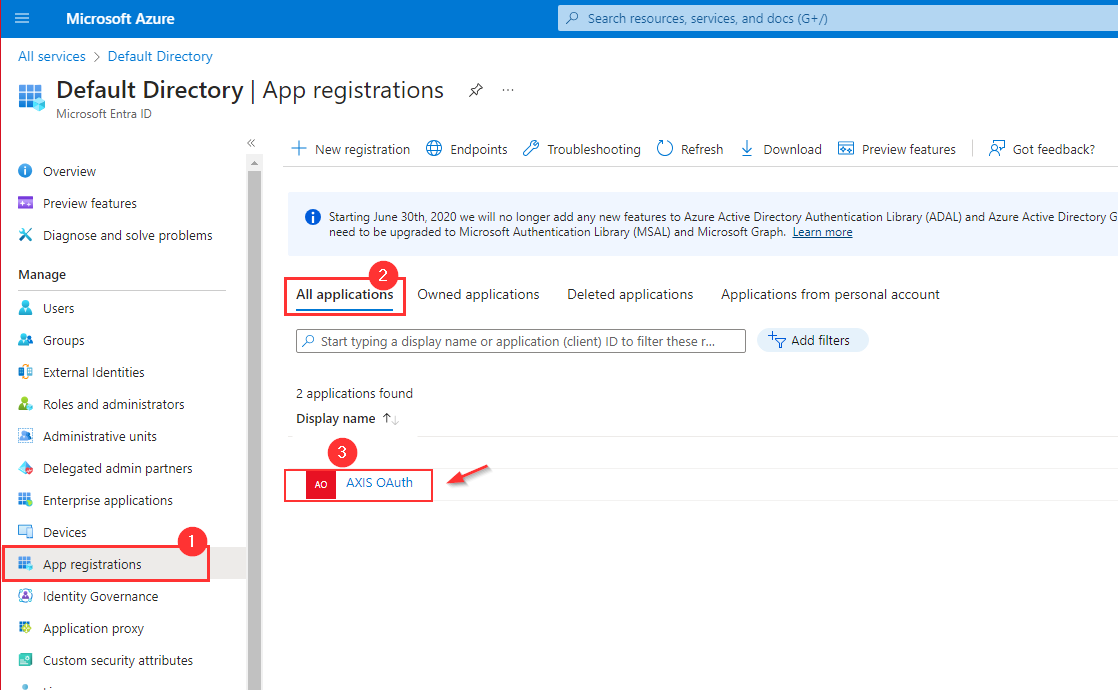
Selecting the Axis application in Azure Portal
- Copy the Application (client) ID and paste it into the IdP Metadata section in the Azure IdP form the Axis Management Console.

Copying Application (client) ID from the application's overview page in the Azure Portal
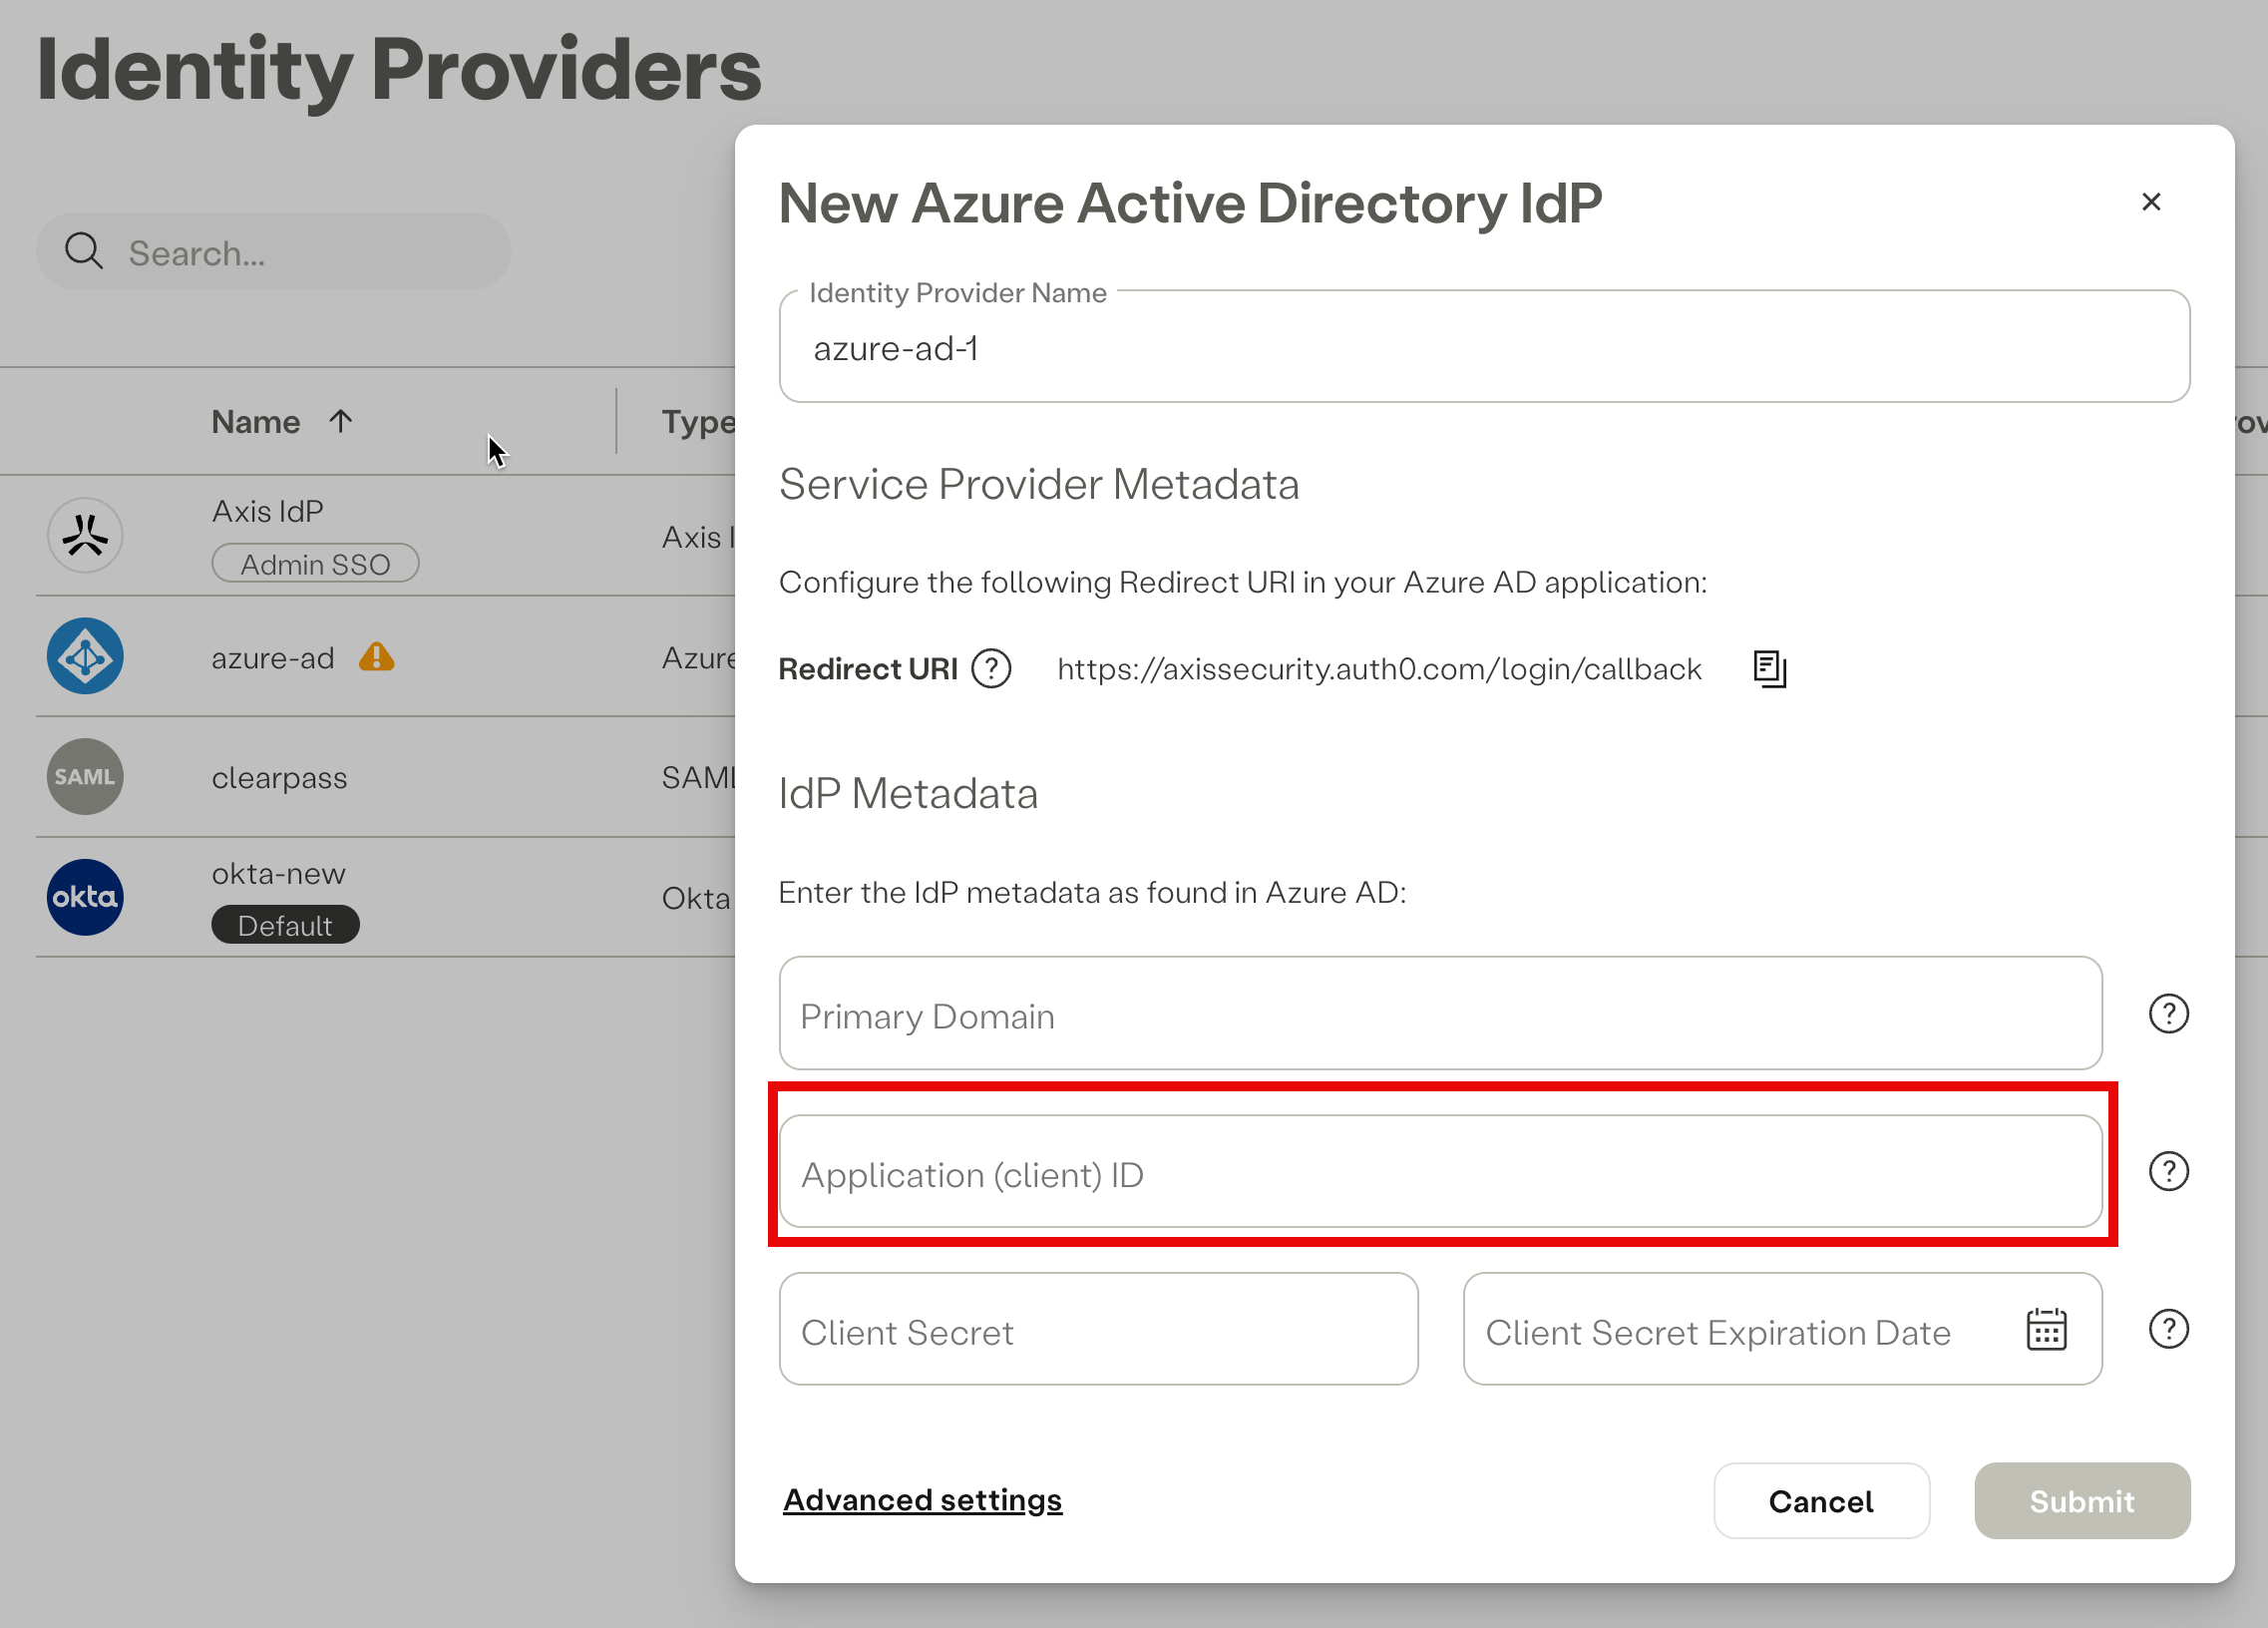
Pasting the Application (client) ID in the IdP form in the Axis Management Console
Step 4: Setting Up Authentication
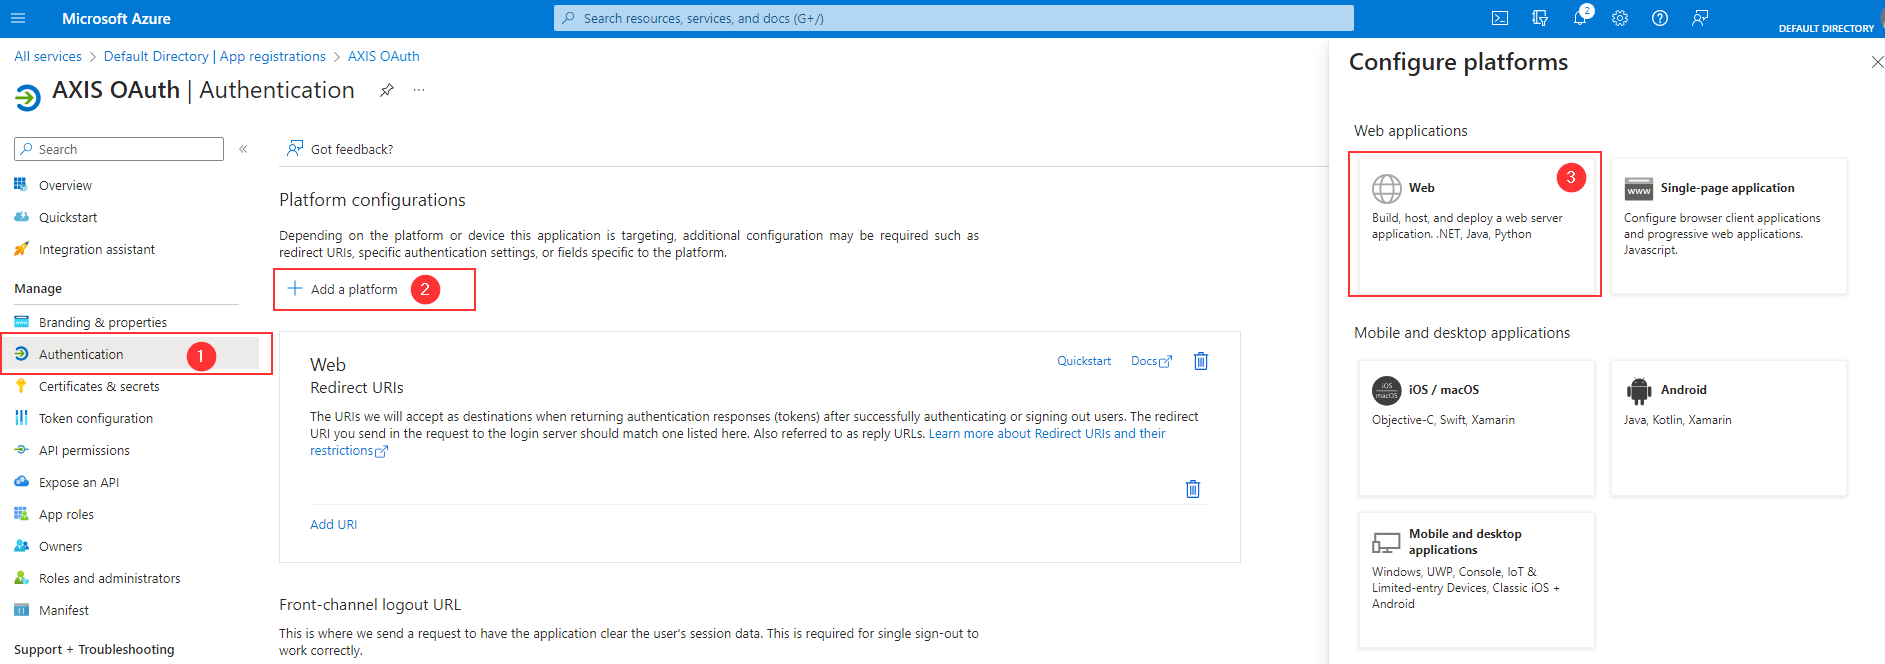
- Select Authentication from the menu on the left.
- Click Add a platform.
- Select Web option in the menu on the right.
- Copy the Redirect URI from the Azure IdP form in the Axis Management Console.
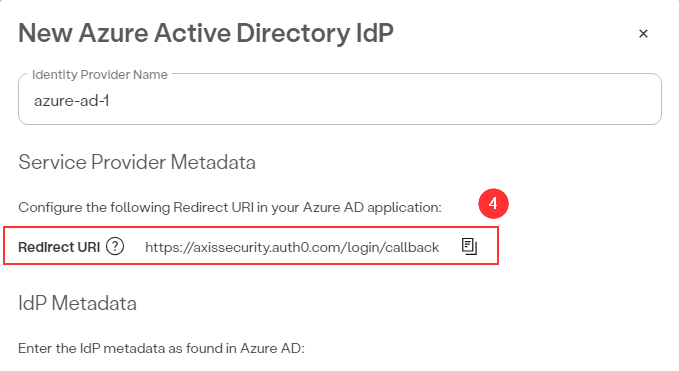
Copying the Redirect URI from the Azure IdP form in the Axis Management Console
- Paste the Redirect URI in the Configure Web dialog in the Azure Portal.
- Click on Configure.
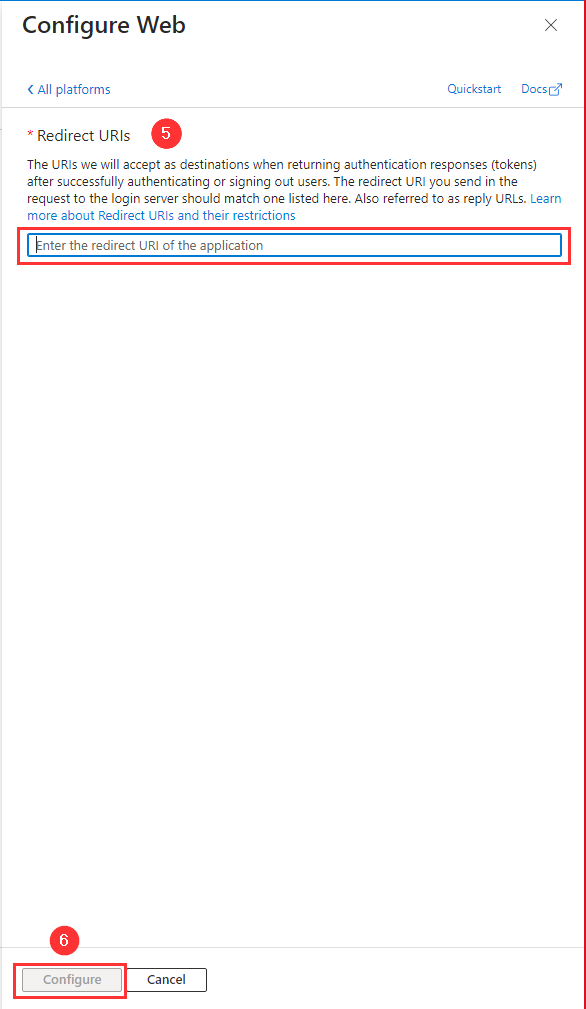
Pasting the Redirect URI in the Configure Web dialog in the Azure Portal
Step 5: Certificates and Secrets
- In the main menu, navigate to Certificates & secrets.
- Select Client Secrets tab.
- Click on New Client Secret.
- Add a description and select expiration.
- Click on Add.

Creating a new client secret in the Axis application in Azure Portal
- Copy the generated Value and Expires and paste it into the IdP Metadata section in the Azure IdP form in the Axis Management Console. Then click on Ok.
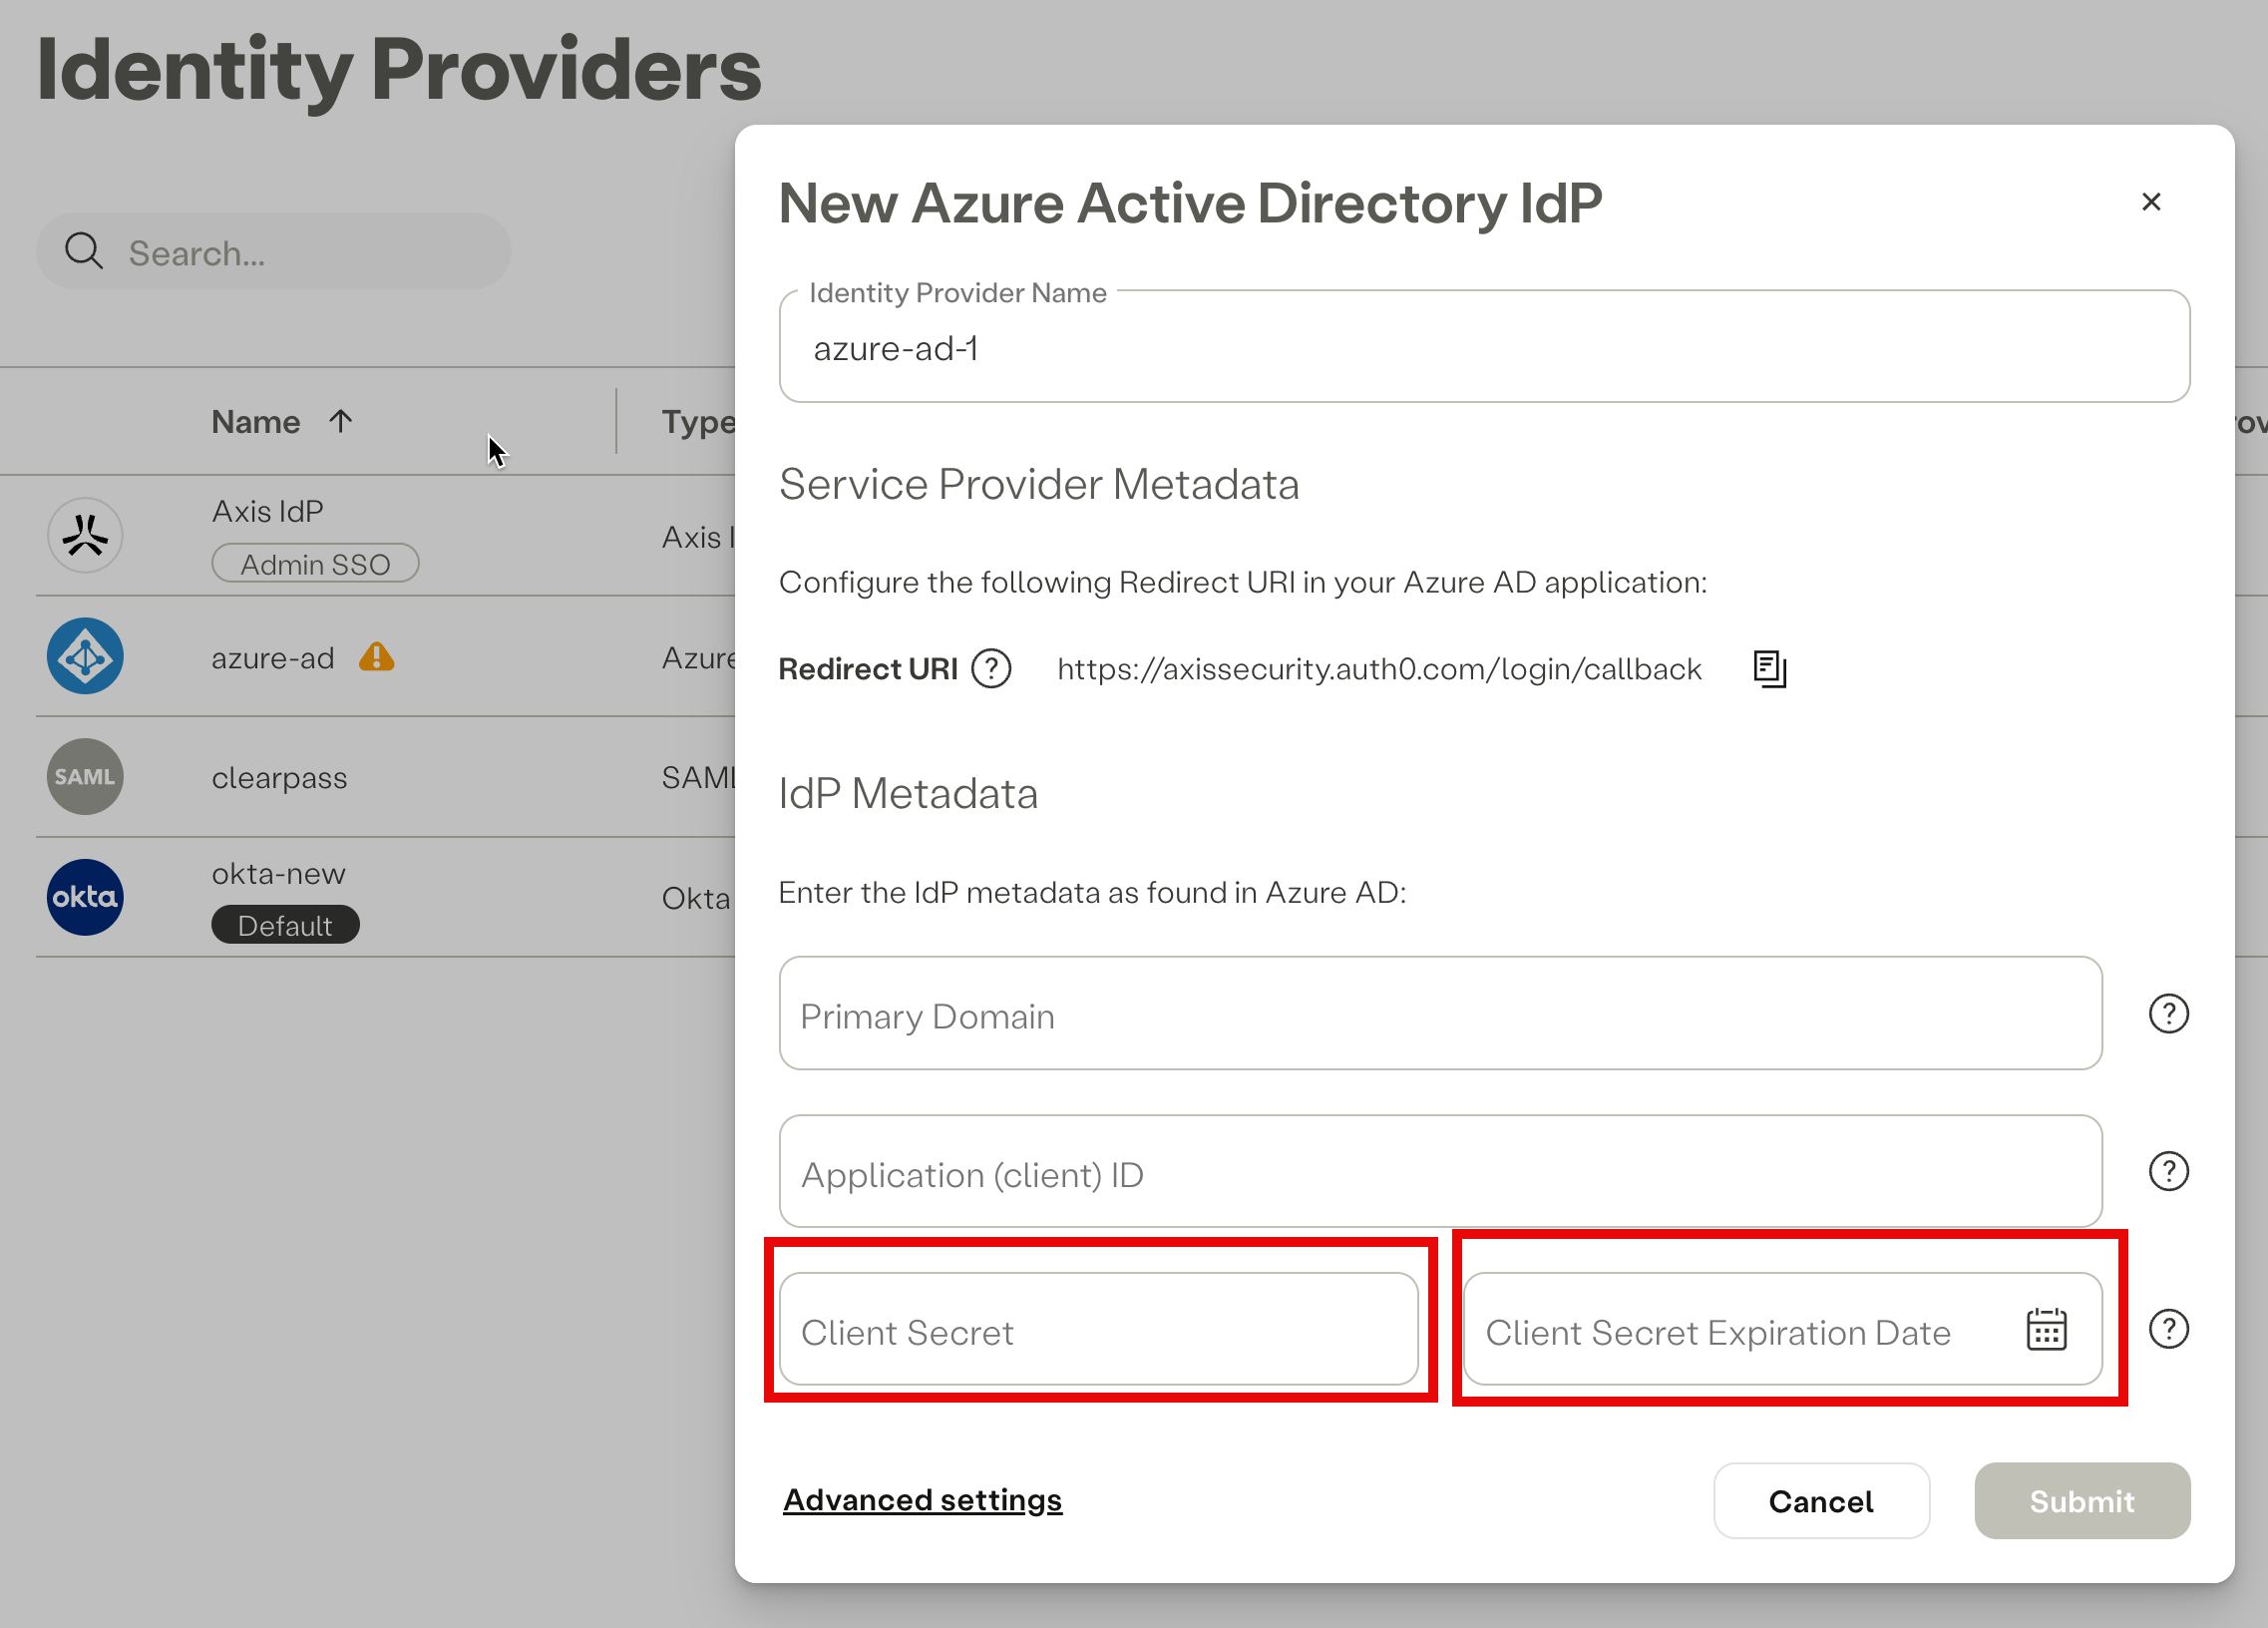
Pasting the Client Secret value and Client Secret Expiration Date in the Azure IdP form in the Axis Management Console
Note
- If you do not input the Client Secret Expiration Date, it will automatically default to the current date.
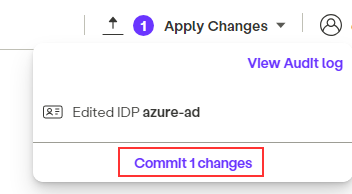
- Click on Commit Changes in the Axis Management Console.
Step 6: API Permissions
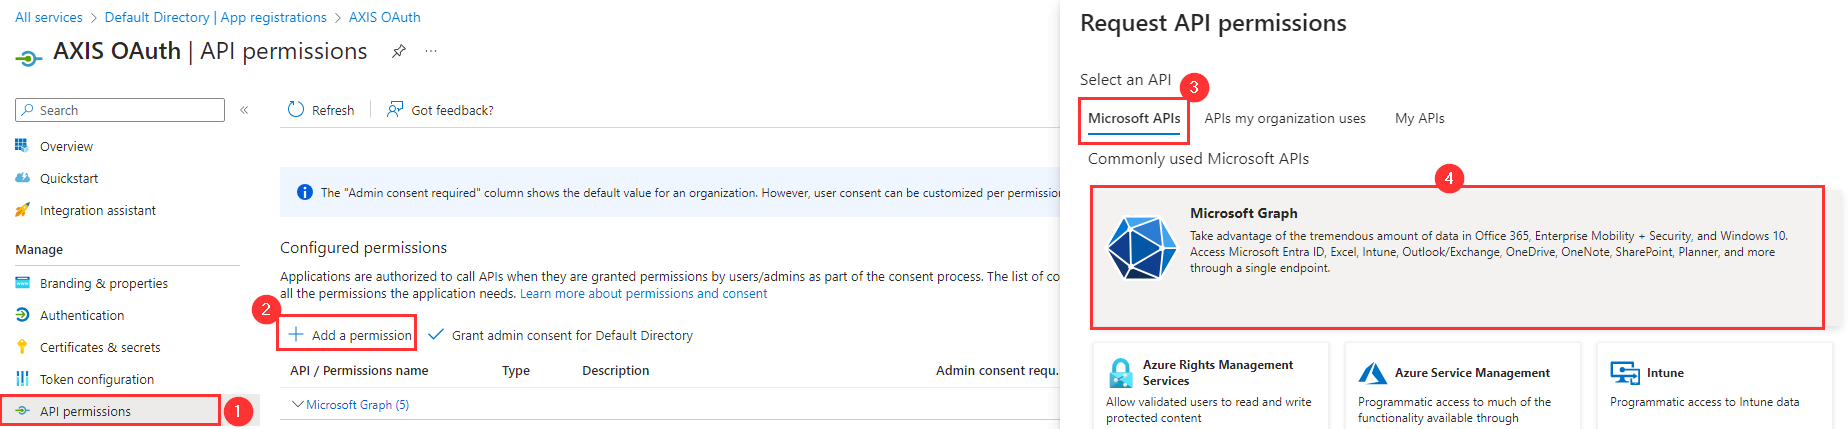
- In the main menu, go to API Permissions.
- Click Add Permission.
- Select the Microsoft APIs tab in the right side bar.
- Select the Microsoft Graph option.
- Click Delegated Permissions.
- Check the following permissions (Assist the filter to find it faster):
- Directory.Read.All (Type: Delegated)
- User.Read (Type: Delegated)
- Click Grant admin consent for Axis Security.

- Click Grant admin consent for Axis Security.
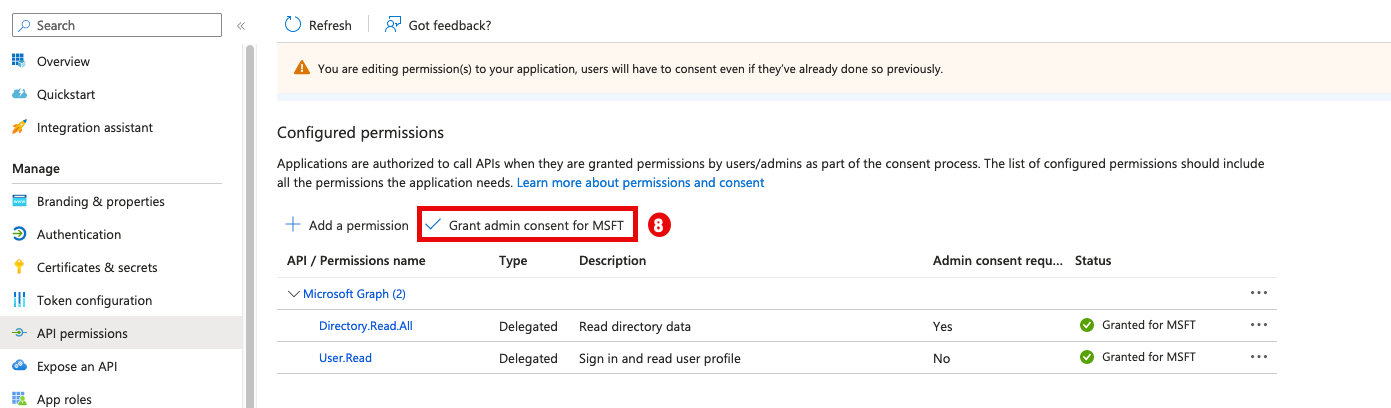
- Click on Yes

Step 7: Test the Azure SSO integration
To test the SSO integration:
- Go to the Portal Address of the Azure IdP you've just created.

- Click Log In.

- Successful login indicates a successful integration.
Provision users and groups to your Azure IdP
Use the following guide to provision users and groups via SCIM.
Updated 5 months ago