JumpCloud IdP Integration
This article will guide you through the steps for integrating JumpCloud as an Identity Provider using SAML.
Step 1: Creating an JumpCloud IdP integration in the Management Console
- In the Axis Management Console, go to Settings -> Identity Providers.
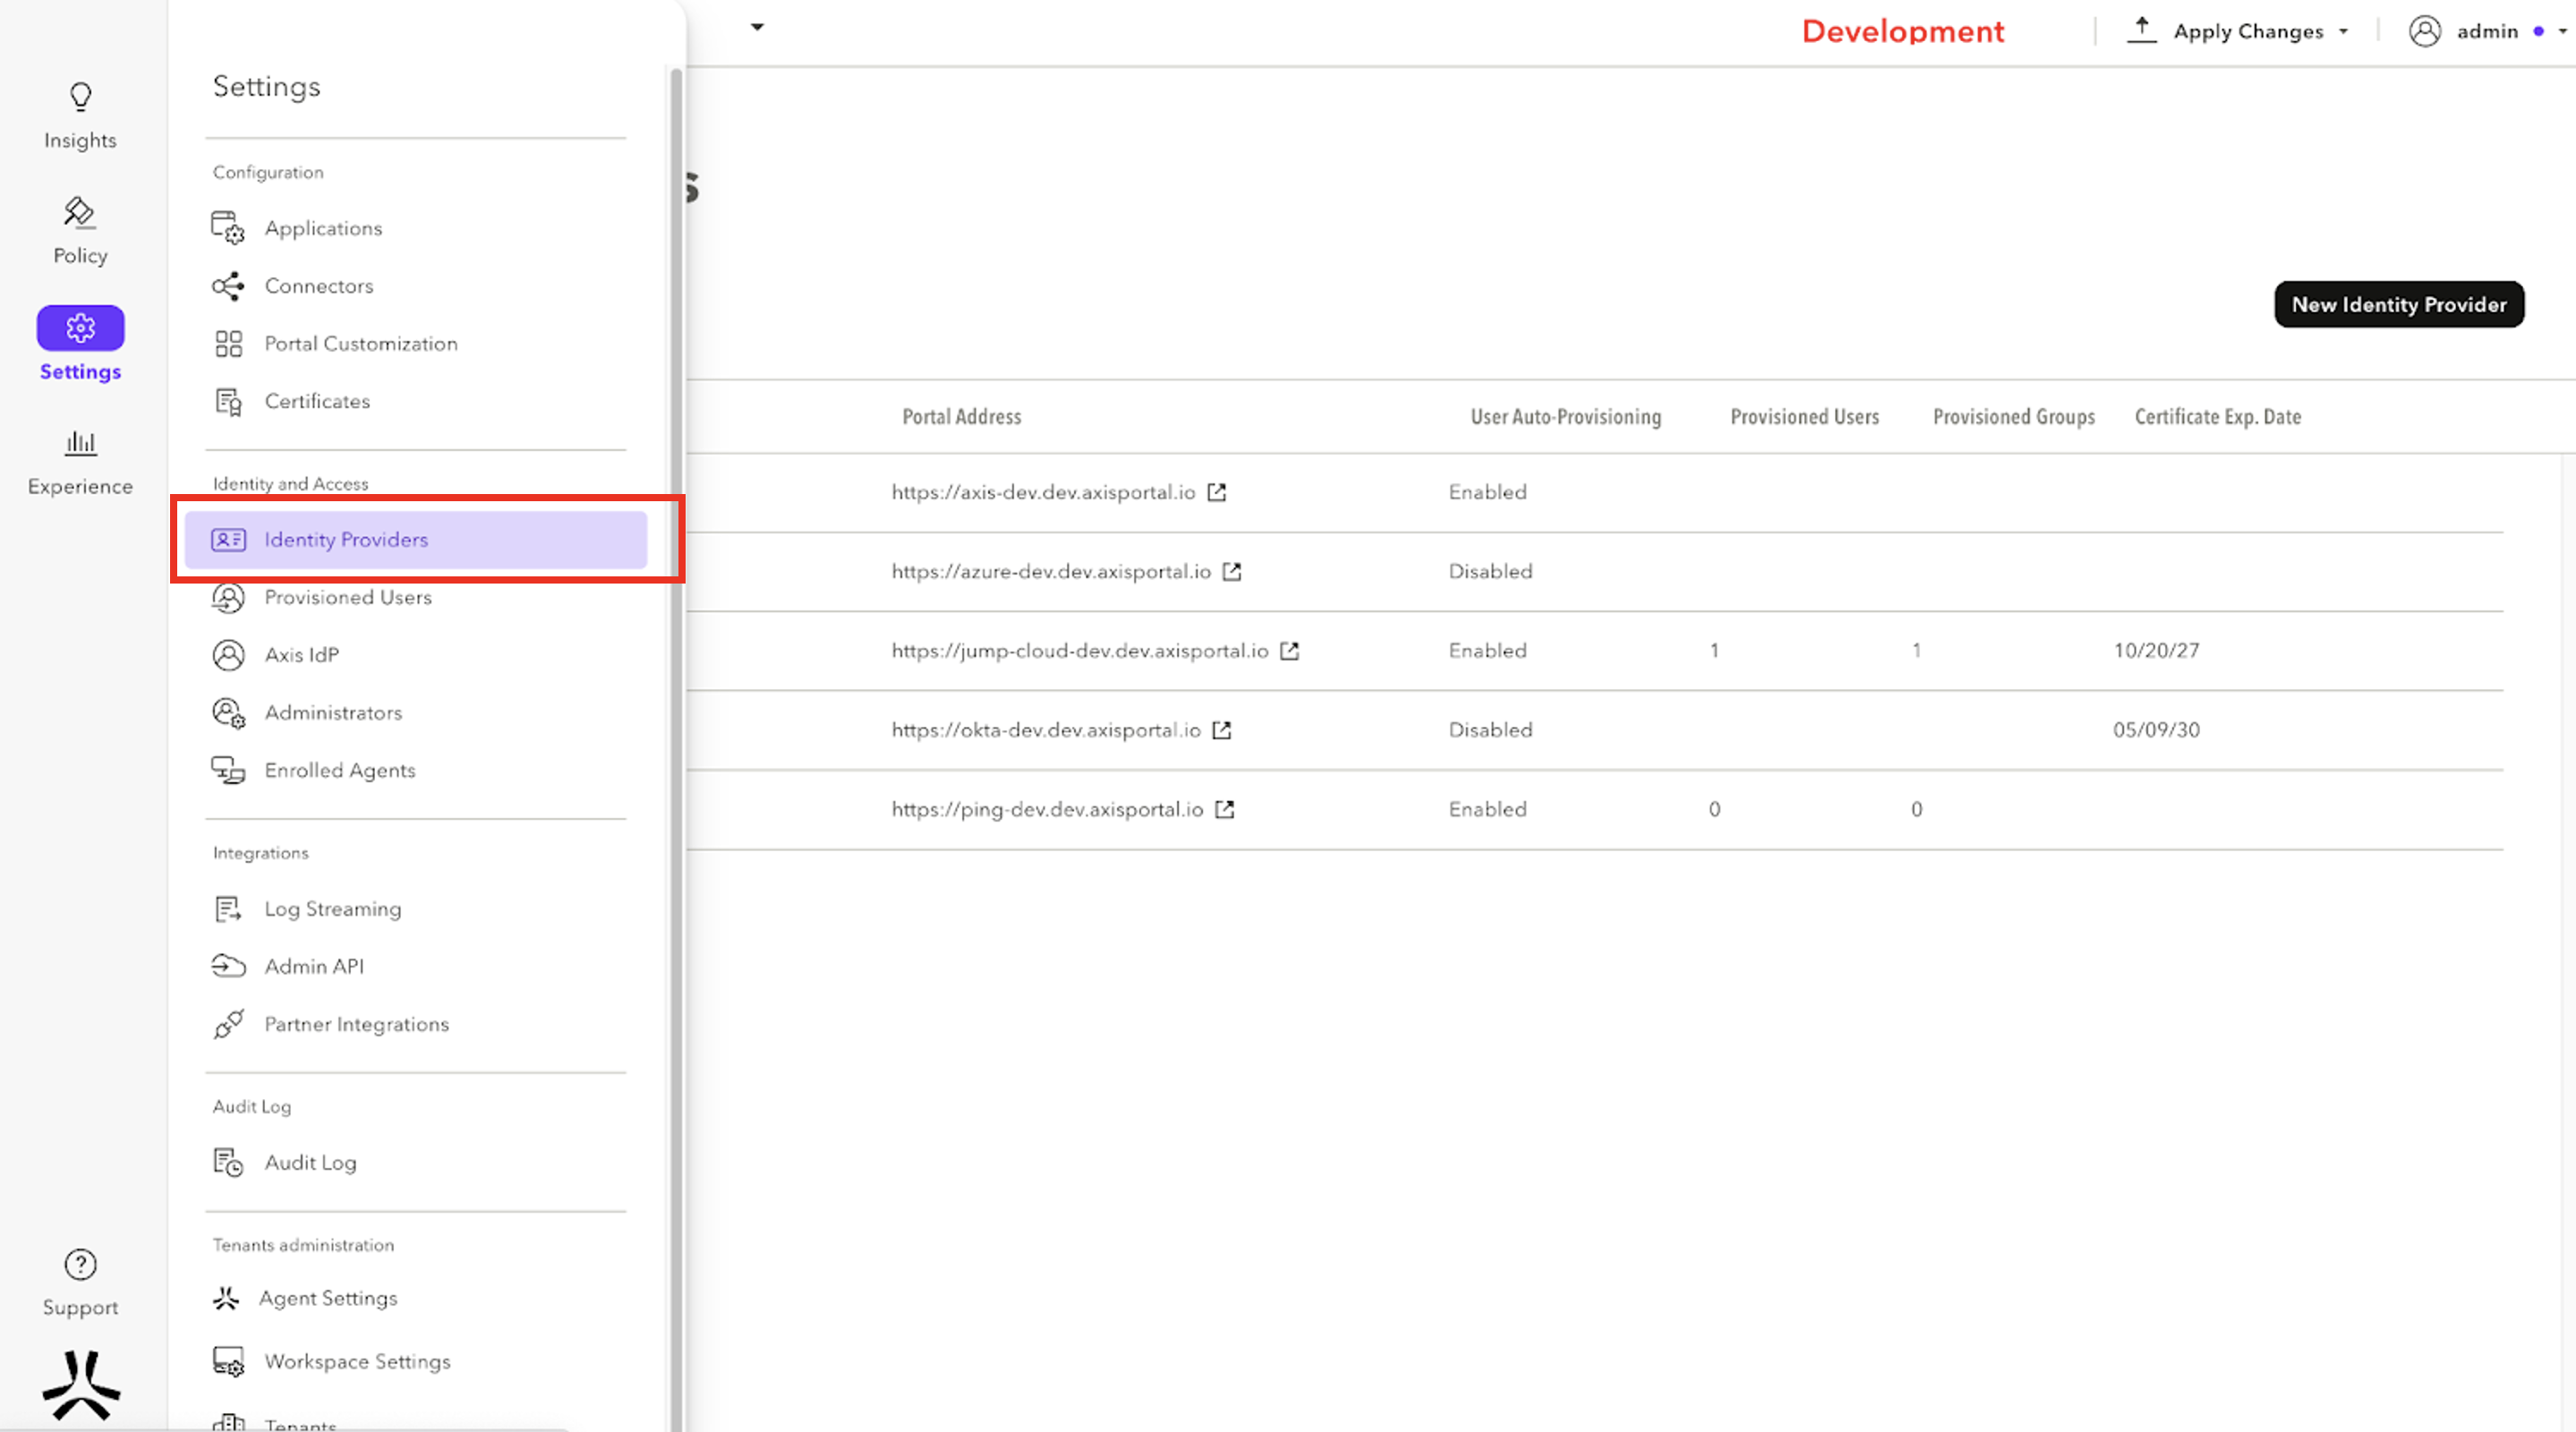
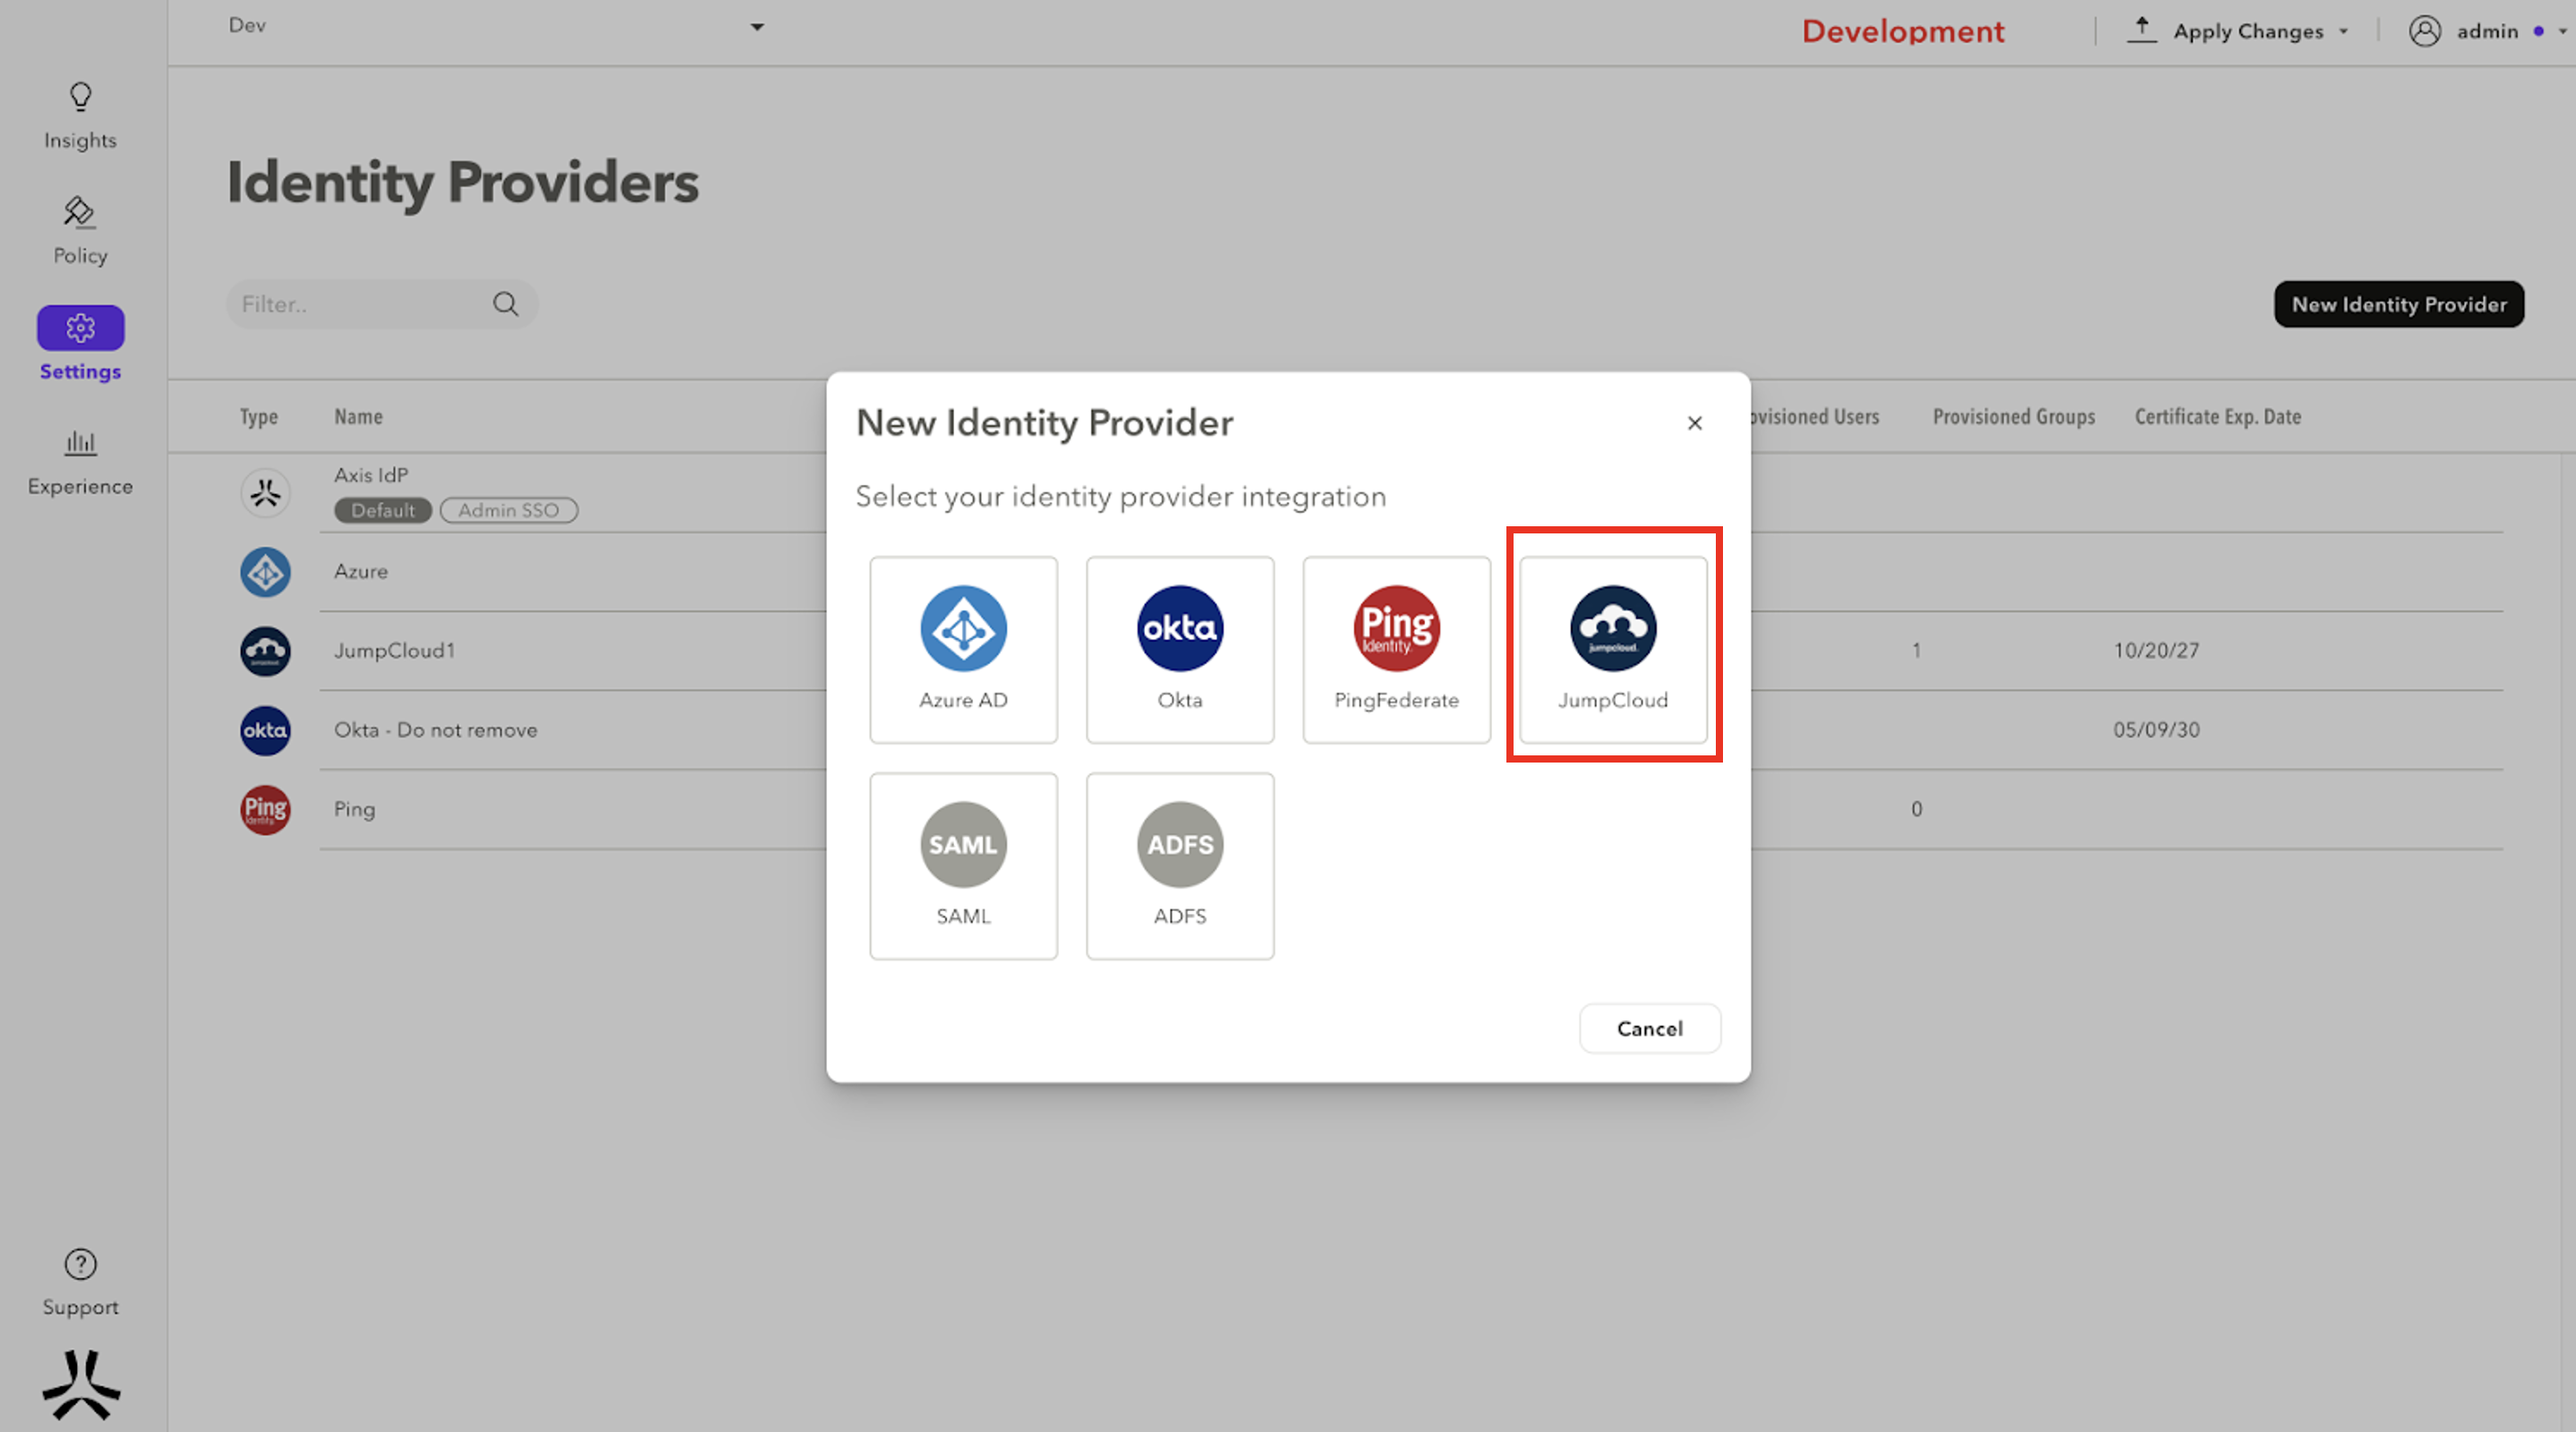
- Click on Add Identity Provider and select JumpCloud.
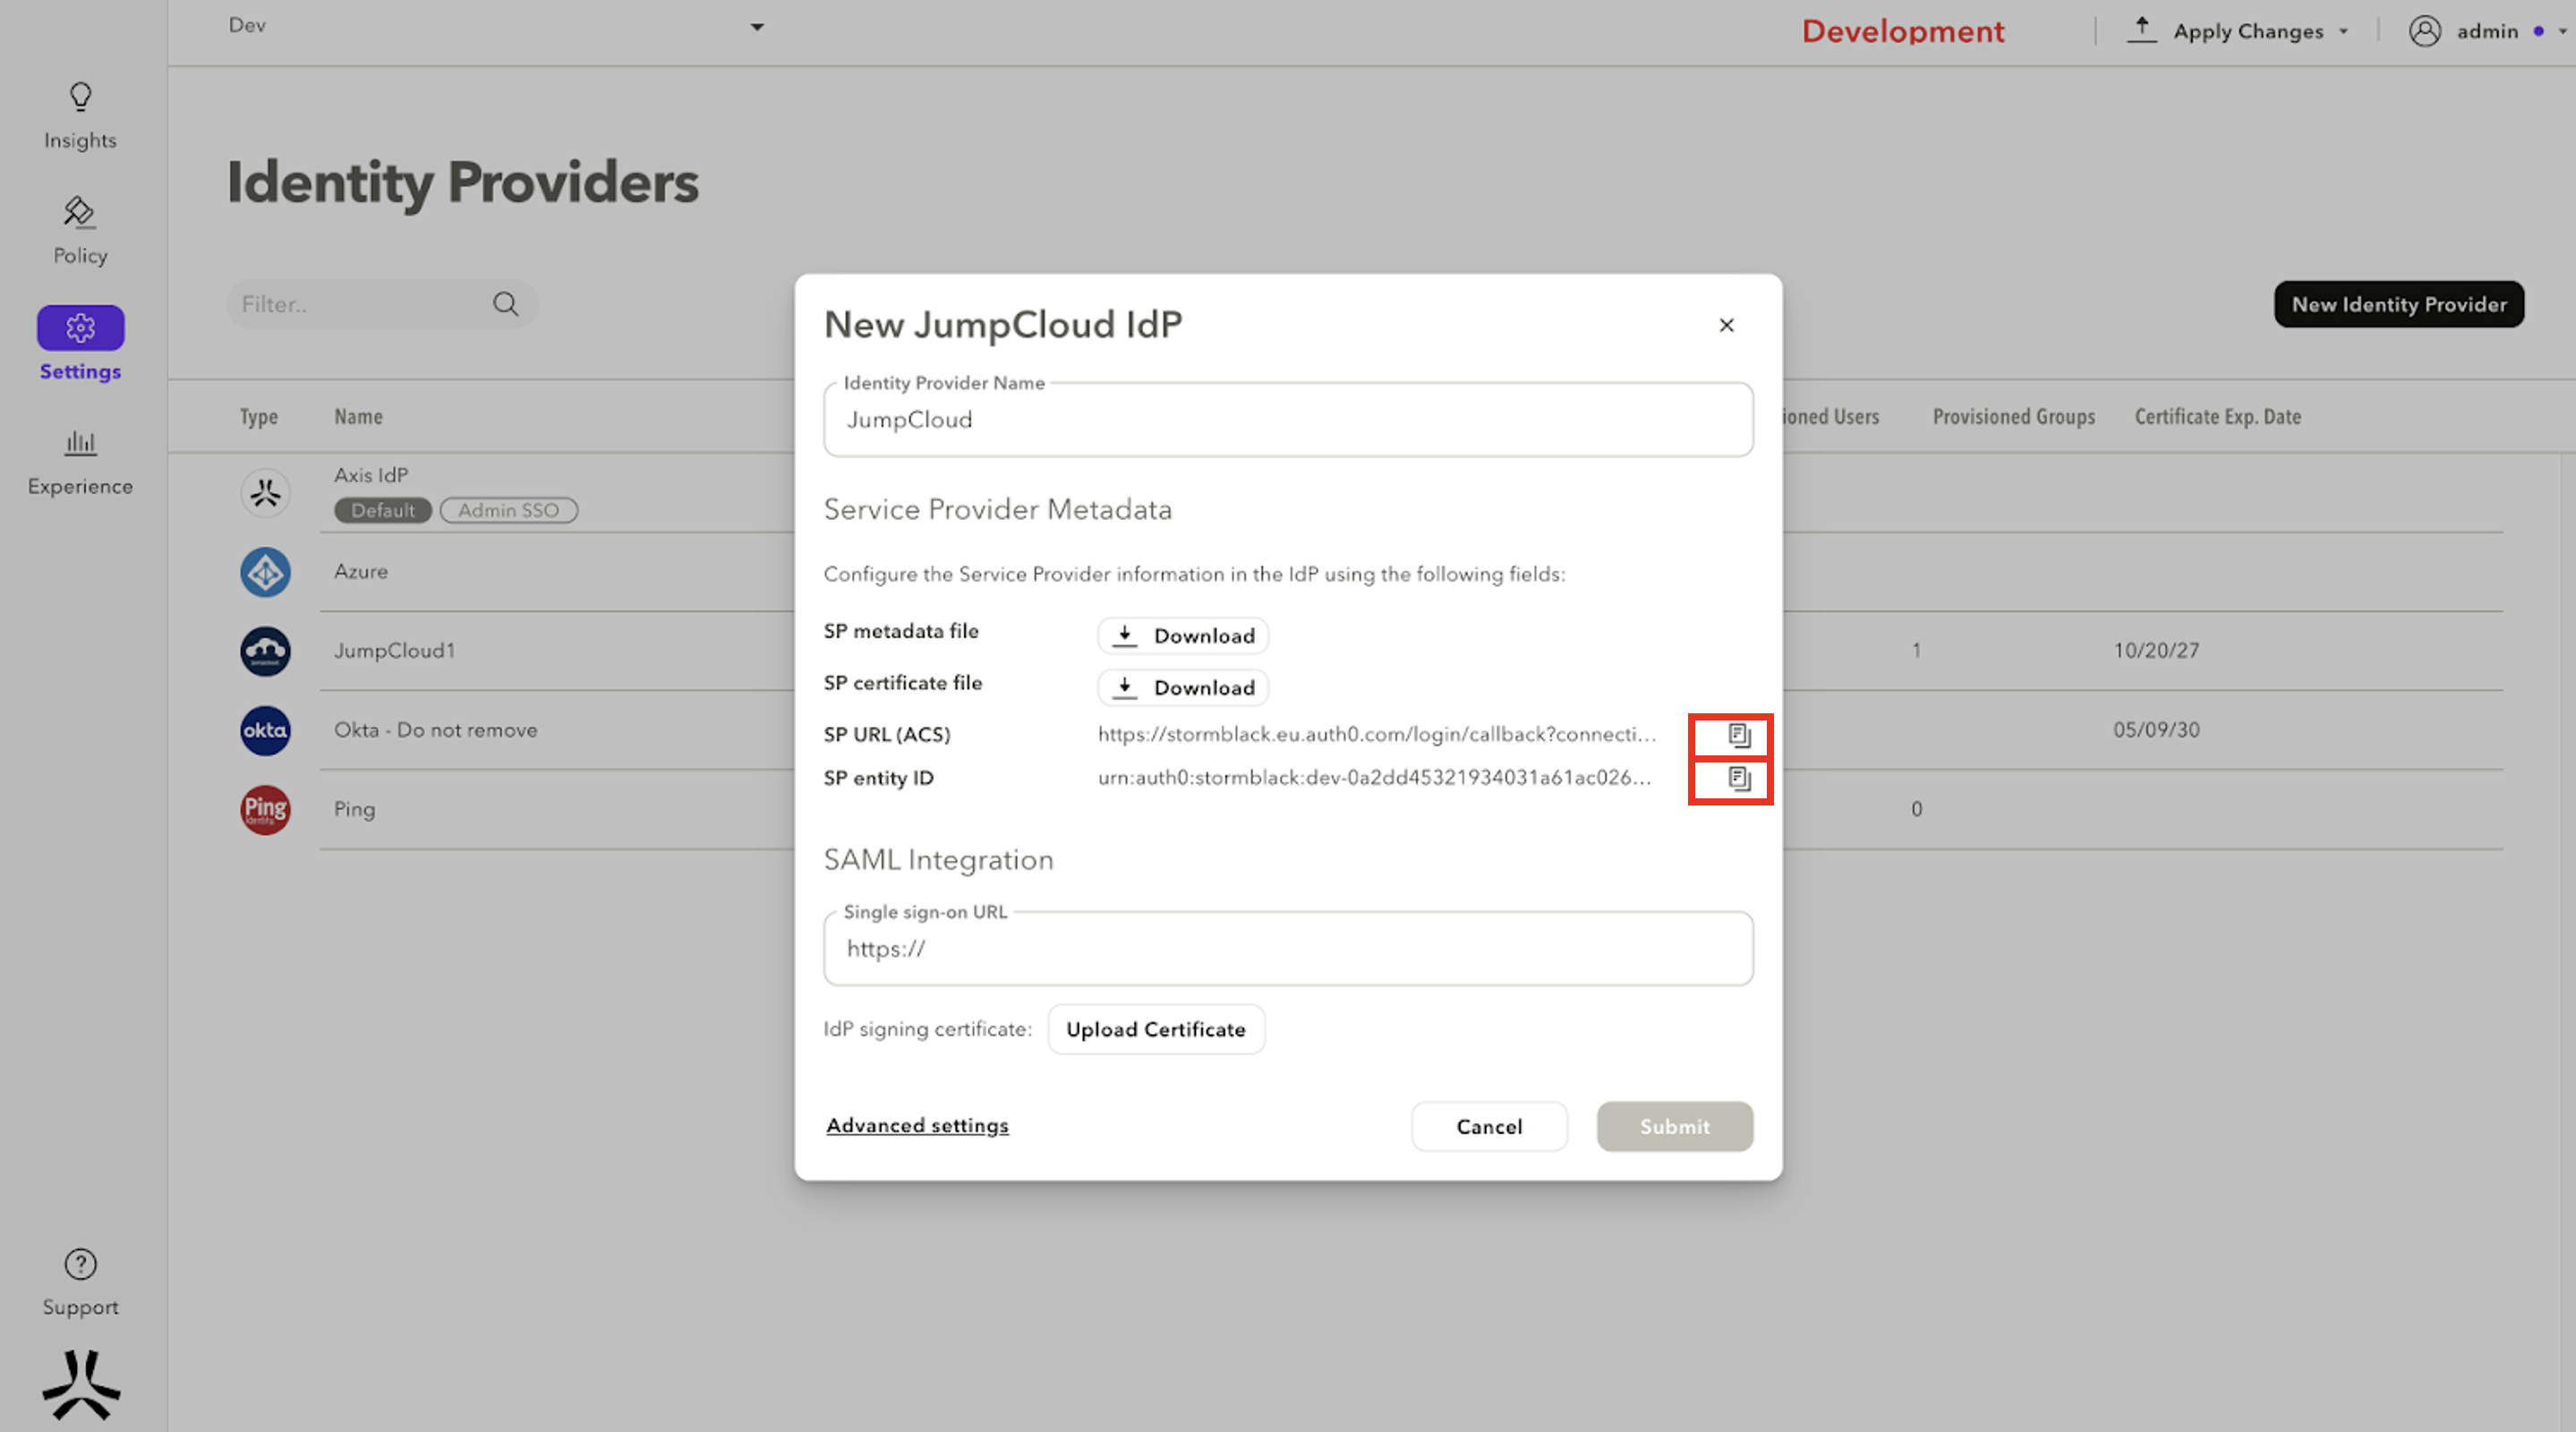
- Enter a Name for the IdP. Copy the SP Application ID and the SCIM Provisioning Token, and paste them into a text editor. You will need these details for Step 2: Configuring SSO connector in JumpCloud.
Please keep the dialog open since we will need to fill in information from the JumpCloud Console
Step 2: Configuring SSO connector in JumpCloud
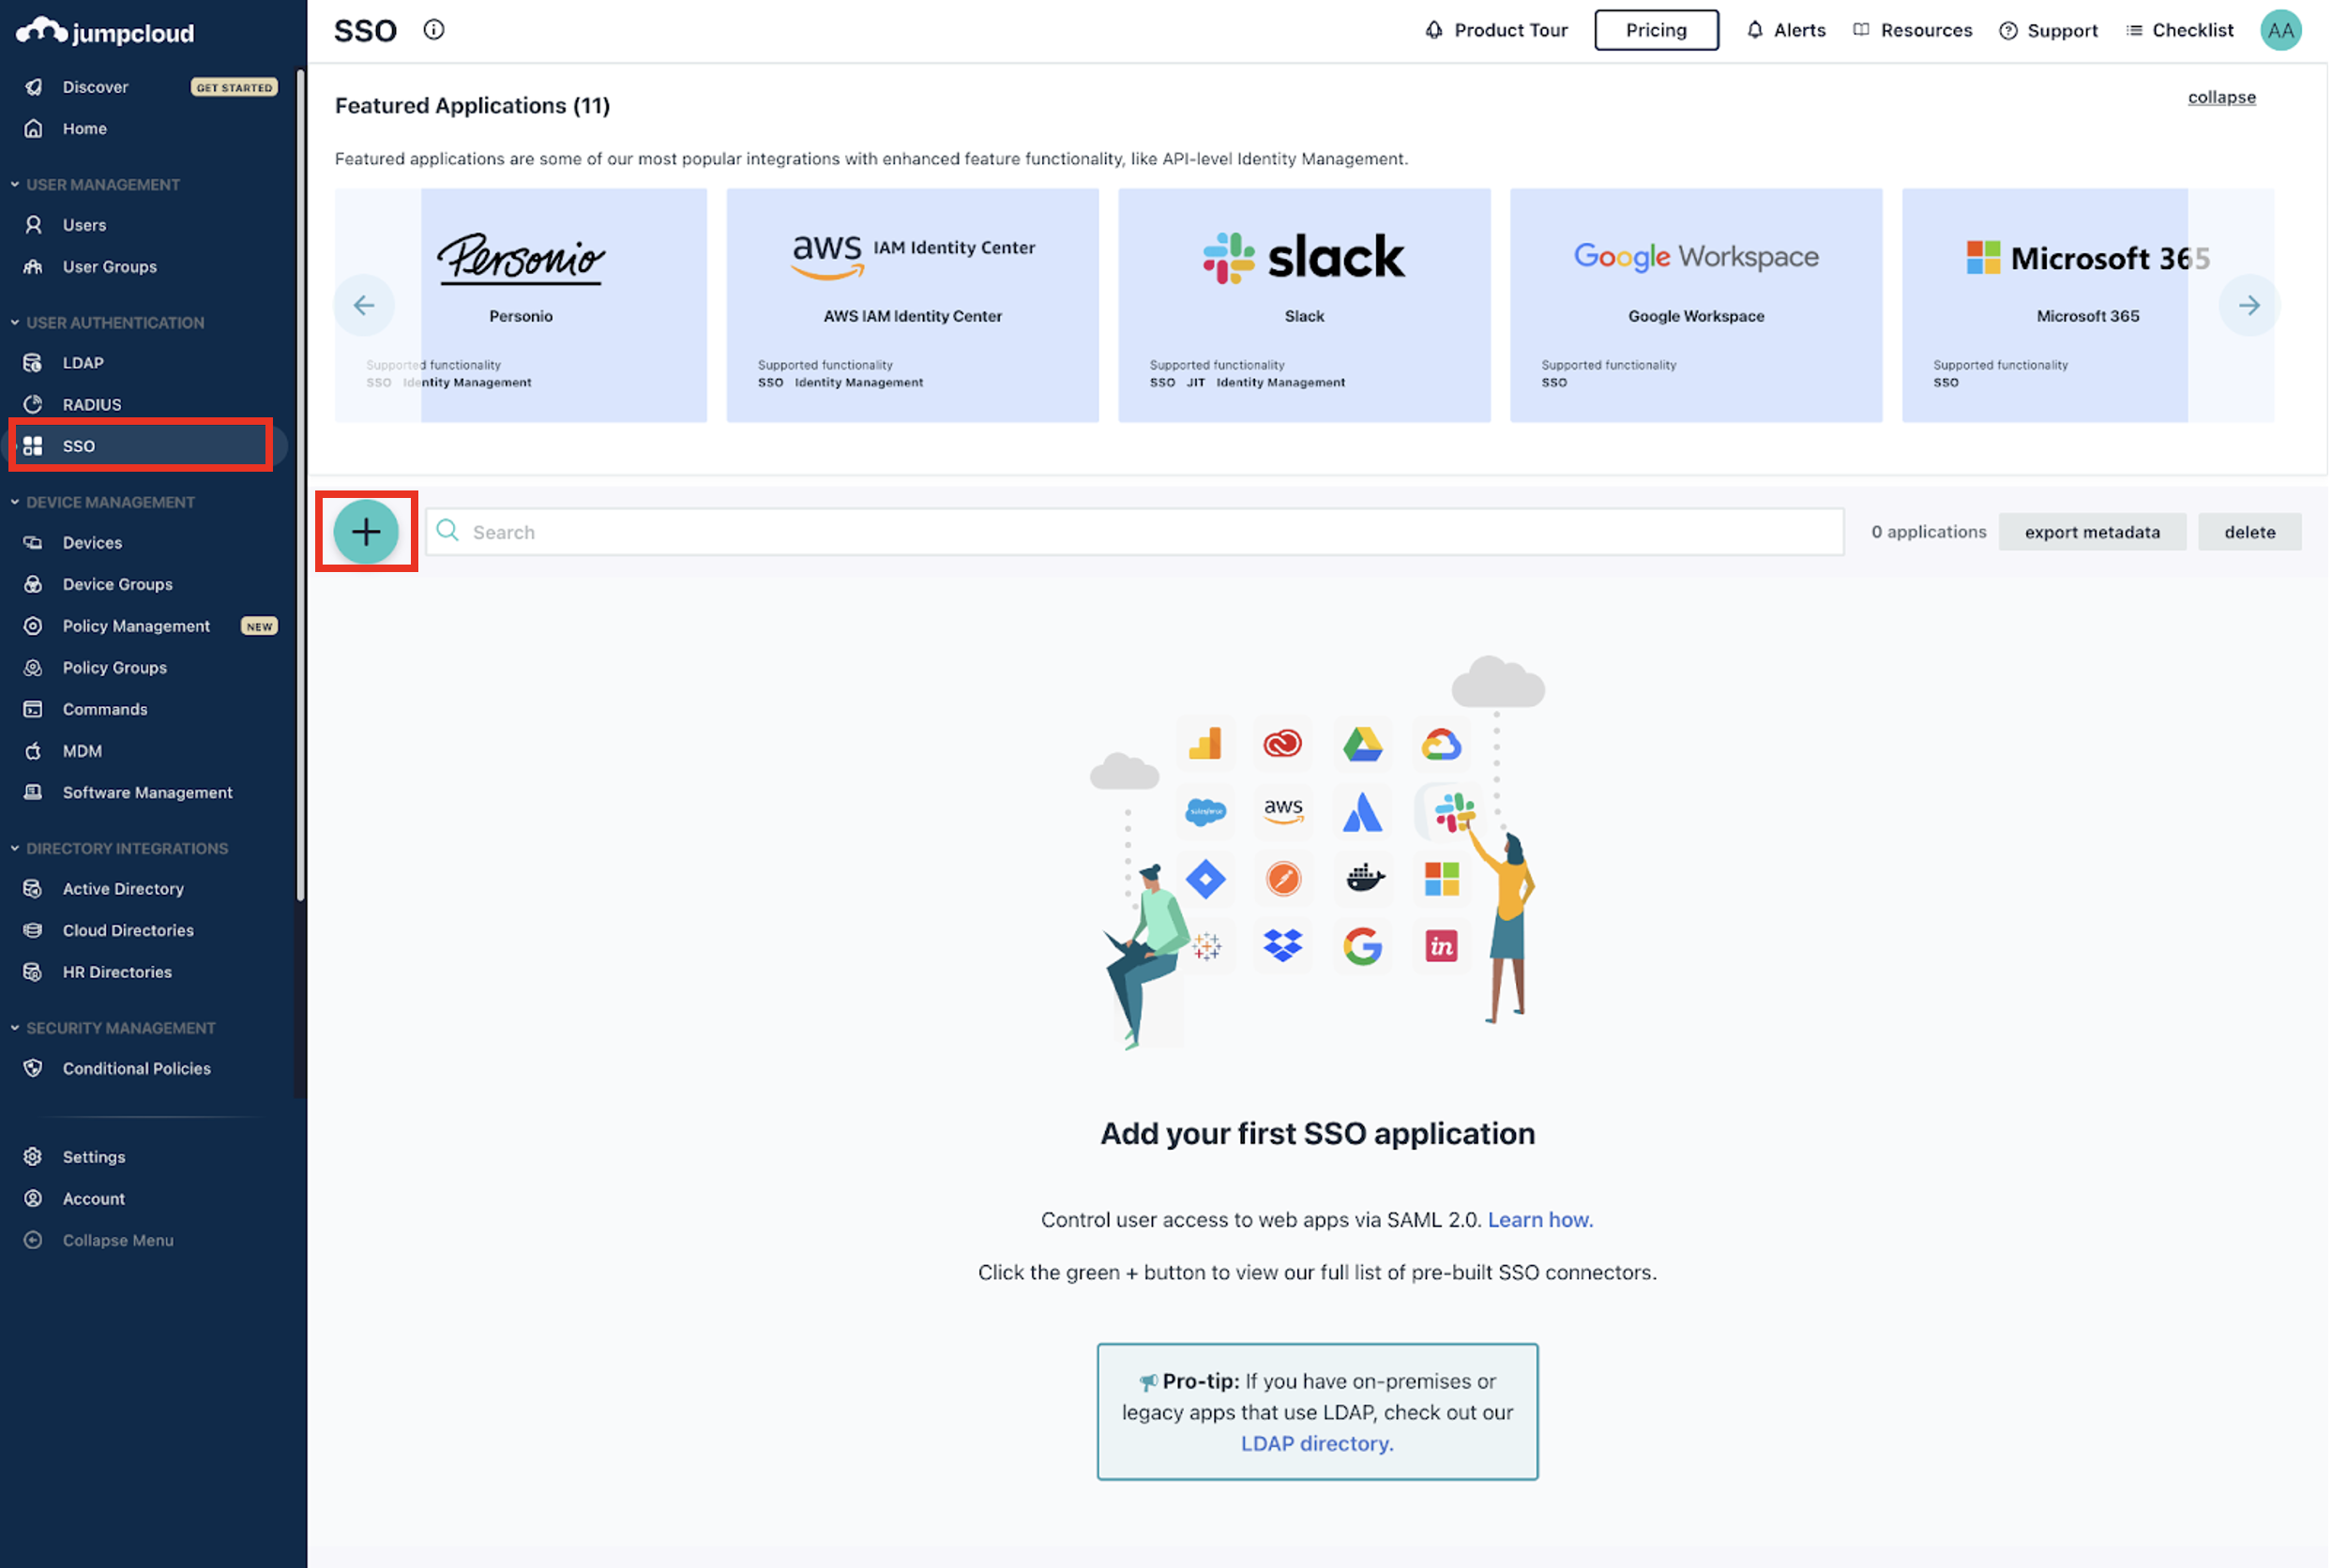
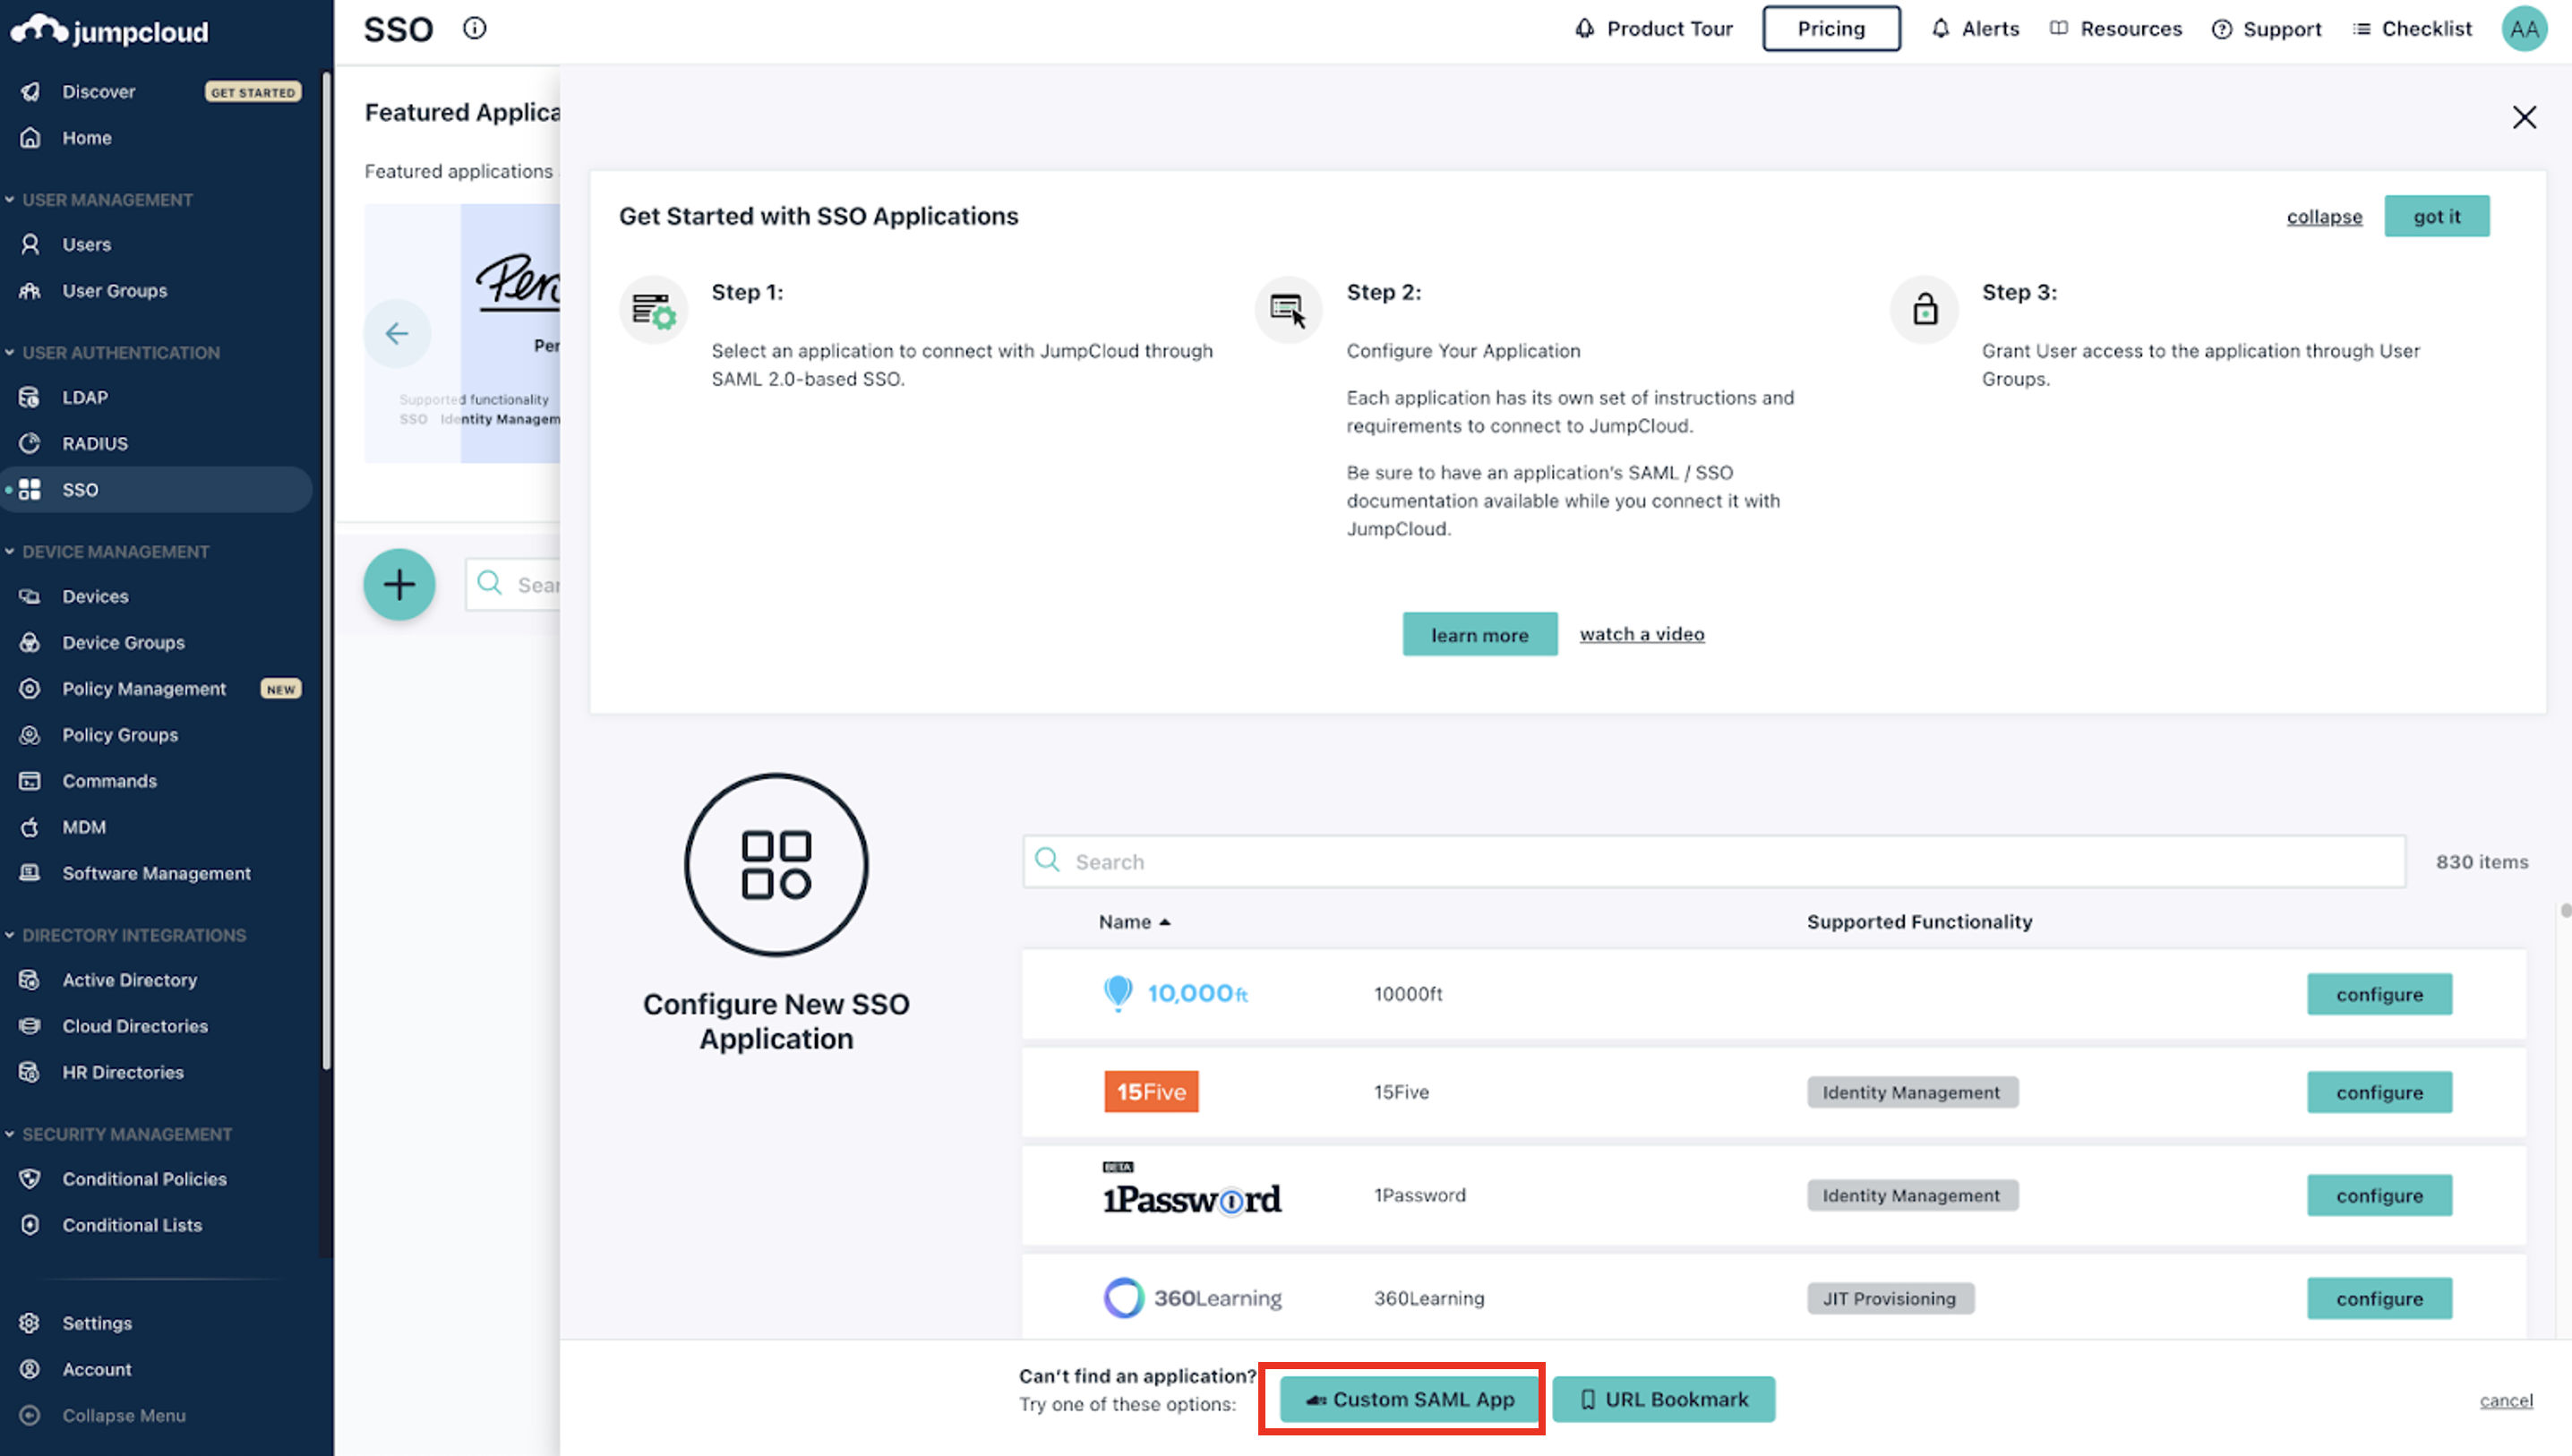
- In the JumpCloud Console, go to SSO. Click on the + to add a new JumpCloud application.
- Cick on Custom SAML App.
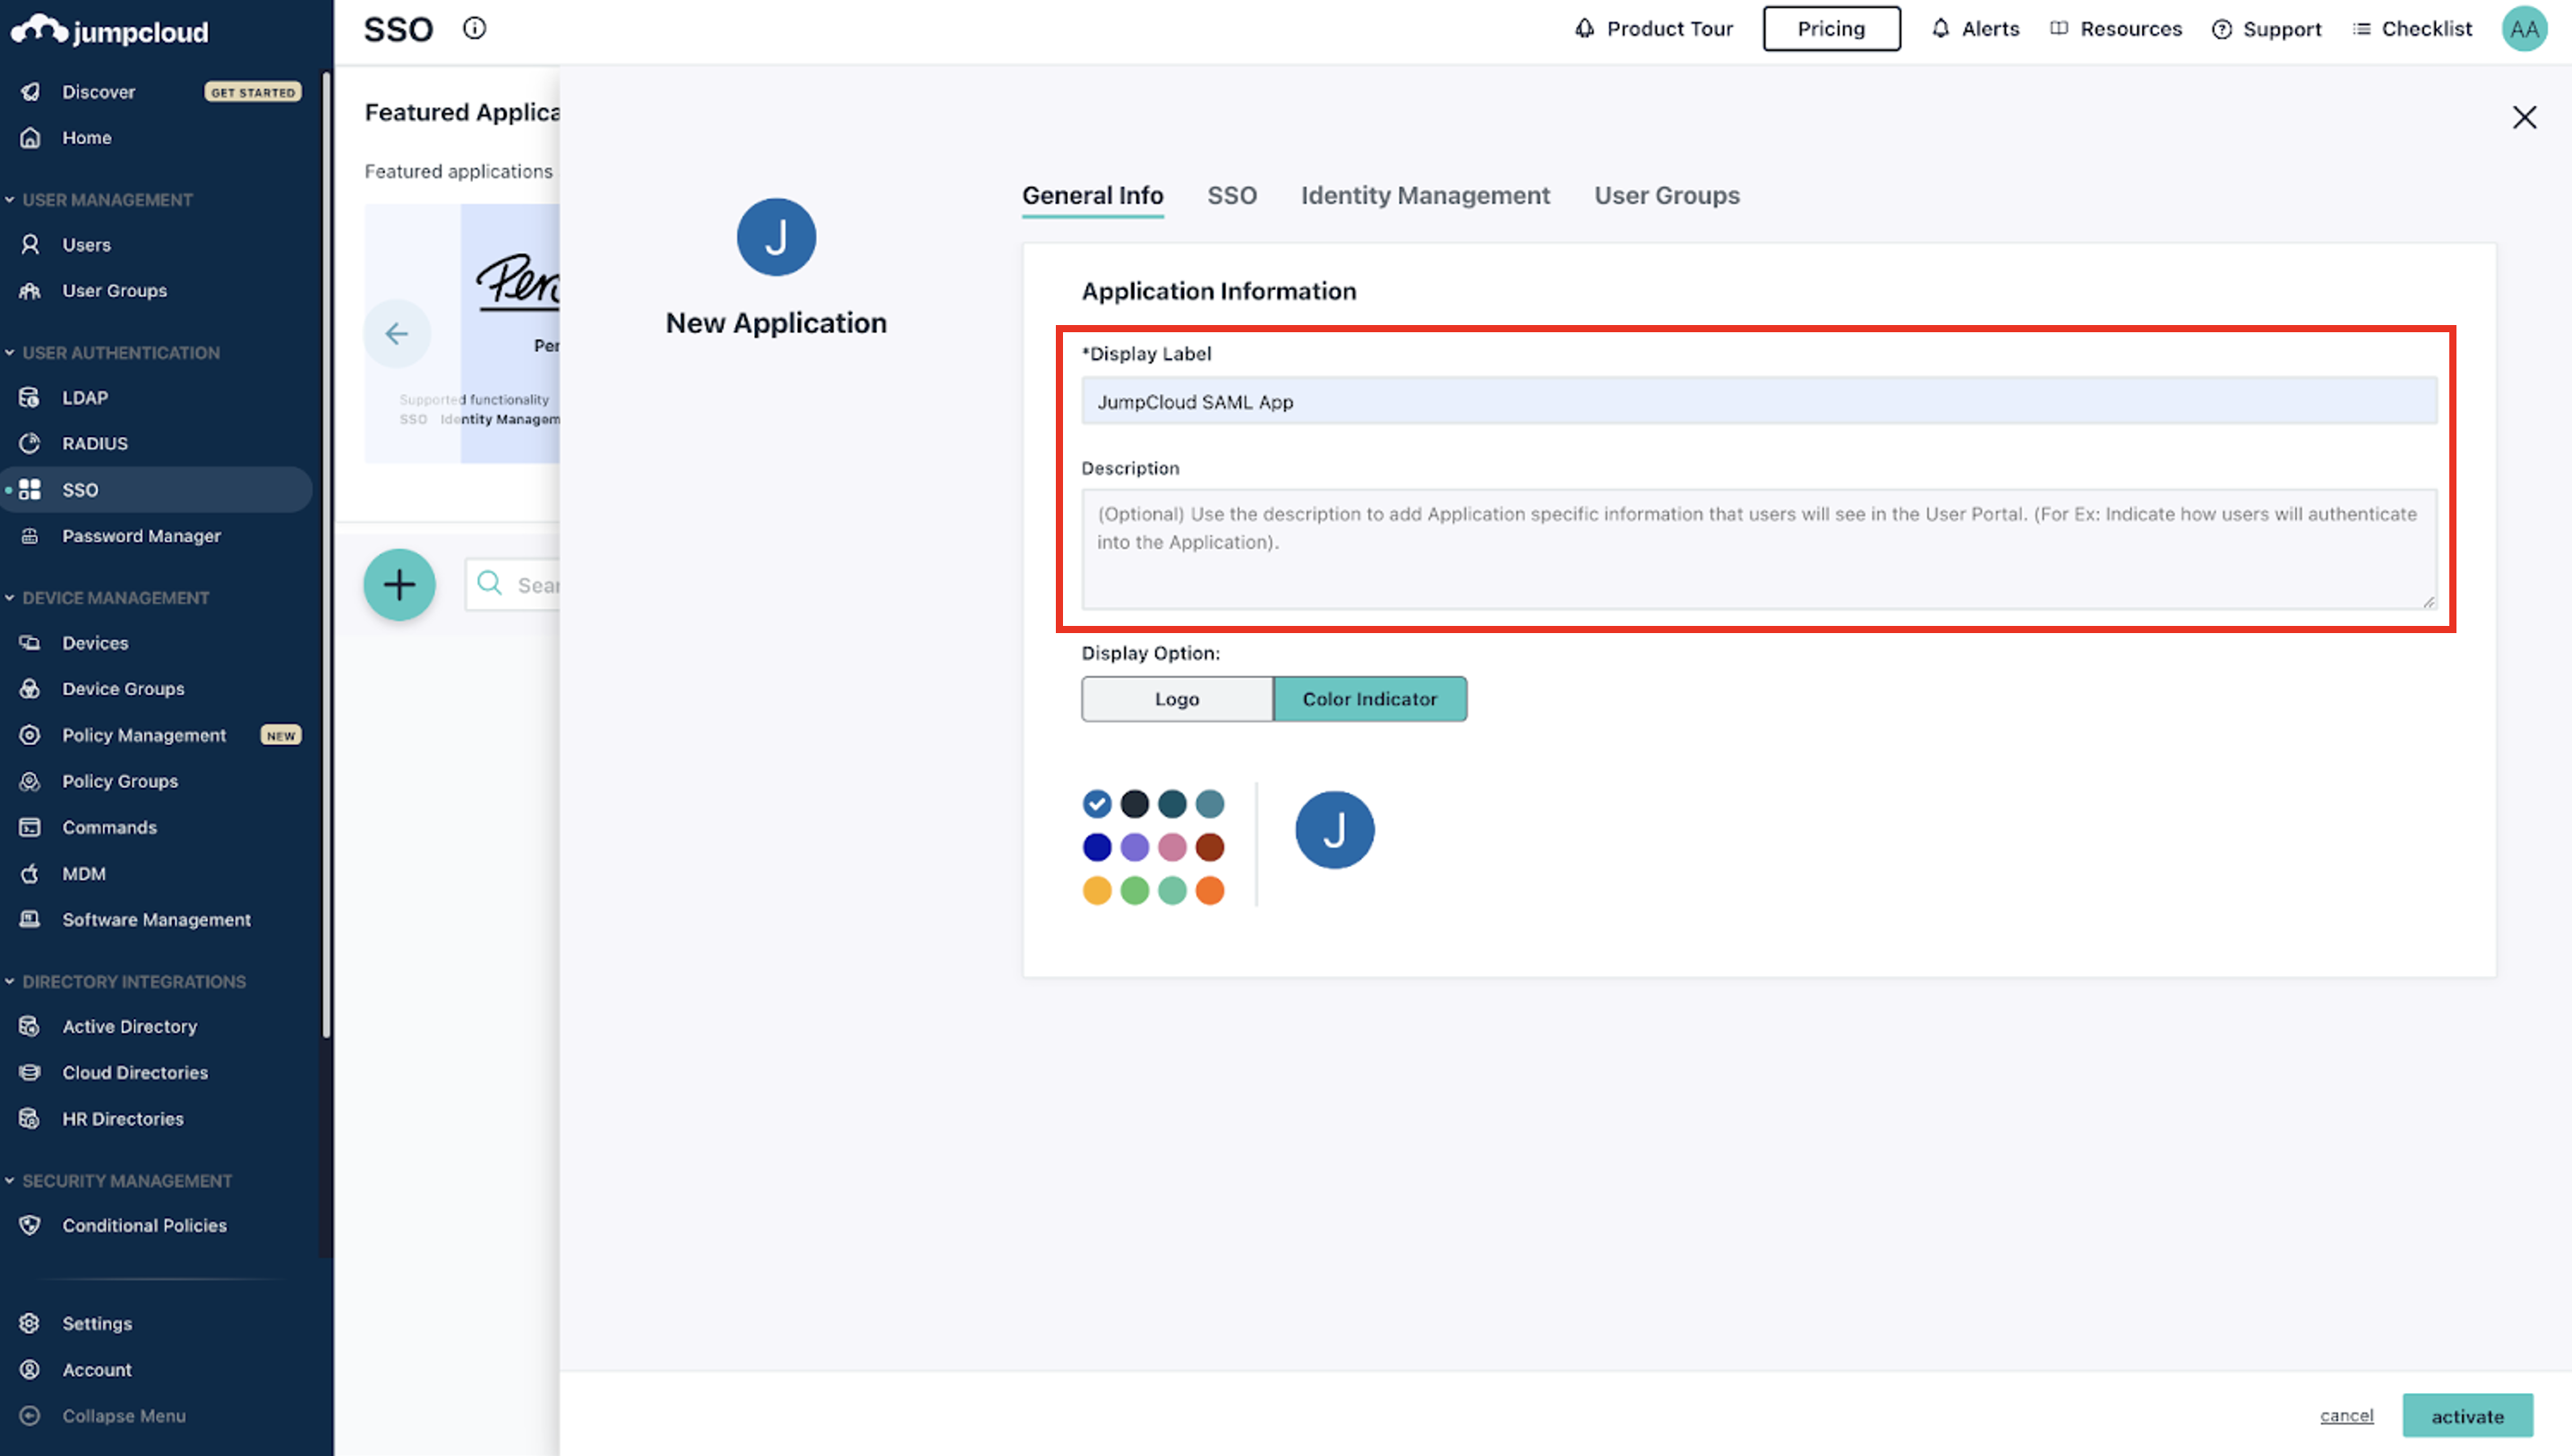
- Type in a Name for the app and a Description (optional).
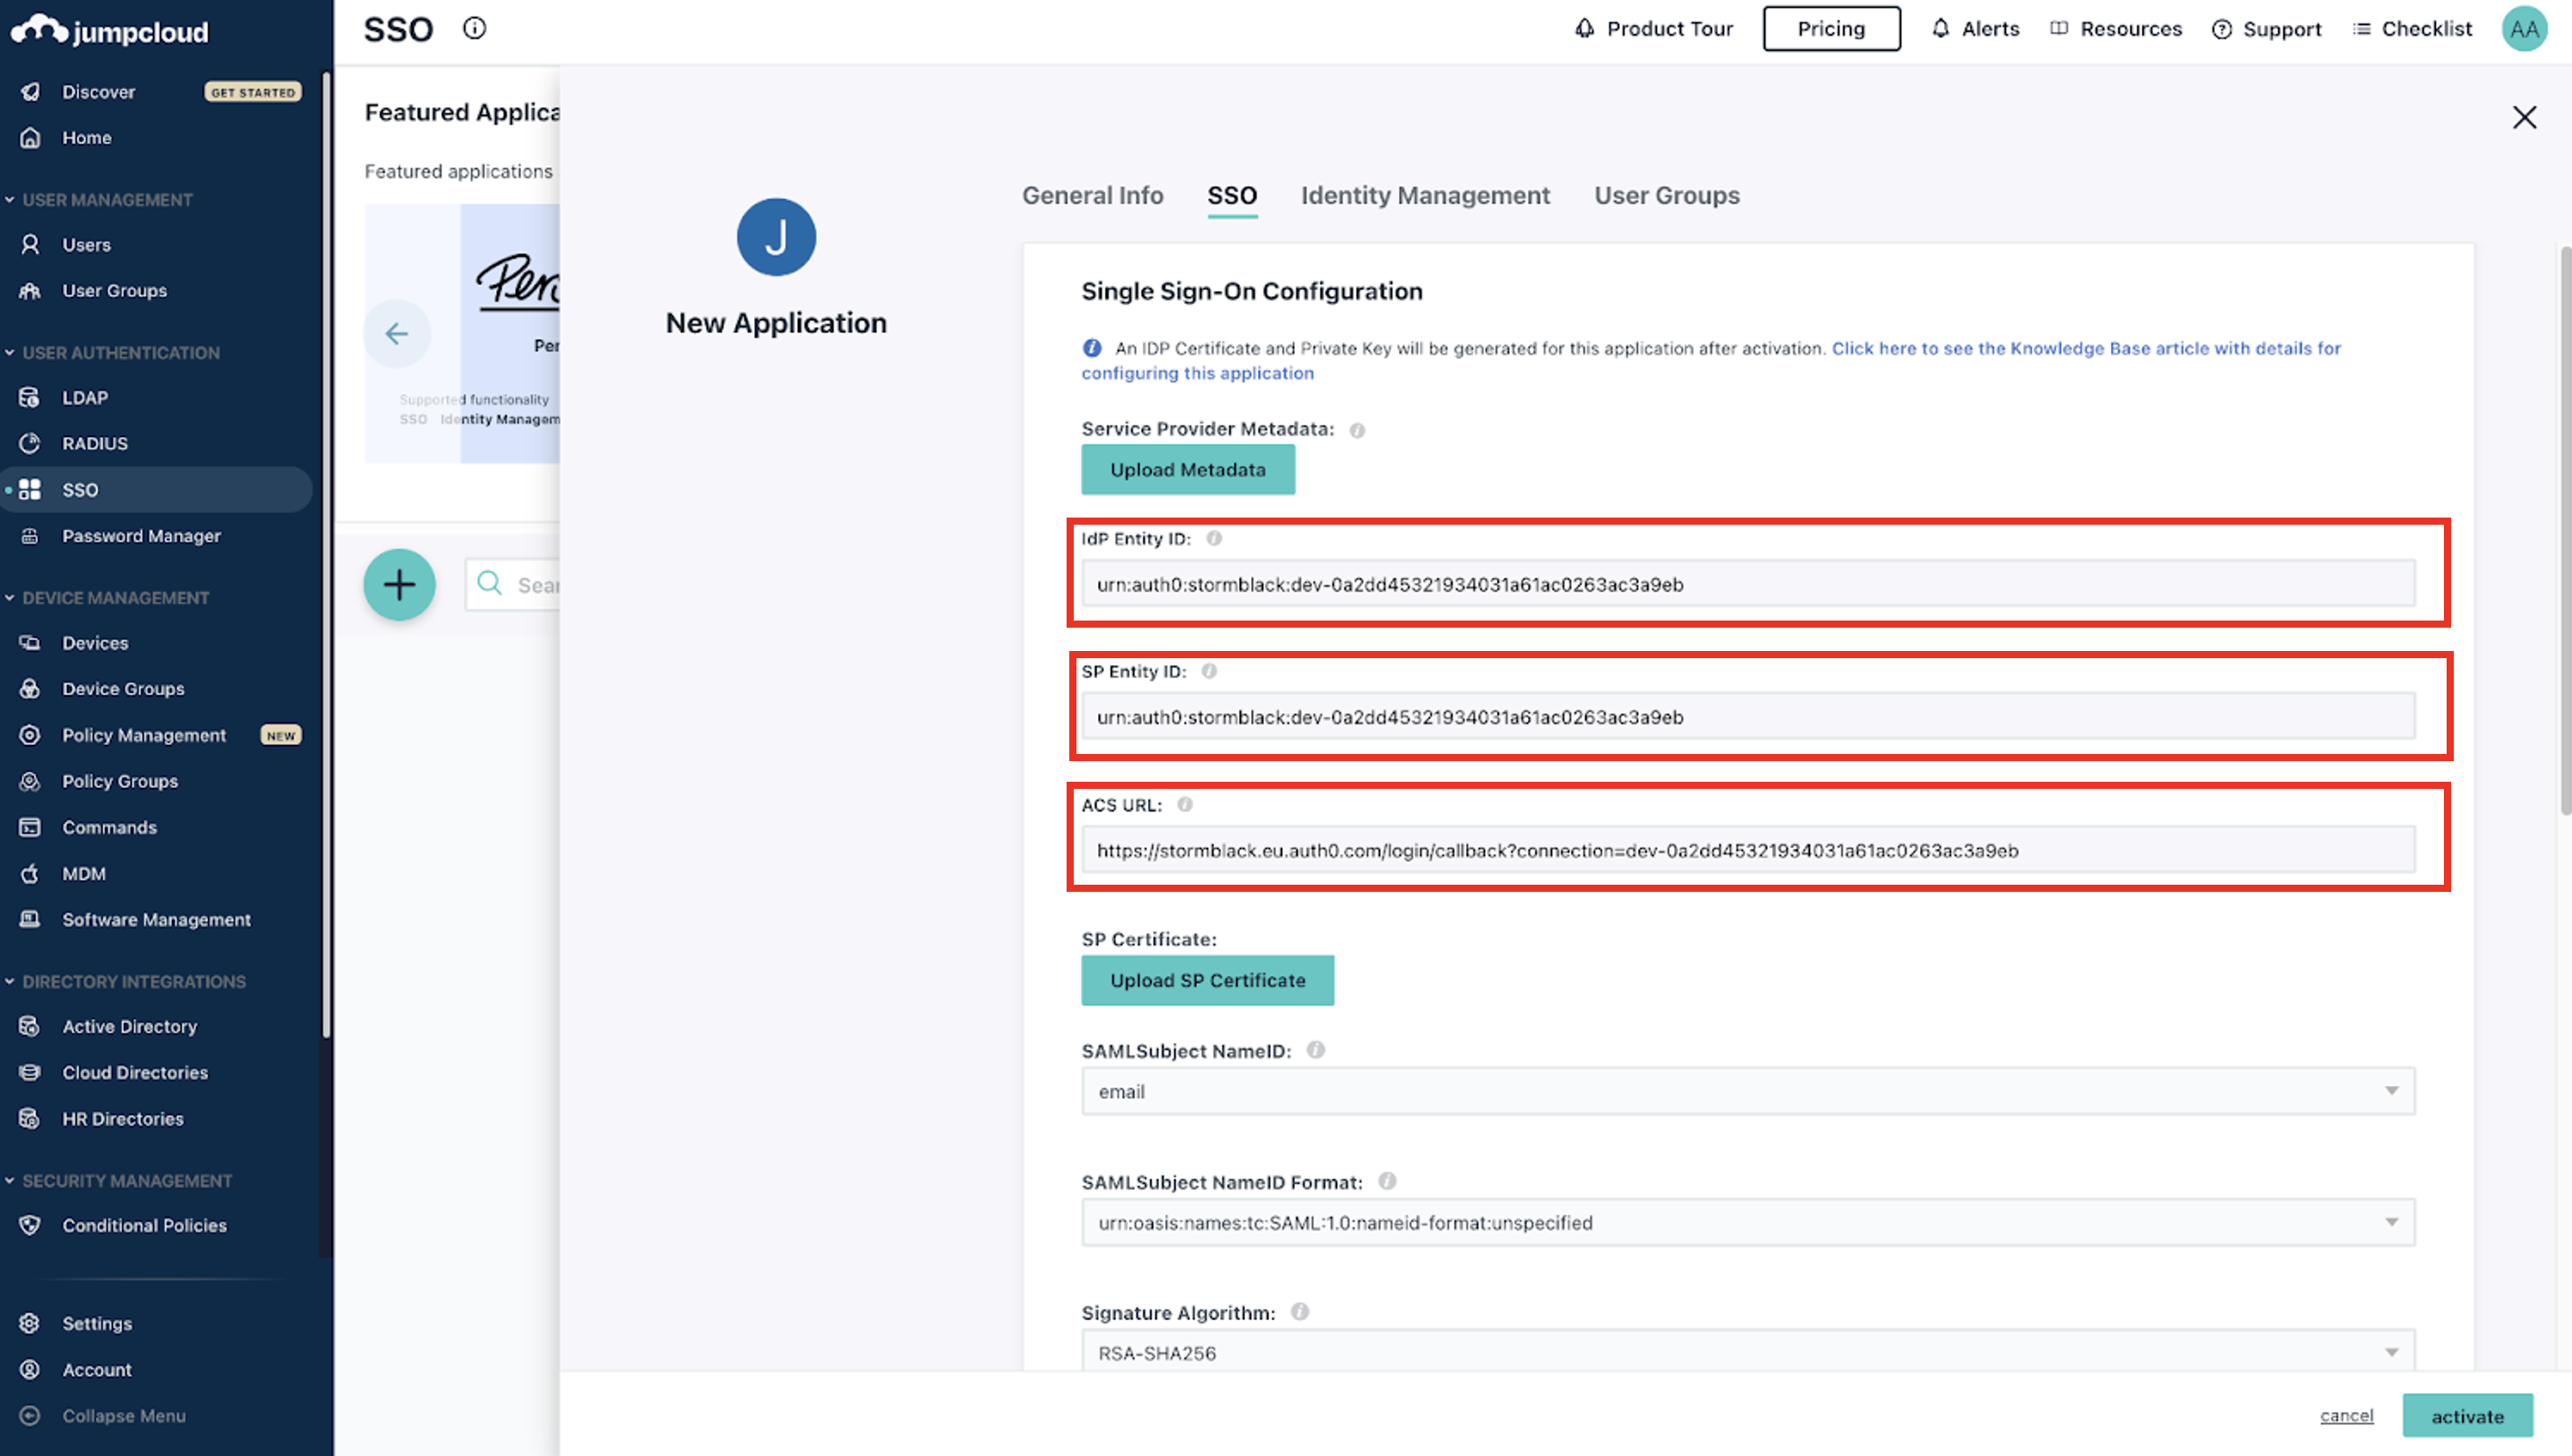
- Go to SSO tab. Paste the SP entity ID you copied from the Axis Management Console in both IdP Entity ID and SP Entity ID. Paste the SP URL (ACS) you copied from the Axis Management Console in the ACS URL.
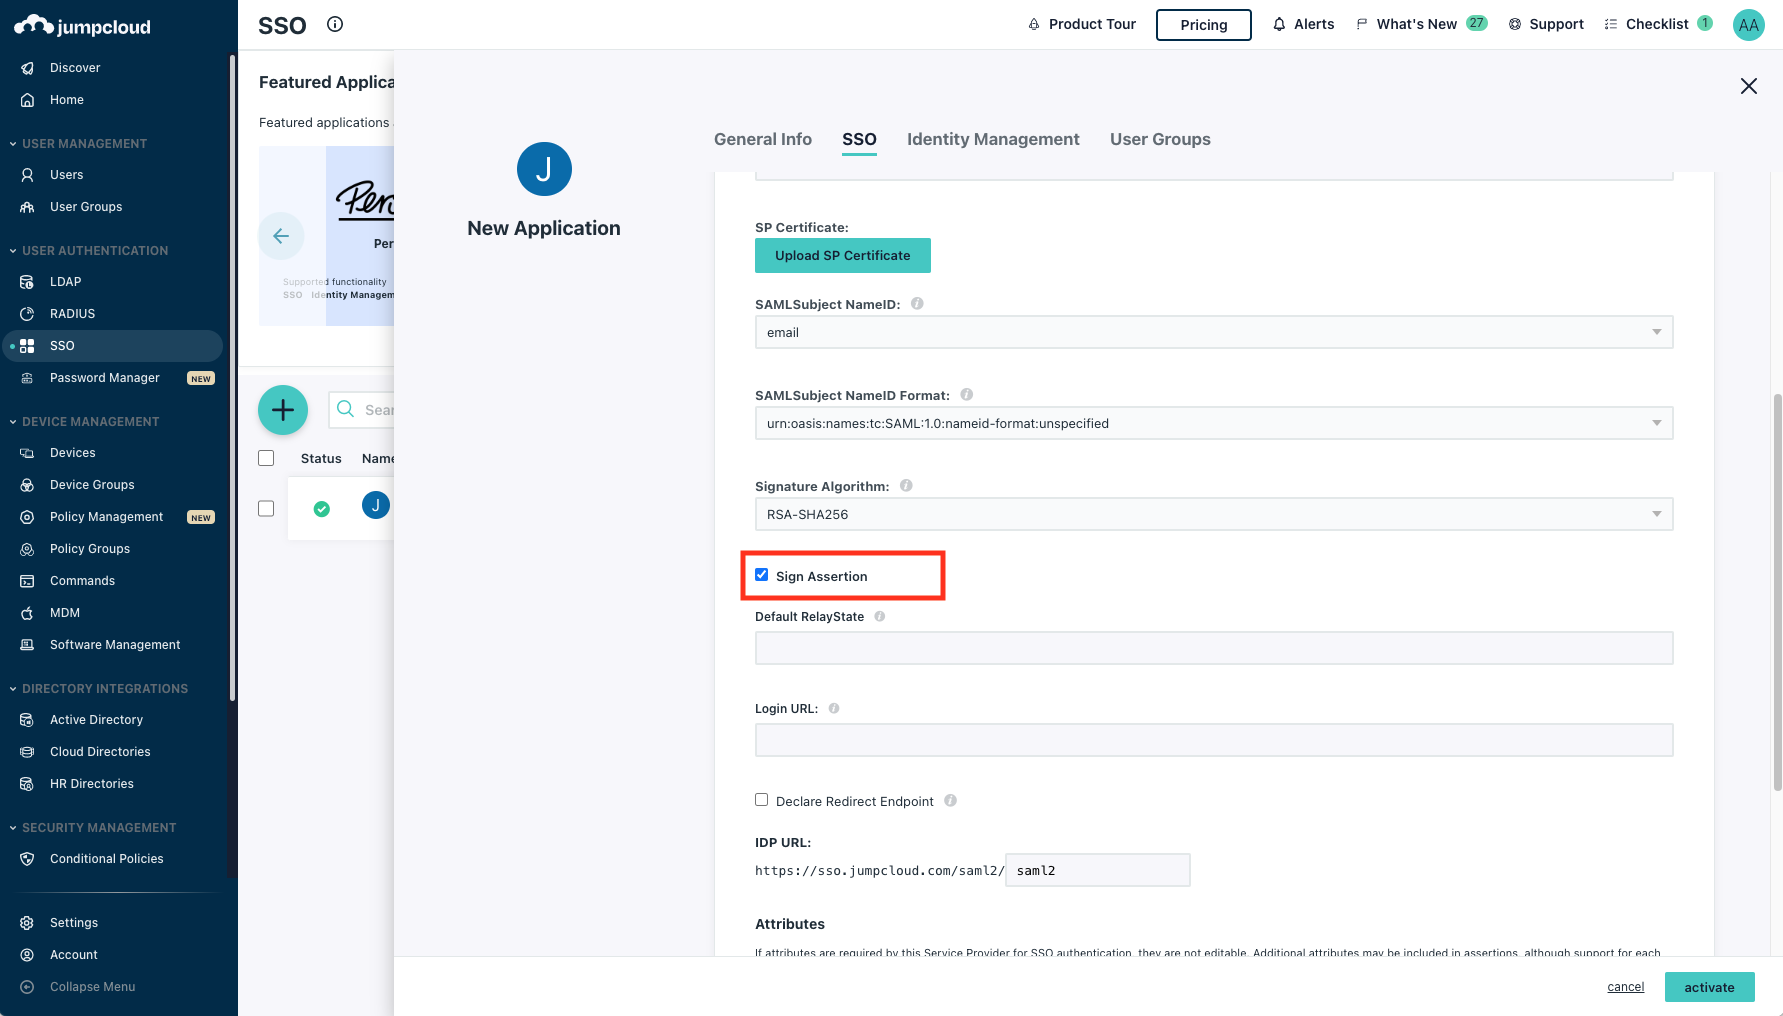
- Check Sign Assertion.
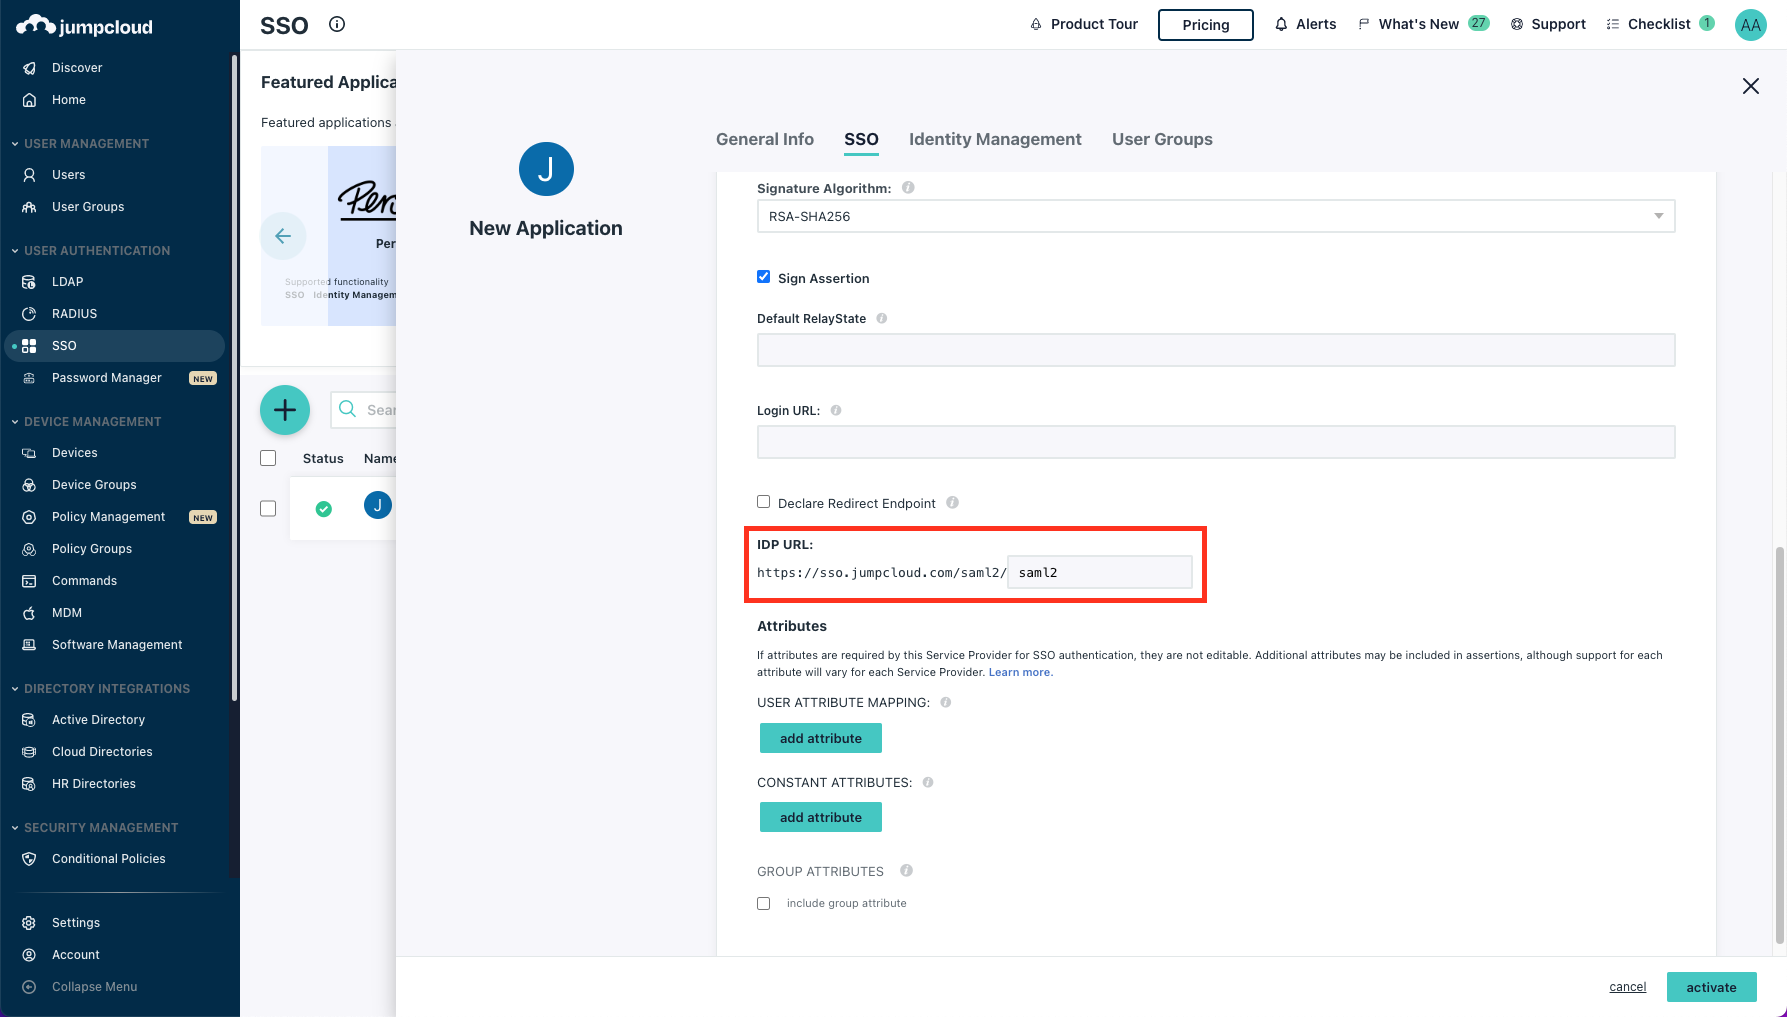
- Copy the IDP URL into a text editor.
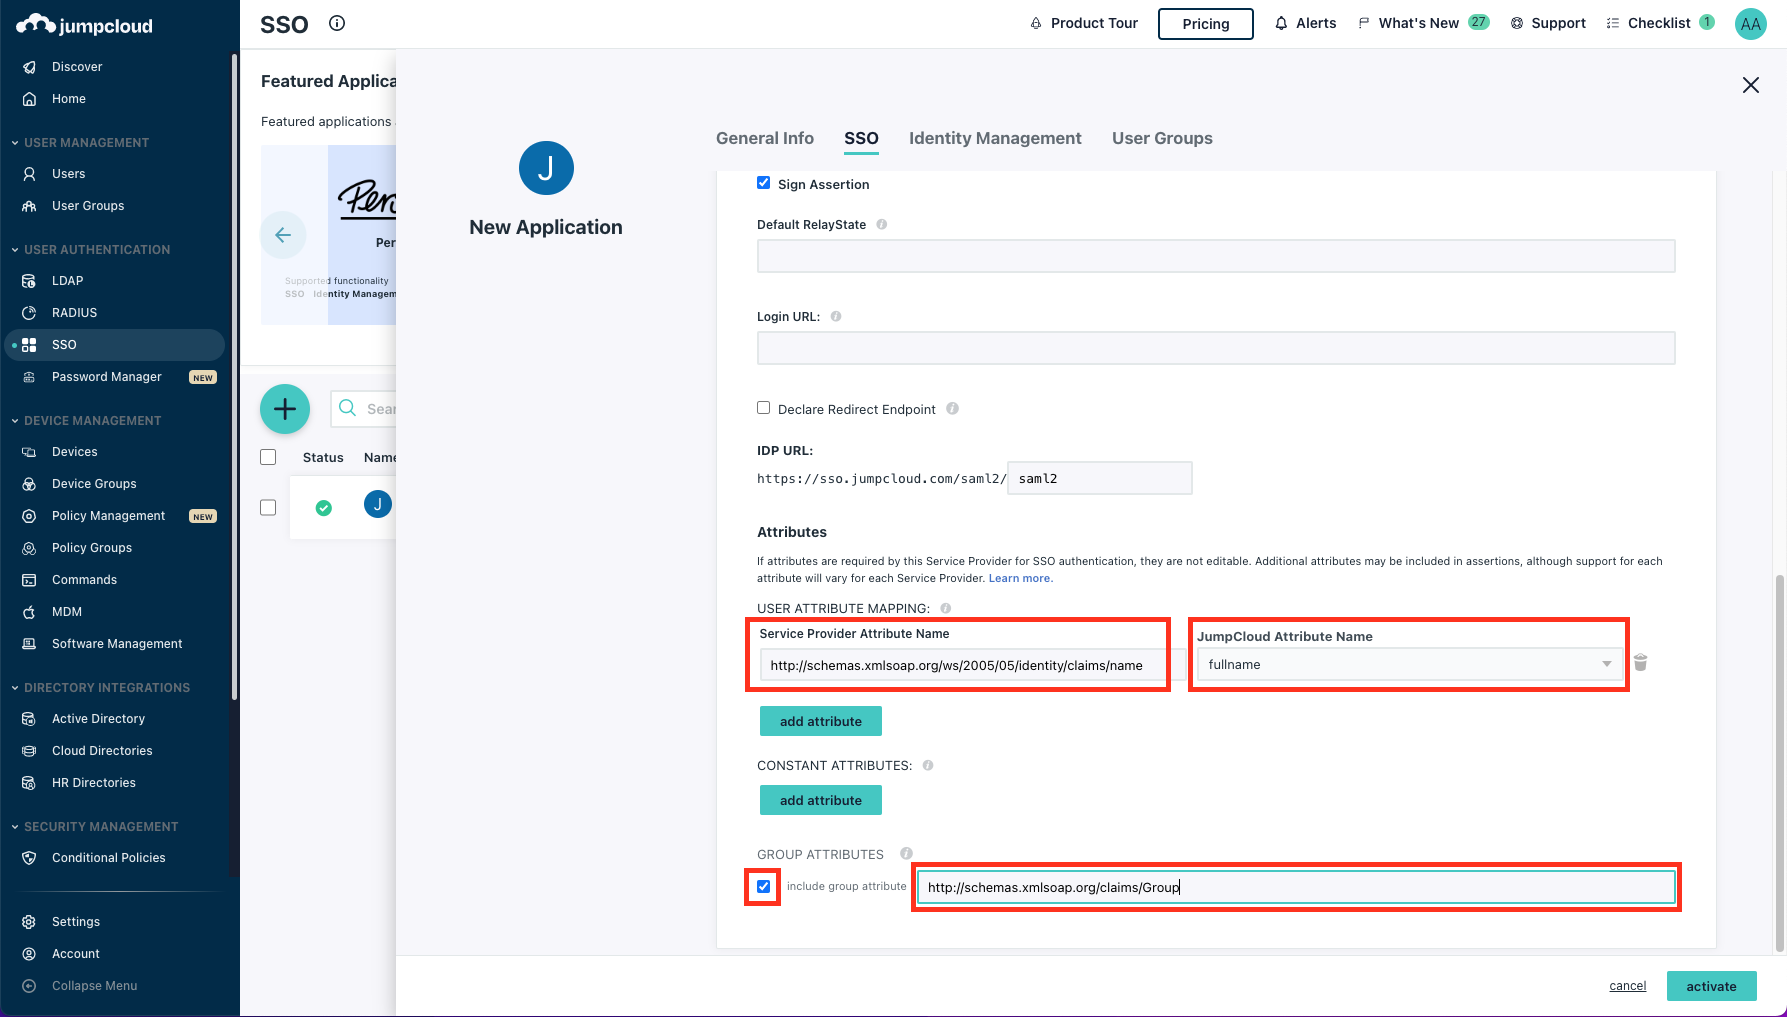
- Click on add attribute (It's under USER ATTRIBUTE MAPPING) and type in Service Provider Attribute Name the following value: “http://schemas.xmlsoap.org/ws/2005/05/identity/claims/name". In JumpCloud Attribute Name select fullname. Under GROUP ATTRIBUTES check include group attribute and type in the following value: “http://schemas.xmlsoap.org/claims/Group”.
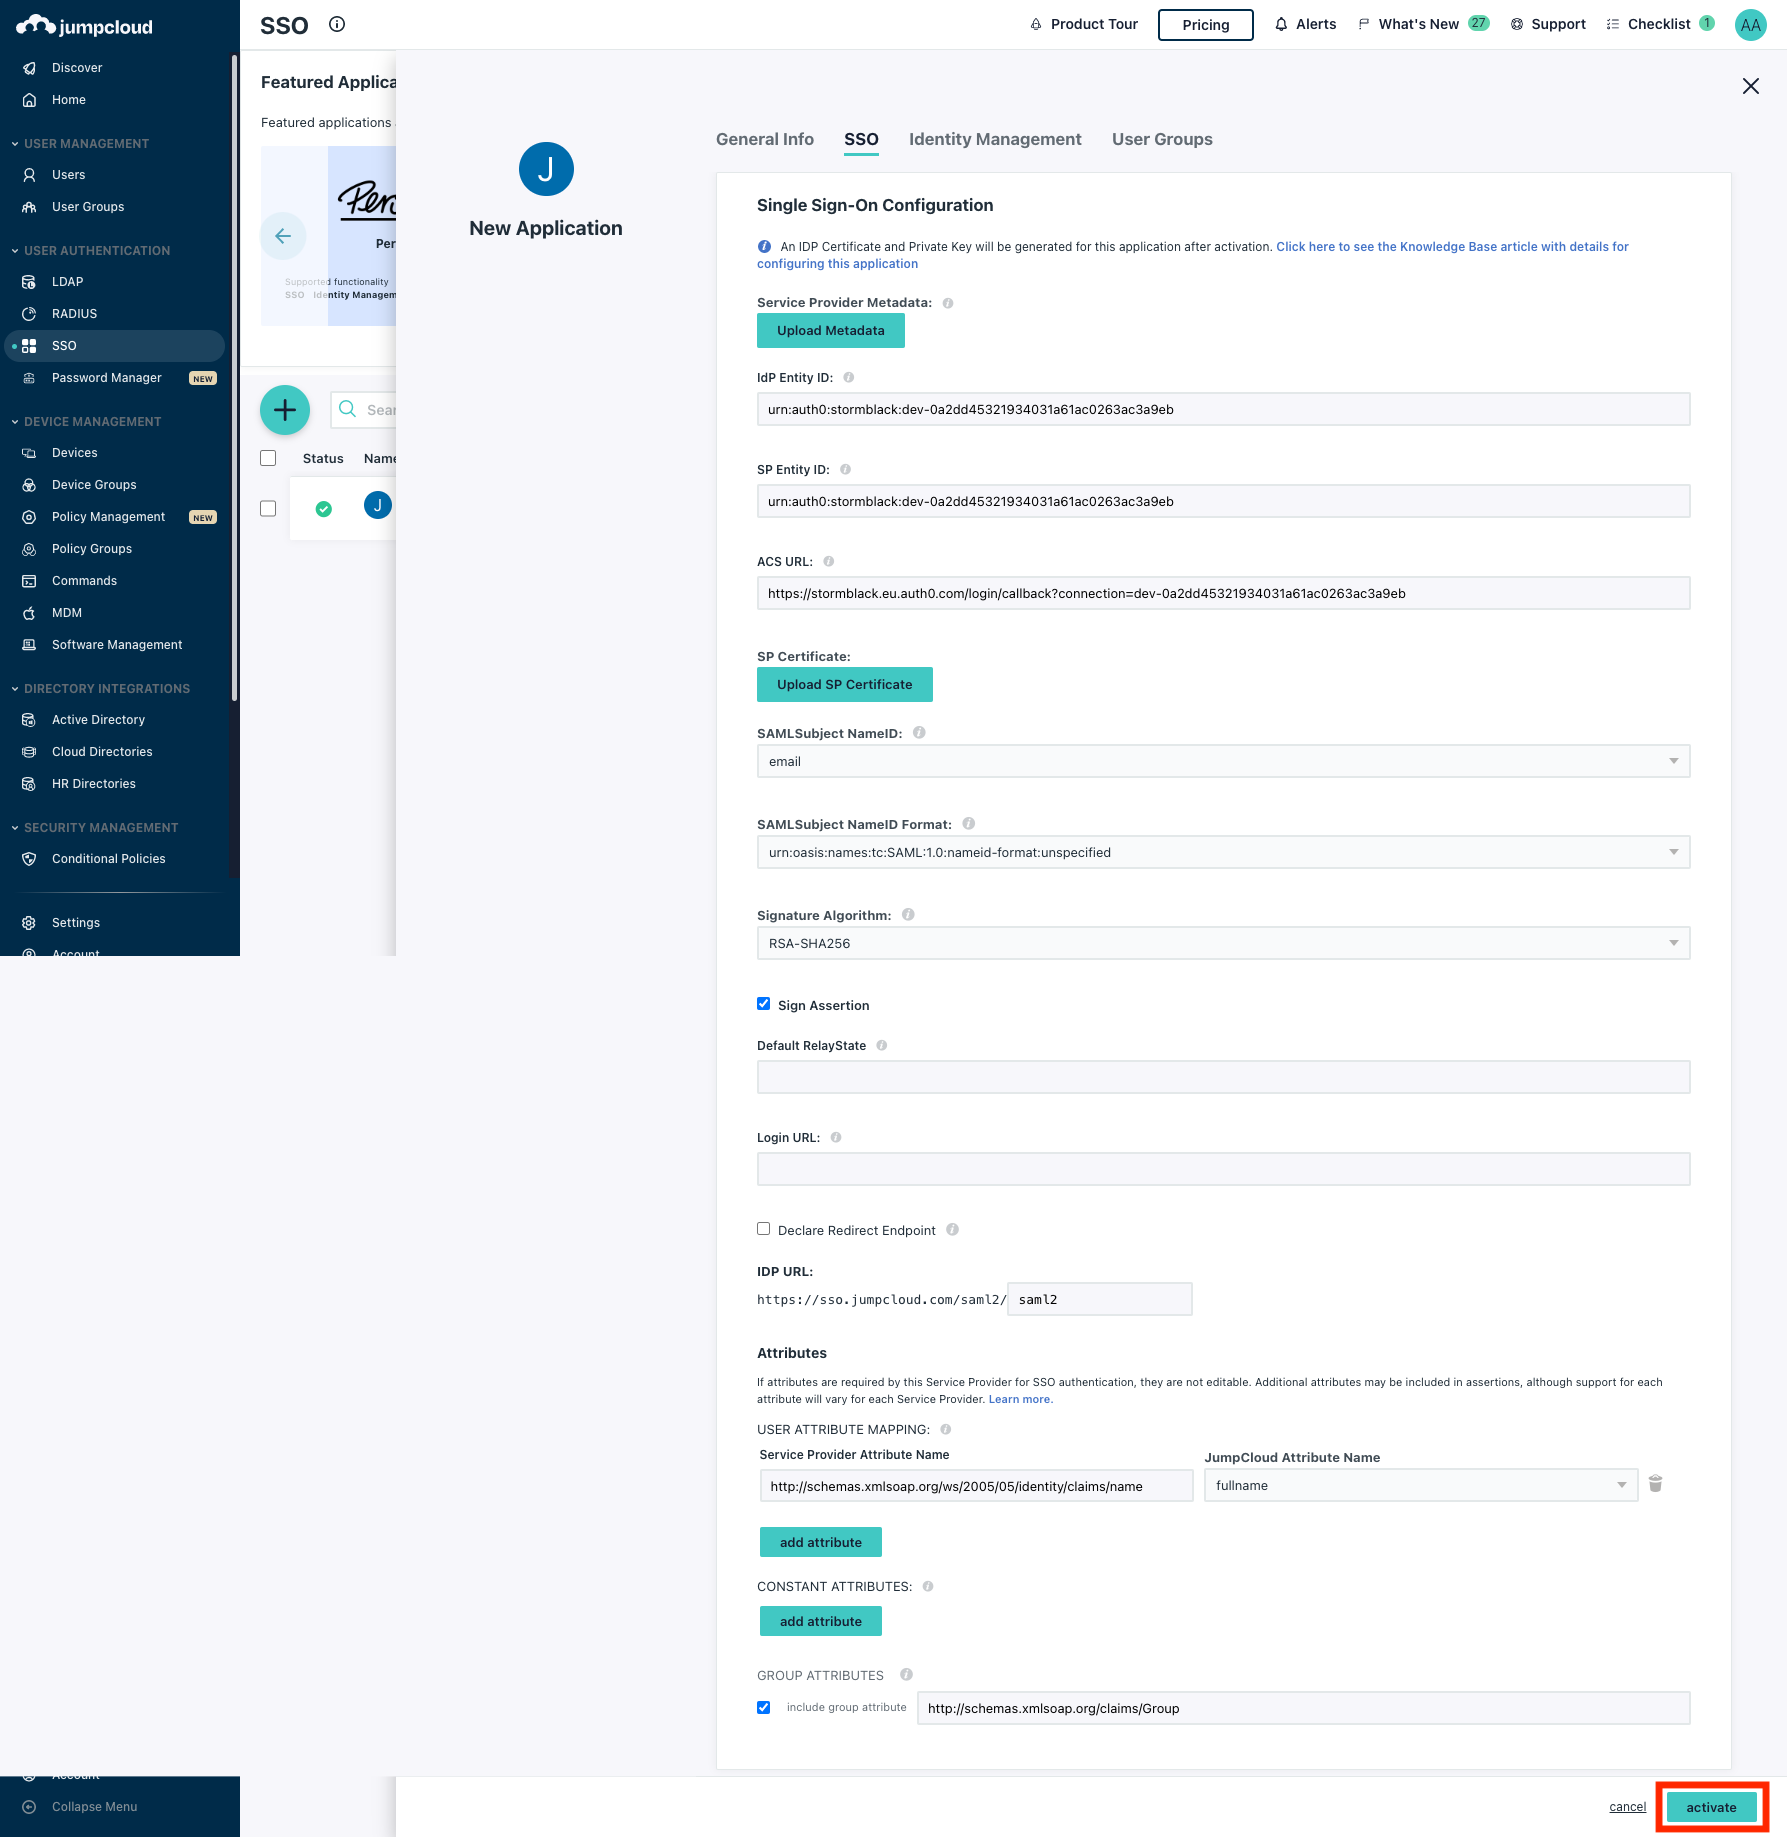
- Click on activate.
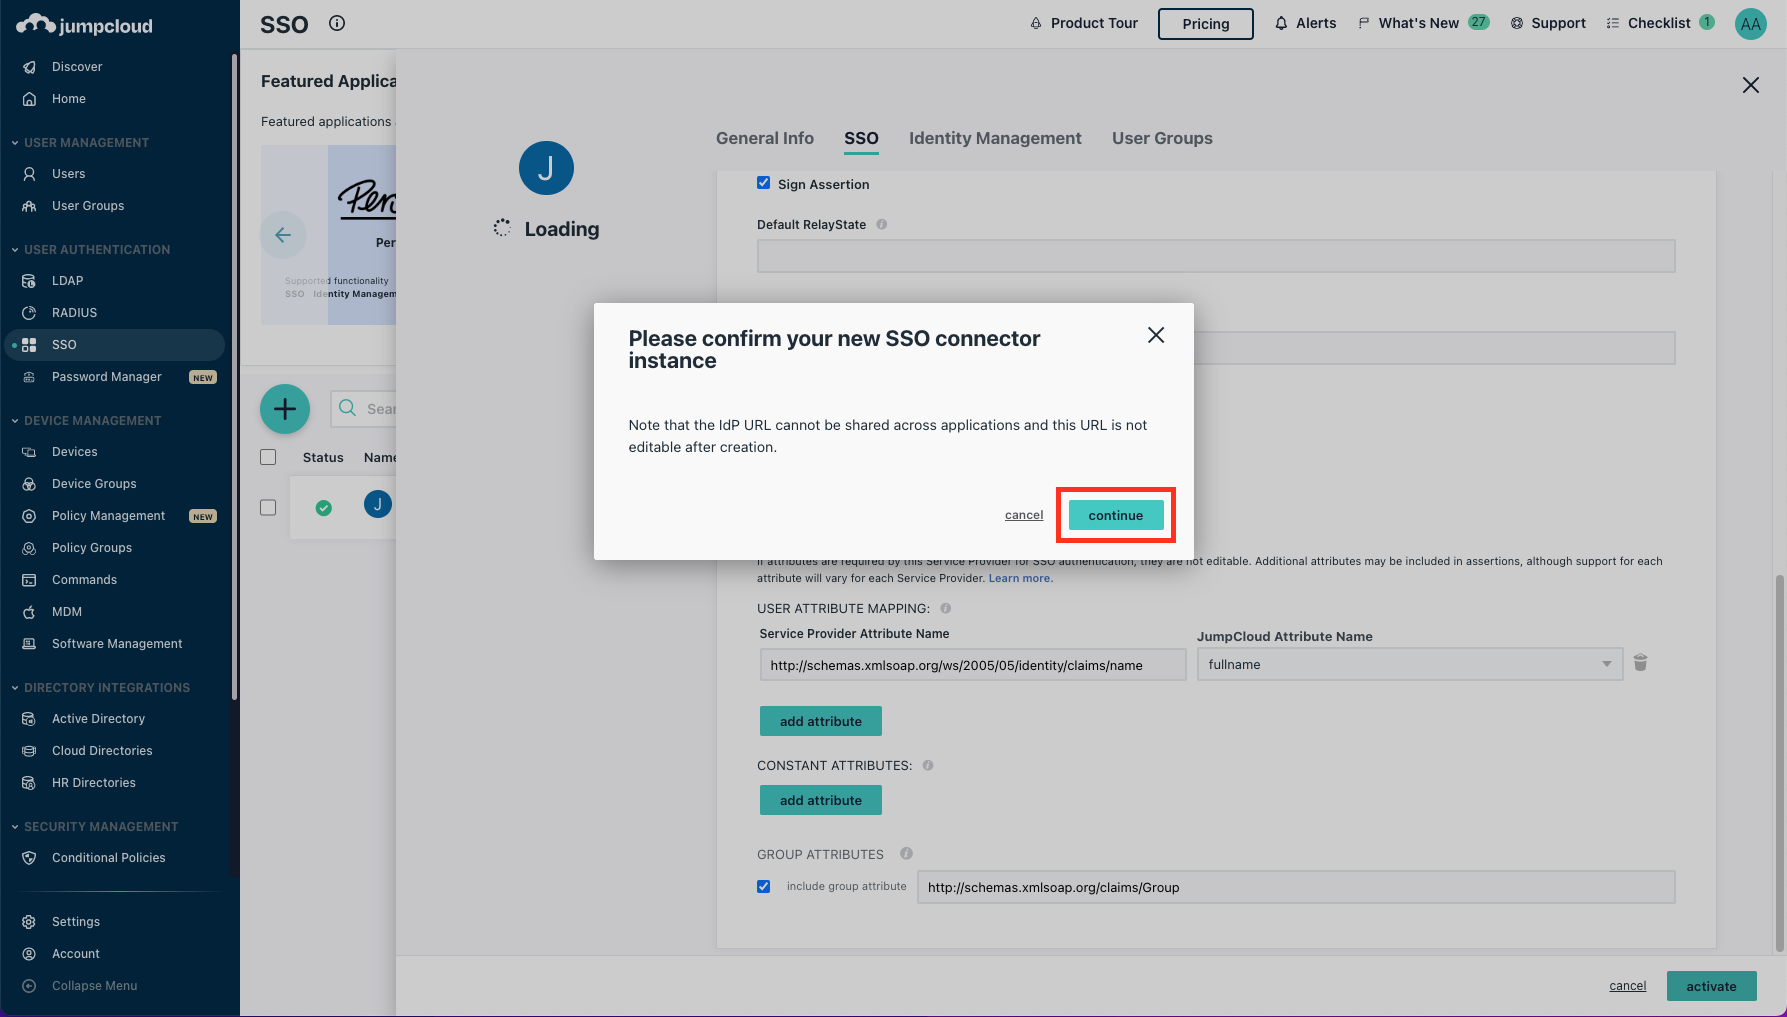
- Confirm the new SSO connector instance and click continue.
You should see a notification that says “Public Certificate has been created”. Click on Download Certificate and keep the certificate, you'll need it later.
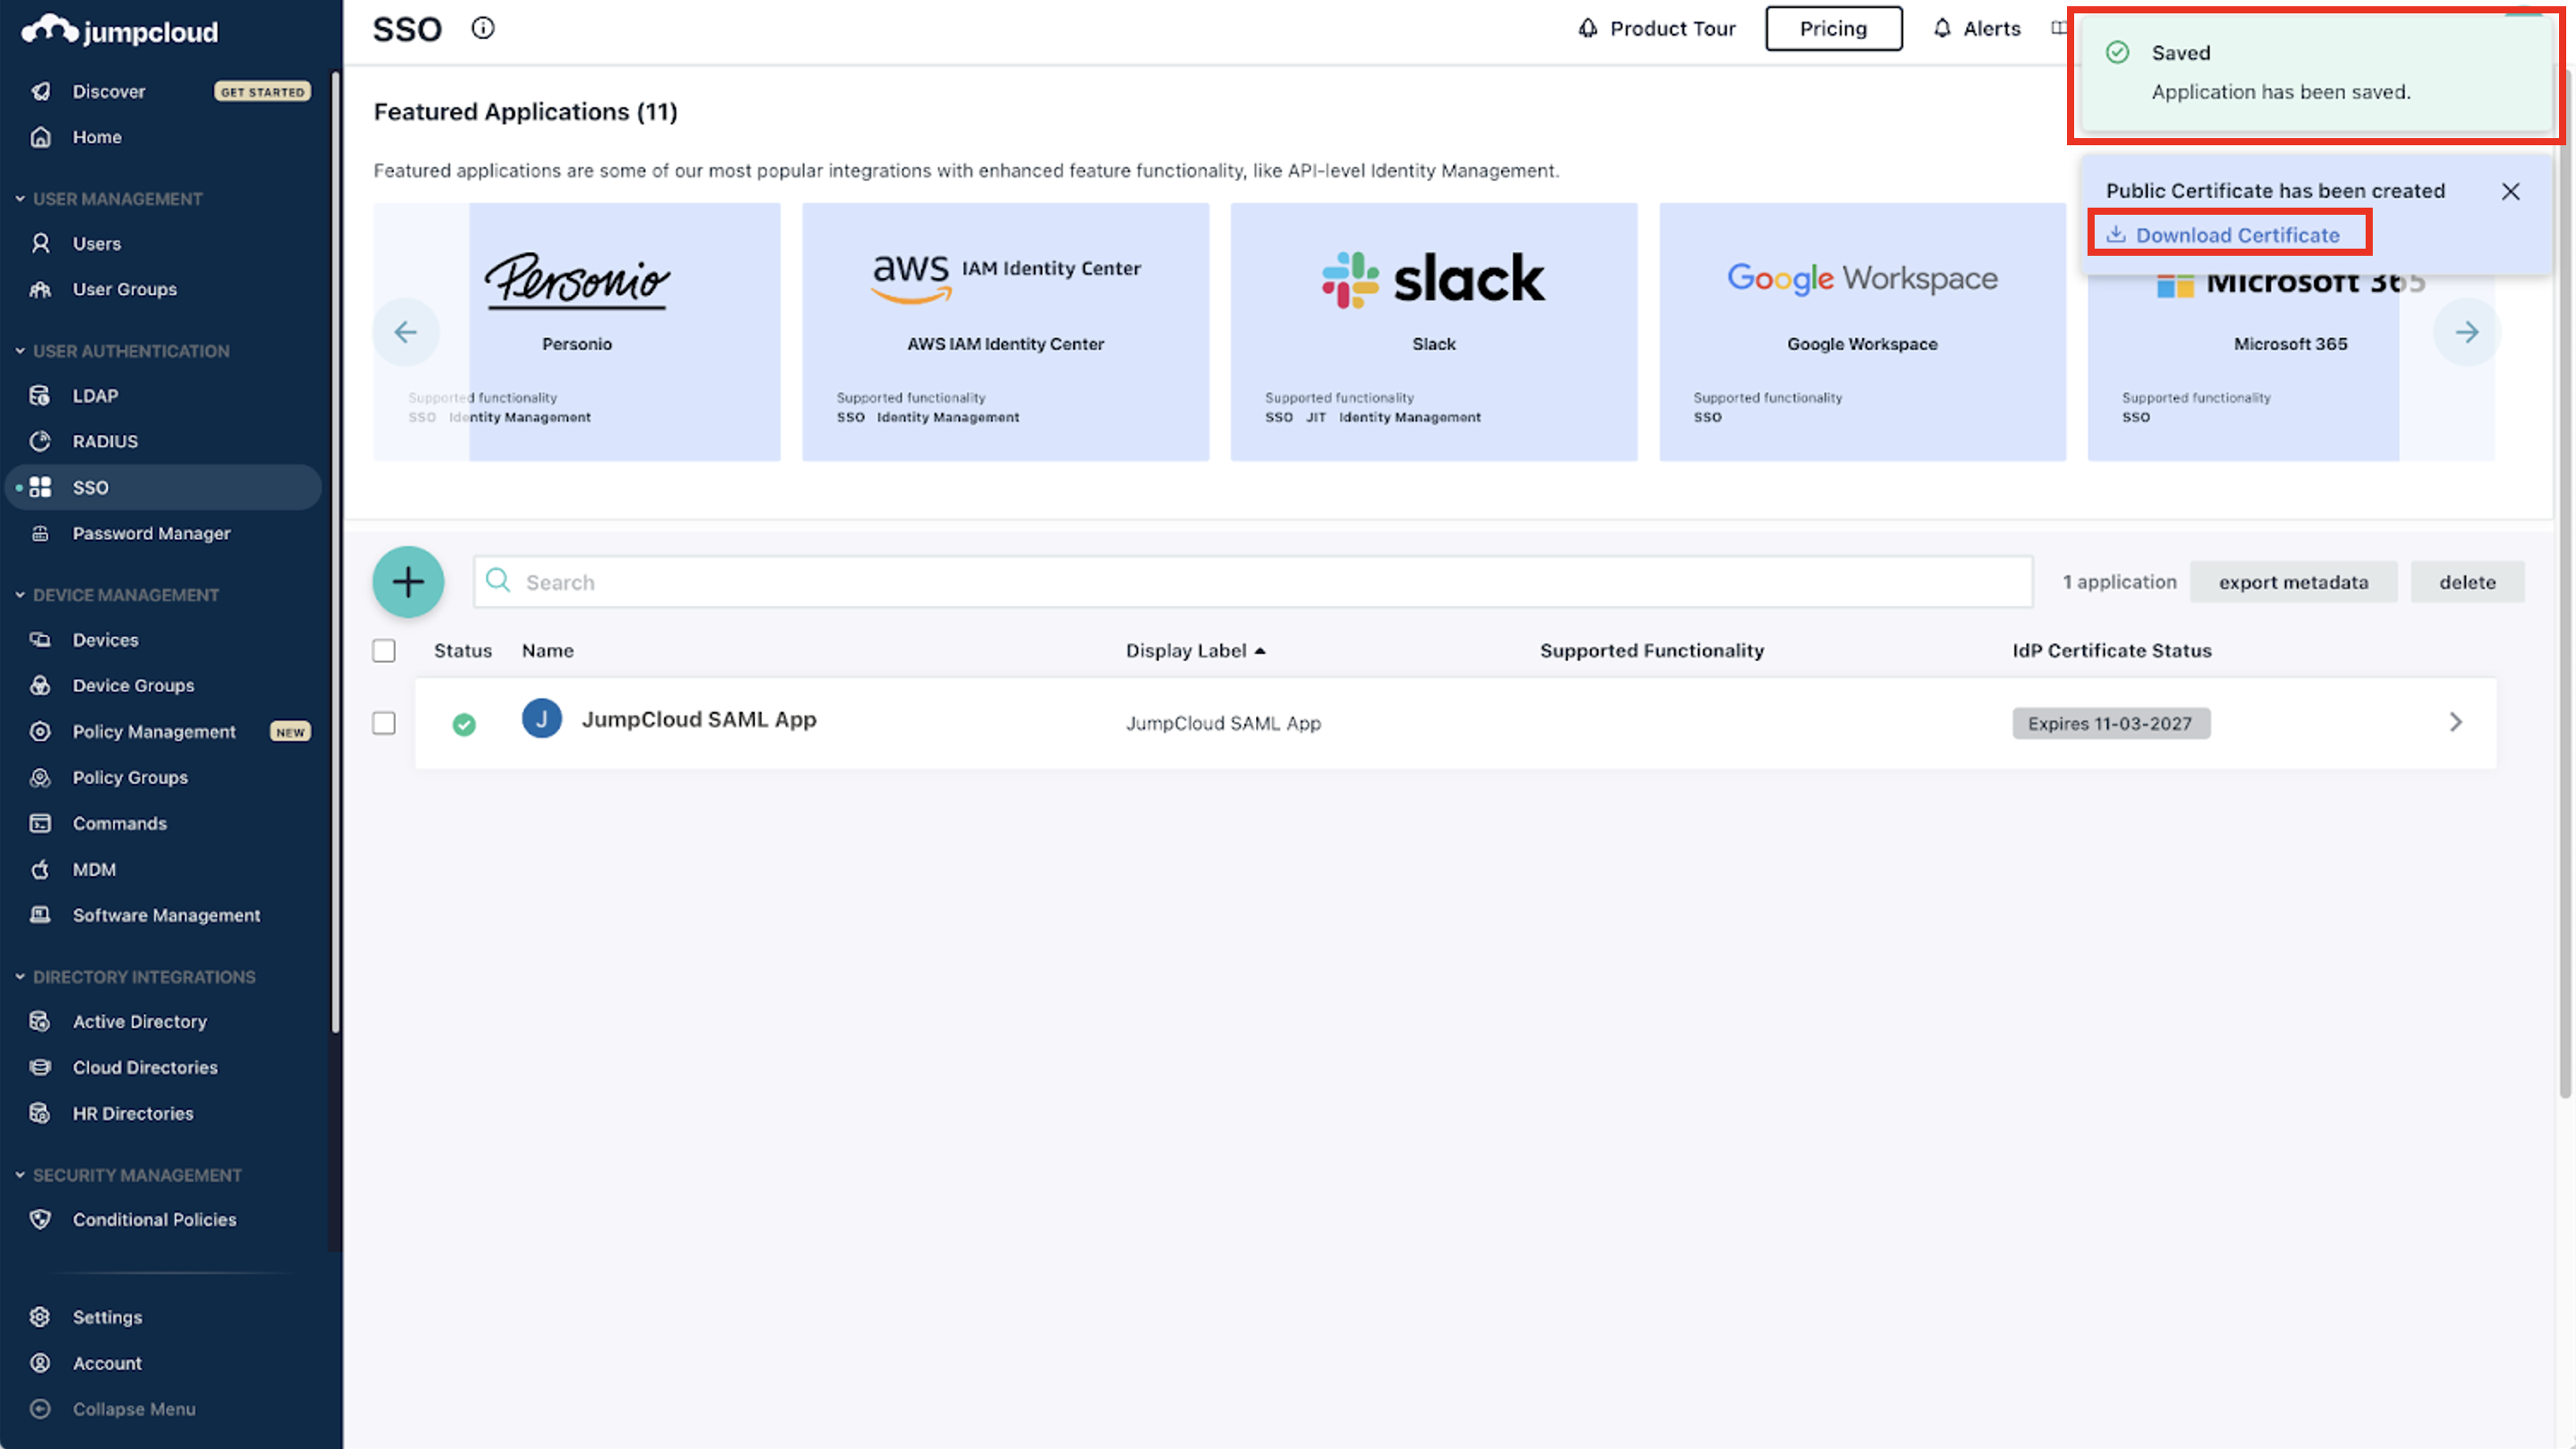
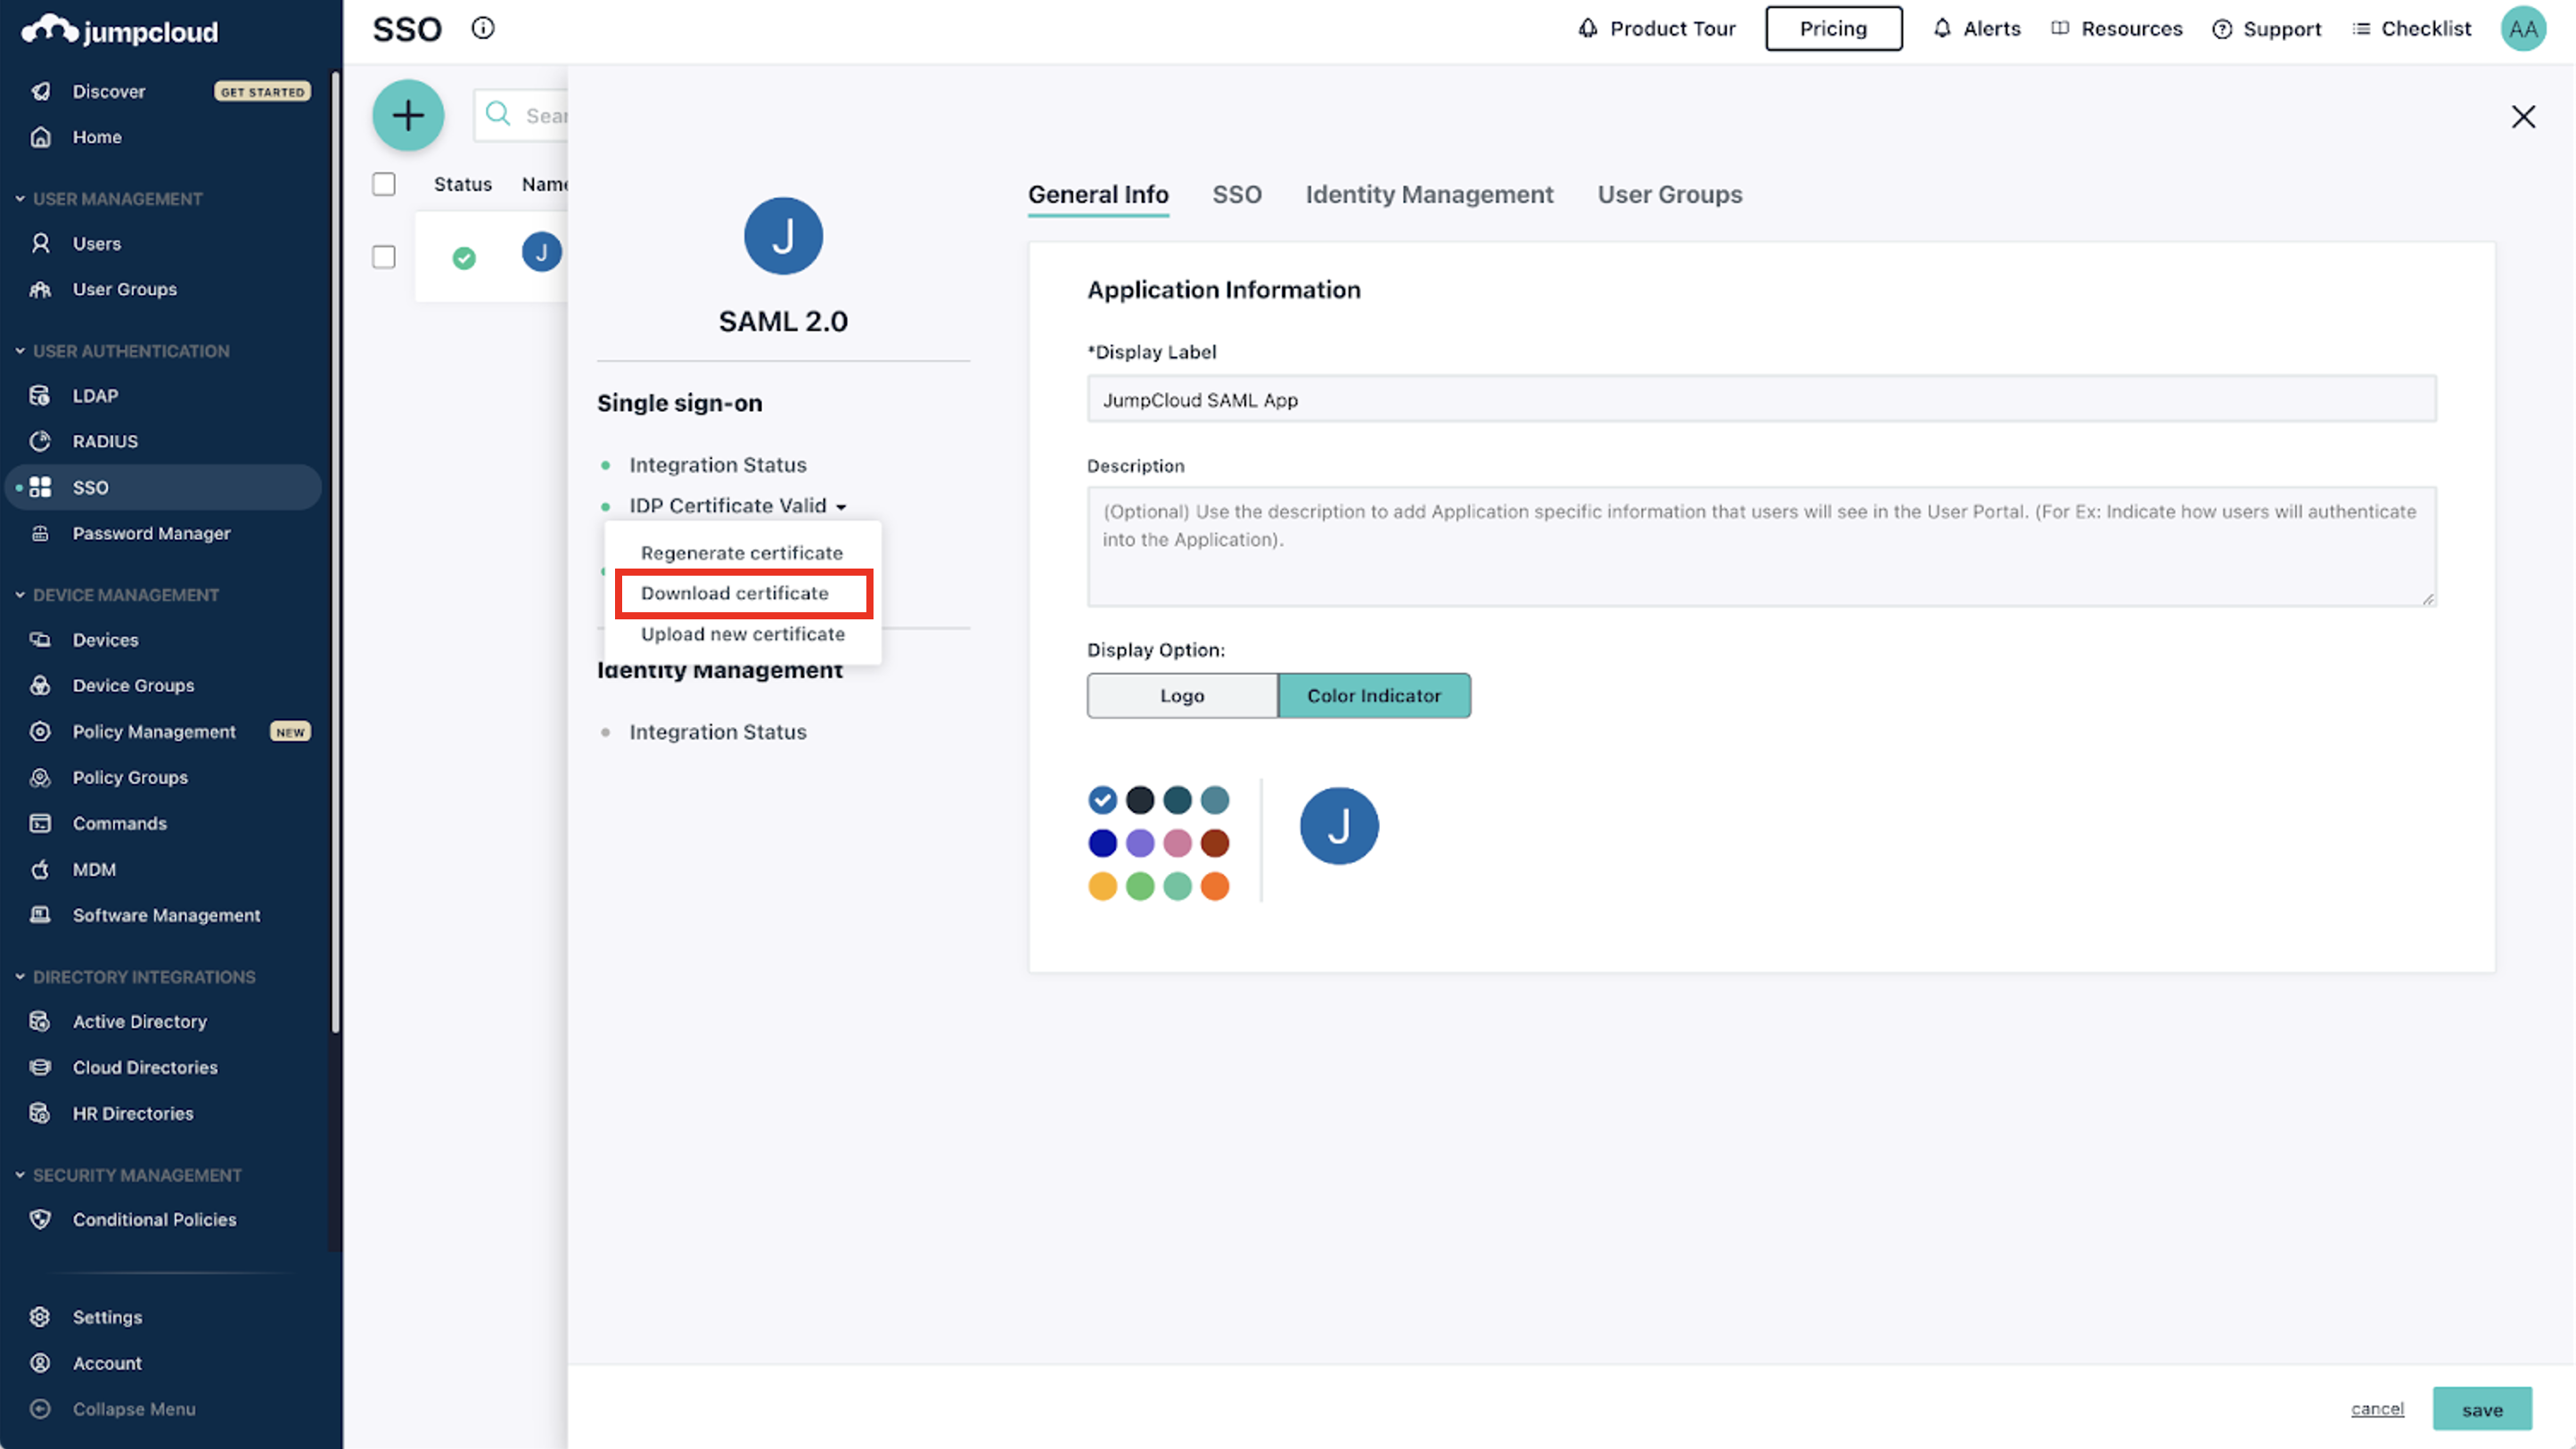
Note: You can also find the certificate by clicking on the SSO instance you created.
- Go back to the Axis Management Console. Paste in the Single sign-on URL the IDP URL you copied from JumpCloud (you can view this URL again when clicking on the SSO instance you created in JumpCloud). Then click on Upload Certificate and select the certificate you downloaded from JumpCloud.
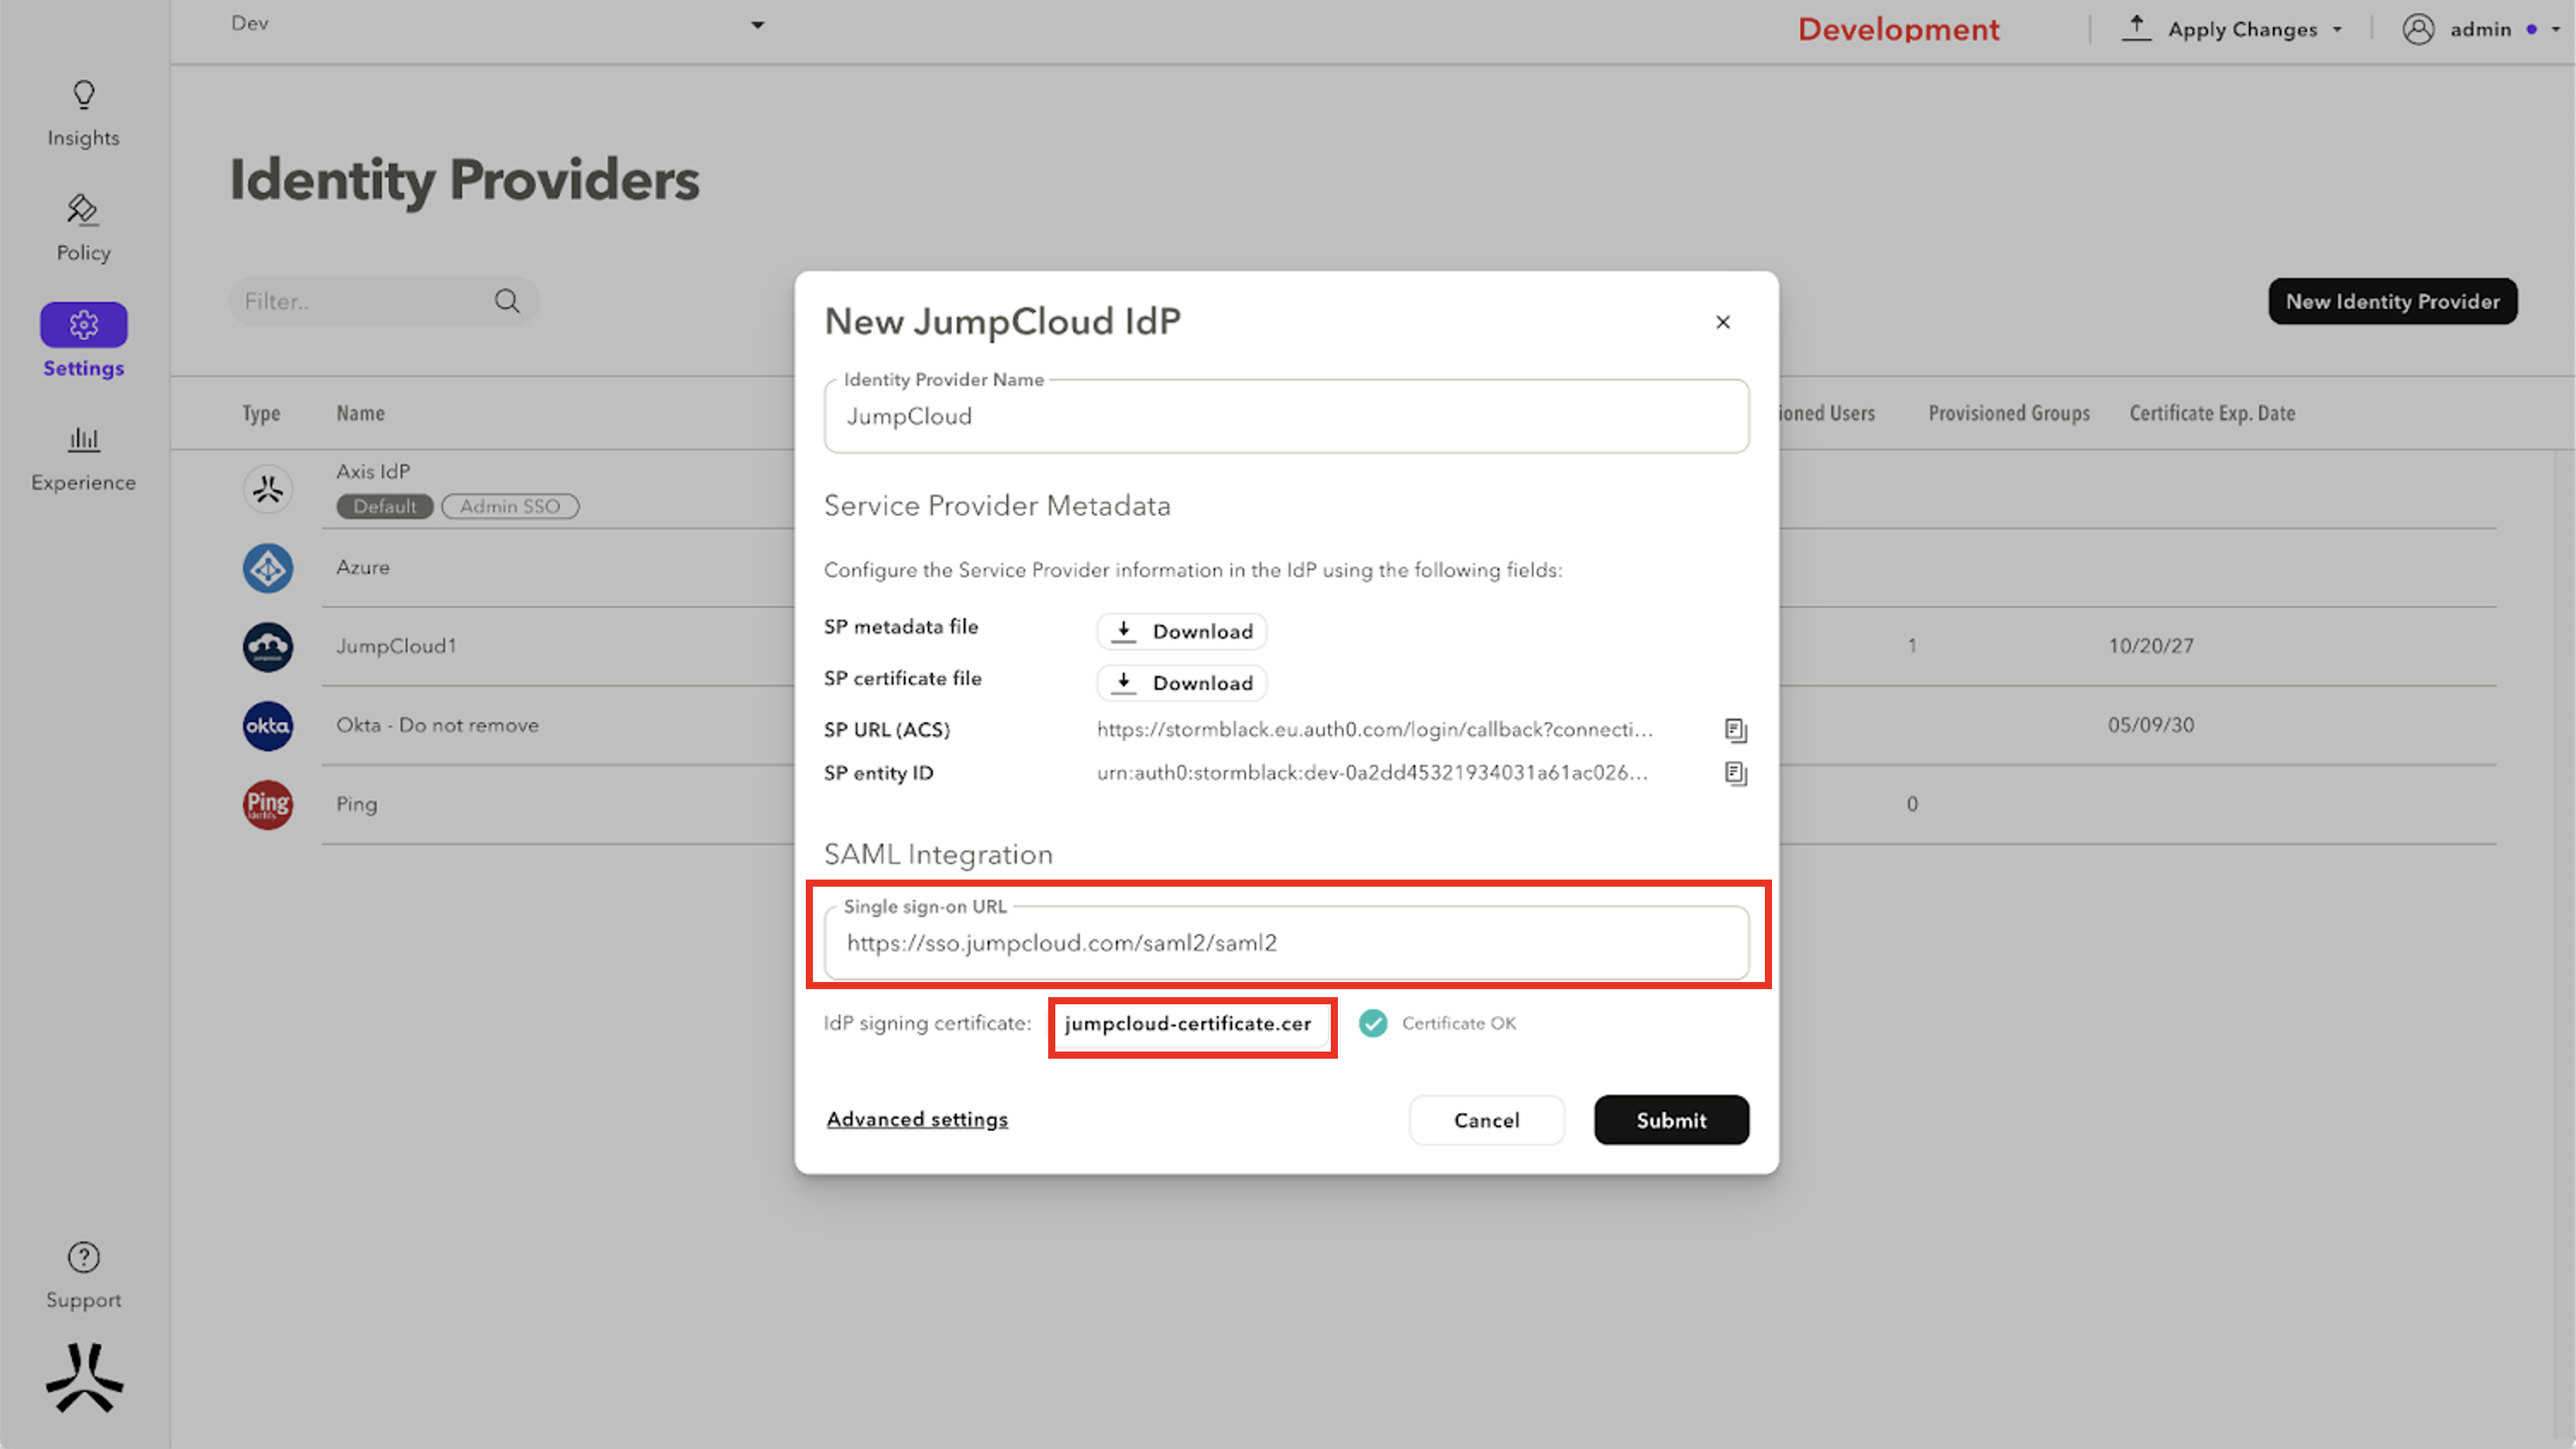
- Click on Submit.
Updated about 3 years ago
