SSH User Provisioning
Administrators can define a root username and password for a Linux machine so that Axis creates a username and password for users with permission to access the machine based on the Identity Provider (IdP) information.
Prerequisites
Administrators must have one of the following root user credentials:
- Server username and password
- Server username and key
Enabling User Provisioning
To enable SSH User Provisioning:
- Go to Settings-> Destinations -> New Application.
- Select SSH Server.
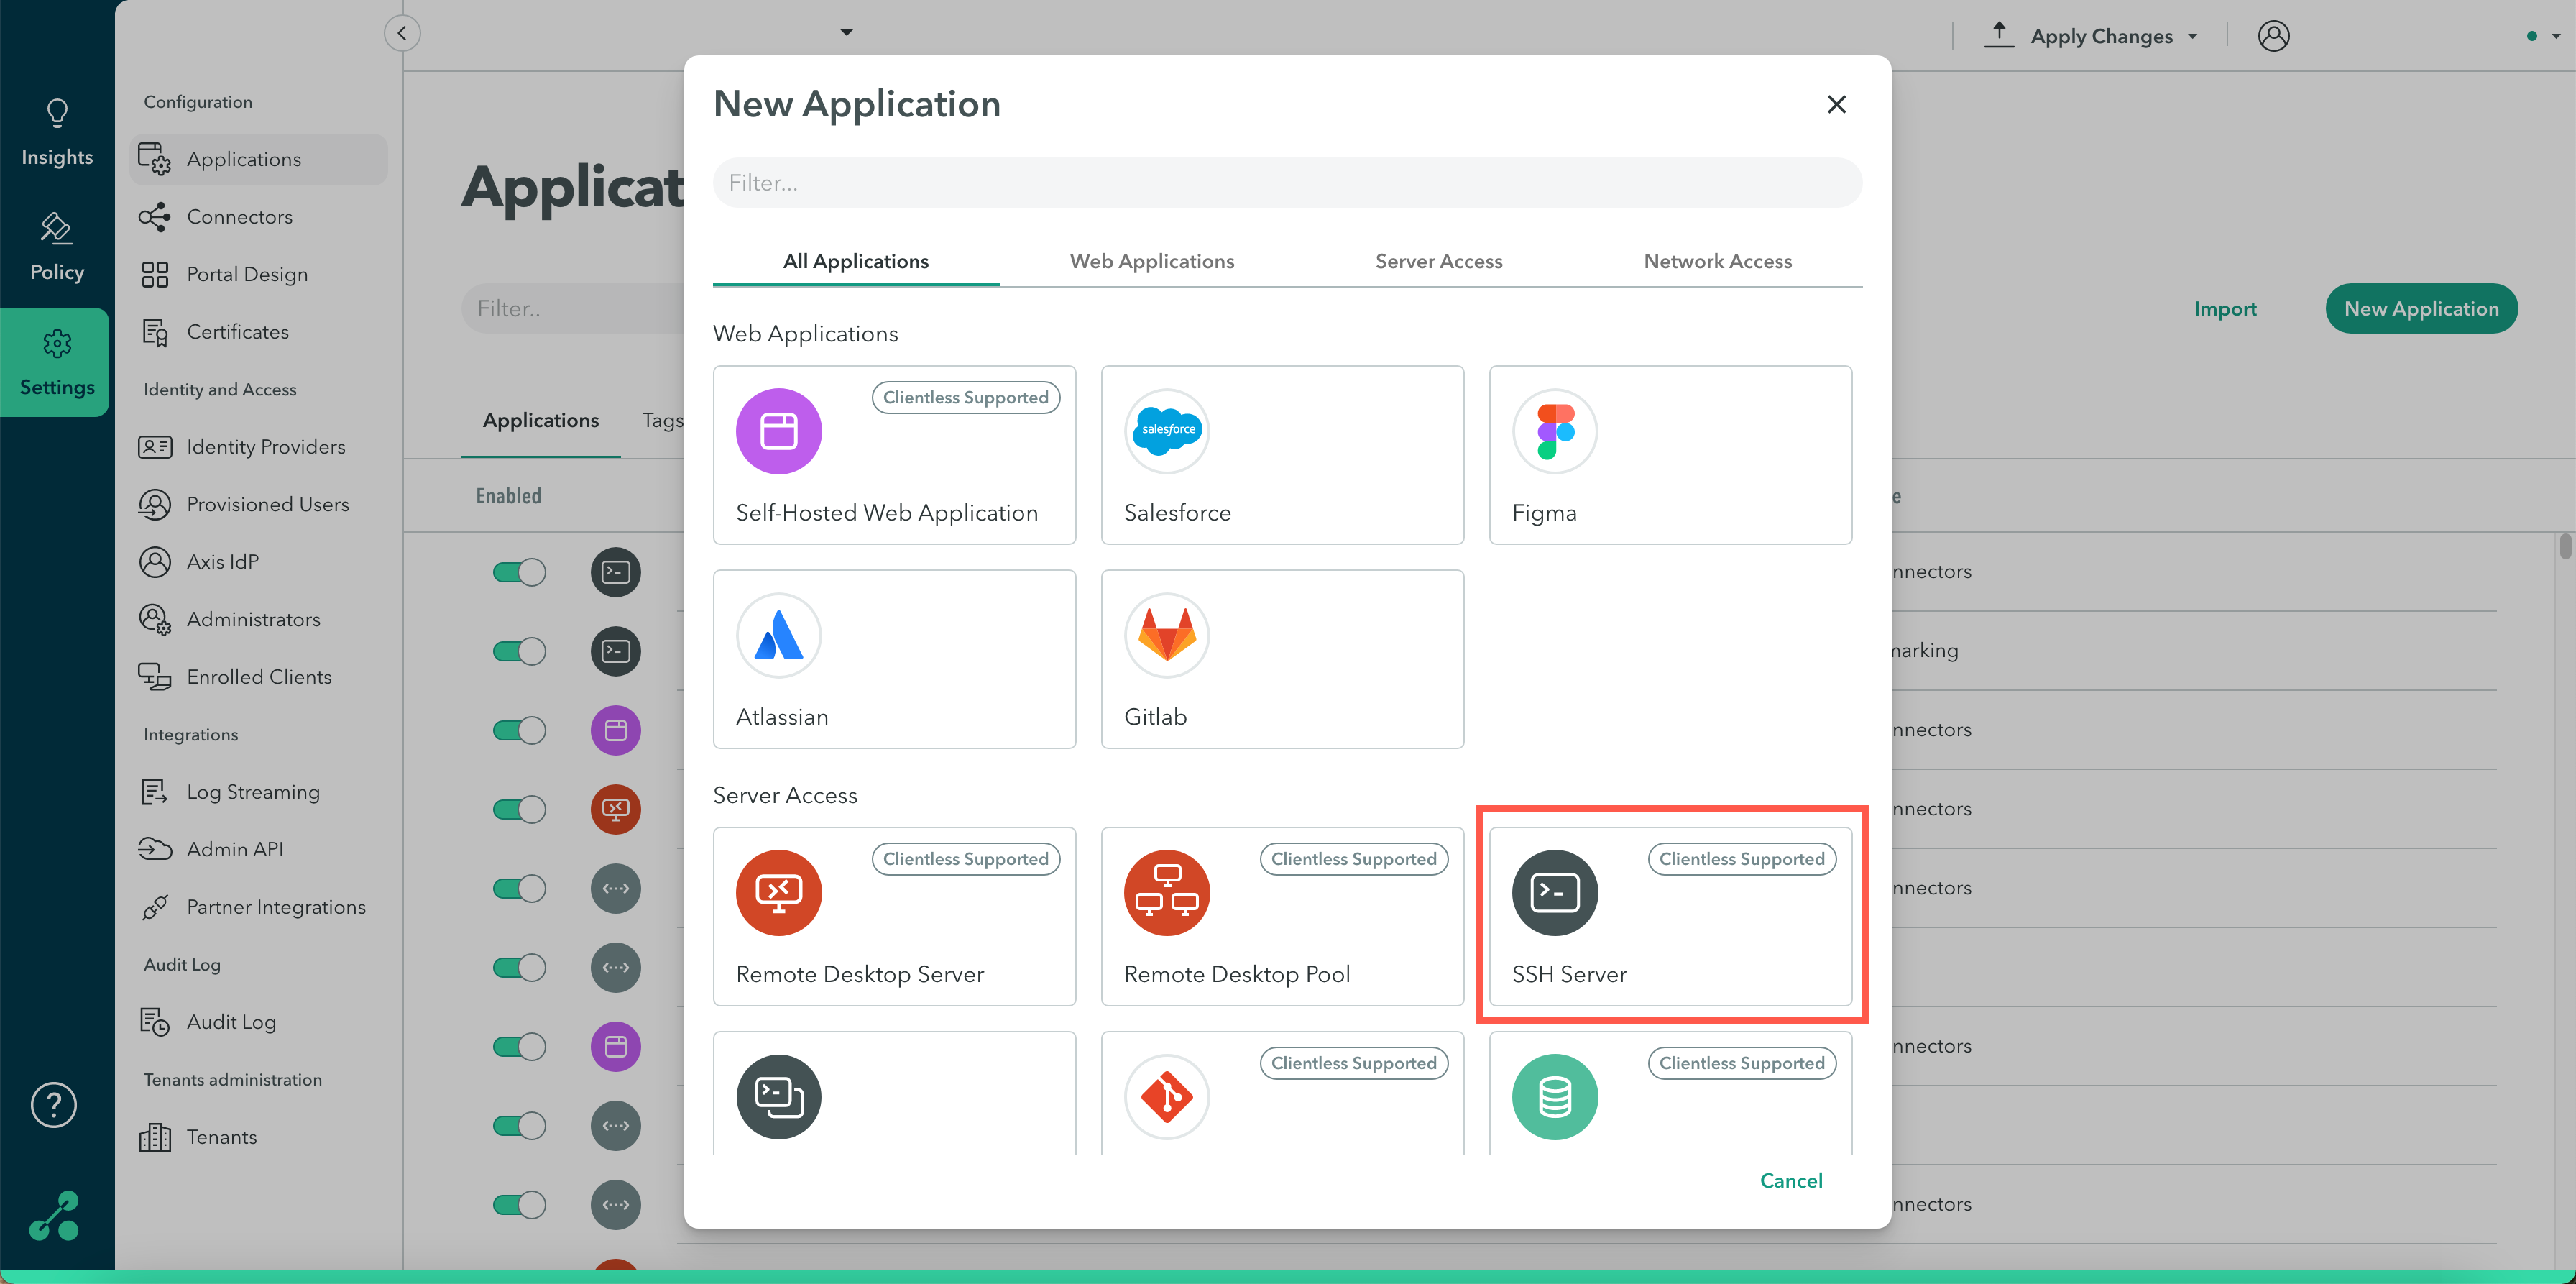
The New SSH Server window appears.
In the Name, enter the name of the application.
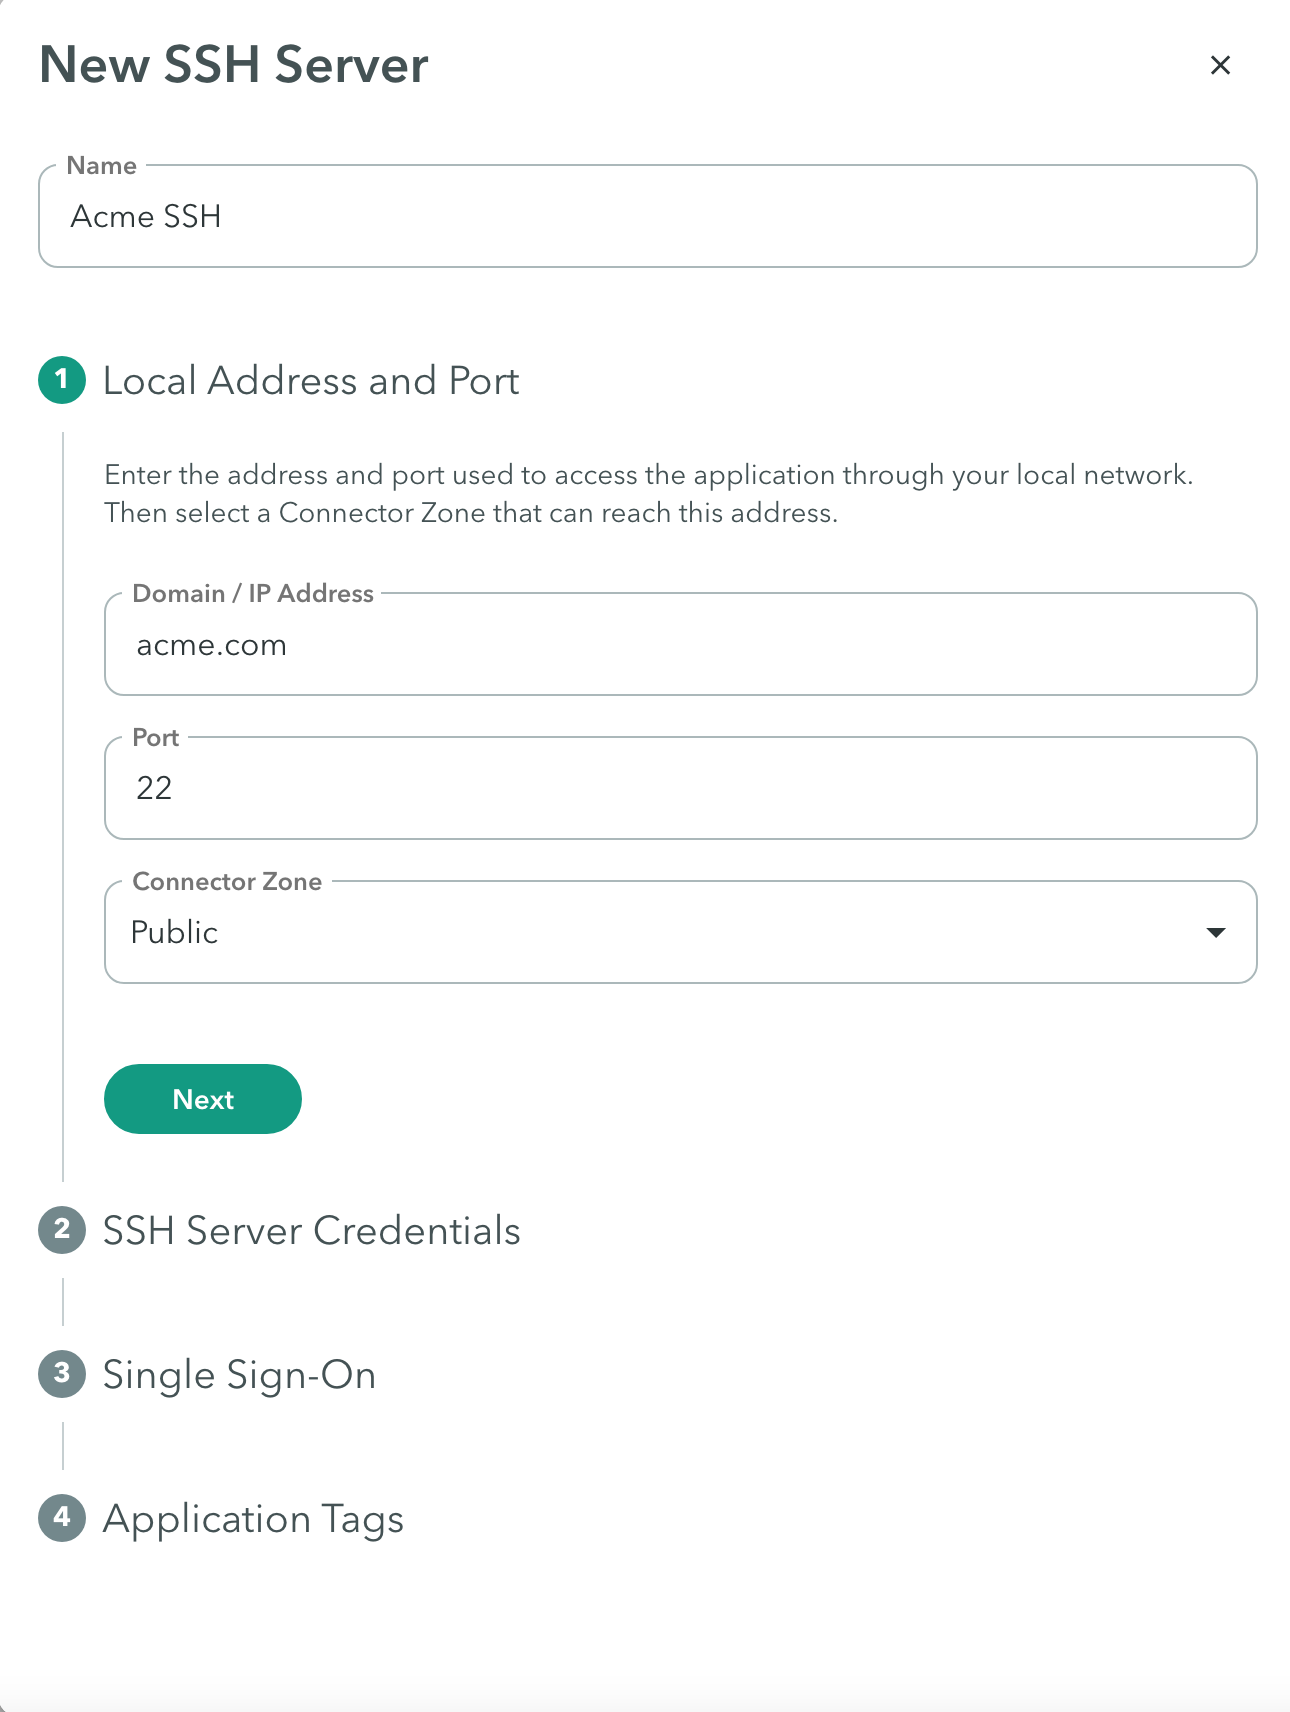
Local Address And Port
- In the Domain field, add the domain or IP address.
Specify the application’s Local Domain/FQDN/IP address that is visible to the connector for the network segment. - In the Port, specify the port for the application as an integer.
For SSH the default port is 22. - In the Connector Zone, select a Connector zone within the same network segment or that has access to the application. For more information about connector zones, click here.
- Click Next.
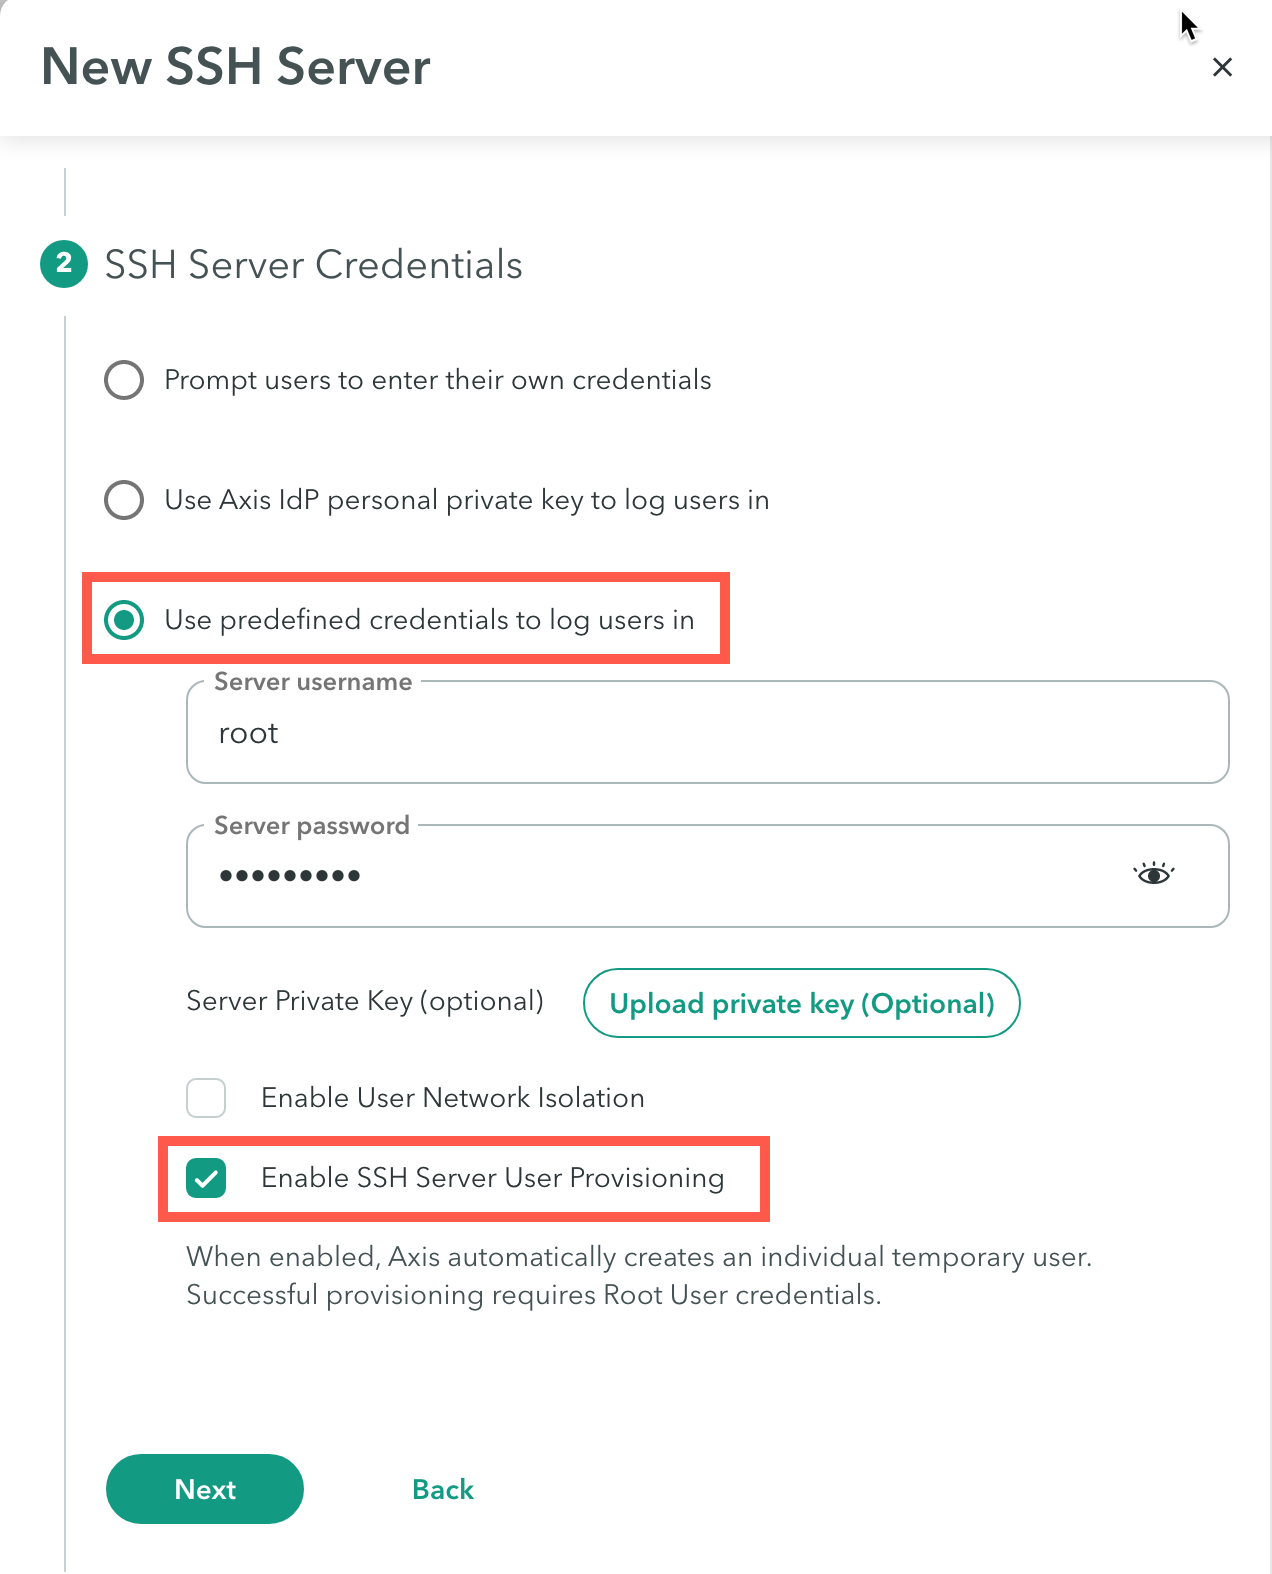
SSH Server Credentials
- In SSH Server Credentials, select Use predefined credentials to log users in.
- In the Server username and Server password, enter the root credentials.
- Select Enable SSH Server User Provisioning.
Note
When enabled, when a user accesses the server, Axis connects to the server with the root credentials, creates a local username and password according to the information from the IdP, and connects the user to the server with these credentials.
Upon subsequent access, the user will be automatically logged in with the credentials.
- Click Next.
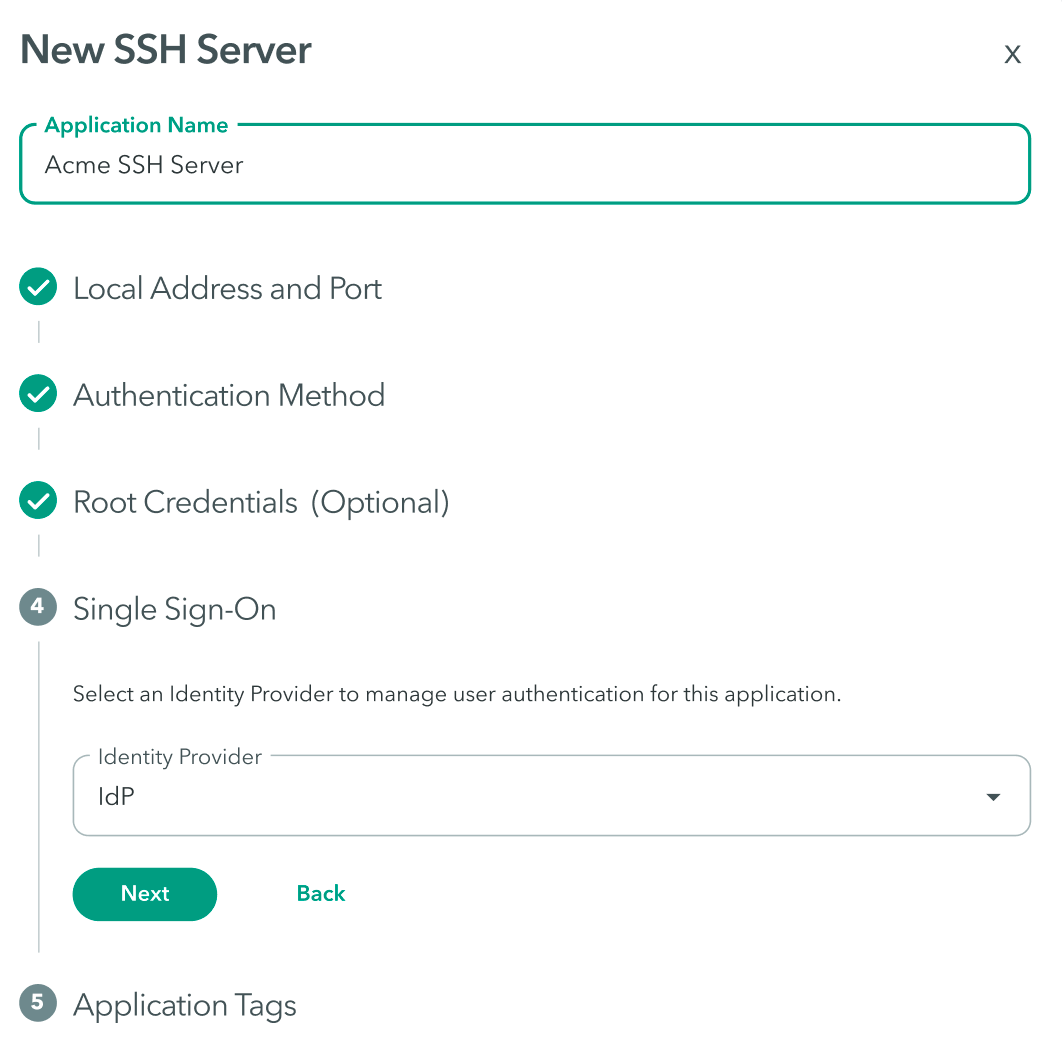
Single Sign-On
- In the Single Sign-On, click the Identity Provider drop-down menu and select the Identity Provider that will manage authentication for this application.
- Click Next.
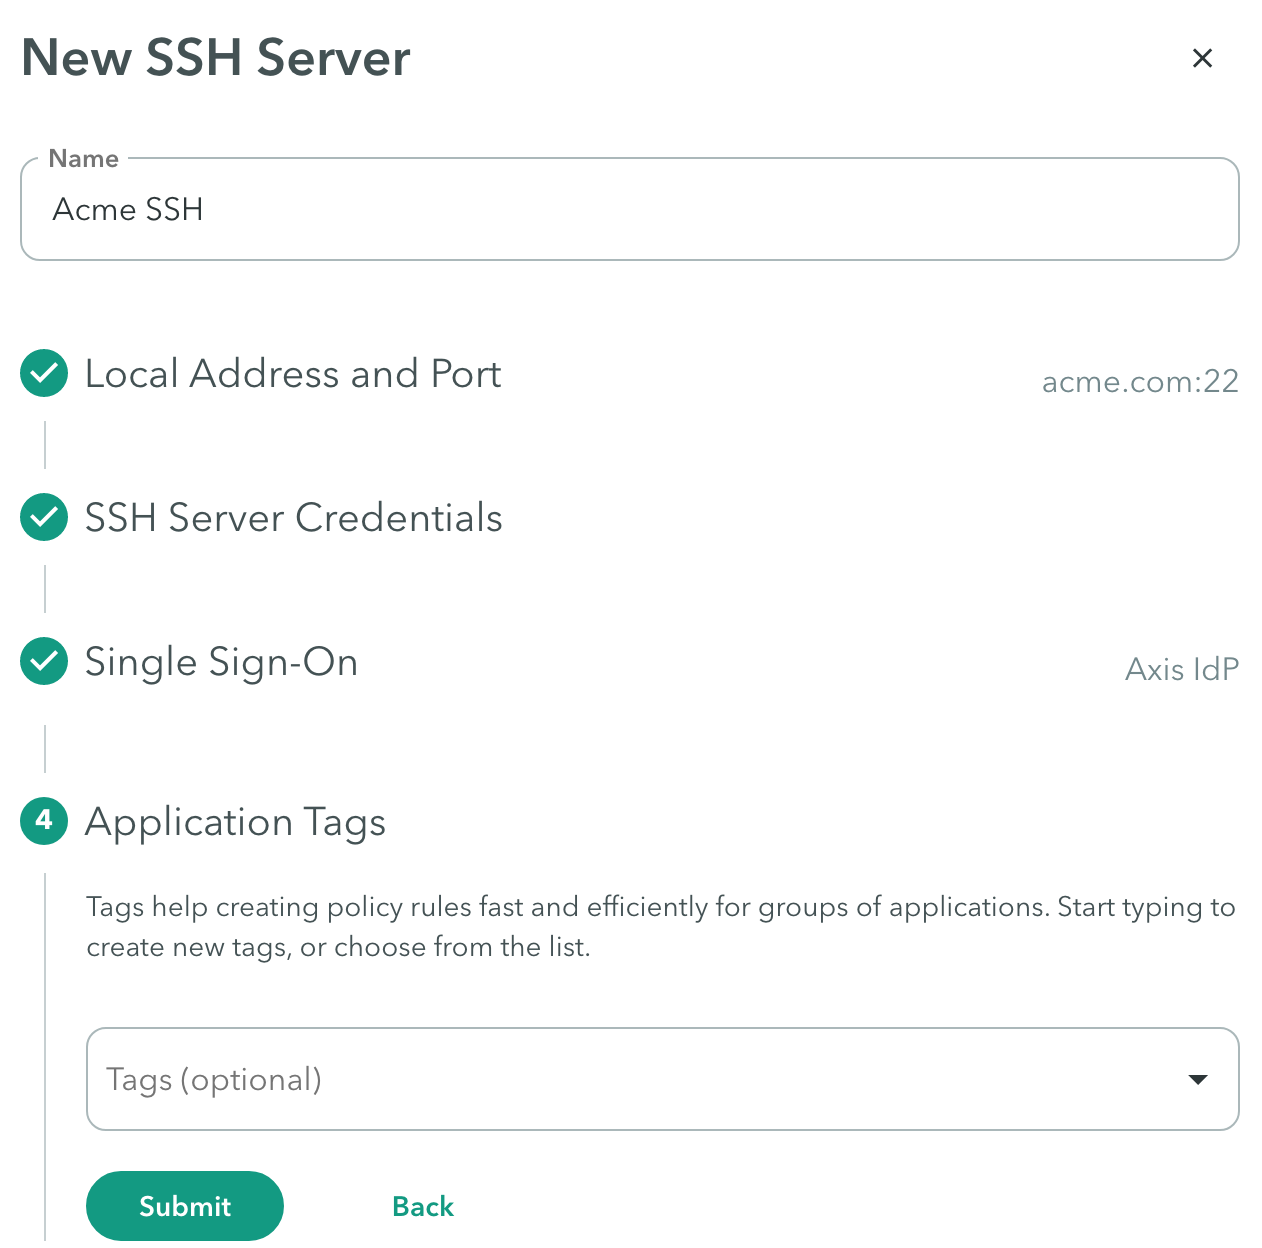
Application Tags (Optional)
Tags help create policy rules fast and efficiently for groups of applications. Click here ]to learn more about creating application tags.
- In the Application Tags, start typing to create new tags, or choose from the Tags drop-down menu.
- Click Submit.
Note
To commit your changes, navigate to the top-right menu, click Apply Changes, then select Commit Changes.
Updated almost 2 years ago
