Configuring a Web Application's Advanced Settings
After adding a new web application, you can configure its advanced settings and API Application Access
NoteThis is a limited release feature.
Use the Advanced Settings screen to configure:
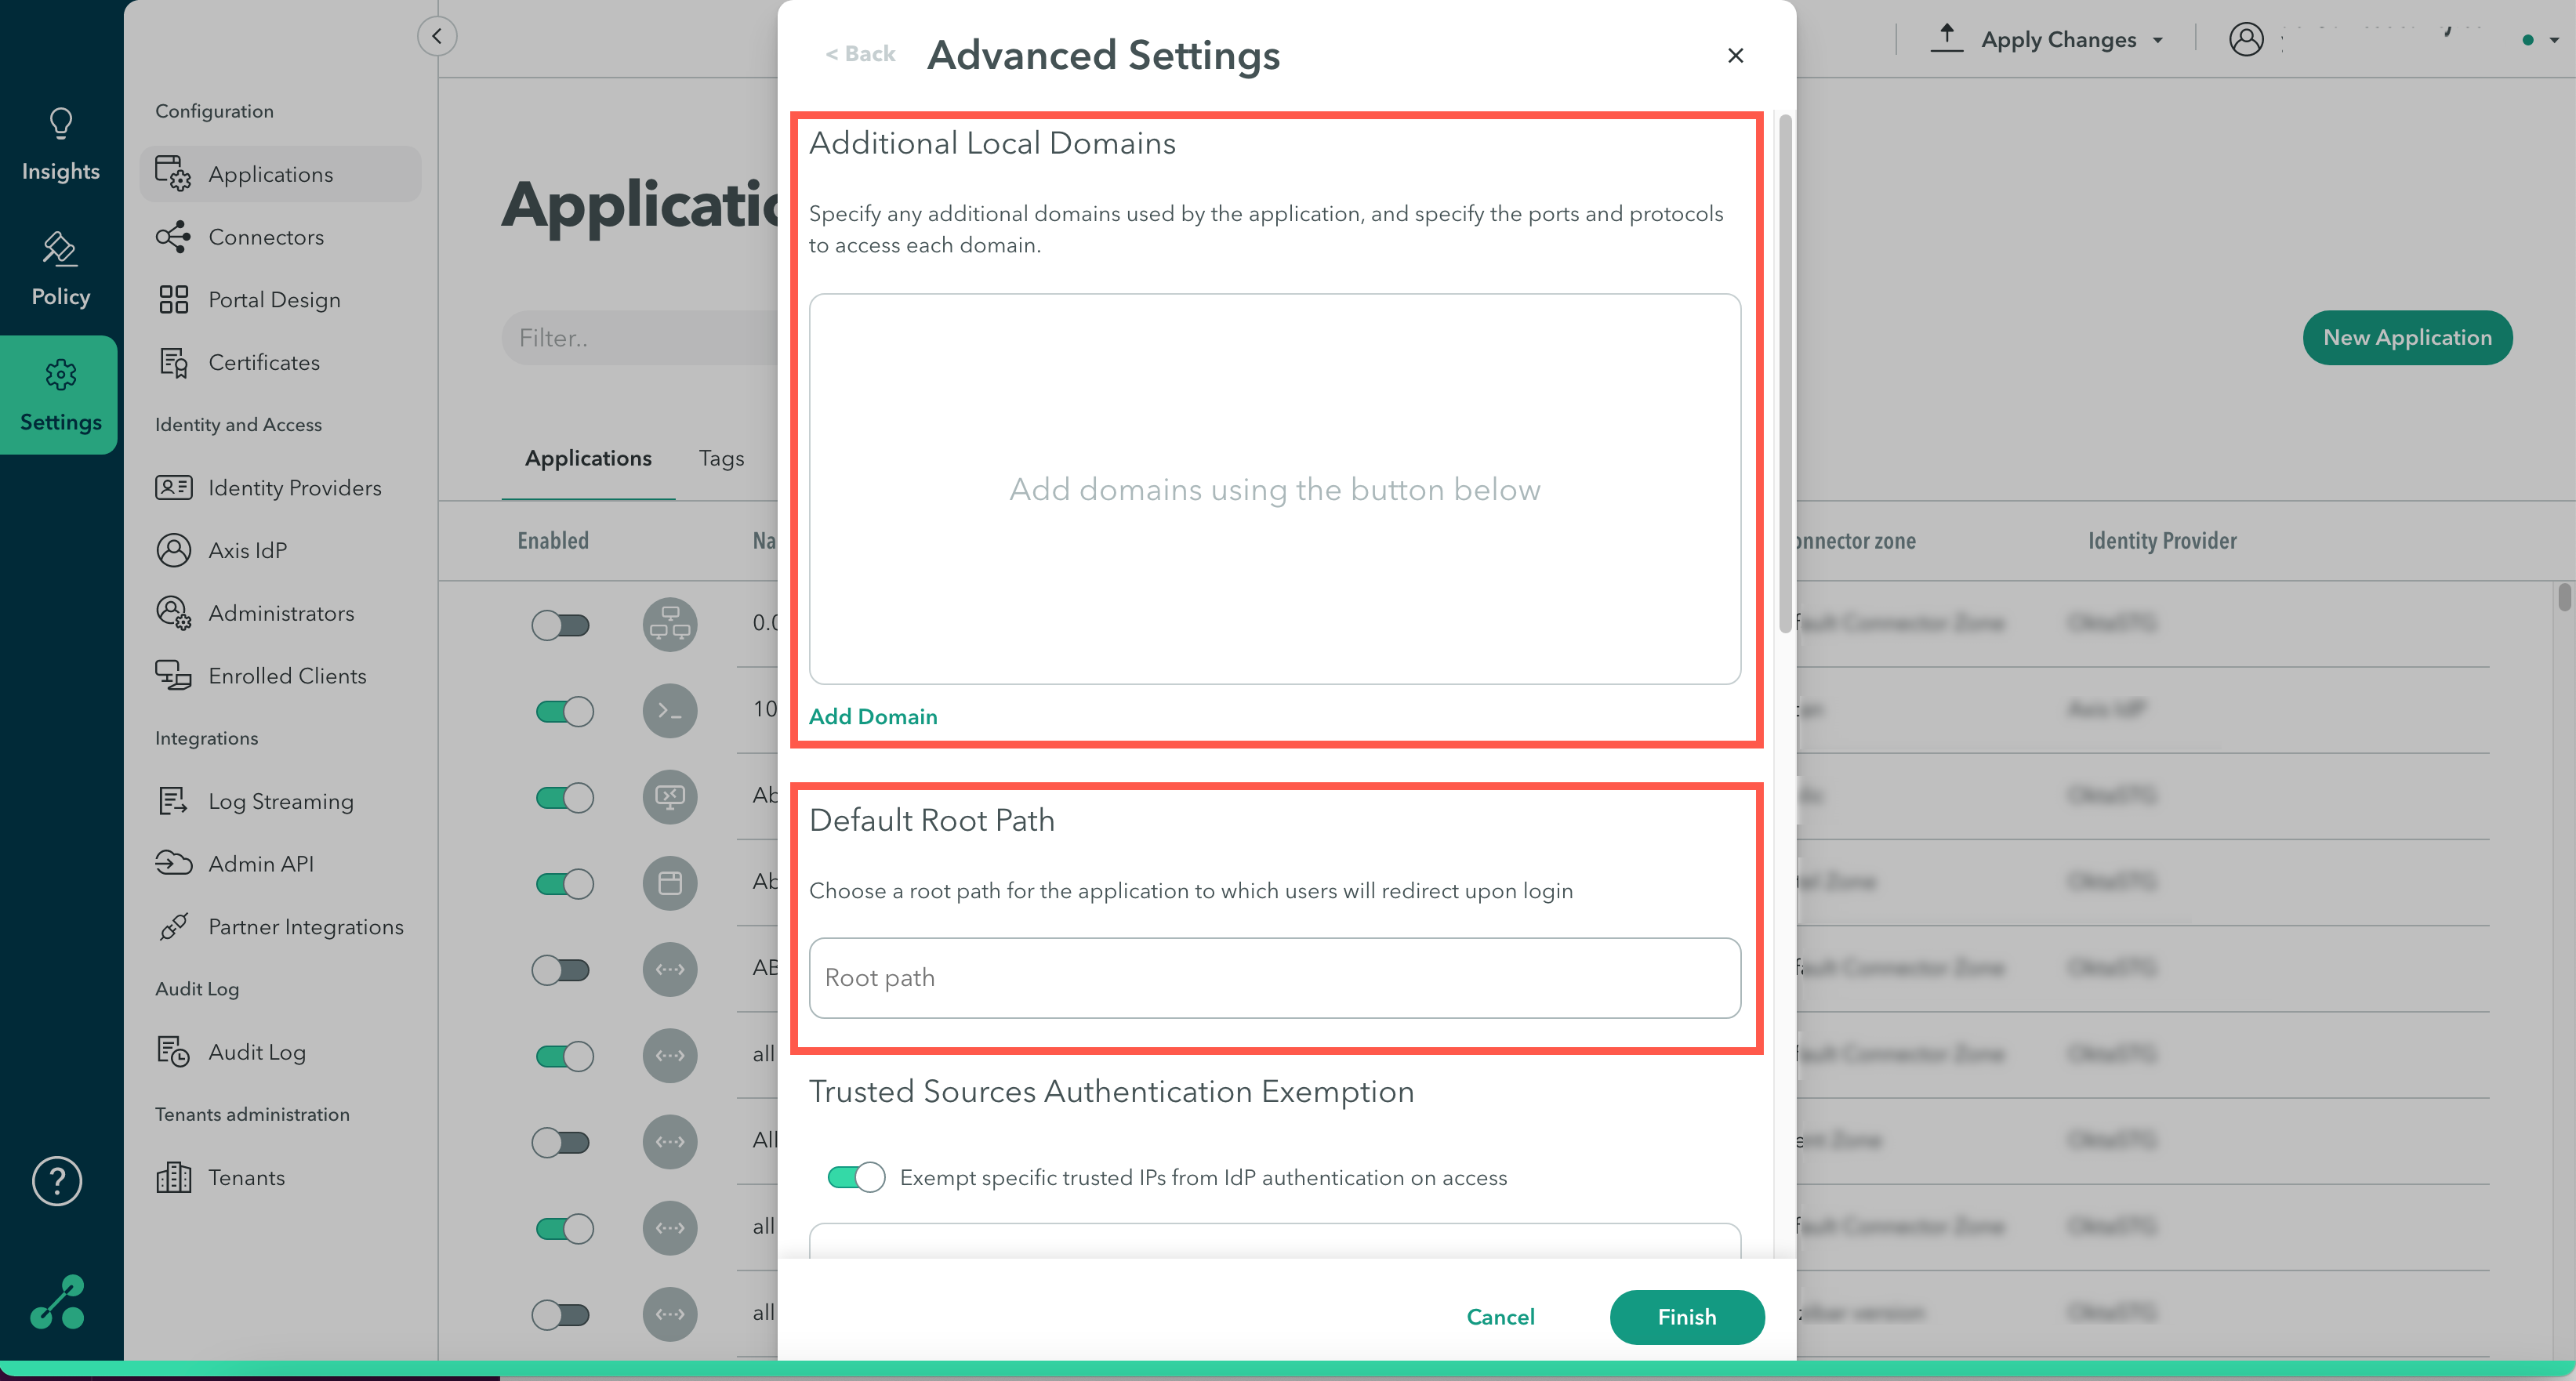
- Additional Local Domains
- Default Root Path
- Trusted Sources Authentication Exemption
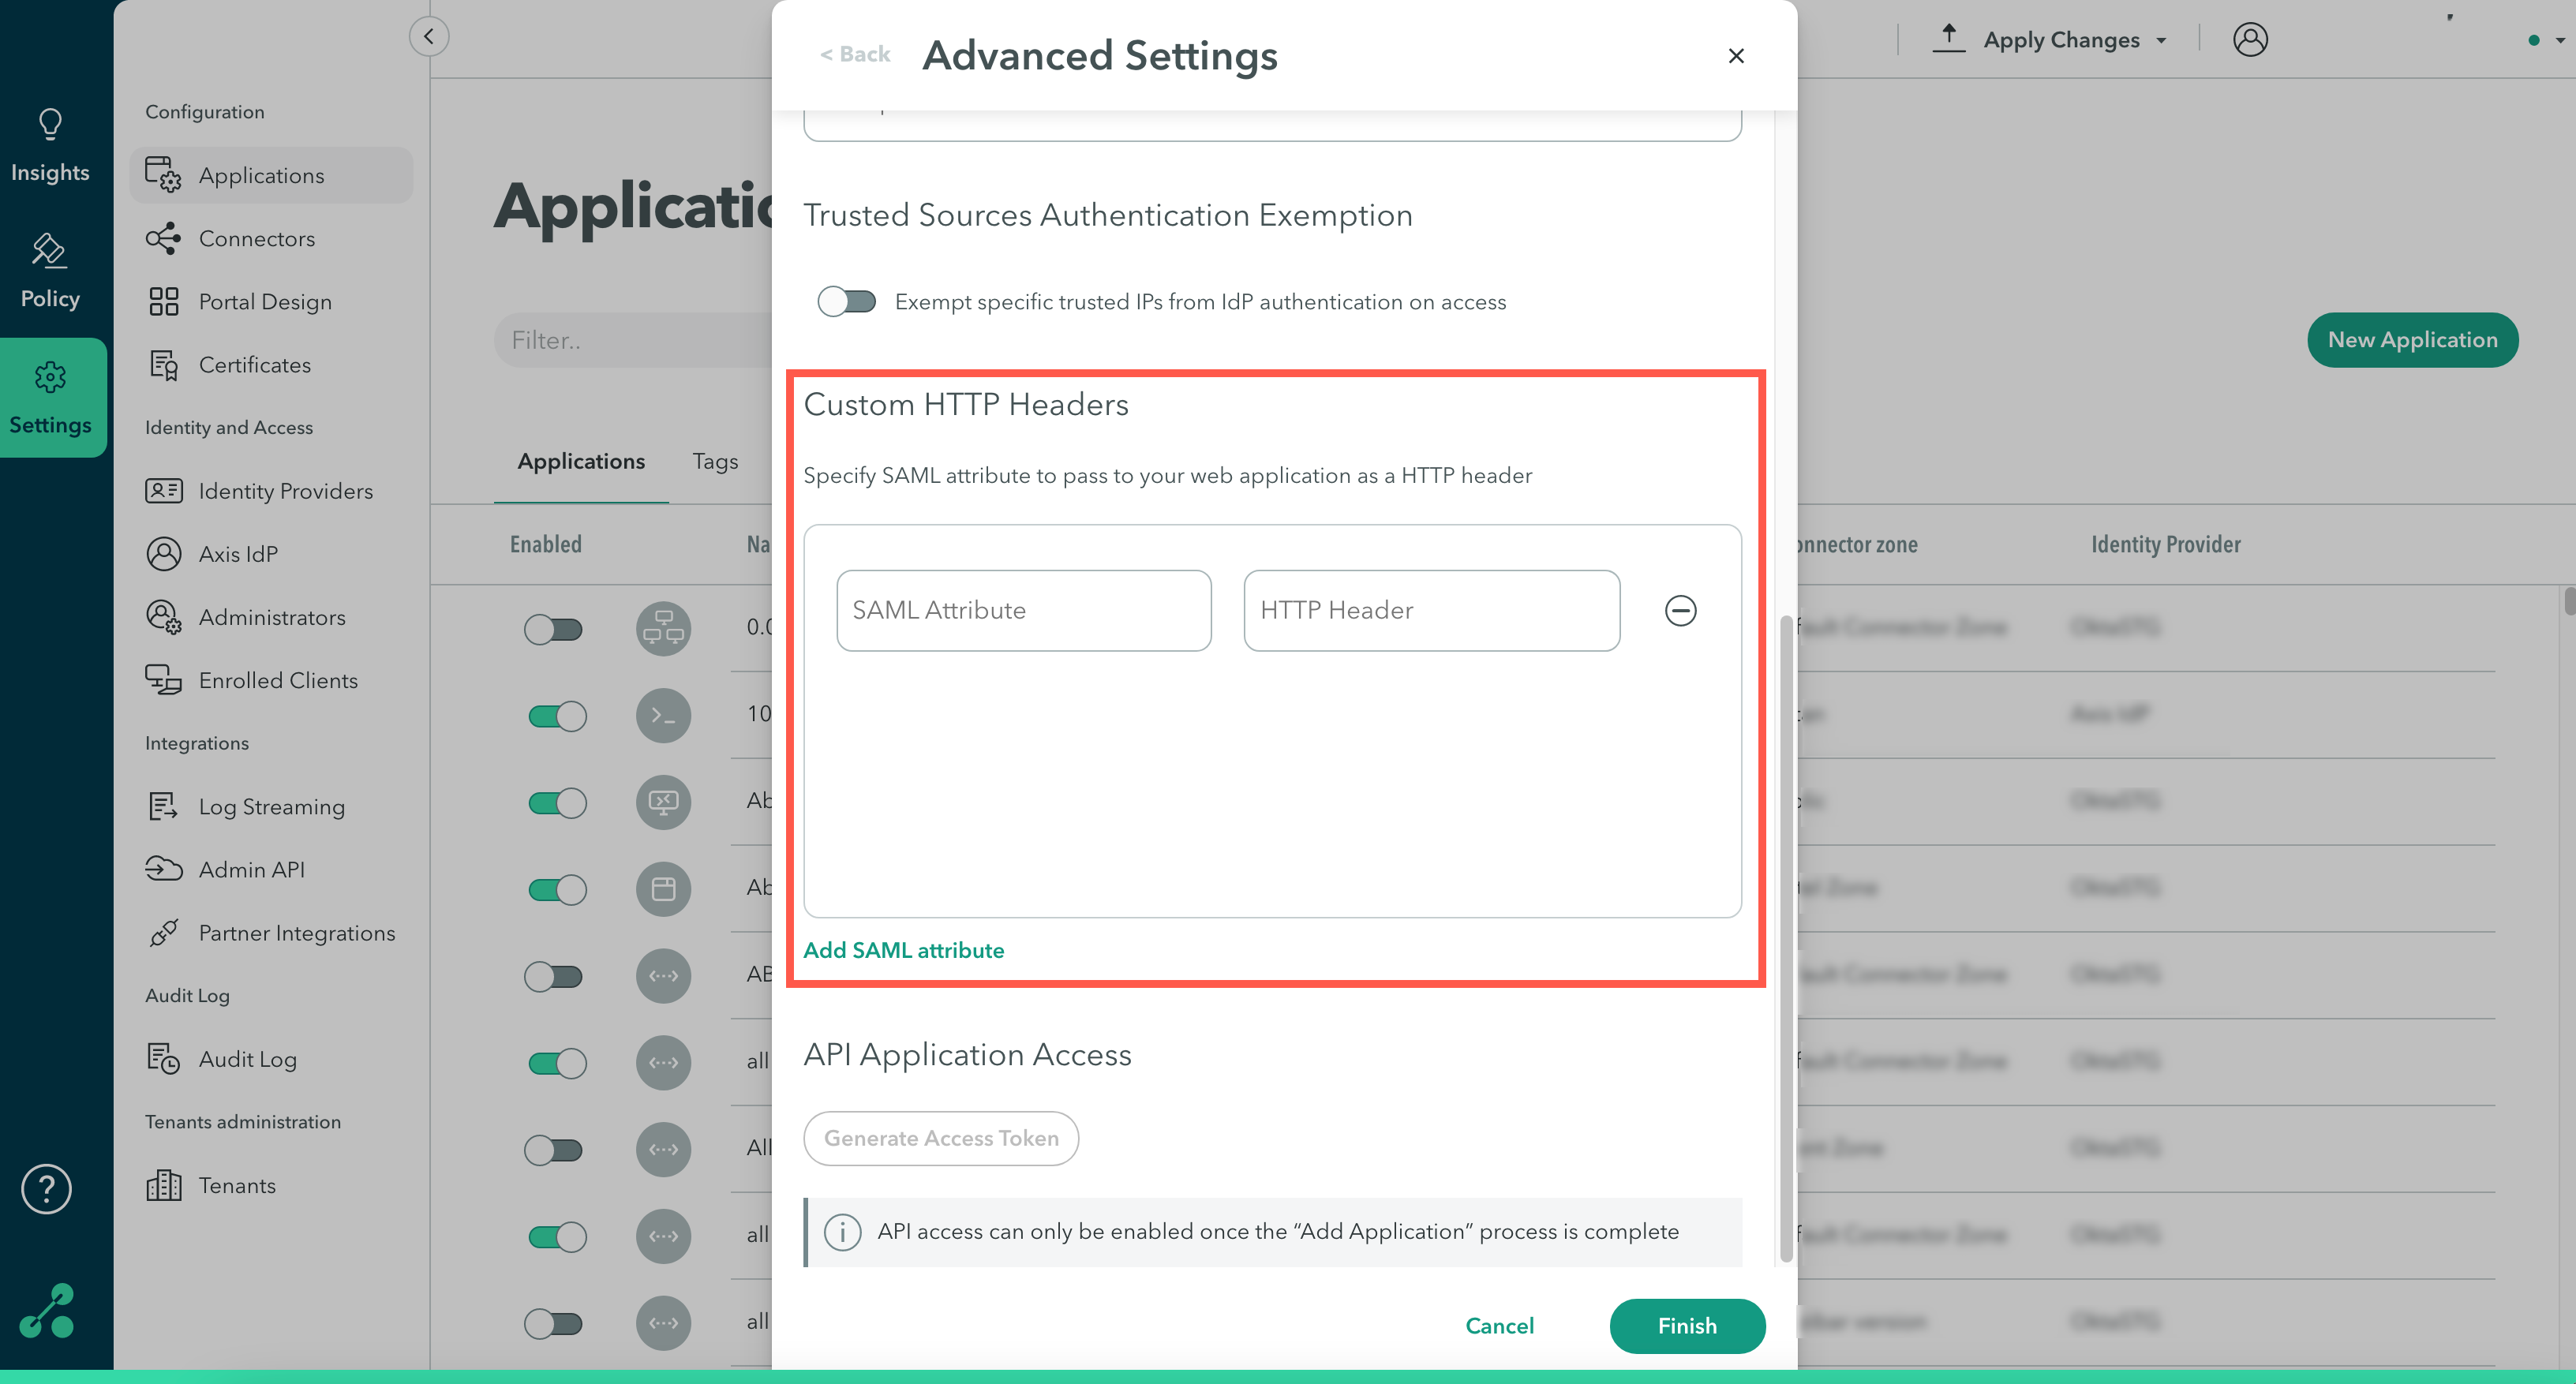
- Custom HTTP Headers
- API Application Access
Step 1: Additional Local Domains
To add local domains that are used by the application:
-
Click Add Domain.
-
For the domain configuration, enter the following:
Protocol: select the web protocol to access the domain: HTTP or HTTPS.
Domain: Enter the domain name.
Port: Add the port to access the domain.
AJAX: Enable this feature to support AJAX requests for additional domains. -
Click Finish.

Step 2: Default Root Path
Select a default root path to use for applications where there is no page for the root path.
Example
You have an internal SAP server https://sap.company.com, but it is serving multiple applications that different users need to access via URL paths. The root path allows the administrator to define which path will be used for this published application.
For example you might have 2 SAP applications for different users, and their URLs are https://sap.company.com/application1/login and **https://sap.company.com/application2/login. **
The administrator configures the respective path, such as /application1/login and /application2/login to the published application.
Step 3: Trusted Sources Authentication Exemption
Use the Trusted Sources Authentication Exemption option for server-to-server communication from a trusted resource without going through IdP authentication.
NoteThis is a limited release feature.
To configure a Trusted Sources Authentication Exemption:
-
Click the Exempt specific trusted IPs from IdP authentication on access toggle to enable the feature.
-
In the Source Name, enter the source name.
-
In the IP range/CIDR, enter the IP range or CIDR.

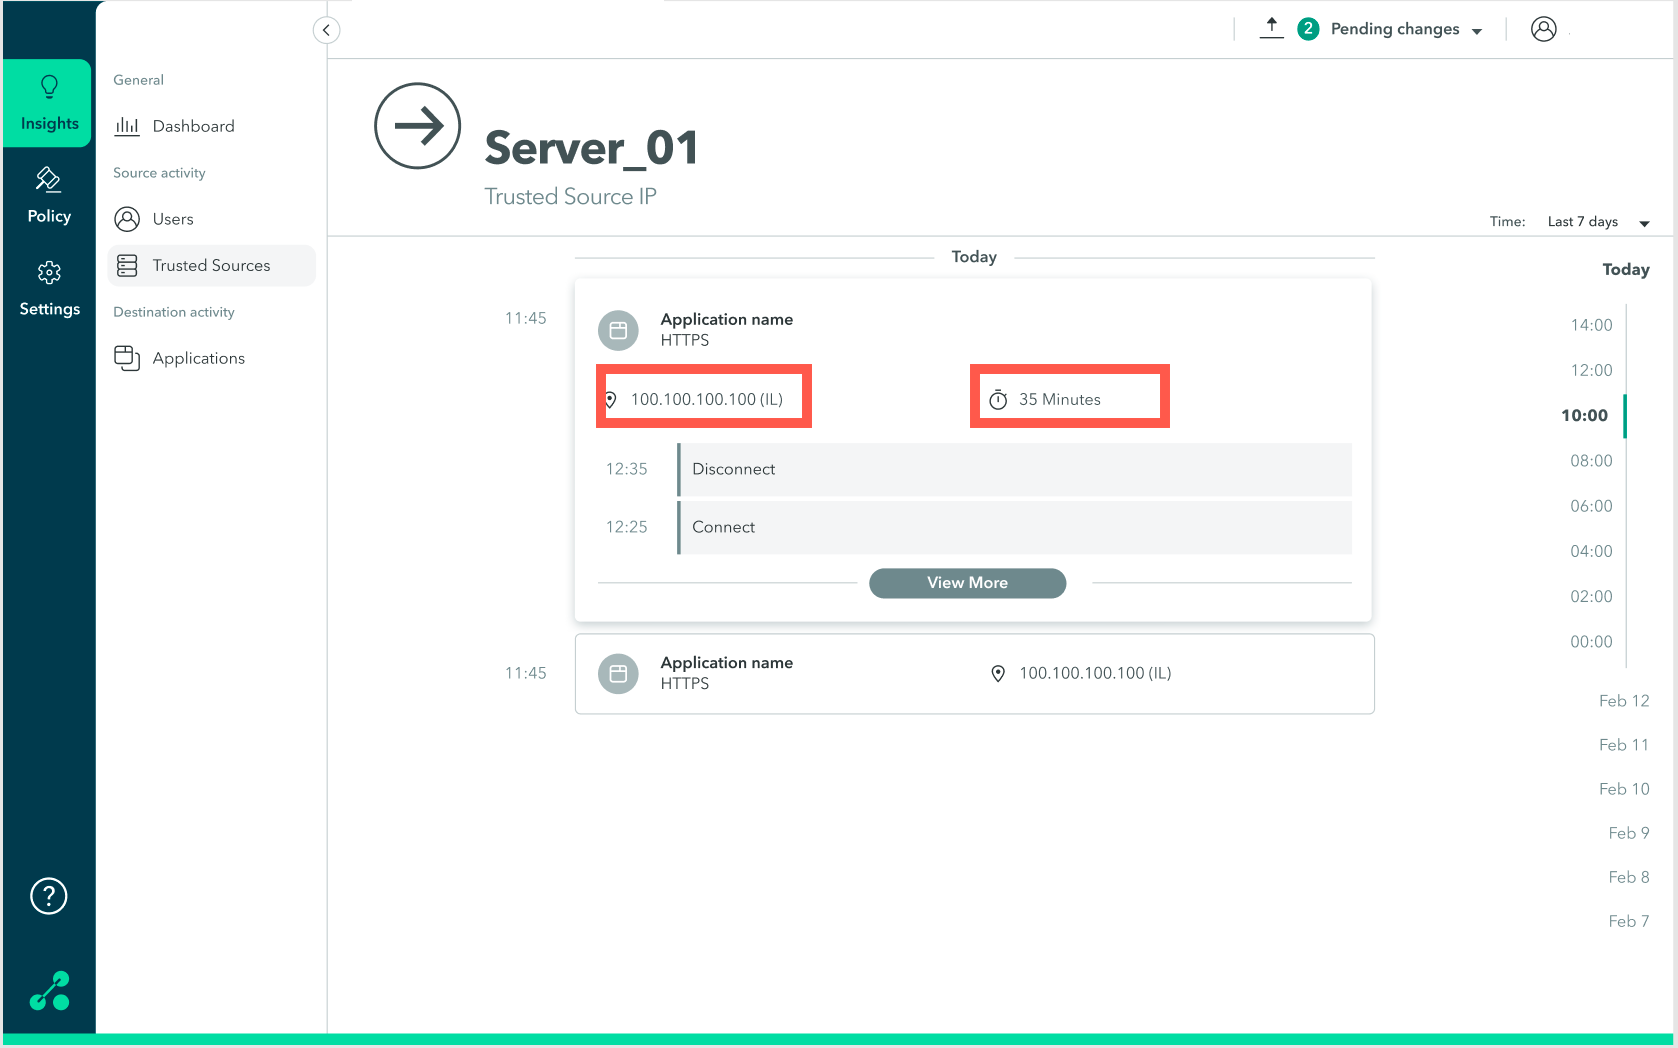
Viewing Trusted Sources Activity
You can view trusted source sessions, including the IP address, location, and duration of the session.
To view trusted source activity:
- Go to the Insights > Trusted Sources screen.
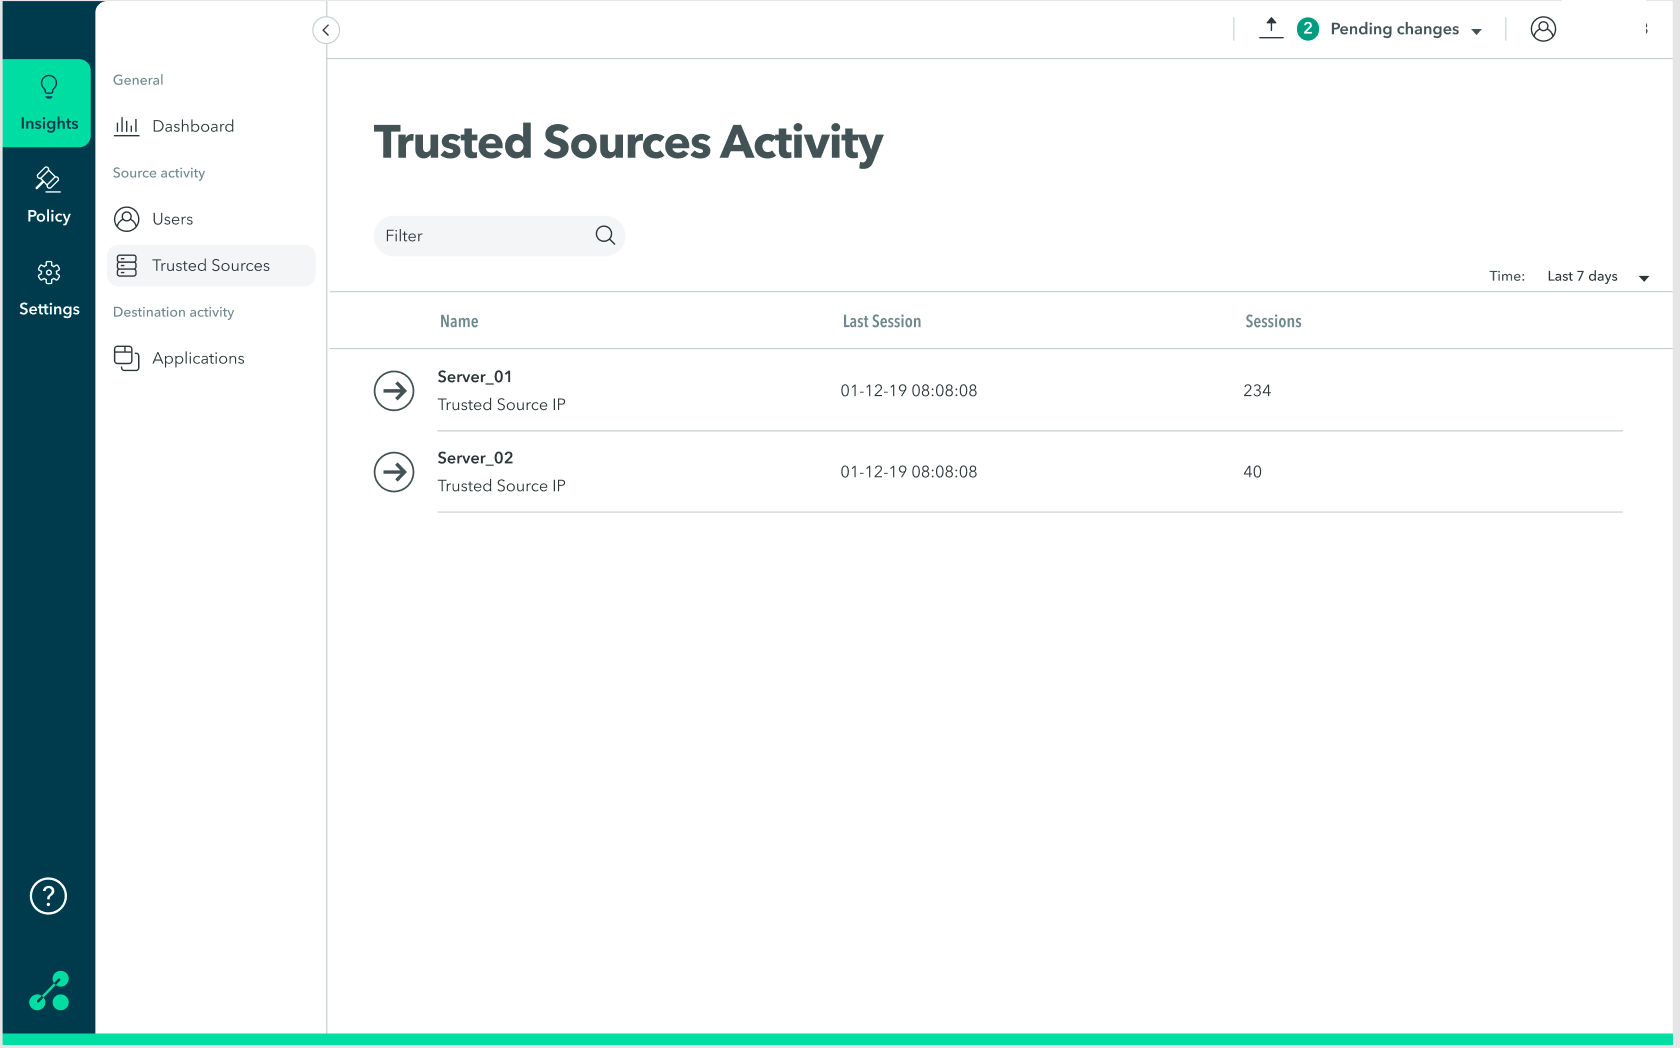
- On the trusted resource, click anywhere in the row to view detailed information about the trusted resource (IP address, location, and duration of session).
The following screen is displayed:
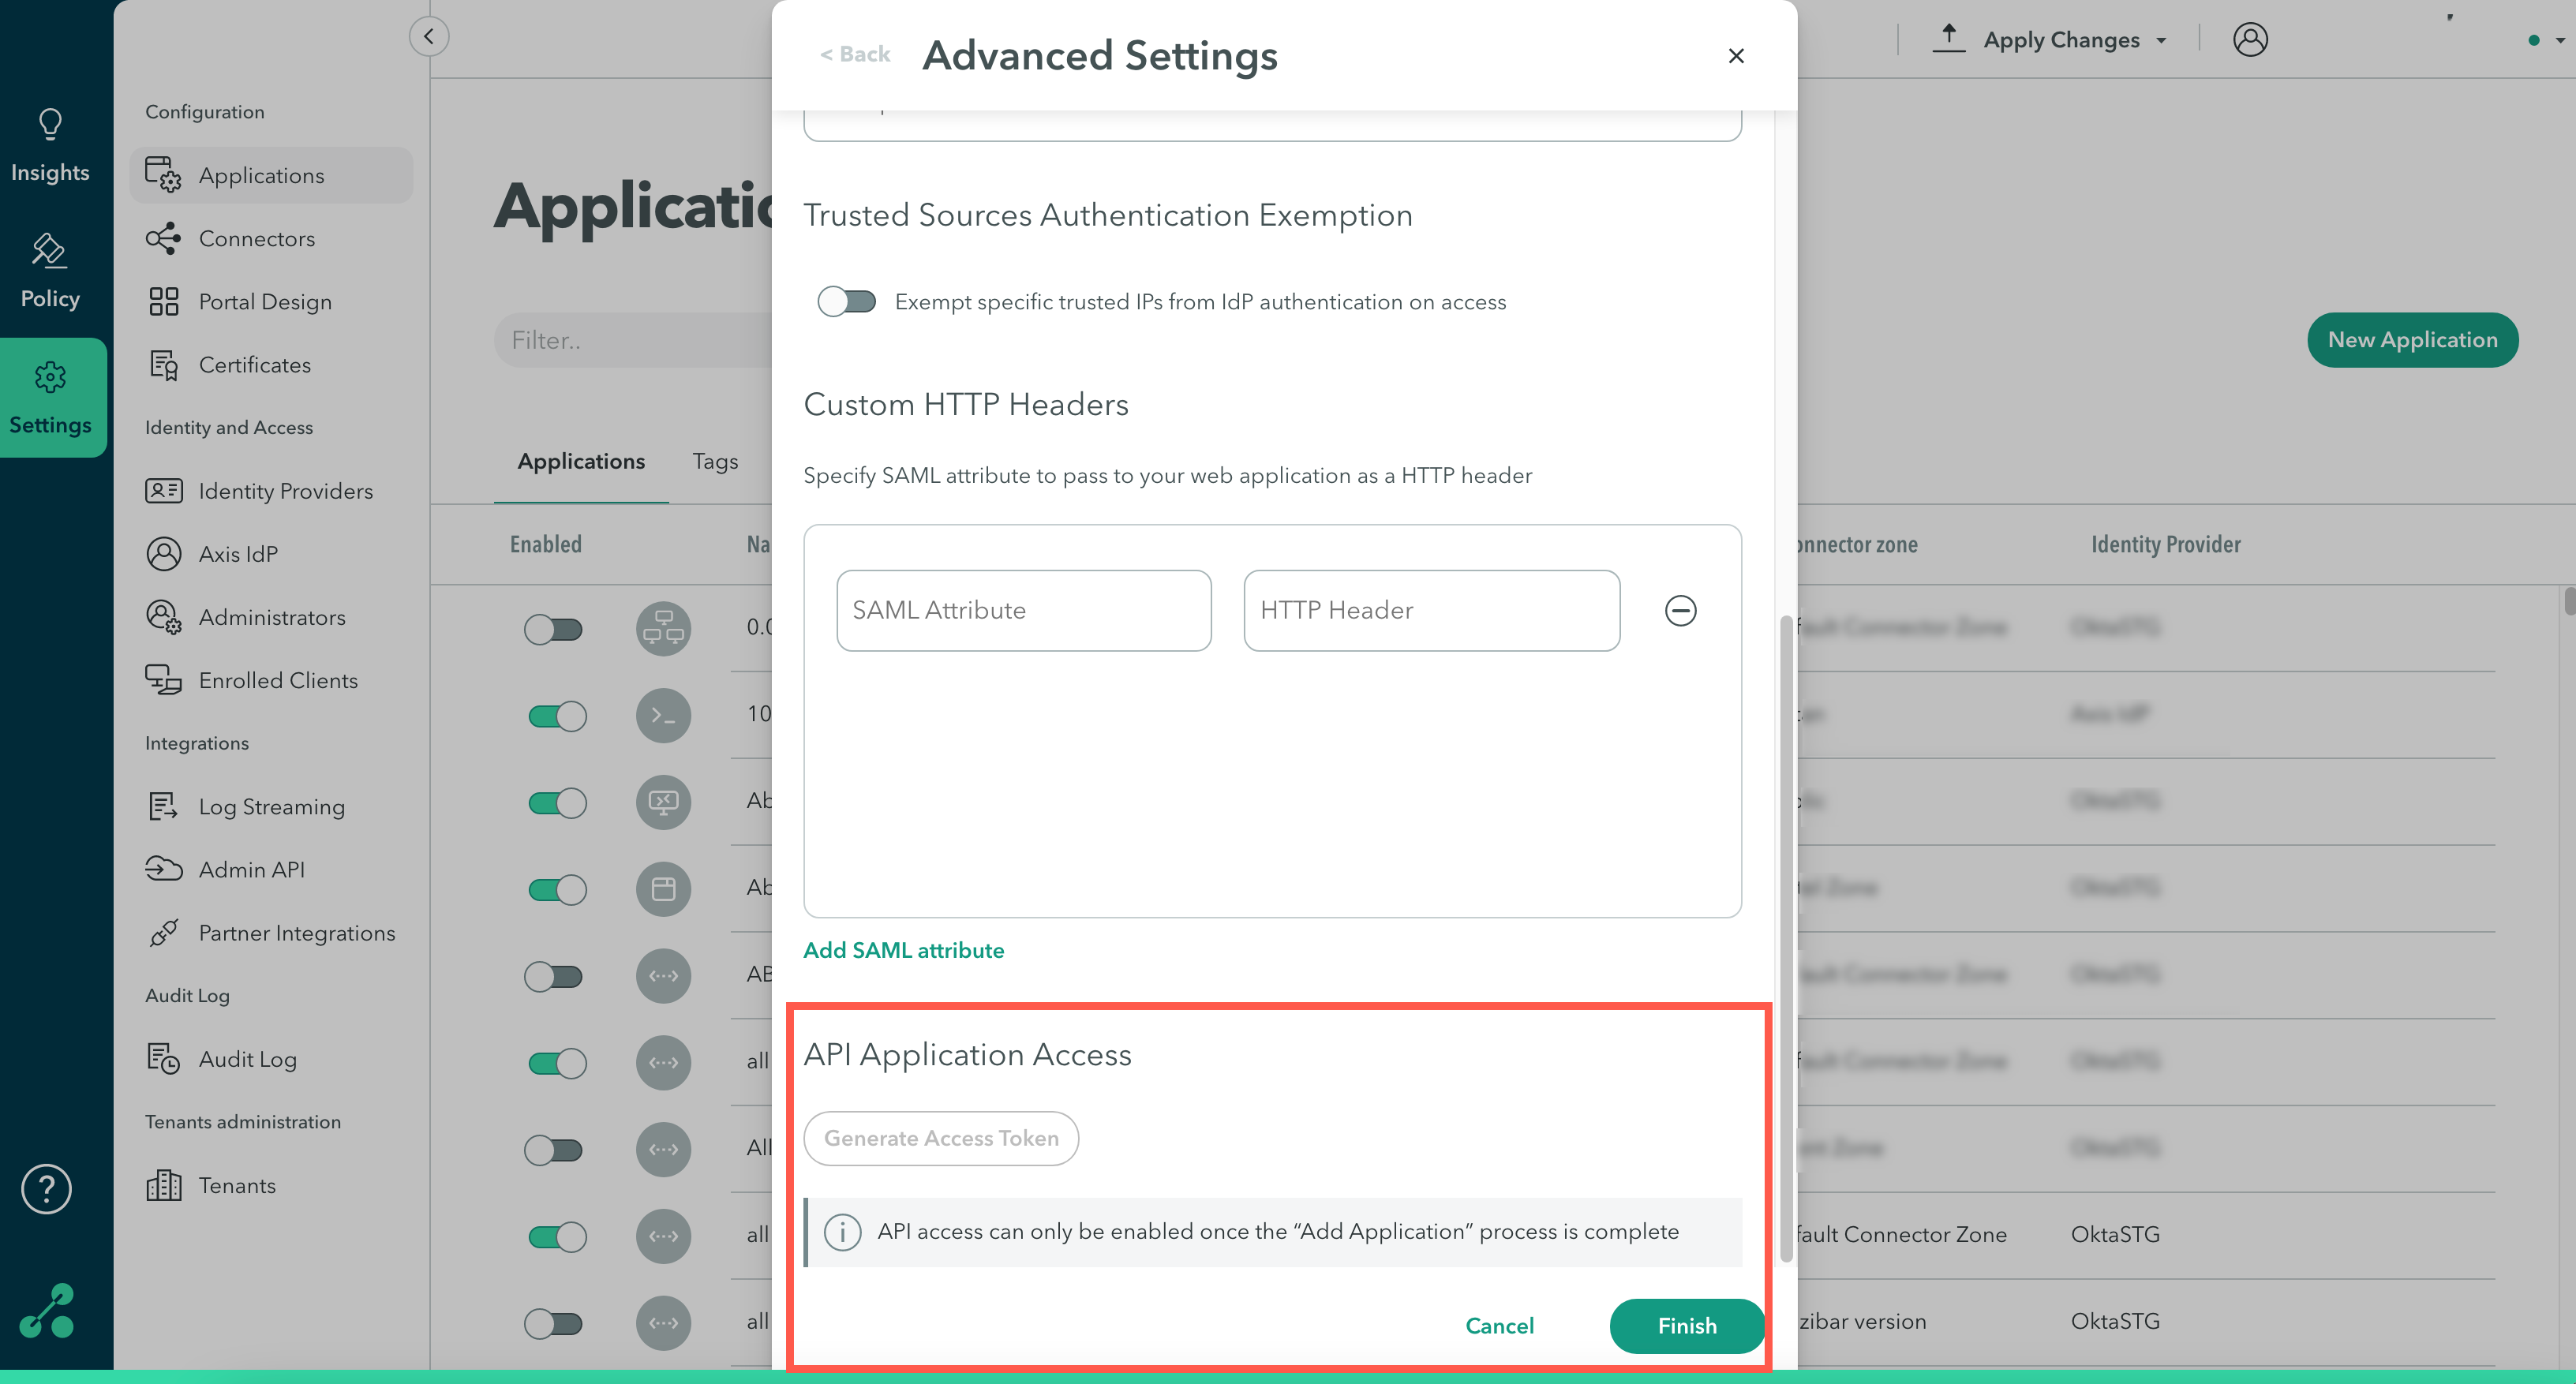
Step 4: Custom HTTP Headers
Specify SAML attributes to pass to your web application as an HTTP header.
An Axis user logging into an application is authenticated by an Identity Provider (IdP). The information is then sent by the IdP to Axis. Such information includes usernames, emails, and more. The protocol for communication between Axis Security and the IDP is SAML.
At times, the application requires information from the IdP. Axis sends that information to the application's HTTP Header fields. Specify the HTTP Header and SAML claim to be used by the application. A claim is information that an IdP provides about a user inside the token they issue for that user.
To configure Custom HTTP Headers:
- Click Advanced Settings-> Add SAML Header.
- Enter the value (SAML claim) to send under key (HTTP header).
Maintaining Header Values in the HTTP Rewrite
URL rewriting is an Atmos Cloud feature that changes the destination by altering URLs, ensuring that the traffic is routed through the Atmos Cloud. This includes rewriting the response HTTP headers, which may result in an Error 404 Not Found instead of displaying the required page.
To prevent URL breakage and to ensure that the user can access the requested page, Atmos can refrain from rewriting the "Host" header, thus maintaining the original header value as it is.
To enable this feature, contact [email protected].
Note:This can only be enabled for applications using a custom domain, meaning the remote application address is a customer-owned domain.
Step 5: API Application Access
NoteAPI access can only be enabled once the “Add Application” process is complete.
To configure API Application Access:
- Click Generate Access Token.
- Copy the token.
- Click Finish.
- Paste the token in your API's "Axis-Auth" header.
NoteTo commit your changes, navigate to the top-right menu, click Apply Changes, then select Commit Changes.
Updated 27 days ago