Multiple User-Destination Pairings
Creating policy rules that map many users to destinations, such as pairing users with their personal workstations, is time-consuming and difficult to manage. Administrators can now create identity objects for Okta, Azure, and Axis IdP that contain multiple pairs of users and domains or IP addresses they would like to allow them to access. The admin is able to add an identity object with all the user-destination pairings to one policy rule, and each user/group will be able to access only the destinations they were matched to.
Step 1: Create an Identity Object
Follow the instructions here to create an identity object.
Step 2: Add Multiple User-Destination Pairs
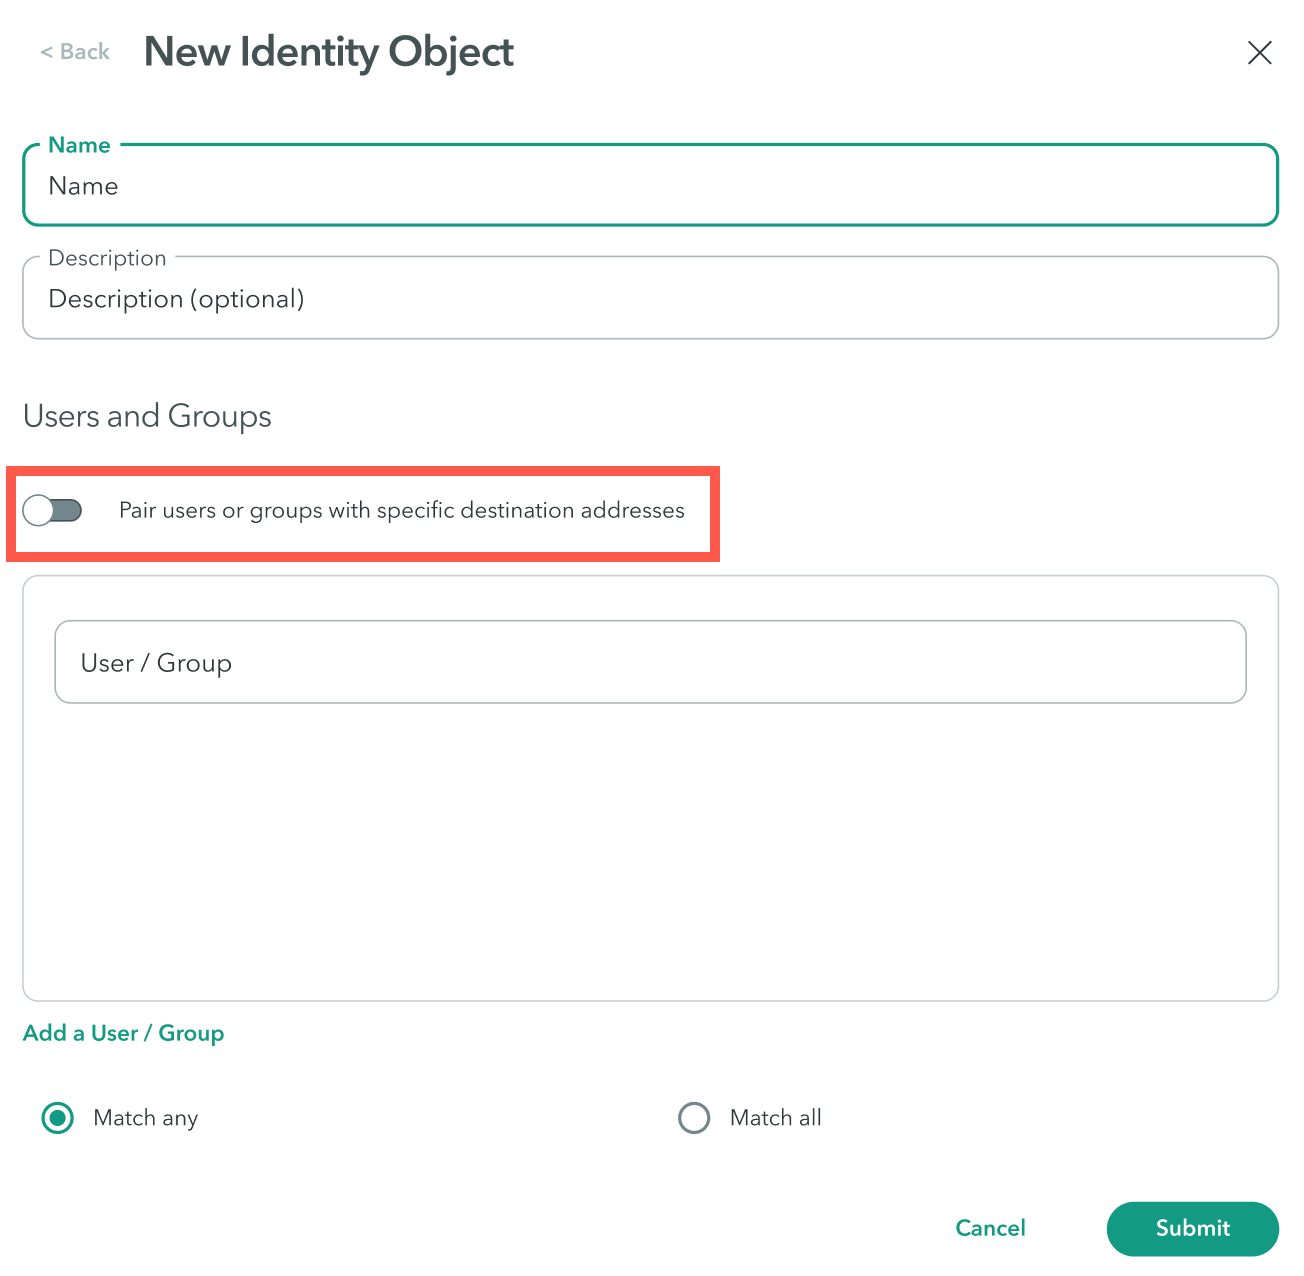
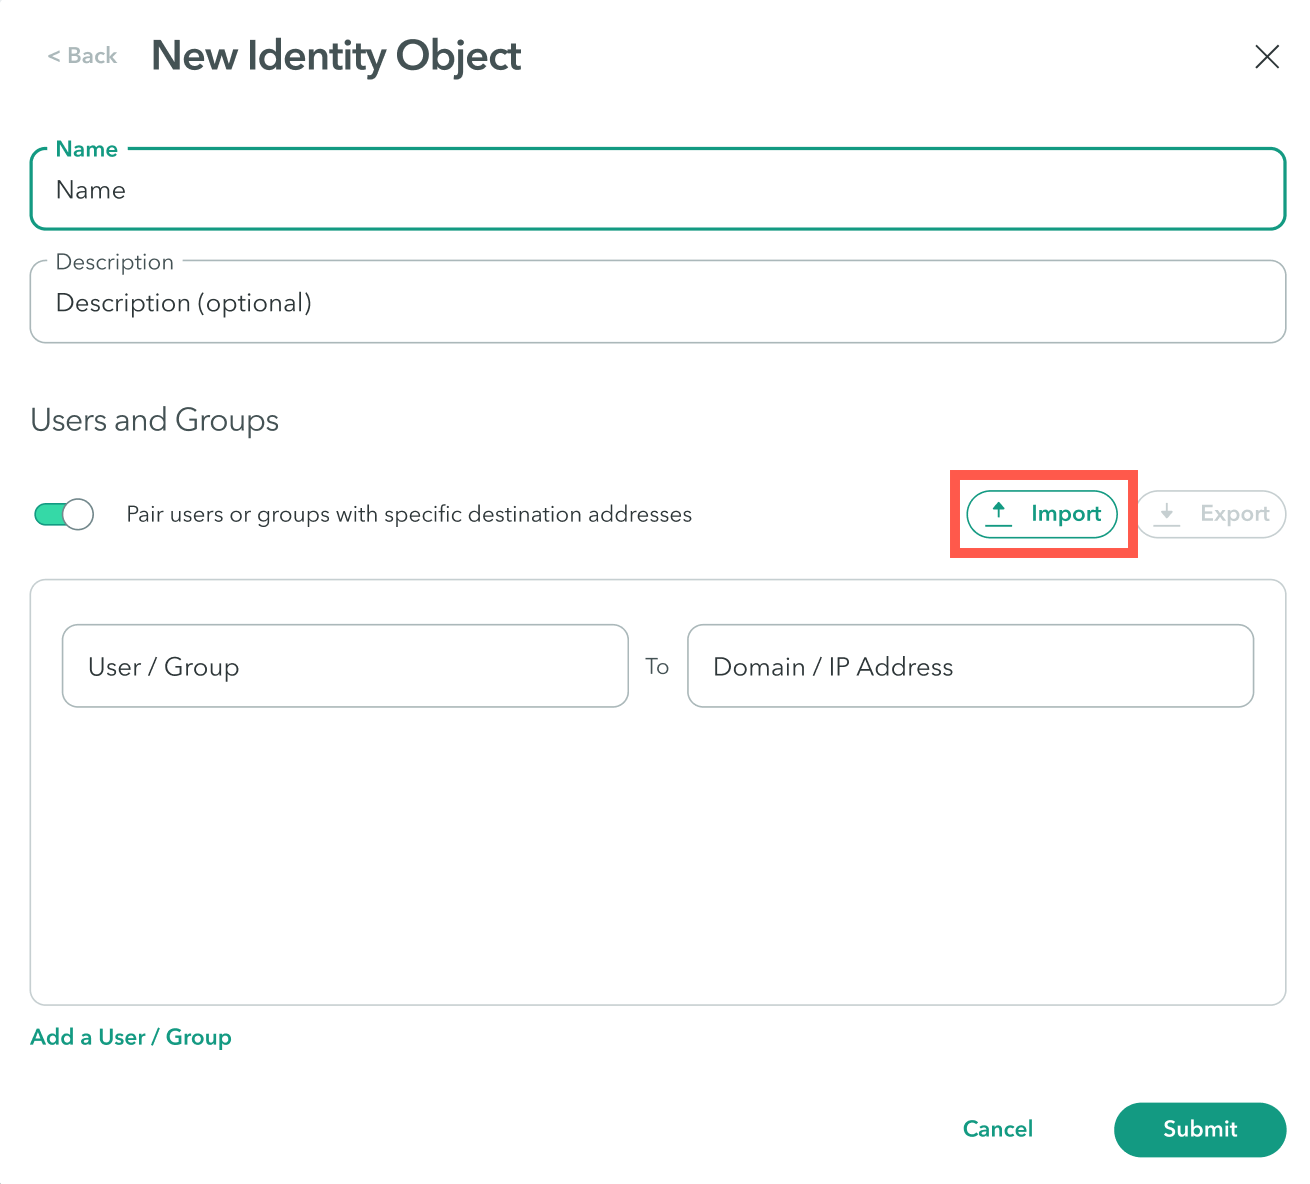
- In the New Identity dialog add a name for the identity object.
- Add a description (optional).
Users and Groups
- Click the toggle next to Pair users or groups with specific destination addresses.
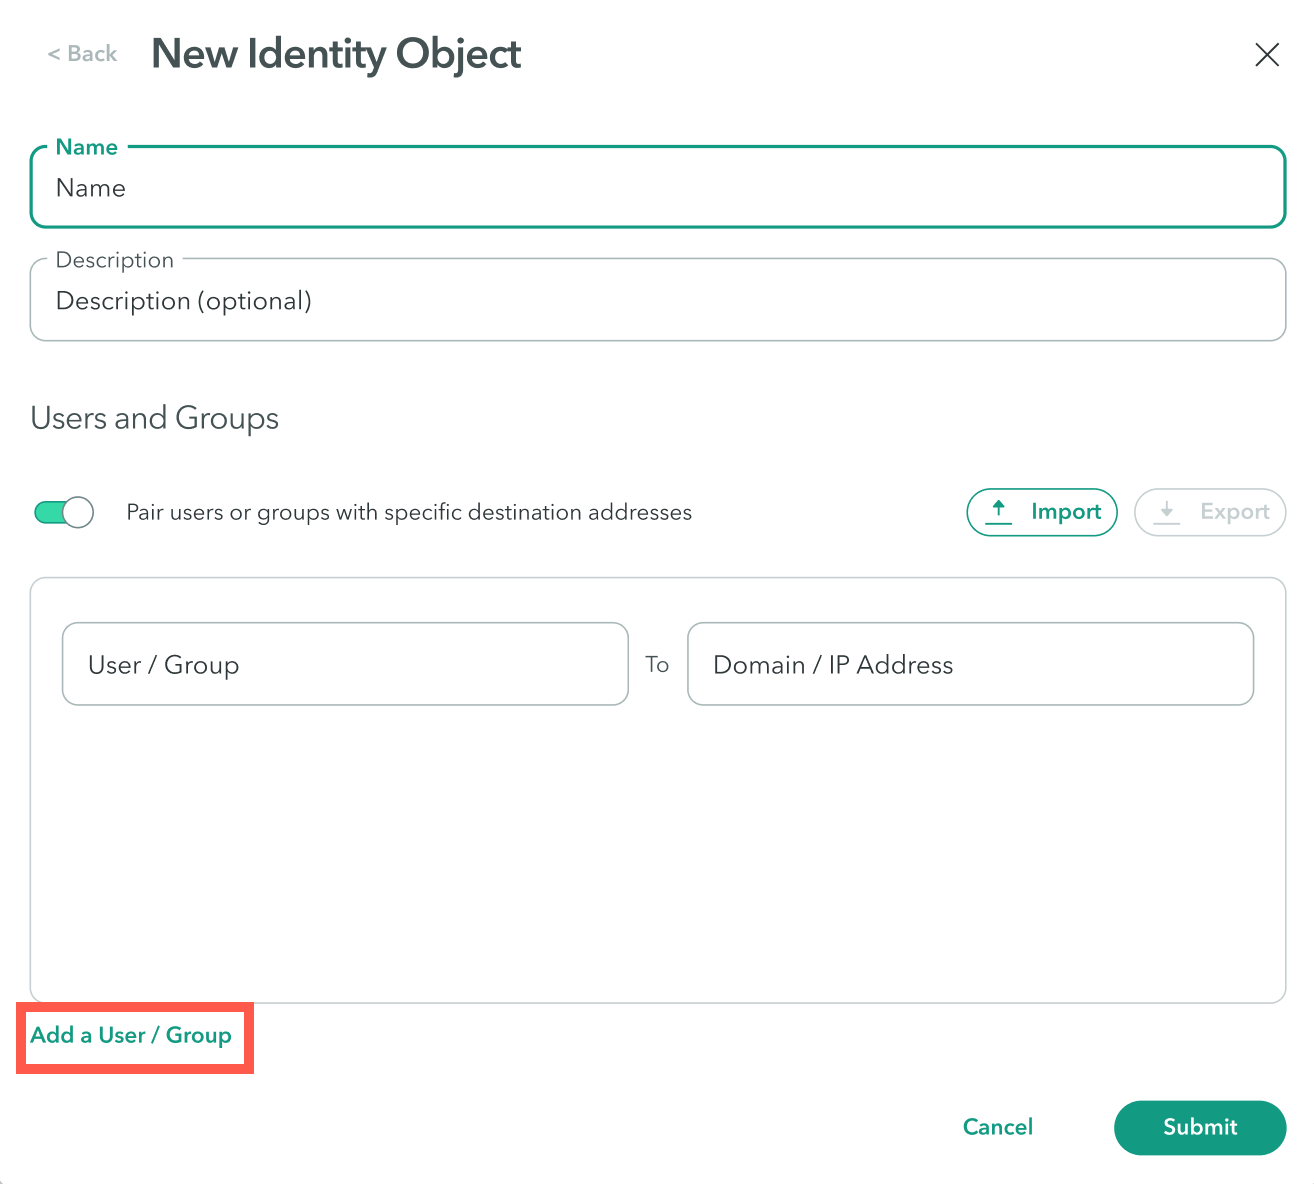
- Add users/groups and their destinations. Click Add a User/ Group to add more pairs.
Importing User-Destination Pairings from a CSV
You can create a CSV file with the user-destination pairings and import it into the identity object form.
Notes
- These will override any existing pairings.
- You can add up to 2,000 entries for each CSV file.
To import a CSV file with user-destination pairing:
Step 1: Download and modify CSV file
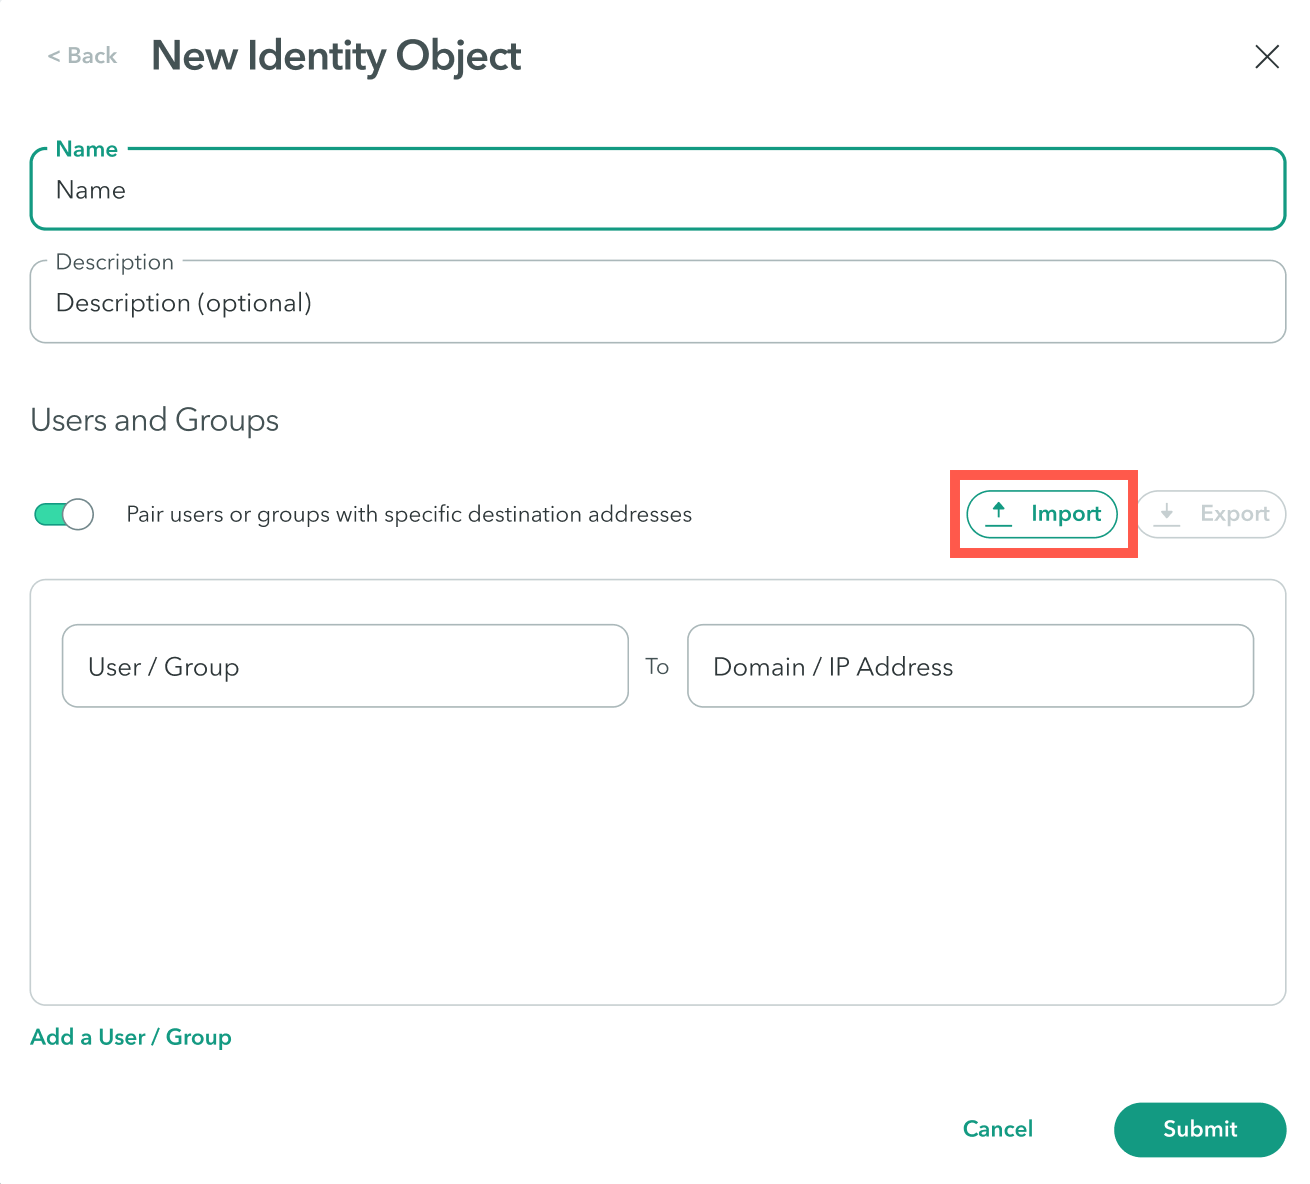
- In the New Identity Object dialog click Import.
The Import Identities and Addresses via CSV dialog appears.
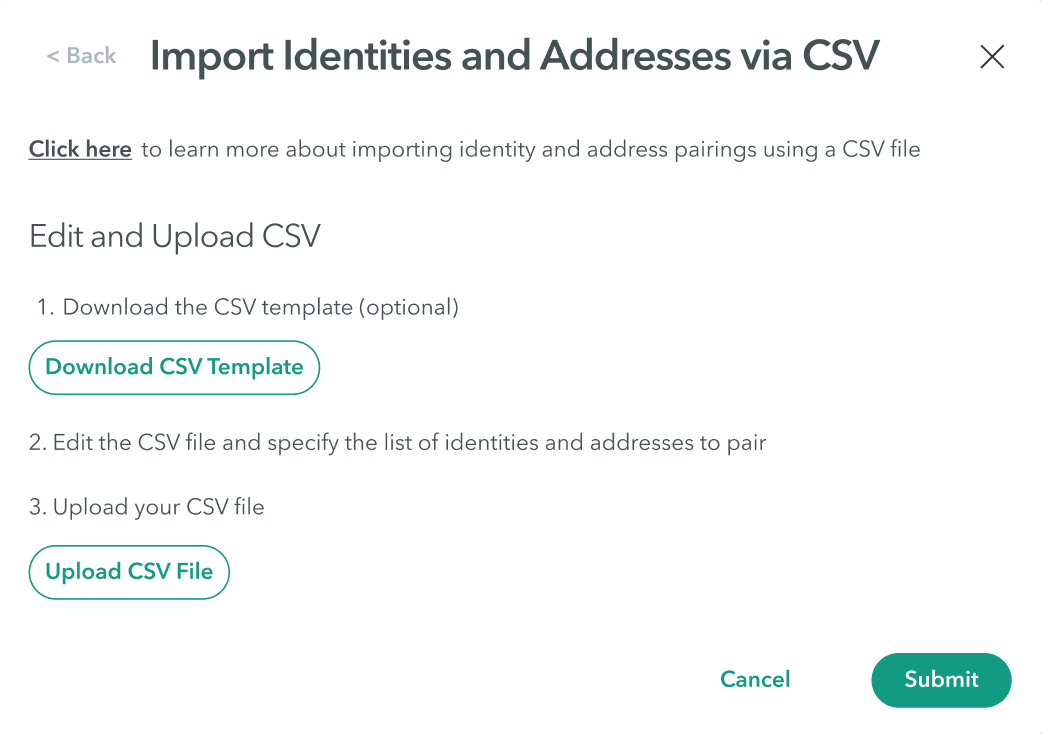
- Click Download CSV Template.
- Open the downloaded CSV file.
- Delete the explanation and example rows as shown in the following screenshot:

- Enter the information as shown in the following table.
Note
Headers marked with an asterisk (*) are required for importing the data.
| Field | Description | Example |
|---|---|---|
| Identity Type* | Enter the identity type: user or group | User |
| Identity Name* | Enter the name given to the user or group | bobjones |
| Destination Address* | Enter an IP or domain address | 10.1.1.1 |
Step 2: Upload the CSV file to Axis Security
To upload the CSV file:
- In the New Identity Object dialog click Import.
The Import Identities and Addresses via CSV dialog appears.
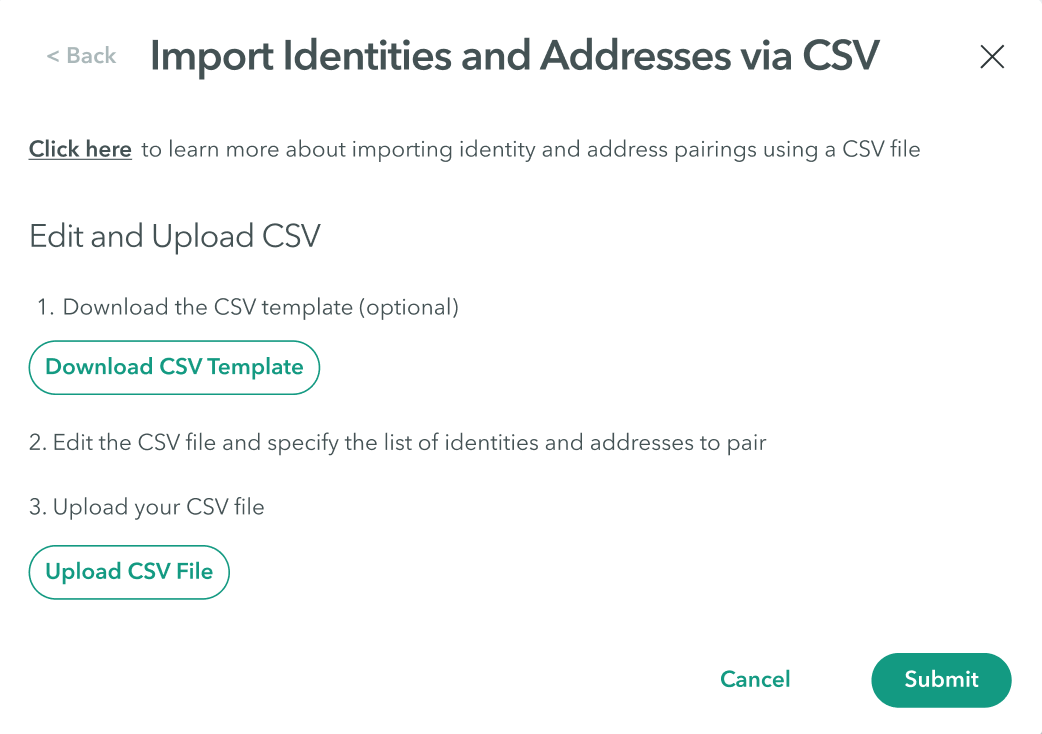
- Click Upload CSV File and attach the modified CSV file.
Step 3: Finalize import
- Click Submit.
- Click Apply changes-> Commit changes.
Troubleshooting User-Destination Pairing Import
The following table describes errors in pairing imports and how to manage them.
| Error | Solution |
|---|---|
| Missing information- Type field can’t be empty | Make sure the Type field is populated for all user-destination pairings |
| Identity type “” is invalid | Make sure to enter either "user" or "group" |
| Missing information - Identity Name field can't be empty | Make sure the Identity Name field is populated for all user-destination pairings |
| The user “” does not exist in the IdP | Make sure the spelling is correct |
| The group “” does not exist in the IdP | Make sure the spelling is correct |
| Missing information - Destination Address field can't be empty | Make sure the Destination Address field is populated for all user-destination pairings |
| Destination Address “” is invalid | Make sure the field includes a valid domain or IP address |
Updated over 3 years ago
