SaaS Custom HTTP Headers
With SaaS Custom HTTP Headers, admins can inject custom headers into users' sessions with SaaS Applications. Some SaaS Applications such as Microsoft Office 365, G-suite and Dropbox support account type control, for instance blocking personal account and allowing only access to corporate accounts, by using HTTP headers.
Configuring Custom HTTP Headers
- Log into the Axis Management console and navigate to the Policy->SaaS Applications screen.
- Configure a new SaaS Application instance as presented in the following article .
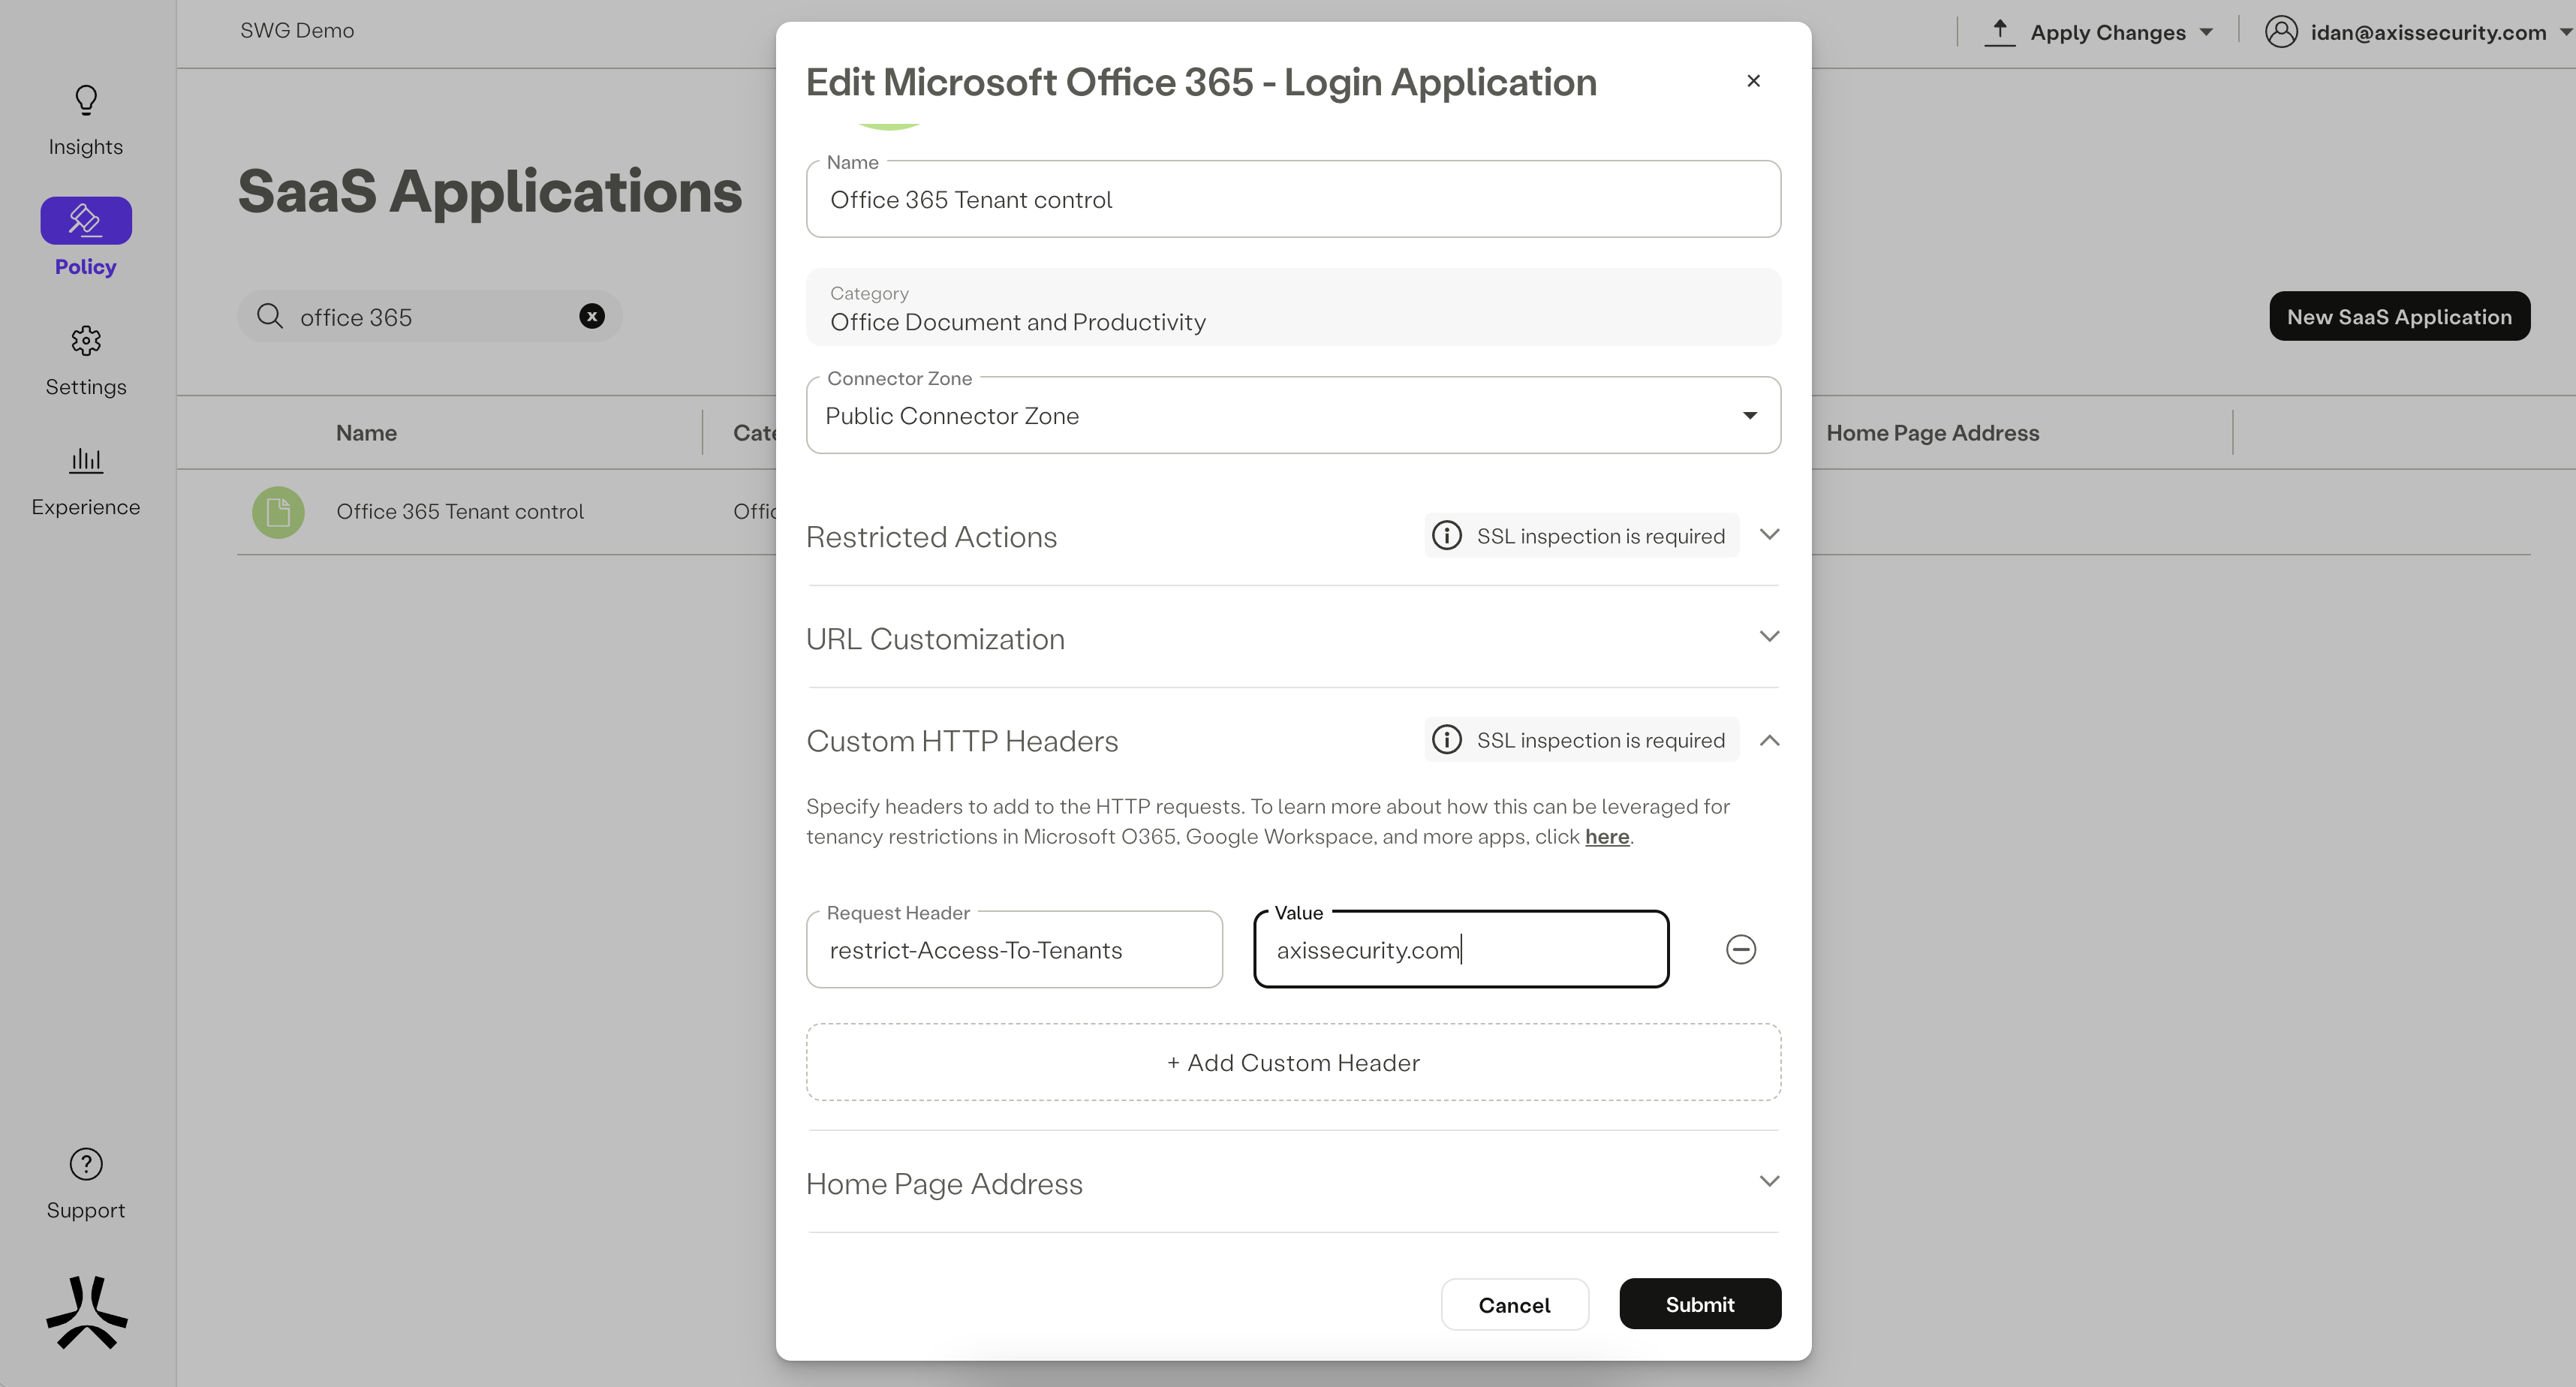
- Under the Custom HTTP Headers Section, enter the key-value pairs that will be injected to sessions destined to the configured SaaS Application by policy.

- Complete creation of the SaaS application by clicking on the “Submit” button. The SaaS application will now appear under the “Destinations” field in the Policy Rule form.
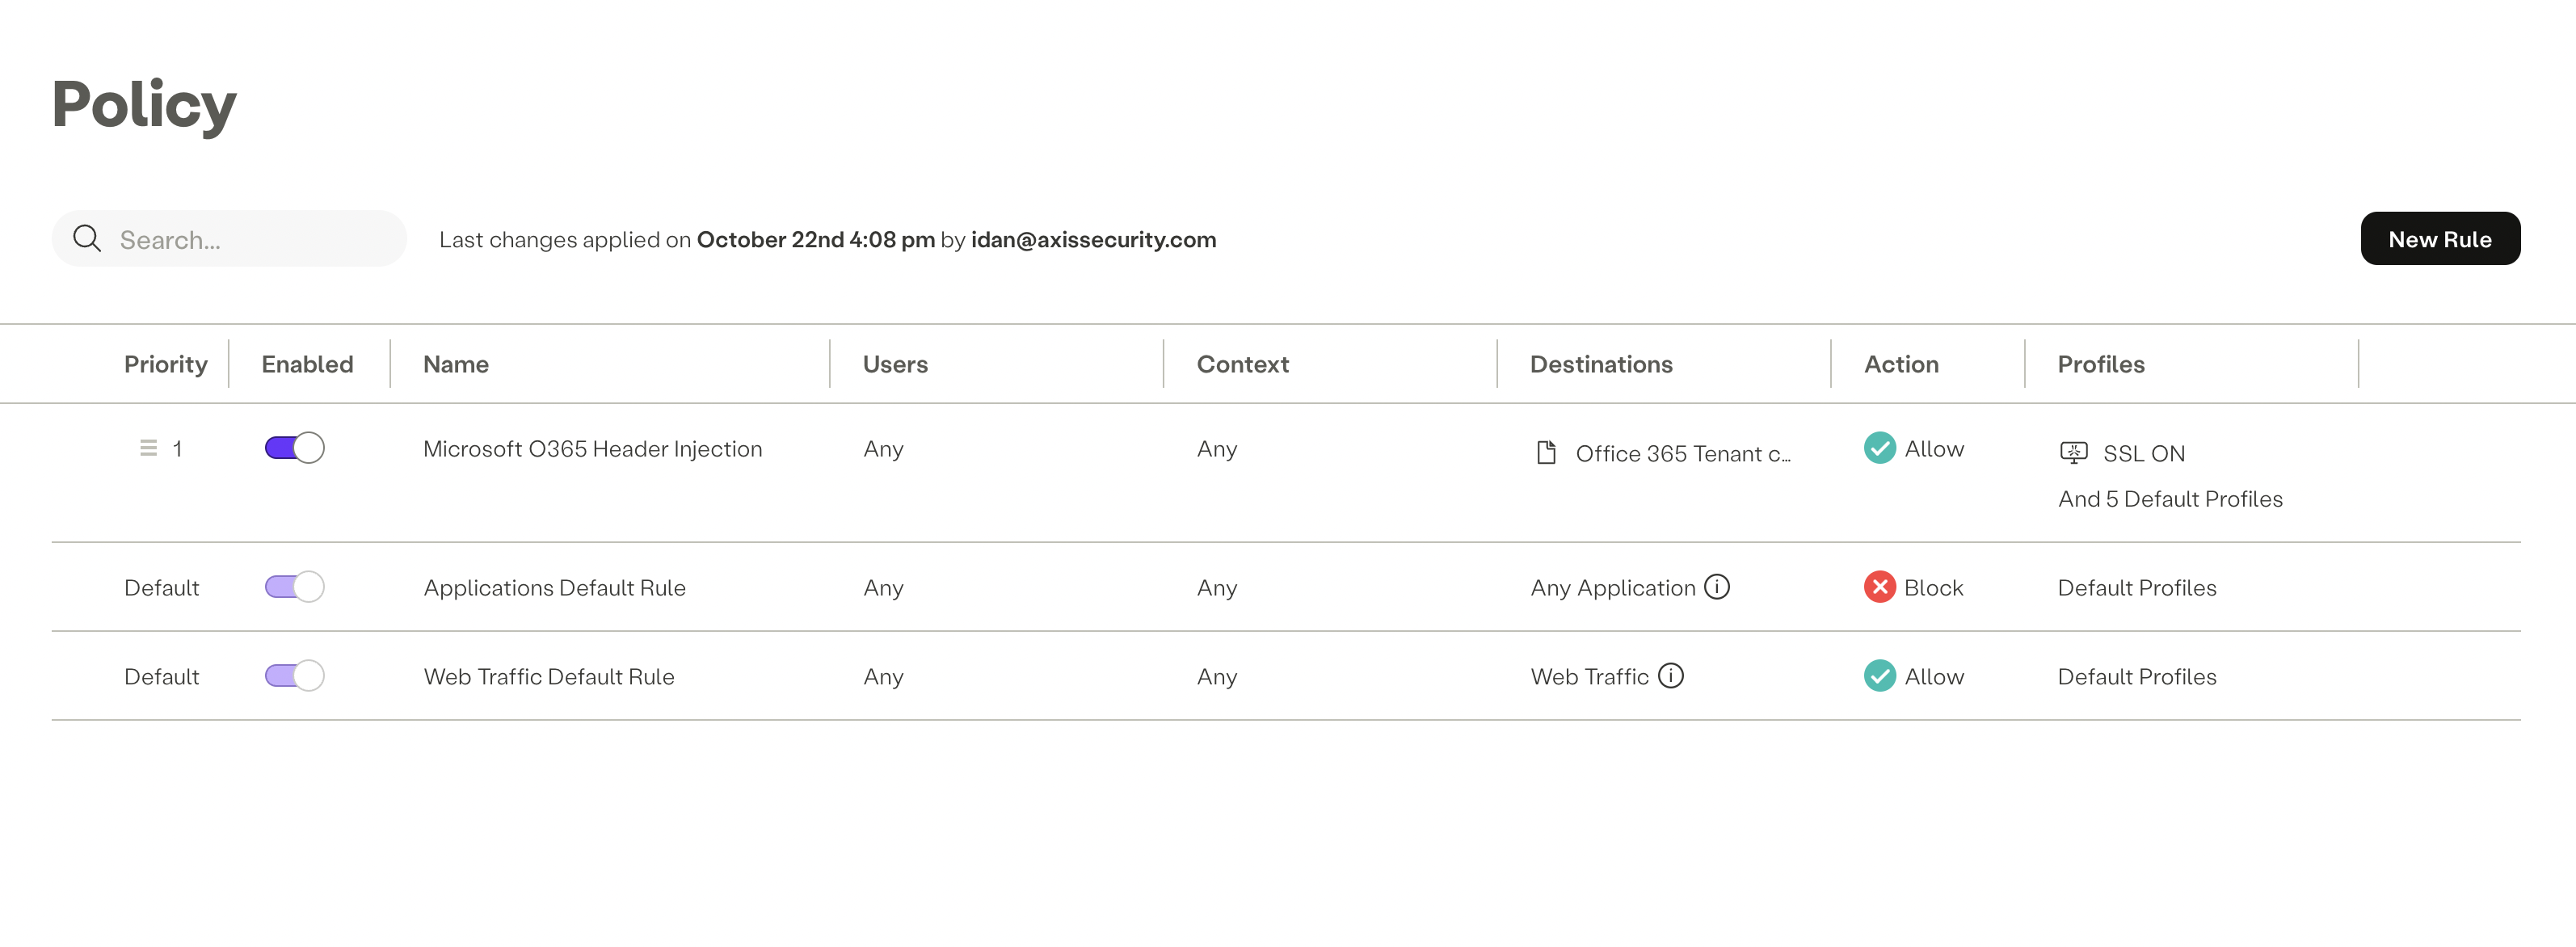
- Add the SaaS Application with the Custom HTTP Headers into a policy rule as the destination. The policy verdict should be "Allow". Note that SSL Inspection is required in order to inject Custom HTTP Headers.

- Click Apply Changes-> Commit Changes.
Custom HTTP Headers Examples
Common SaaS Applications Custom Header policy configurations:
| SaaS Application | Request Header | Description |
|---|---|---|
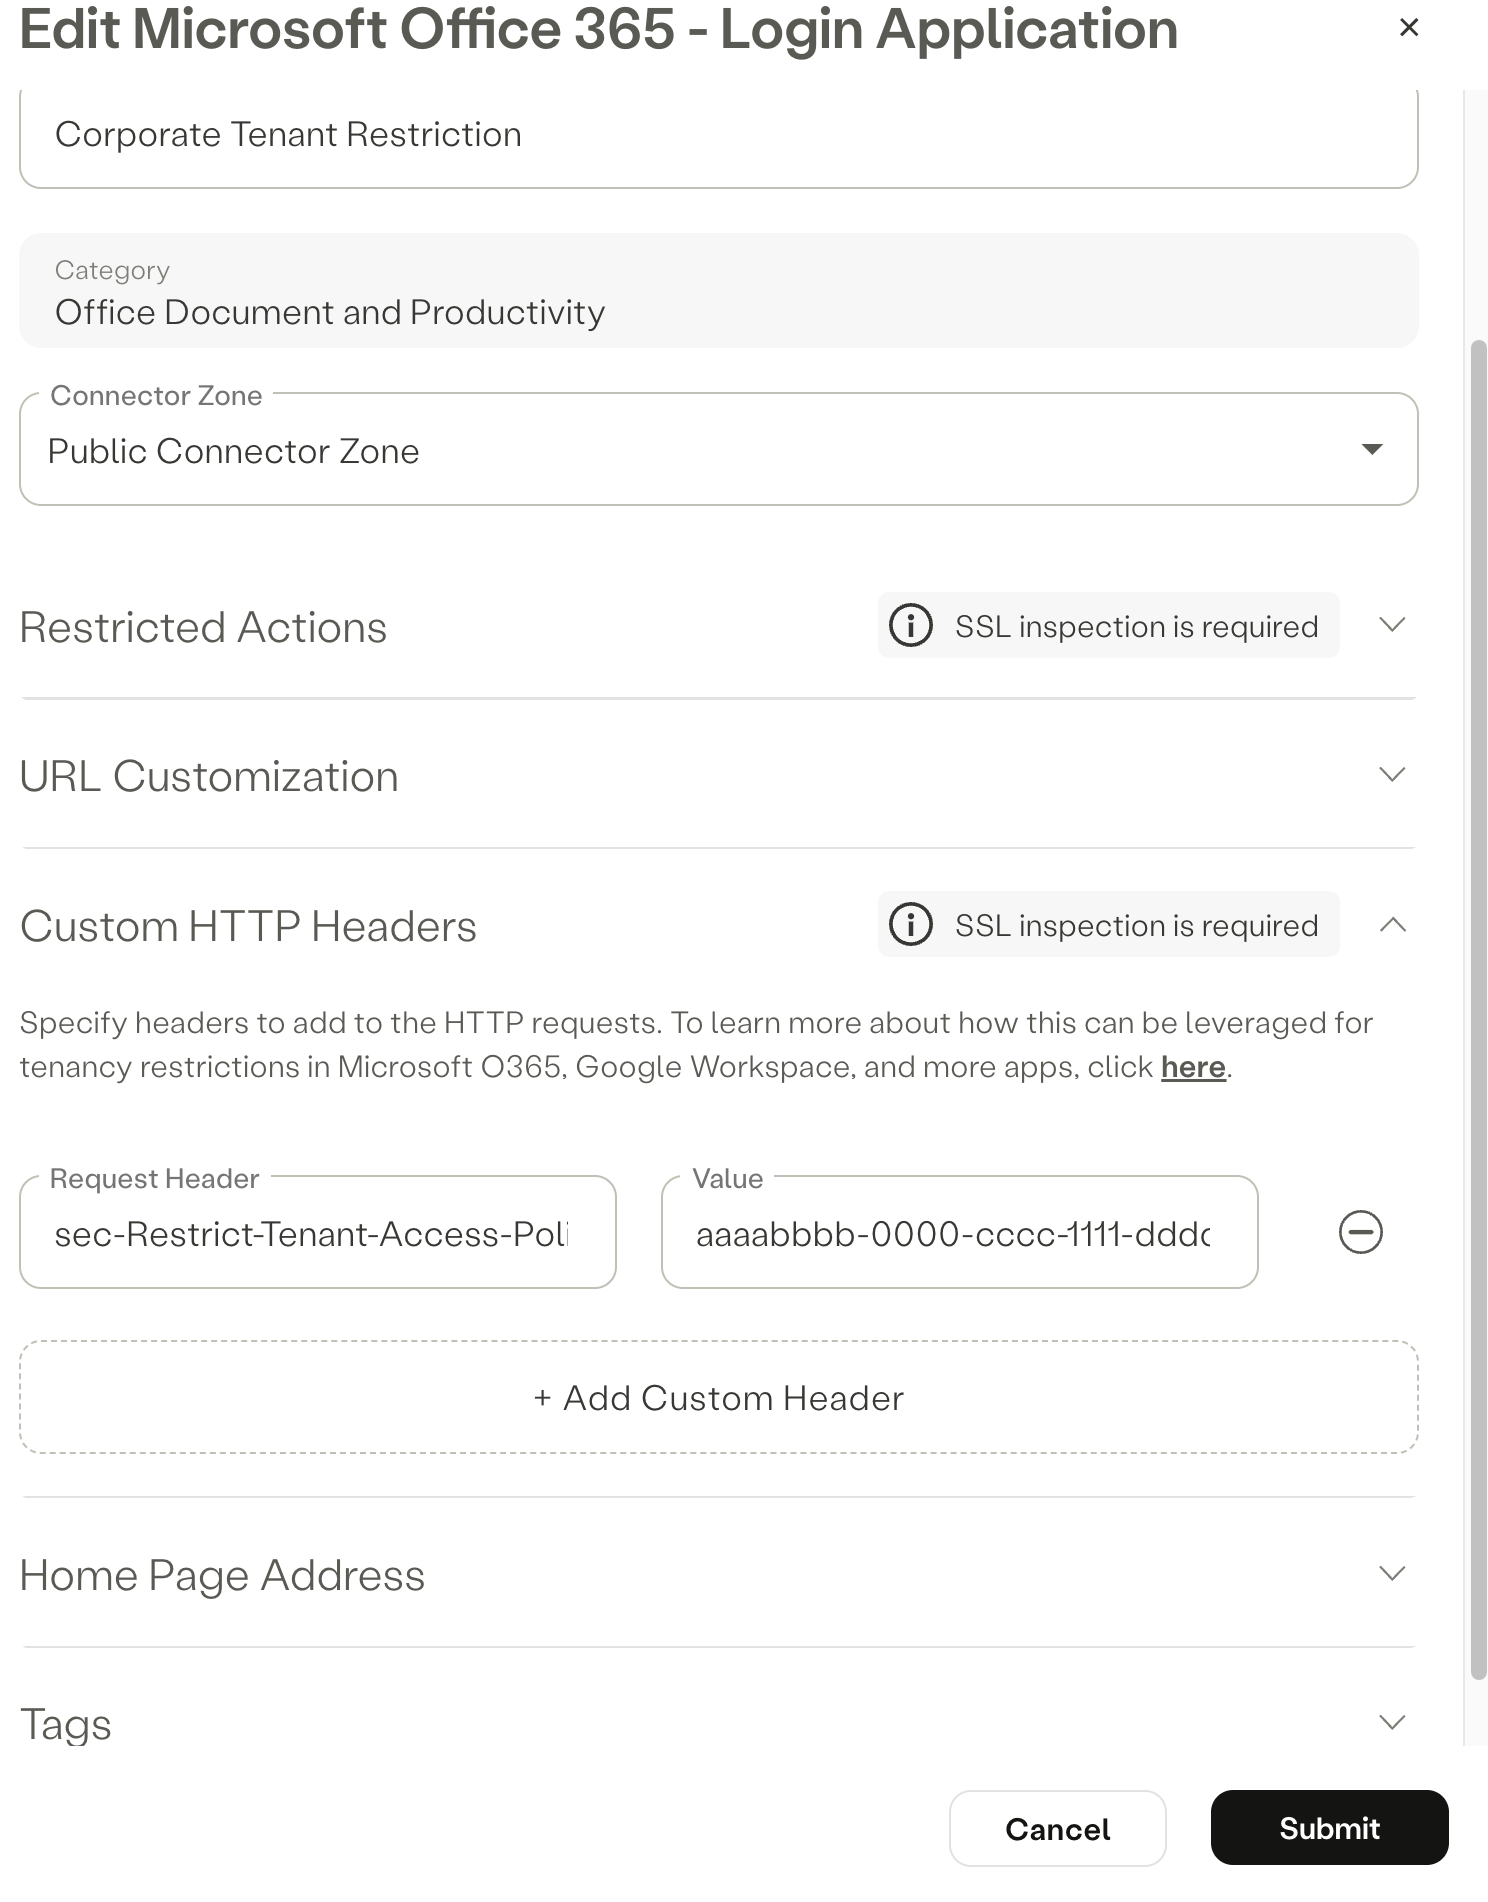
| Microsoft Office 365 | sec-restrict-tenant-access-policy | Both the Tenant ID and Policy ID are required in the value. Refer to Tenant Restrictions on Microsoft step 2. Refer to the configuration example below. |
| G-Suite | X-GoogApps-Allowed-Domains | Value of the domain (e.g axissecurity.com) you want to allow users to access |
| Dropbox | X-Dropbox-allowed-Team-Ids | Value of team ID (e.g 1235925) you want to allow users to access |
Notes
- In order to inject Custom HTTP Headers SSL Inspection is required.
- It is recommended to target the Login SaaS Application of the various SaaS providers, e.g "Microsoft Office 365 - Login", "Google Workspace - Login" for the Custom Header Injection feature.
Microsoft Configuration Example - Allow corporate domain, but block personal
- Open Settings -> Destination -> SaaS Applications
- Select New Application -> Microsoft Office 365 - Login Application
- Refer to Step 7 on Microsoft's website to locate both your Tenant ID and Policy ID


- Insert the Request Header sec-Restrict-Tenant-Access-Policy in the Request Header followed by the tenantid:policyid In the Value

- Add a rule and apply changes.
Updated over 1 year ago
