Adding and Deploying Connectors
Connectors provide a secure and authenticated interface between a customer’s network and the Axis Application Security Cloud.
Important
The best practice is to associate applications to a zone with at least 2 connectors
Before you begin, click here to learn more about connectors and connector zones.
Prerequisites
Connector deployment requires setting up a server and configuring firewall rules.
For setting up a server, you may select one of the following options:
- Deploy a connector on your own server. If you choose this option, click here to read and verify the server requirements.
- Deploy a virtual machine template. If you choose this option, follow the deployment instructions here.
- Deploy in AWS. If you choose this option, follow the AWS deployment instructions here.
For configuring firewall rules, read about Firewall Rules for Connector Connectivity.
Note
Before the connector deployment, it's recommended to verify again all the deployment prerequisites using the Connector Deployment Checklist.
Step 1: Creating a Connector
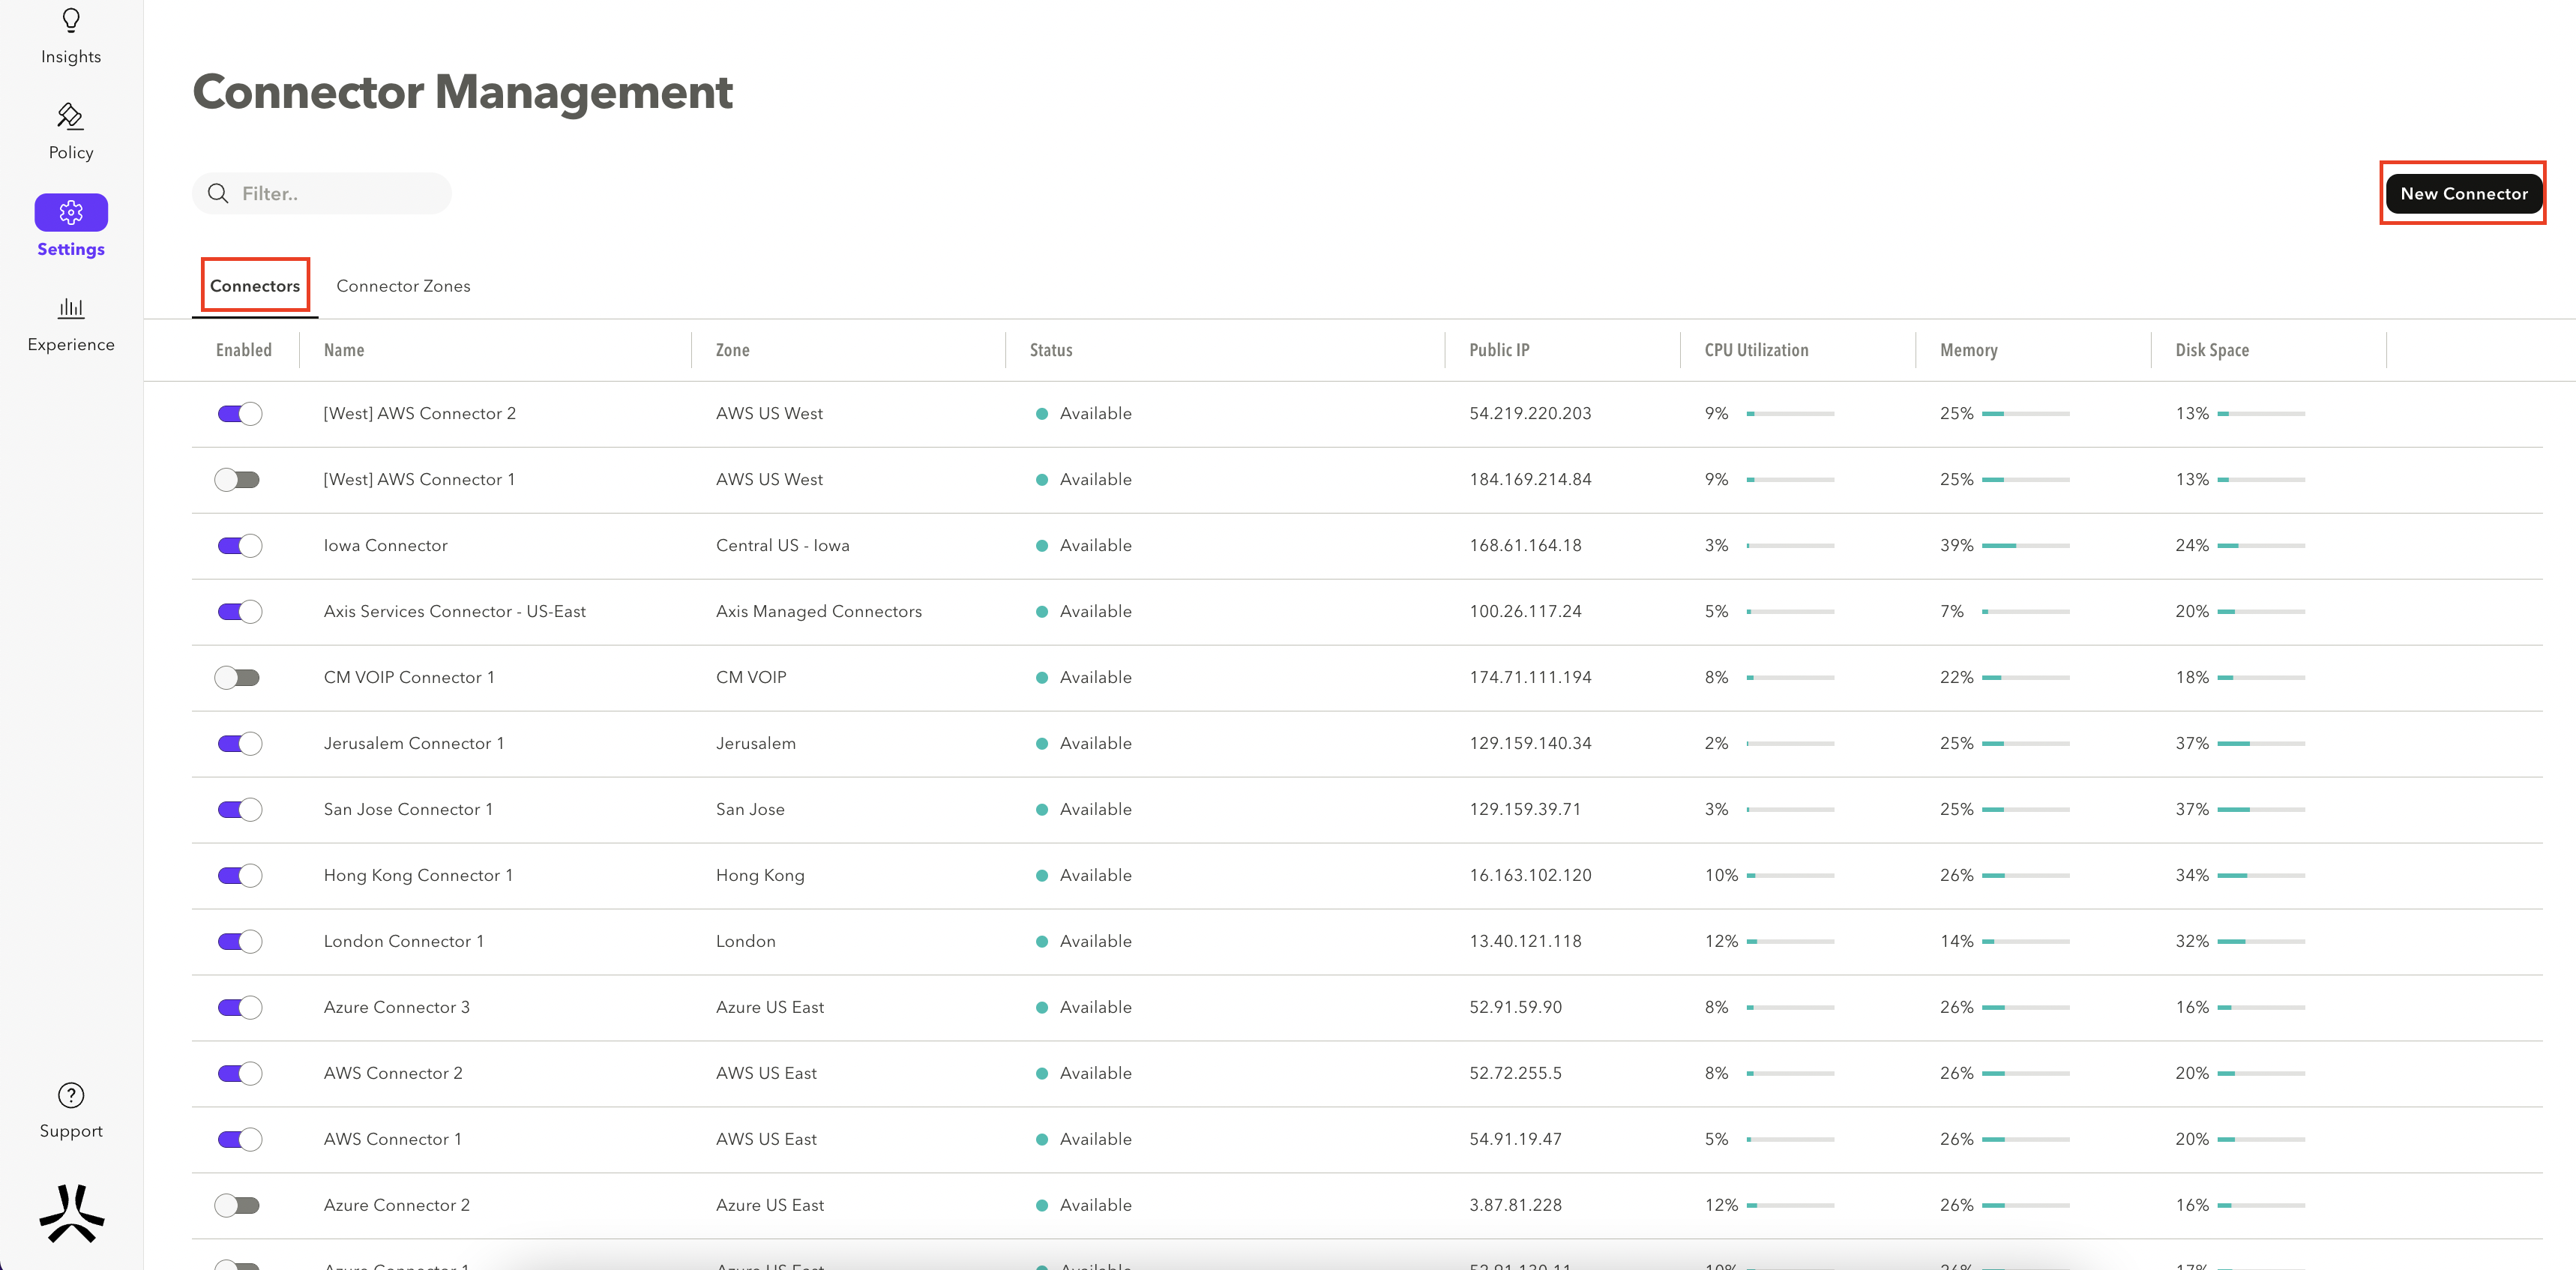
- In the Management Console click Settings -> Connectors -> Add Connector.

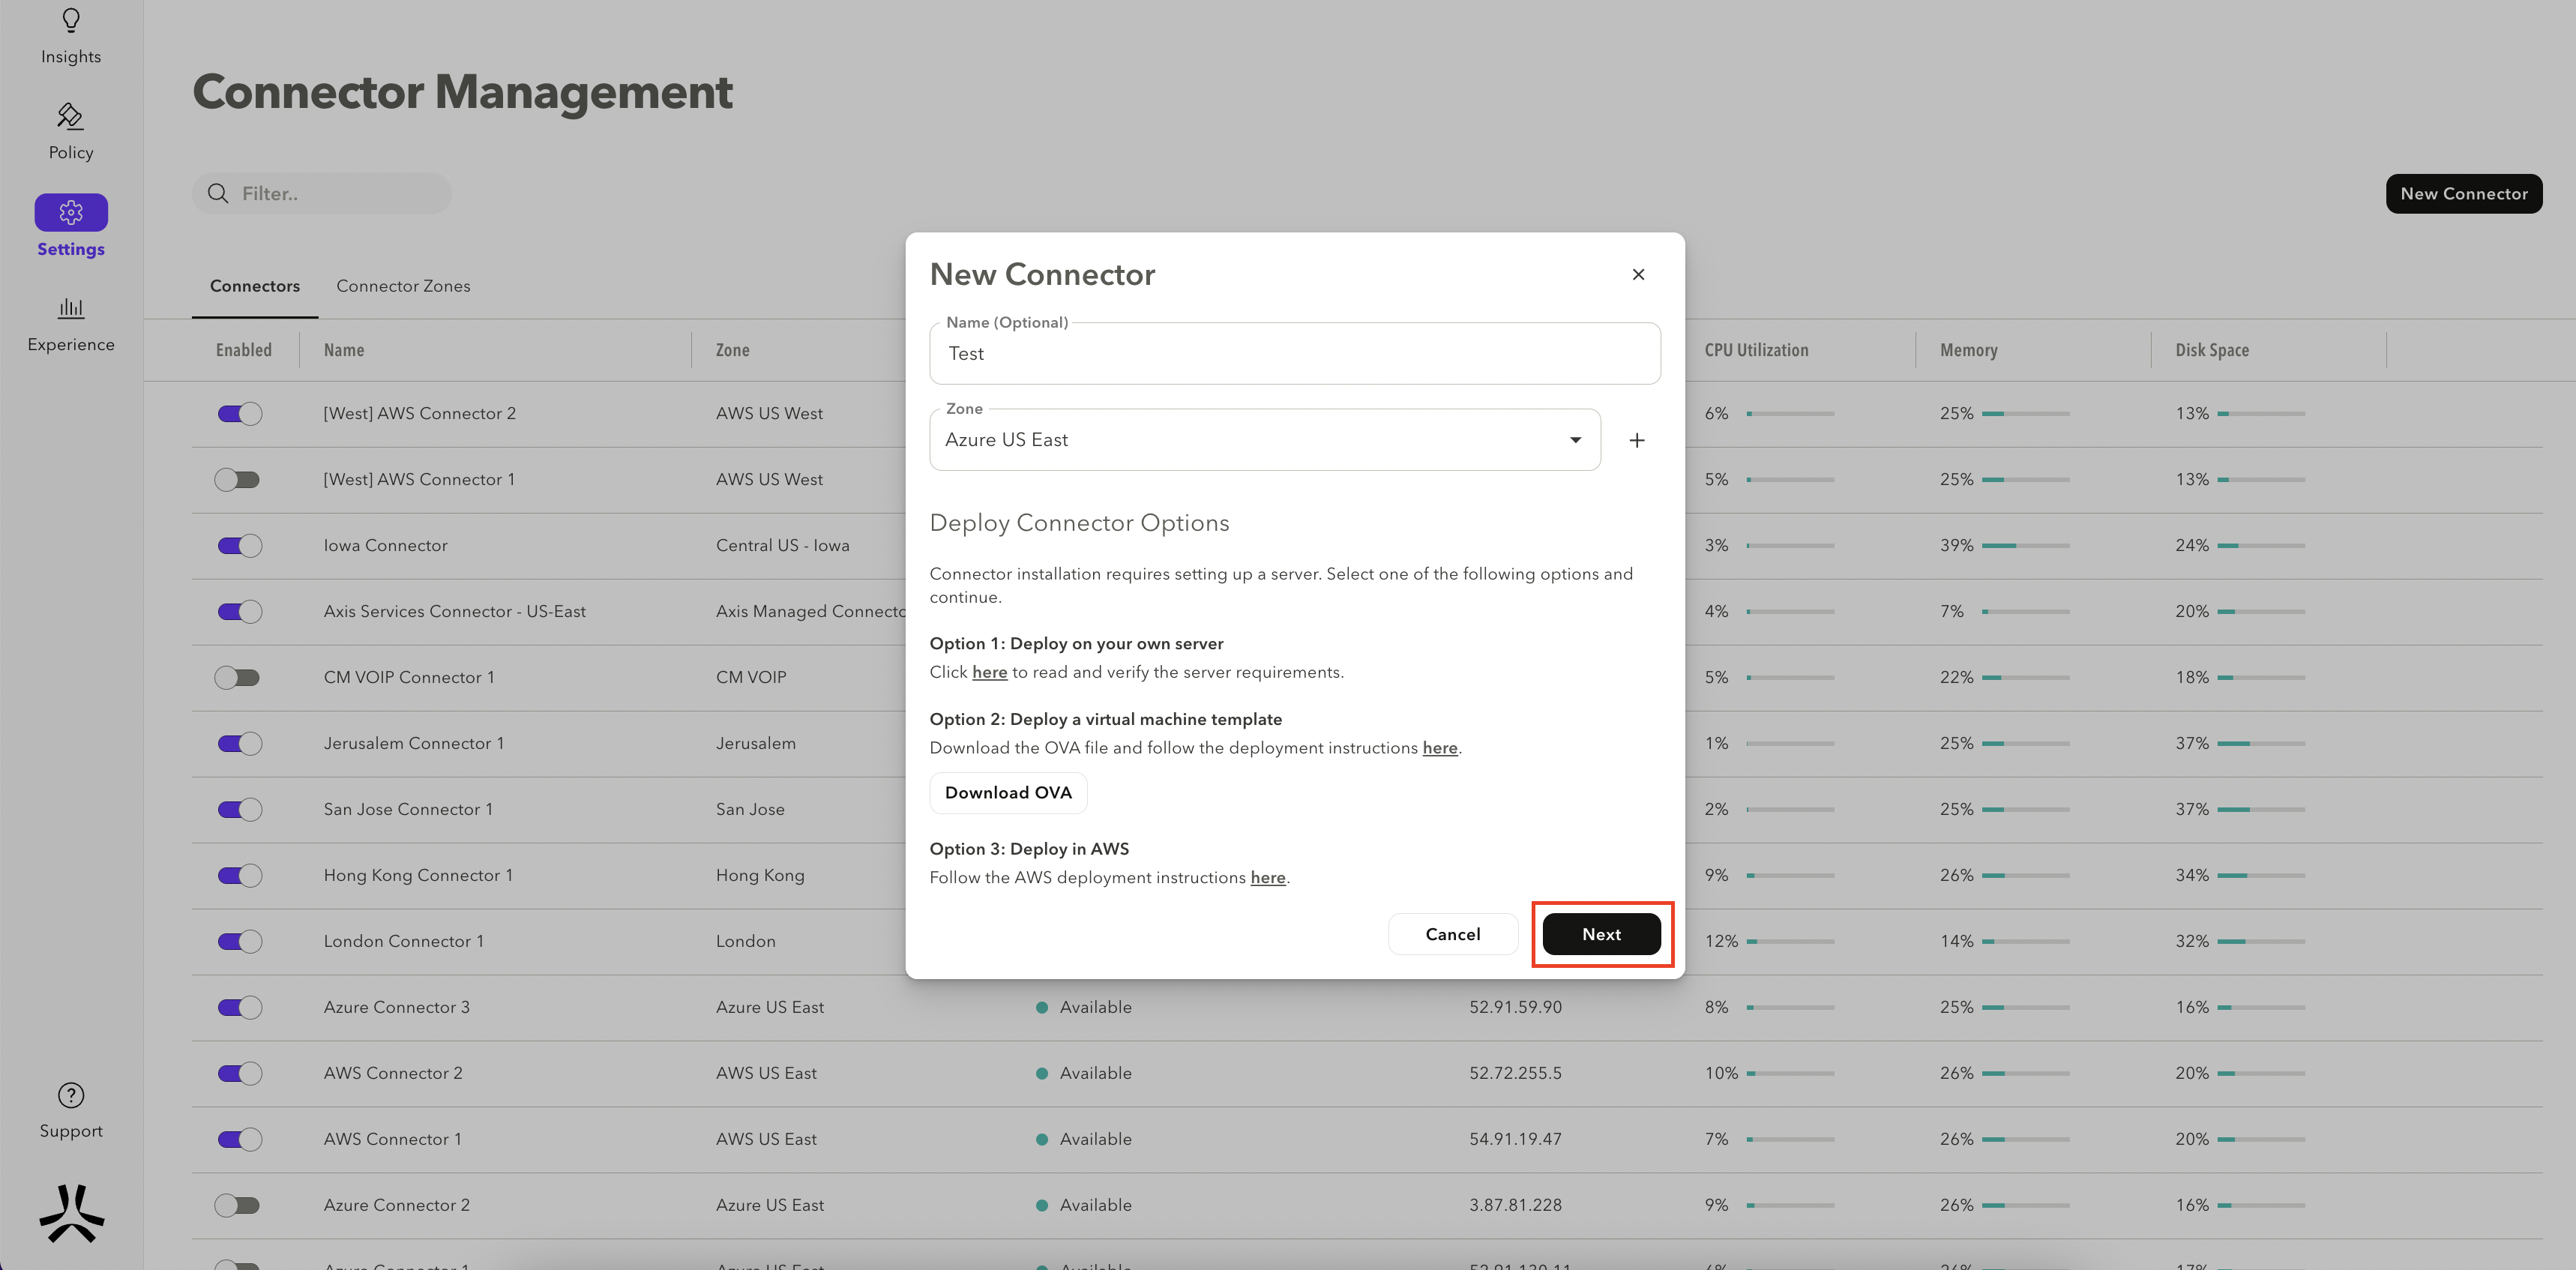
- Add the connector's name. In the Connector Zone field, select an existing zone by clicking the drop-down menu, or otherwise check the box to create a new zone (using a custom connector zone is recommended over using the default connector zone). Click here to learn more about connector zones.

- Click Submit.
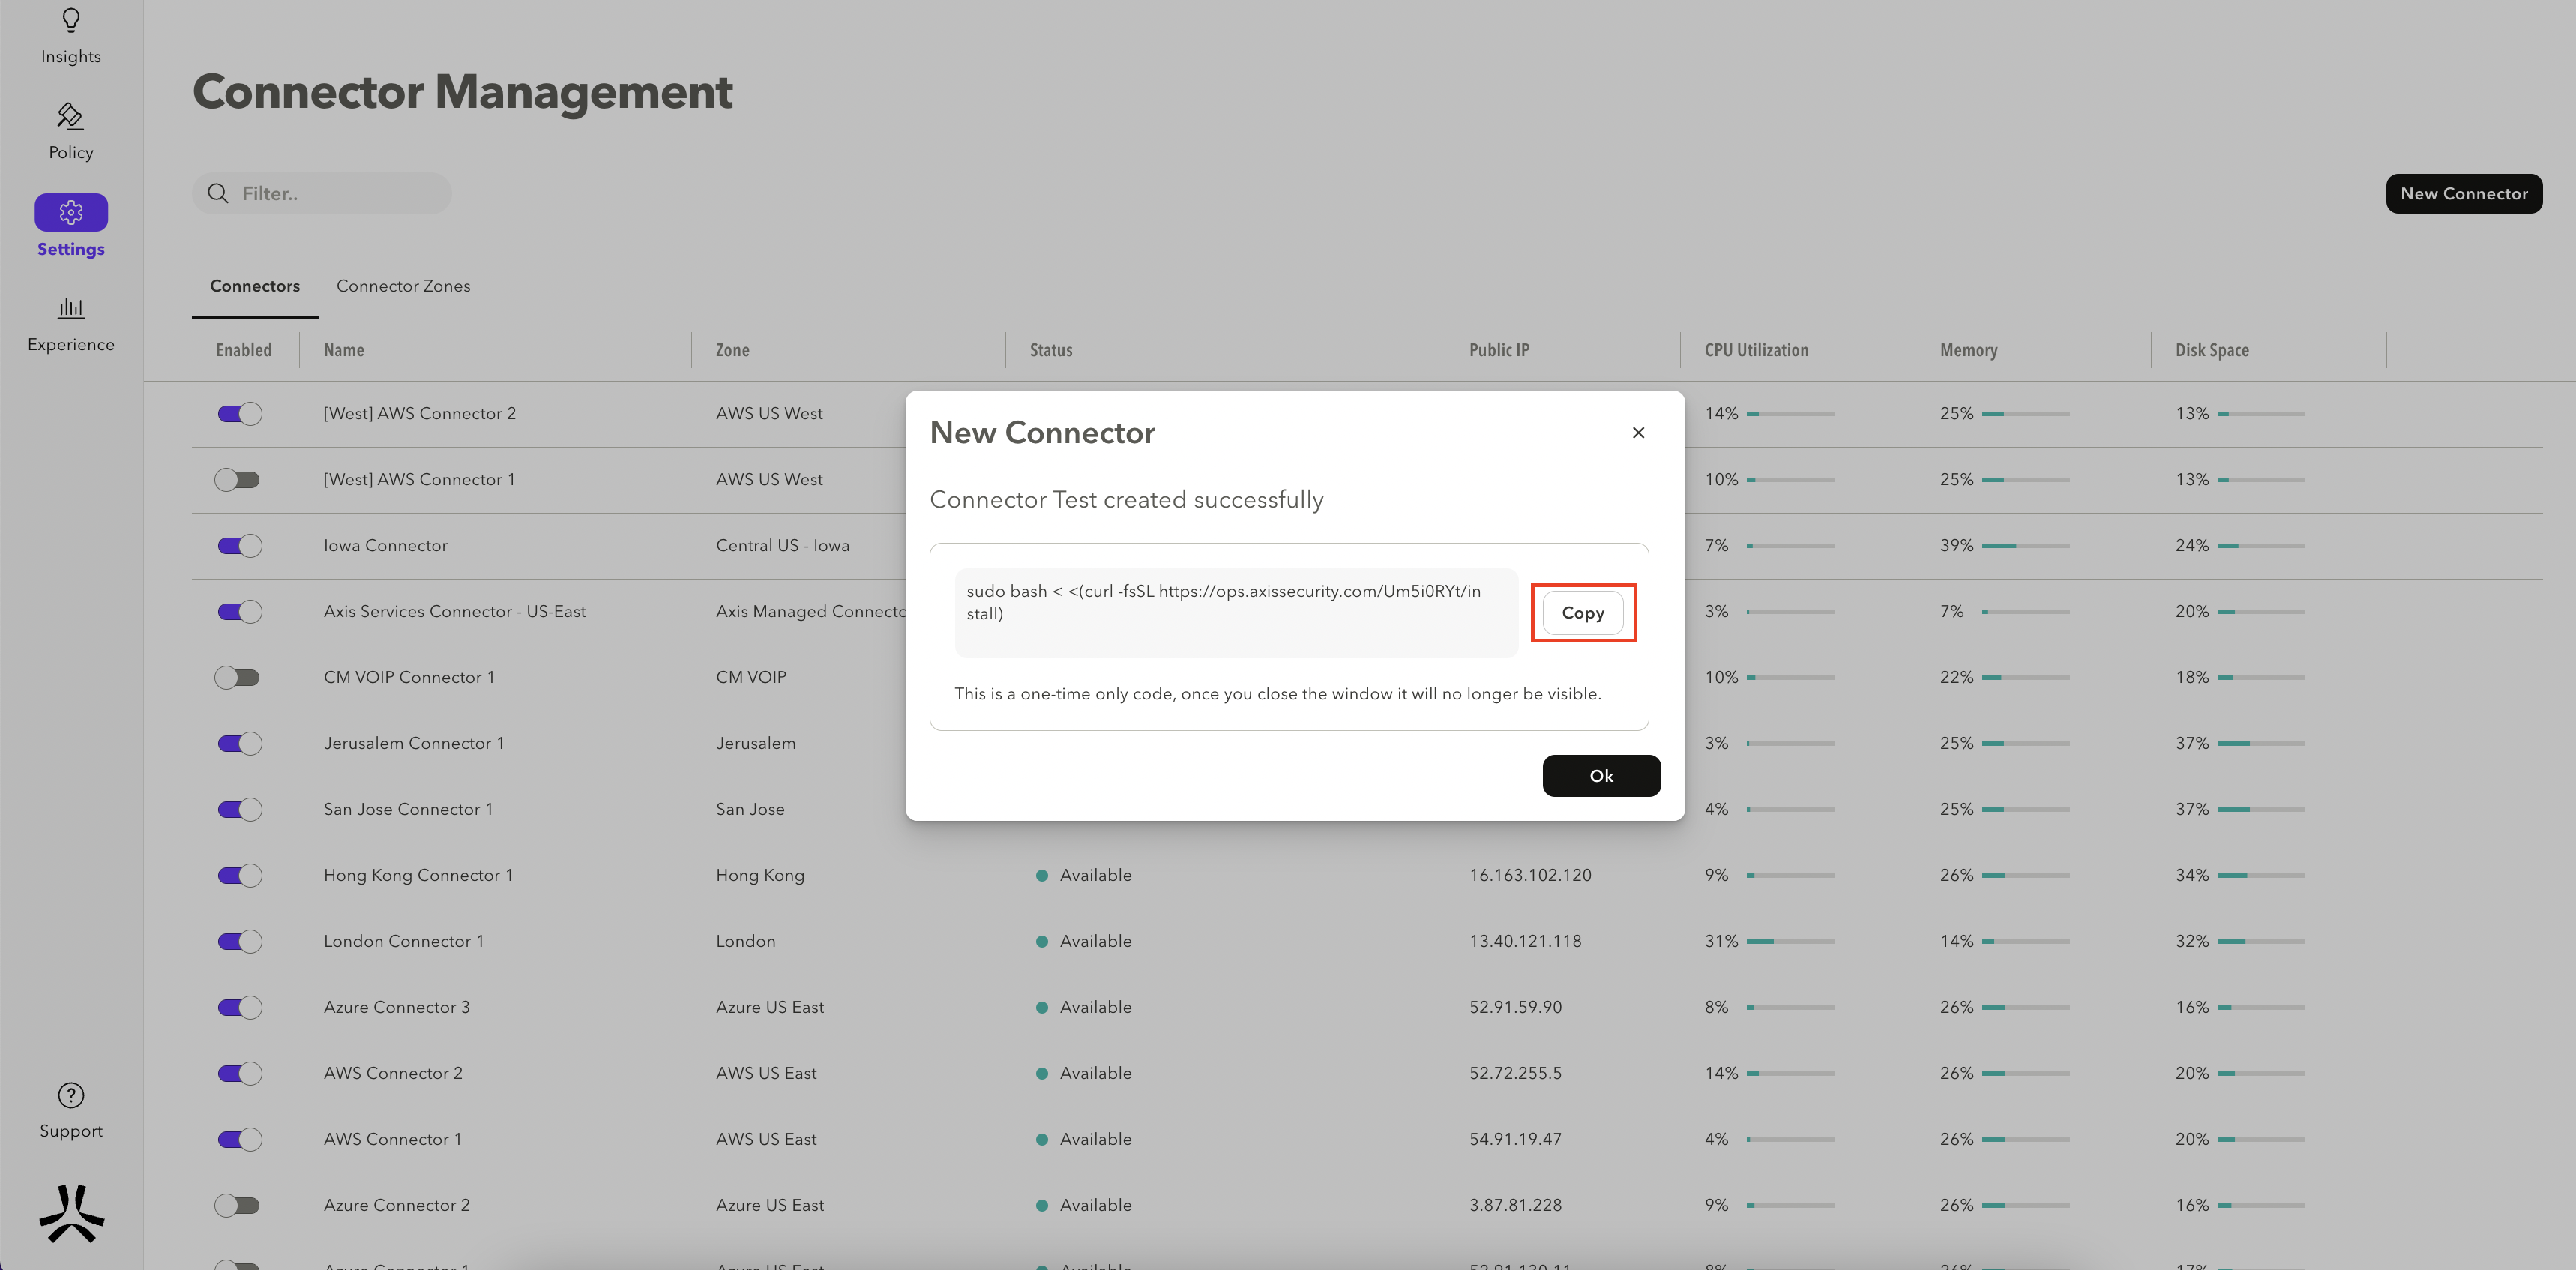
- Copy the code snippet from the window into a text editor.

Note
- The code only appears once, after the window is closed it is no longer visible.
- The code is valid for 24 hours.
- If you wish to install a connector on another machine, please create a new connector.
Step 2: Deploying the Connector to the Virtual Machine
- Console/SSH into the Connector server and paste the code snippet from the connector creation process. This will start downloading the software and register itself with the Axis cloud.
- Run your script in the terminal in the deployed Linux server. The script installs the connector and related dependencies, and may take a few minutes to complete the process.
- Once the server finishes running the script, you will see your connector in the Axis Management Console.
Notes
- The installation script is valid for 24 hours after being generated.
- The installation script code snippet will do the following:
- Check prerequisites: CPU count, root access, disk space, memory, bash.
- Install and configure dependencies (requires sudo): curl, docker, kubernetes, helm.
- Download connector image and configuration.
- Install the connector (requires sudo).
- Clean temp files.
Step 3: Verifying Connectivity
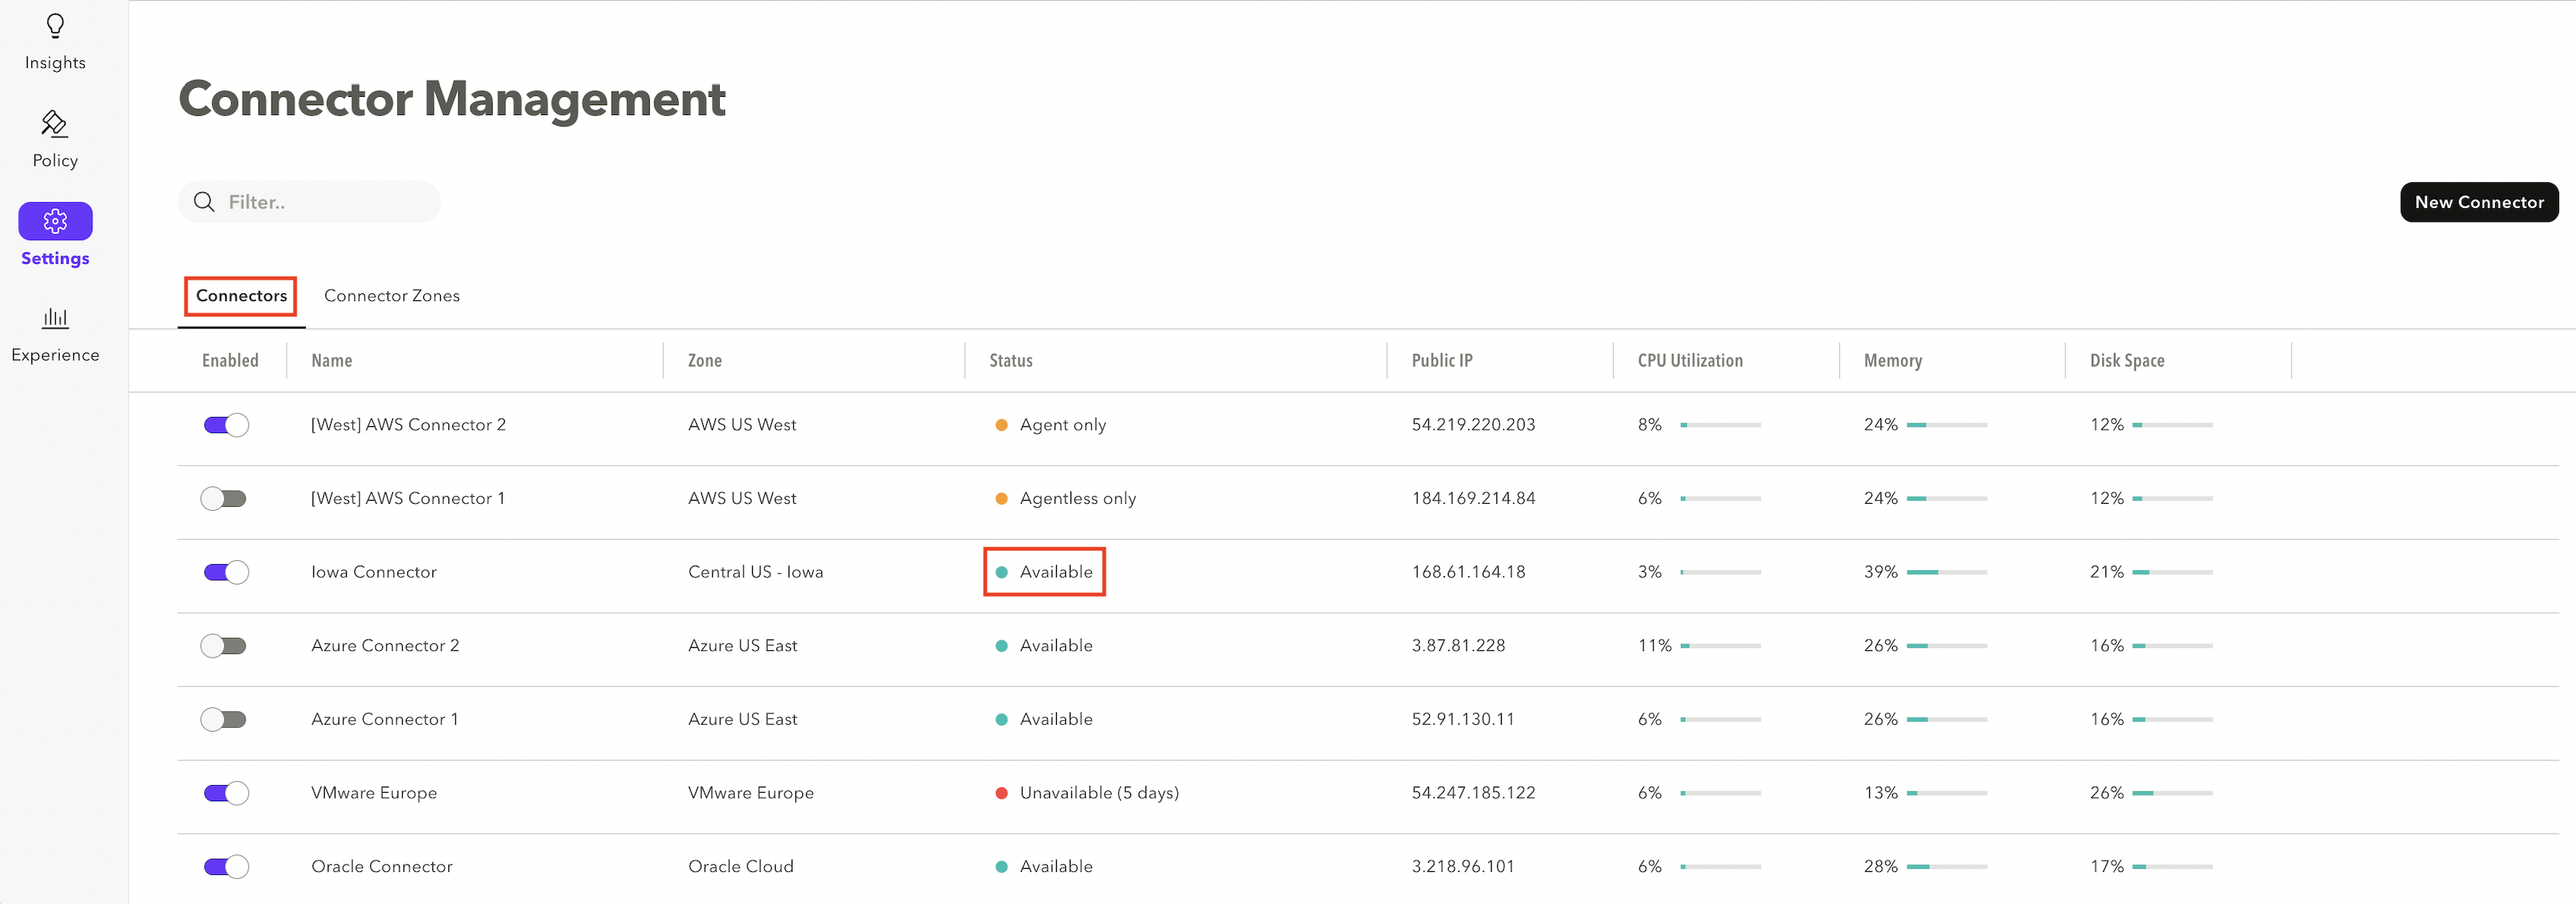
- In the Management Console, go to Settings -> Connectors.
- Make sure the connector shows a green light and says “Available”. If it is not online, check connectivity issues, visit our troubleshooting page, or contact customer support at [email protected]

Note
To commit your changes:
- Go to to the top-right menu.
- Click Apply Changes.
- Review your changes.
- Click Commit Changes.
Updated about 2 years ago
What’s Next
