Adding an RDP Pool
NoteThis is a limited release feature. For more information contact Axis Security Support: [email protected].
A pooled RDP session allows several users to access one of a shared pool of RDP servers. The Remote Desktop Pool option provides access to specific RDP applications from an RDP pool of servers at the Settings > New Application > Remote Desktop Pool screen. You can select an RDP application that is already defined or use the Add the new host option to add RDP servers.
Use the Remote RDP Pool option to provide:
- Desktop access to a pool of load balancing RDP servers
- Access to one or more applications without providing access to the desktop
- Provide access to an application for a single RDP server.
Note
Only the remote desktop pool option provides access to applications.
The best practice is to add your host or IP address instead of selecting an RDP application that is already defined.
Full Desktop or Applications
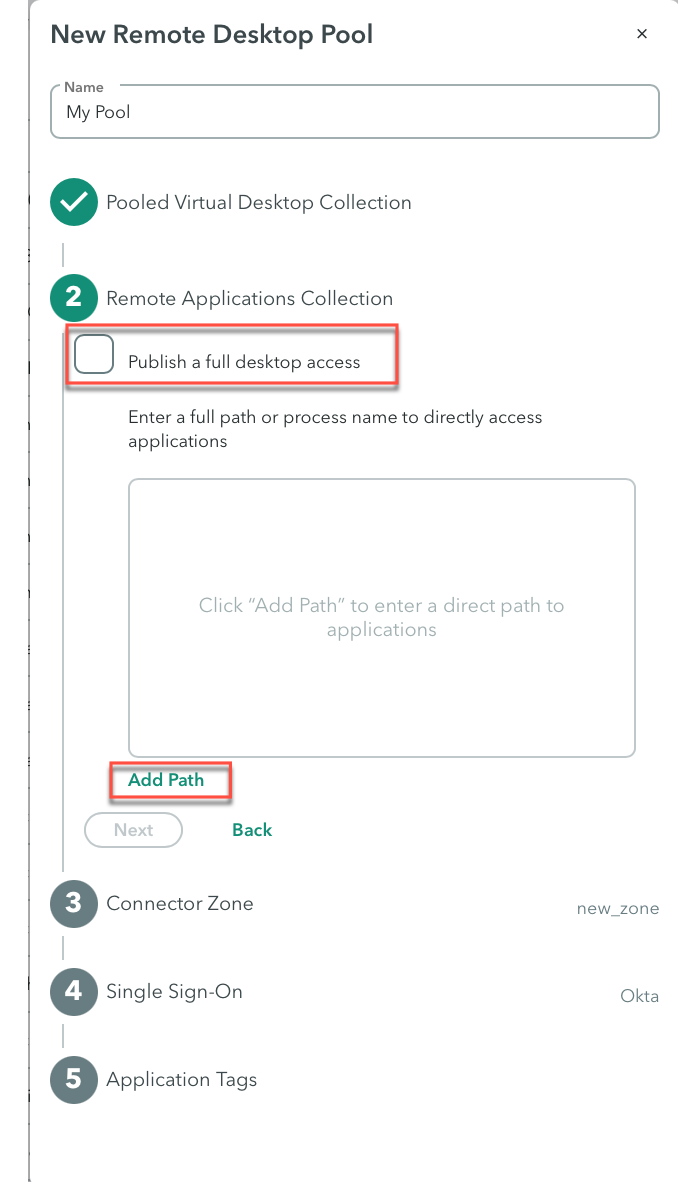
With an RDP pool, you can publish a full desktop or applications. When you select the Publish a full desktop access option, the Add Path option to publish applications is no longer available. To publish only applications, uncheck the full desktop access option.
If your RDP server is listening on a different port, specify the port using the following syntax:[ipaddress]:[port] or [host]:[port]
The port is optional.
Creating a Remote Desktop Pool
New Application
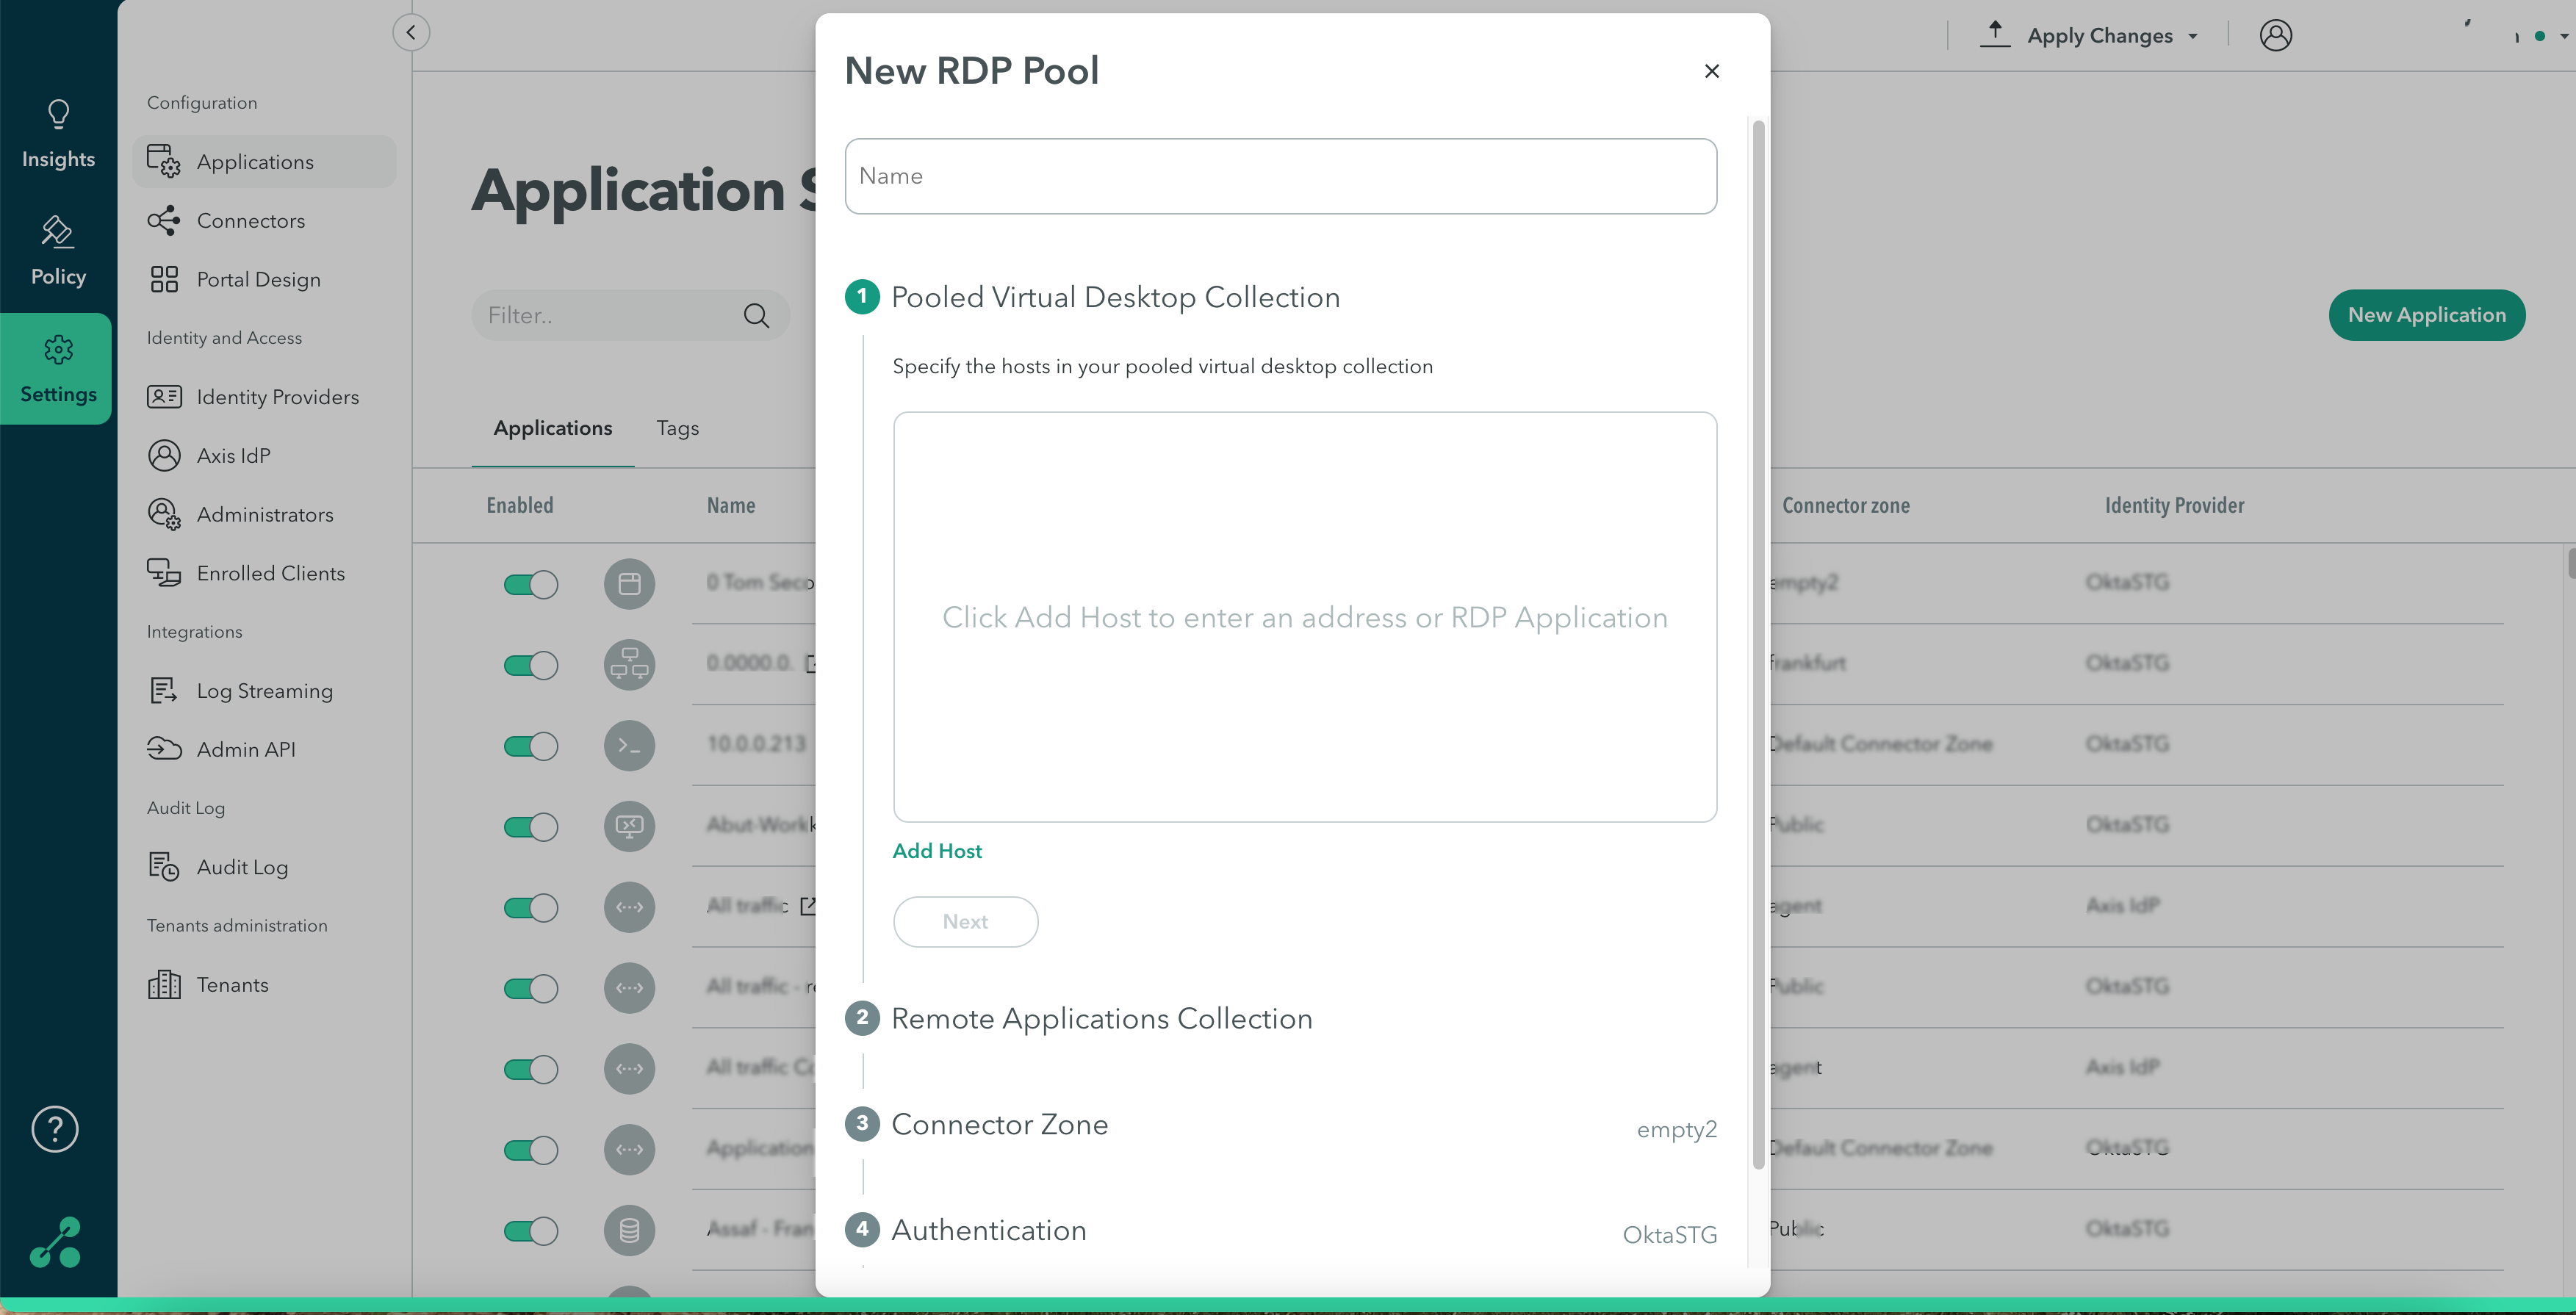
- In the Management Console, go to Settings -> Destinations -> Add Application.
- Select Remote Desktop Pool.
- Enter a name.
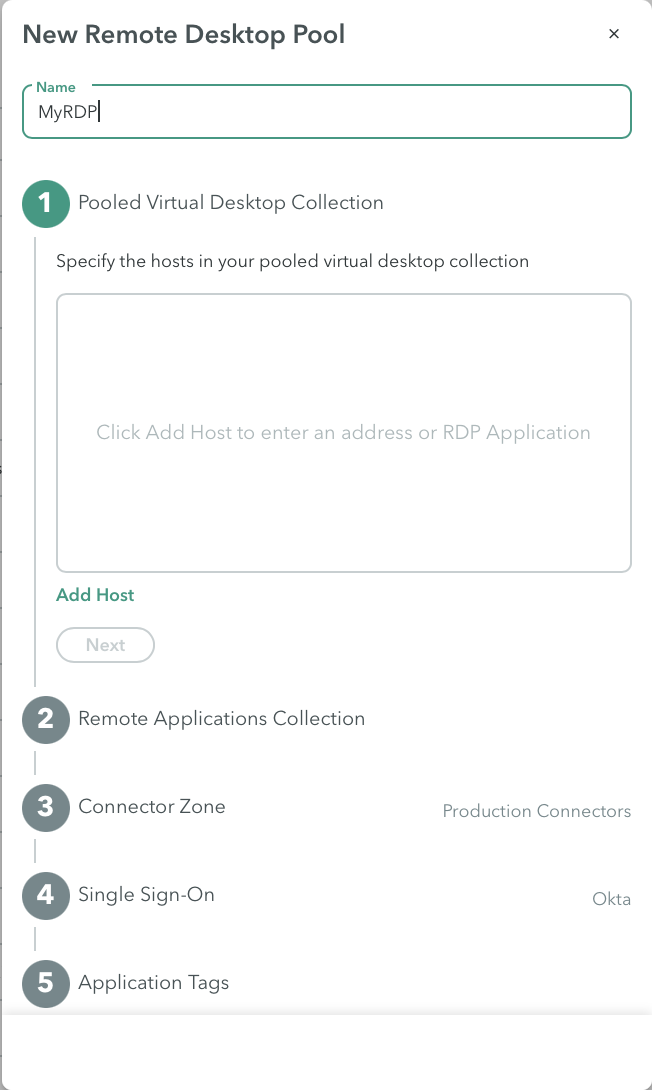
Step 1: Pooled Virtual Desktop Collection
- Specify the hosts that compose your pooled virtual desktop collection:
- Click Add a Host to add a host to the collection.
- Click the drop-down menu to select one of the predefined RDP applications as they will provide the host information.
- Start typing to create a new host.
- Click Next.
NoteWhen selecting existing applications, ensure that the applications and the pool are all using the same IdP and the same connector zone.
Step 2: Remote Applications Collection
Admins can provide users with access to the entire machine or to specific applications.
Use the Publish a full desktop access option to allow users to access any application on the remote desktop.
To limit access to specific applications, add paths for applications that are hosted on your pooled virtual desktop collection. These individual applications will be published to your users when they access the remote desktop.
Examples: Adding Paths for Applications
- Enter the path that leads to the application on the virtual desktop.
For example: C:\windows\system32\notepad.exe - If the application path has spaces, use quotation marks.
For example:“C:\windows\my directory\chrome.exe” - If needed, you can add variables at the end of the path, separated by a space.
For example: “C:\windows\my directory\chrome.exe” --incognito www.acme.com - You can use environment variables in the application path, with a “%” in the beginning and end. For example: “%PROGRAM_FILES%/chrome.exe”
Remote Desktop Services (RDS): Adding Applications
- Enter double pipes || before the application on the virtual desktop.
For example: ||notepad.exe
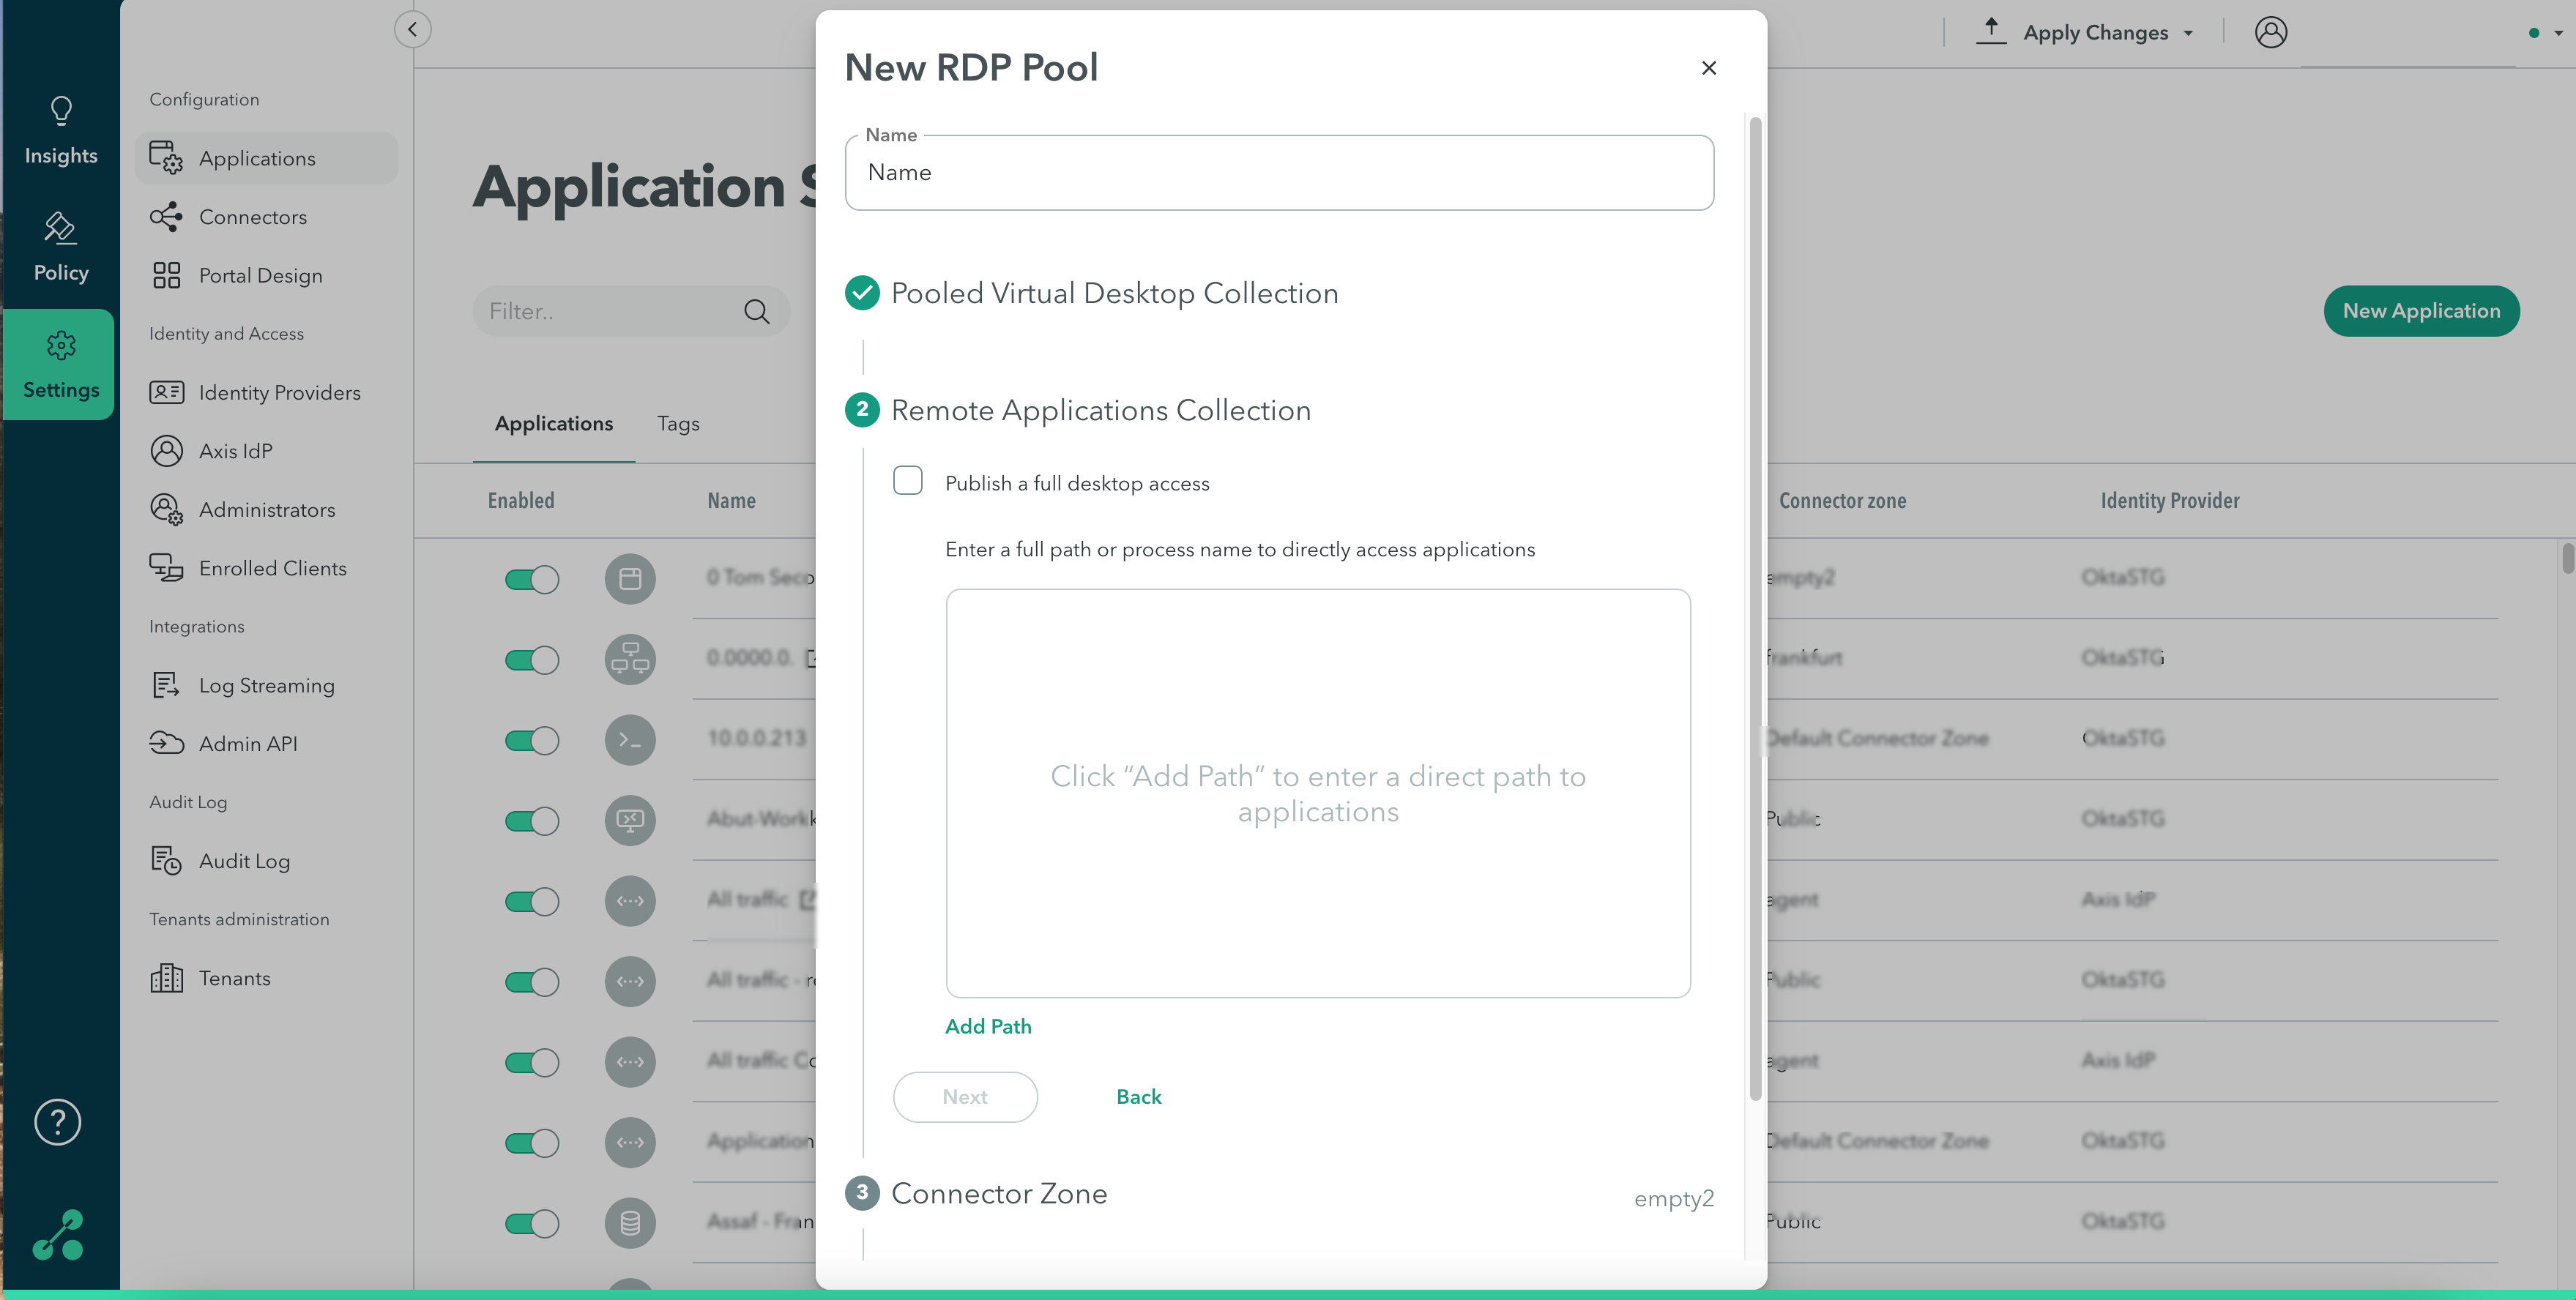
Step 3: Connector Zone
- In the Connector Zone, start typing to find the relevant connector zone. Click here to learn more about connector zones.
- Click Next.

Step 4: Authentication
- Under Identity Provider, select your relevant IdP from the drop-down menu.
- Click Next.
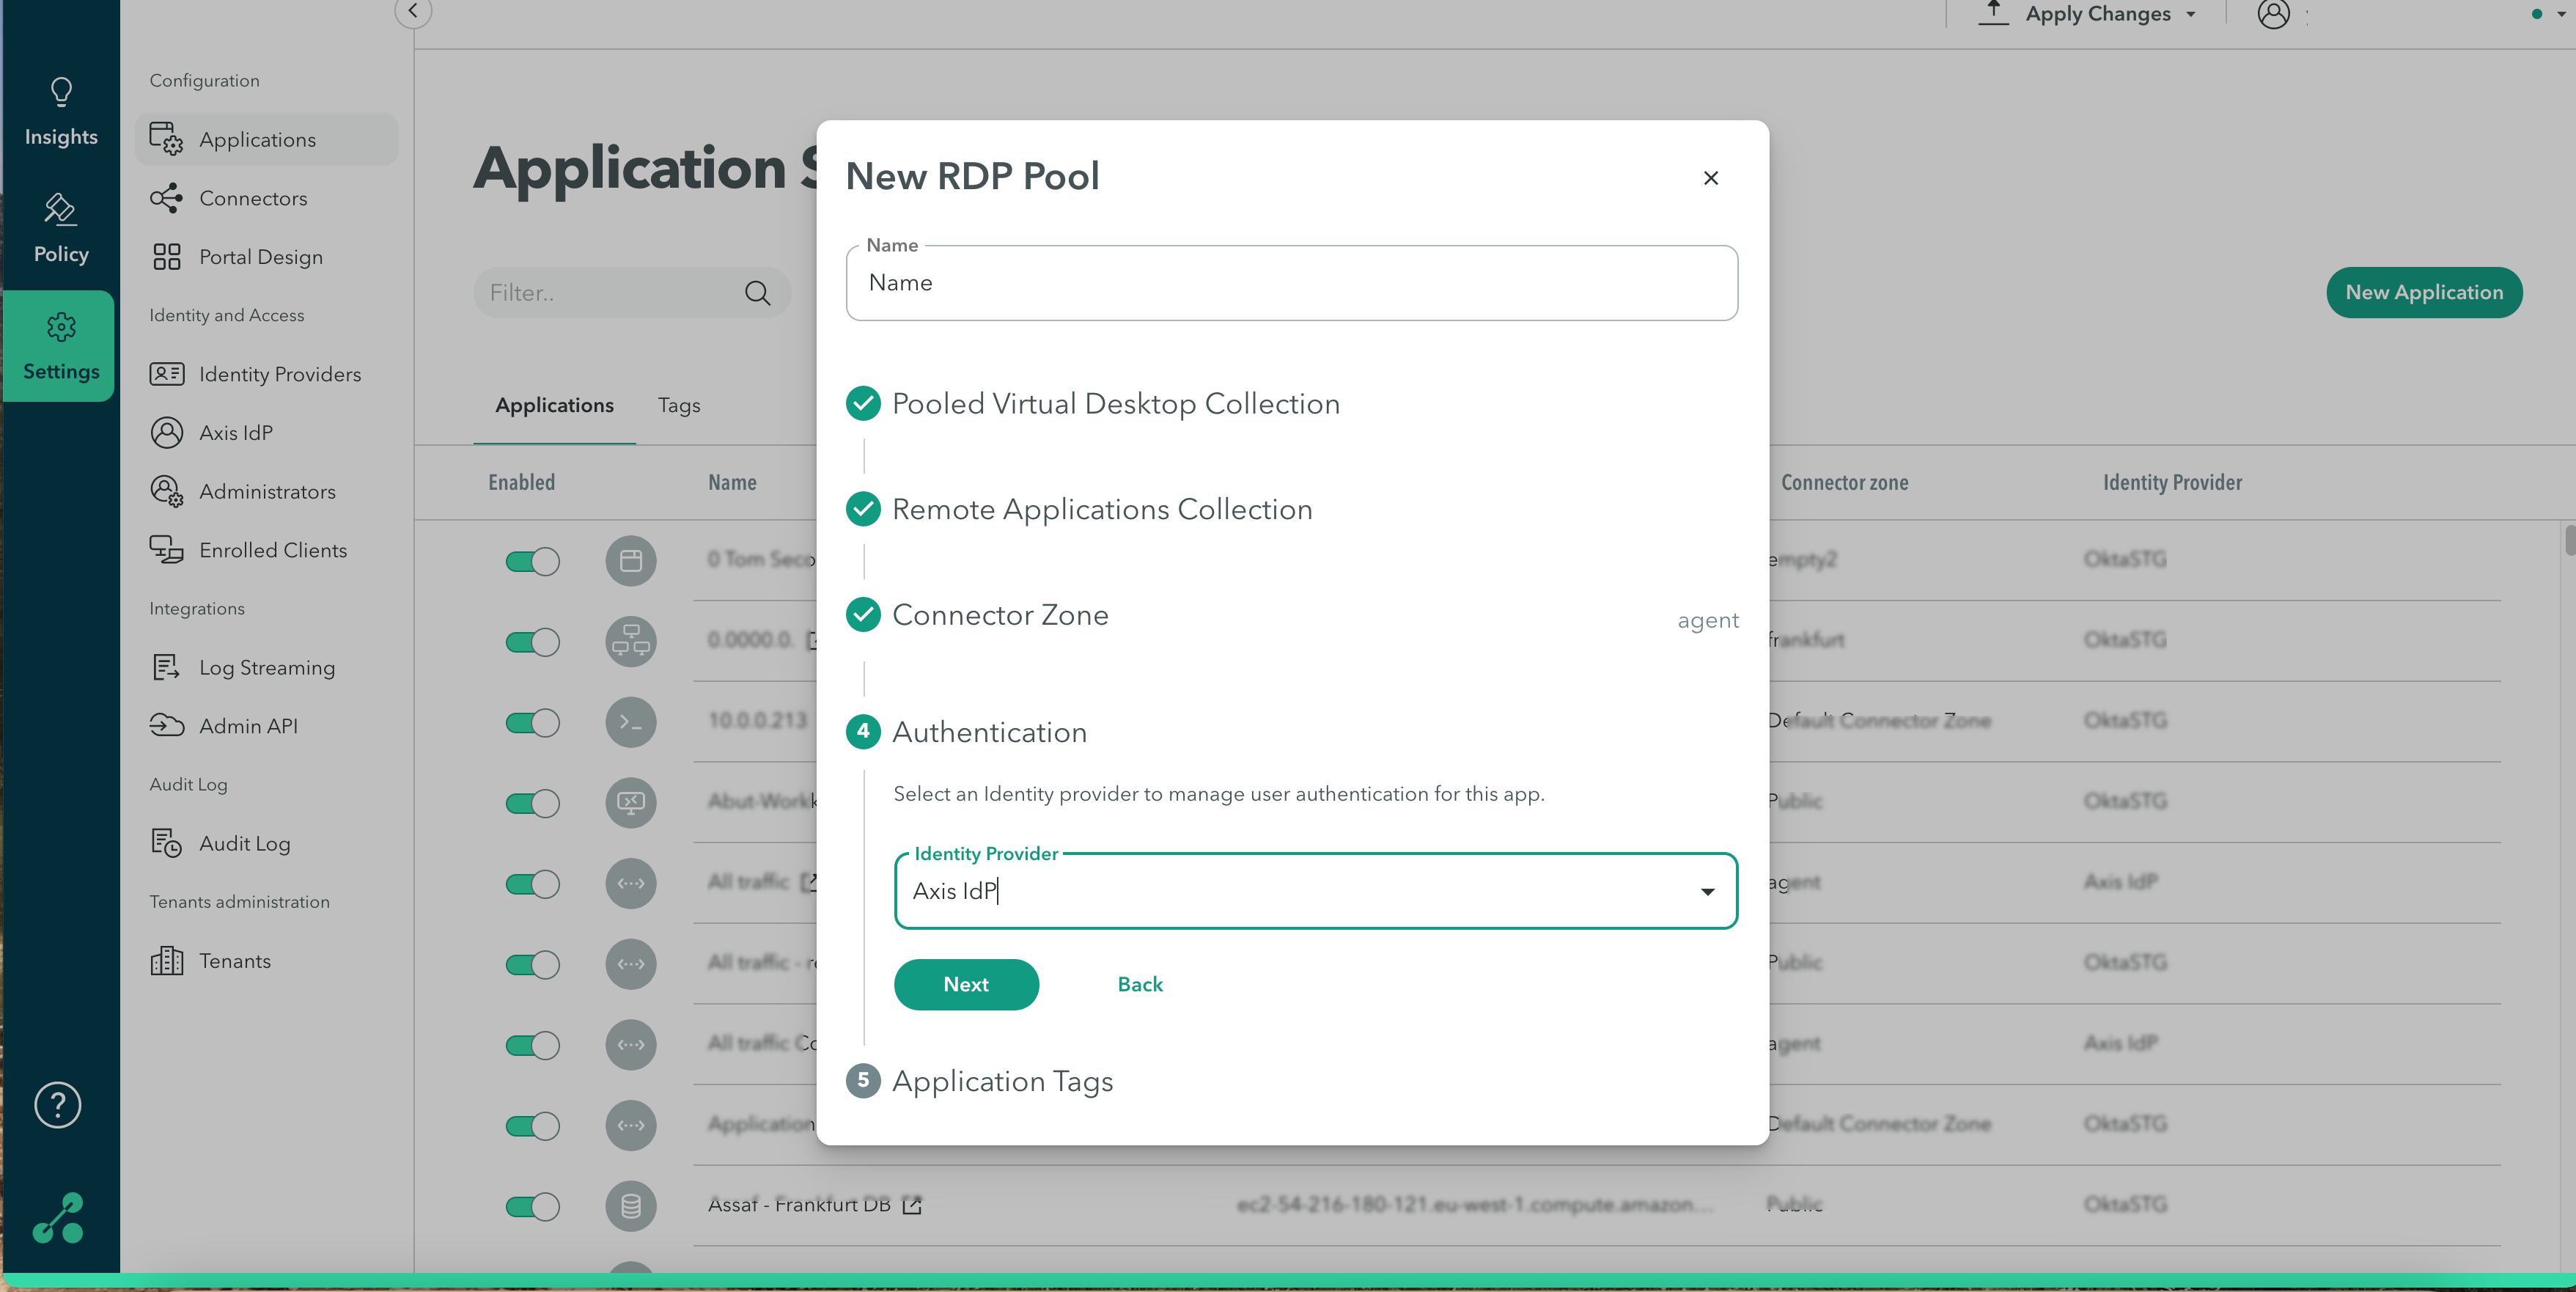
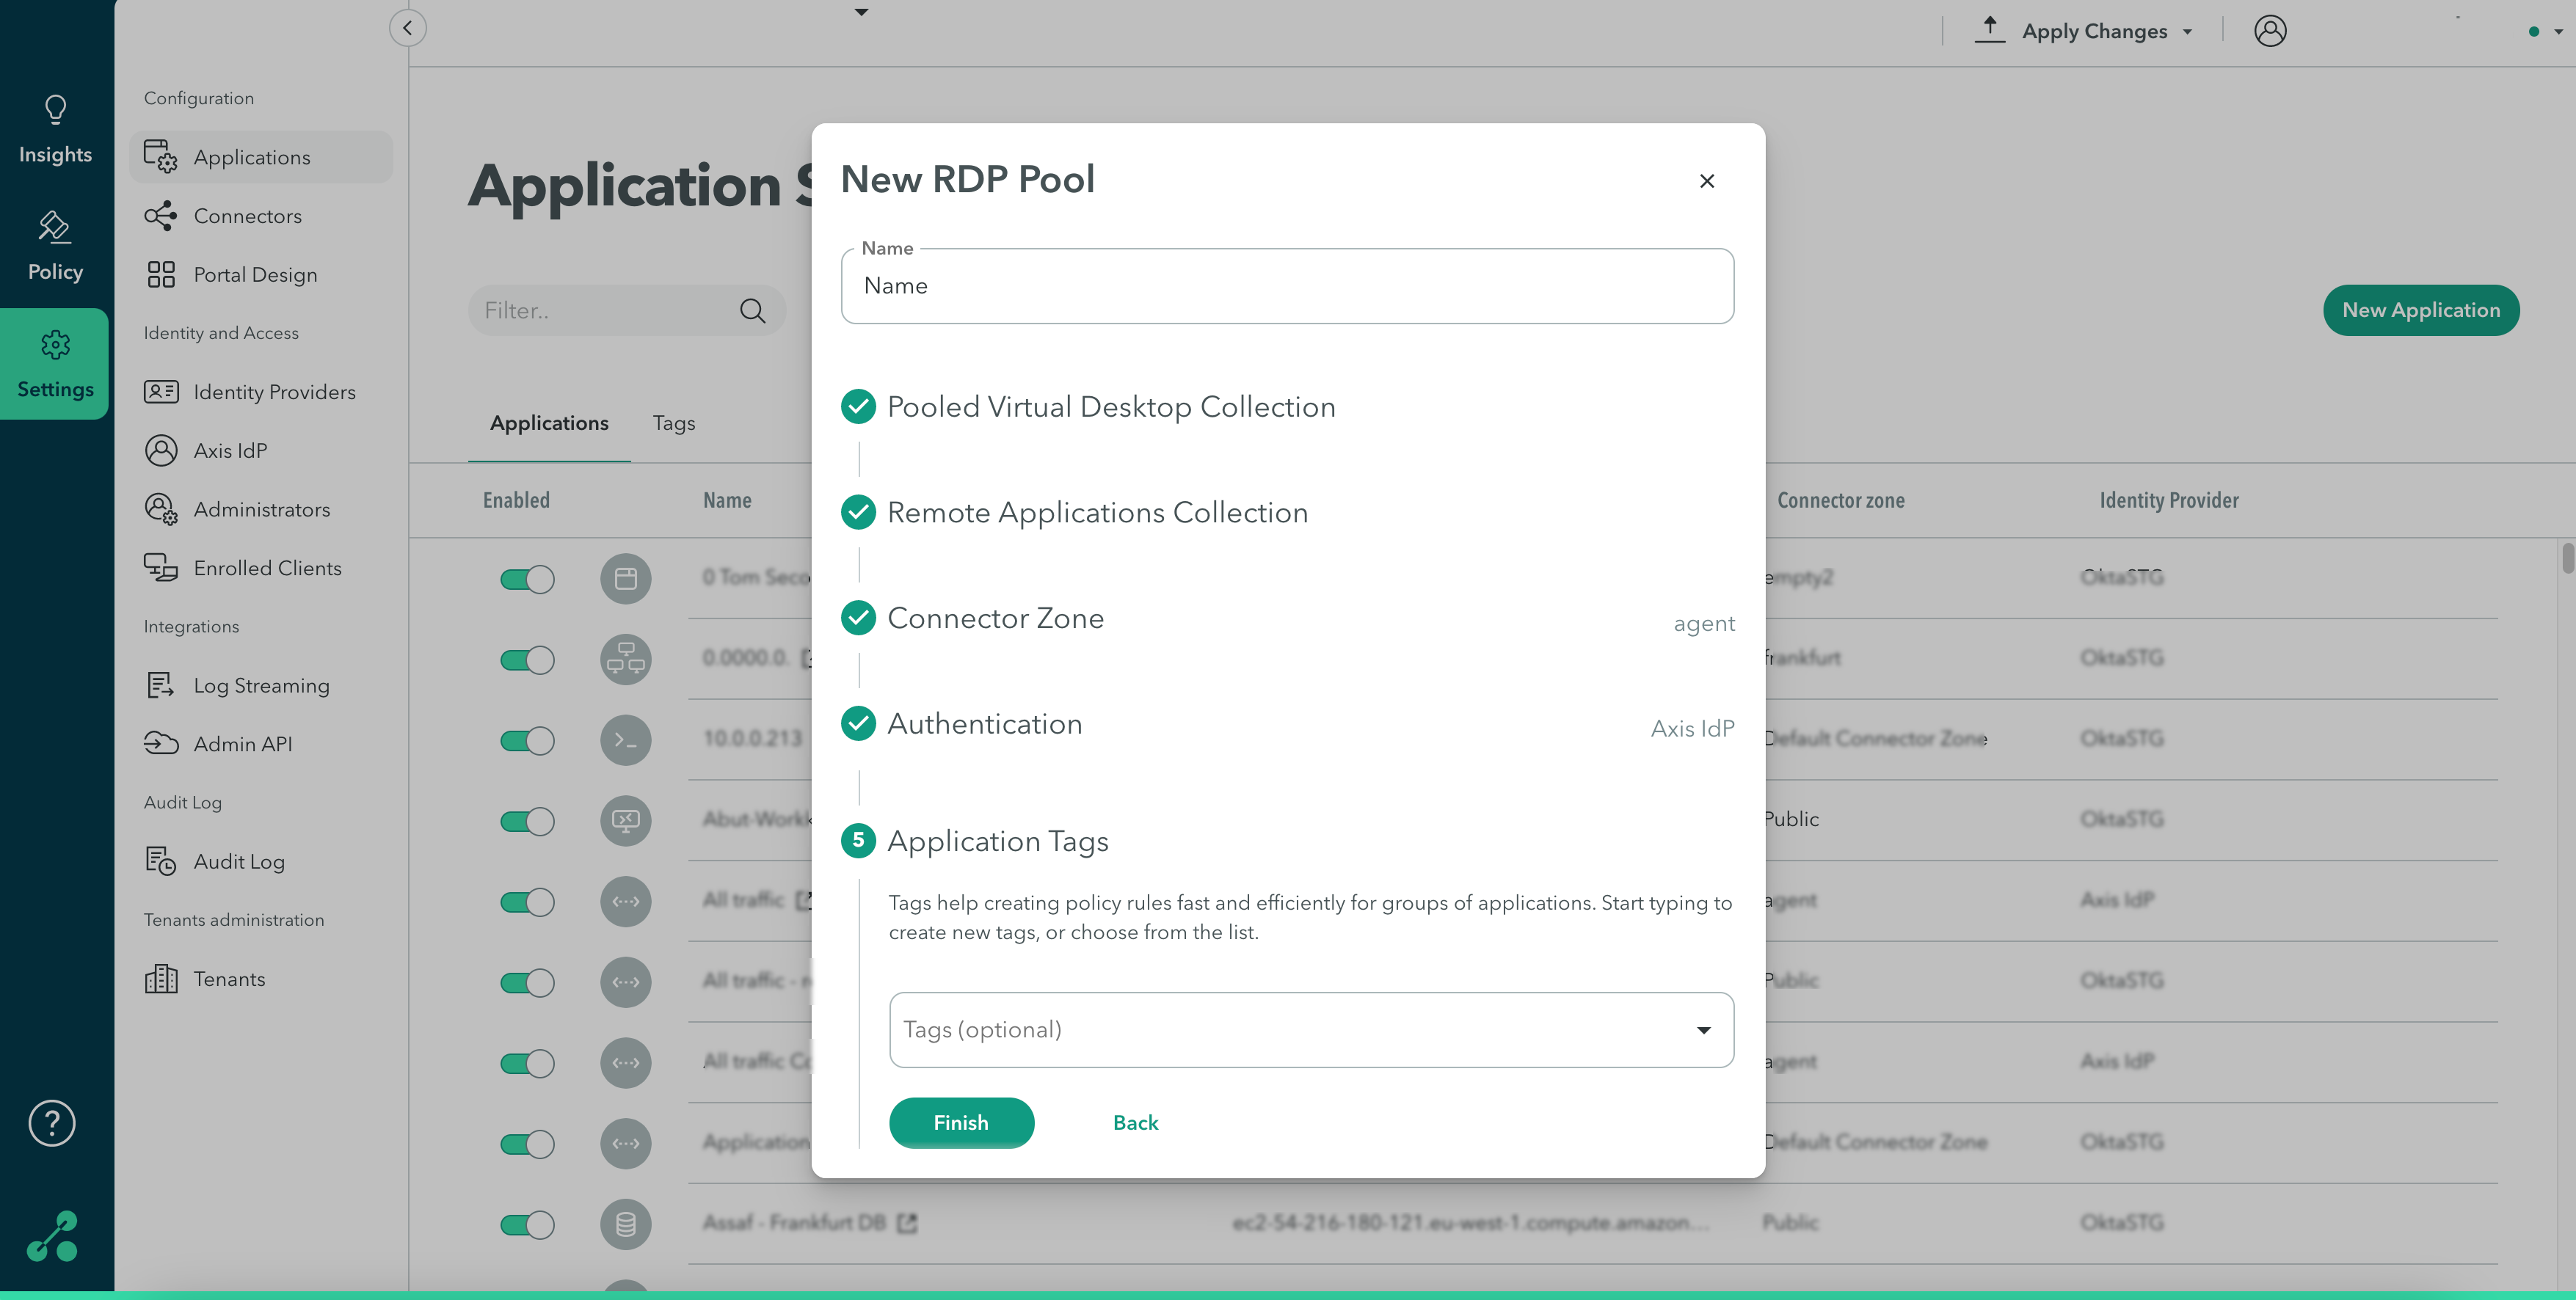
Step 5: Application Tags
- Under tags, you can start typing or add custom application tags.
Click here application to learn more about application tags. - Click Finish.
- Next Steps: Adding an RDP Profile.
NoteTo commit your changes, navigate to the top-right menu, click Apply Changes, then select Commit Changes.
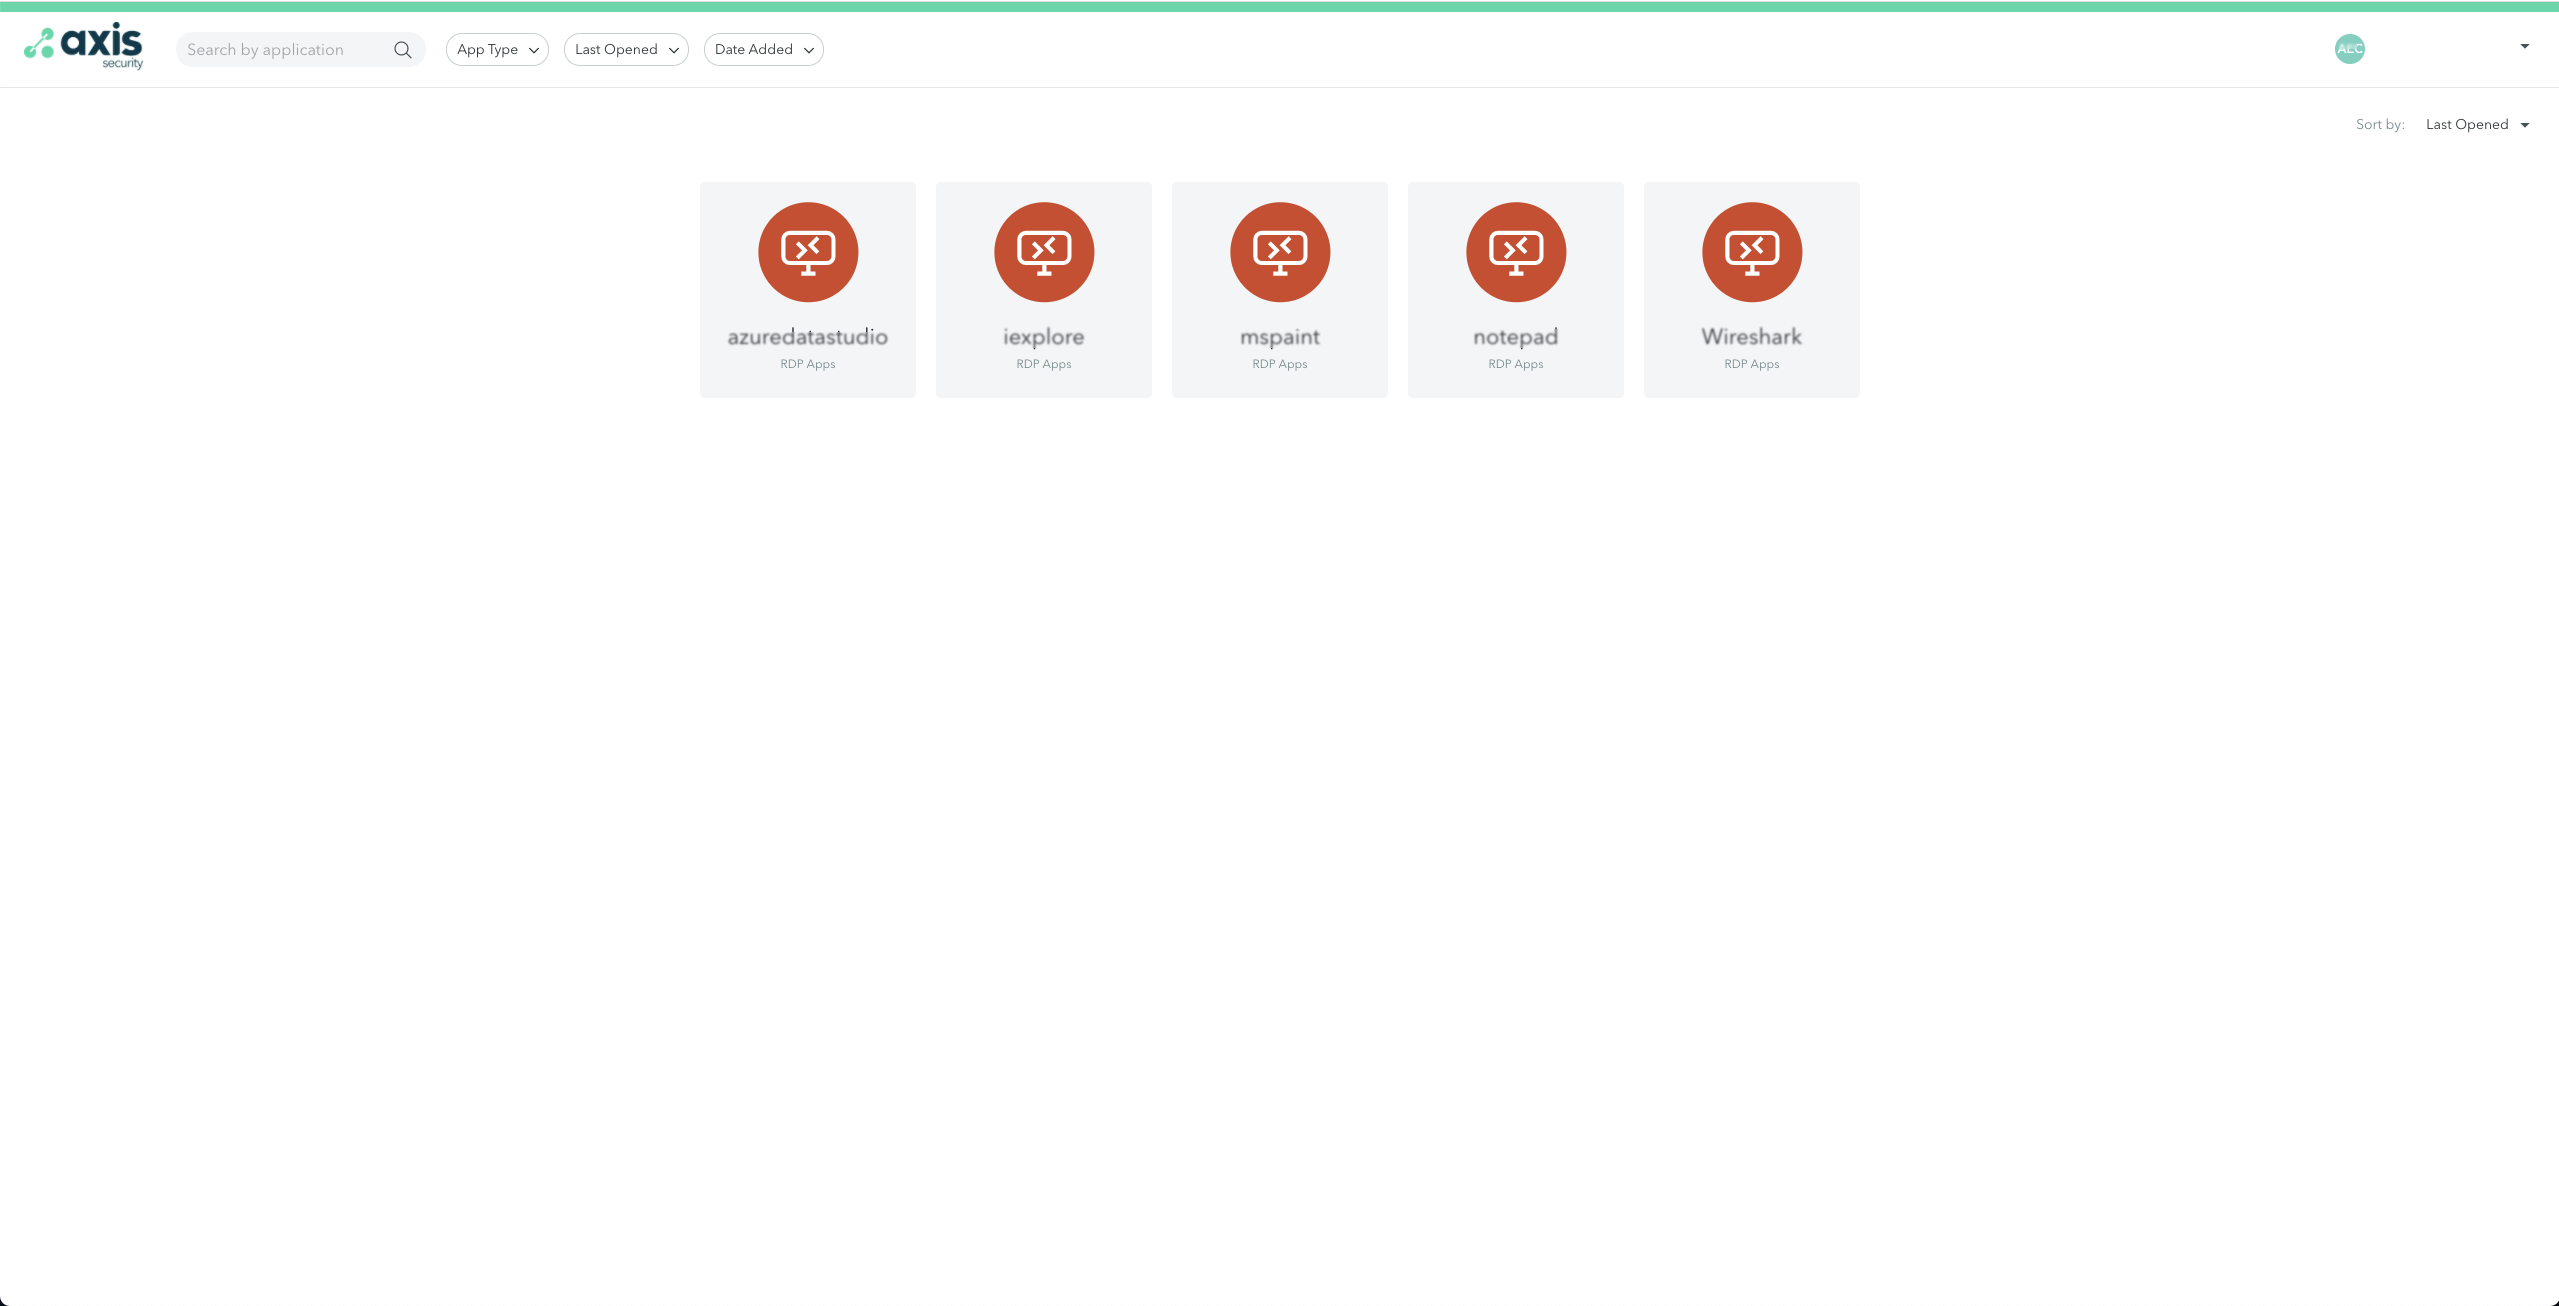
User Portal Visibility
In the User Portal, the user will see all of the applications added by the admin, and will only be able to connect to these applications, not the entire desktop.