Integrating with Crowdstrike
Note
This is a limited release feature. For more information contact Axis Security Support: [email protected]
Axis Security offers integration with various platforms, including Crowdstrike. This integration utilizes the Crowdstrike API to ensure that the user's endpoint is connected to a specific corporate instance of Crowdstrike. From an Atmos Agent security posture perspective, it verifies that Falcon is running and properly connected to the designated tenant.
To integrate with Crowdstrike:
- In the Crowdstrike console, click the Falcon on the top left bar.
- Under Support, click API Clients and Keys.
- Click Add new API client.
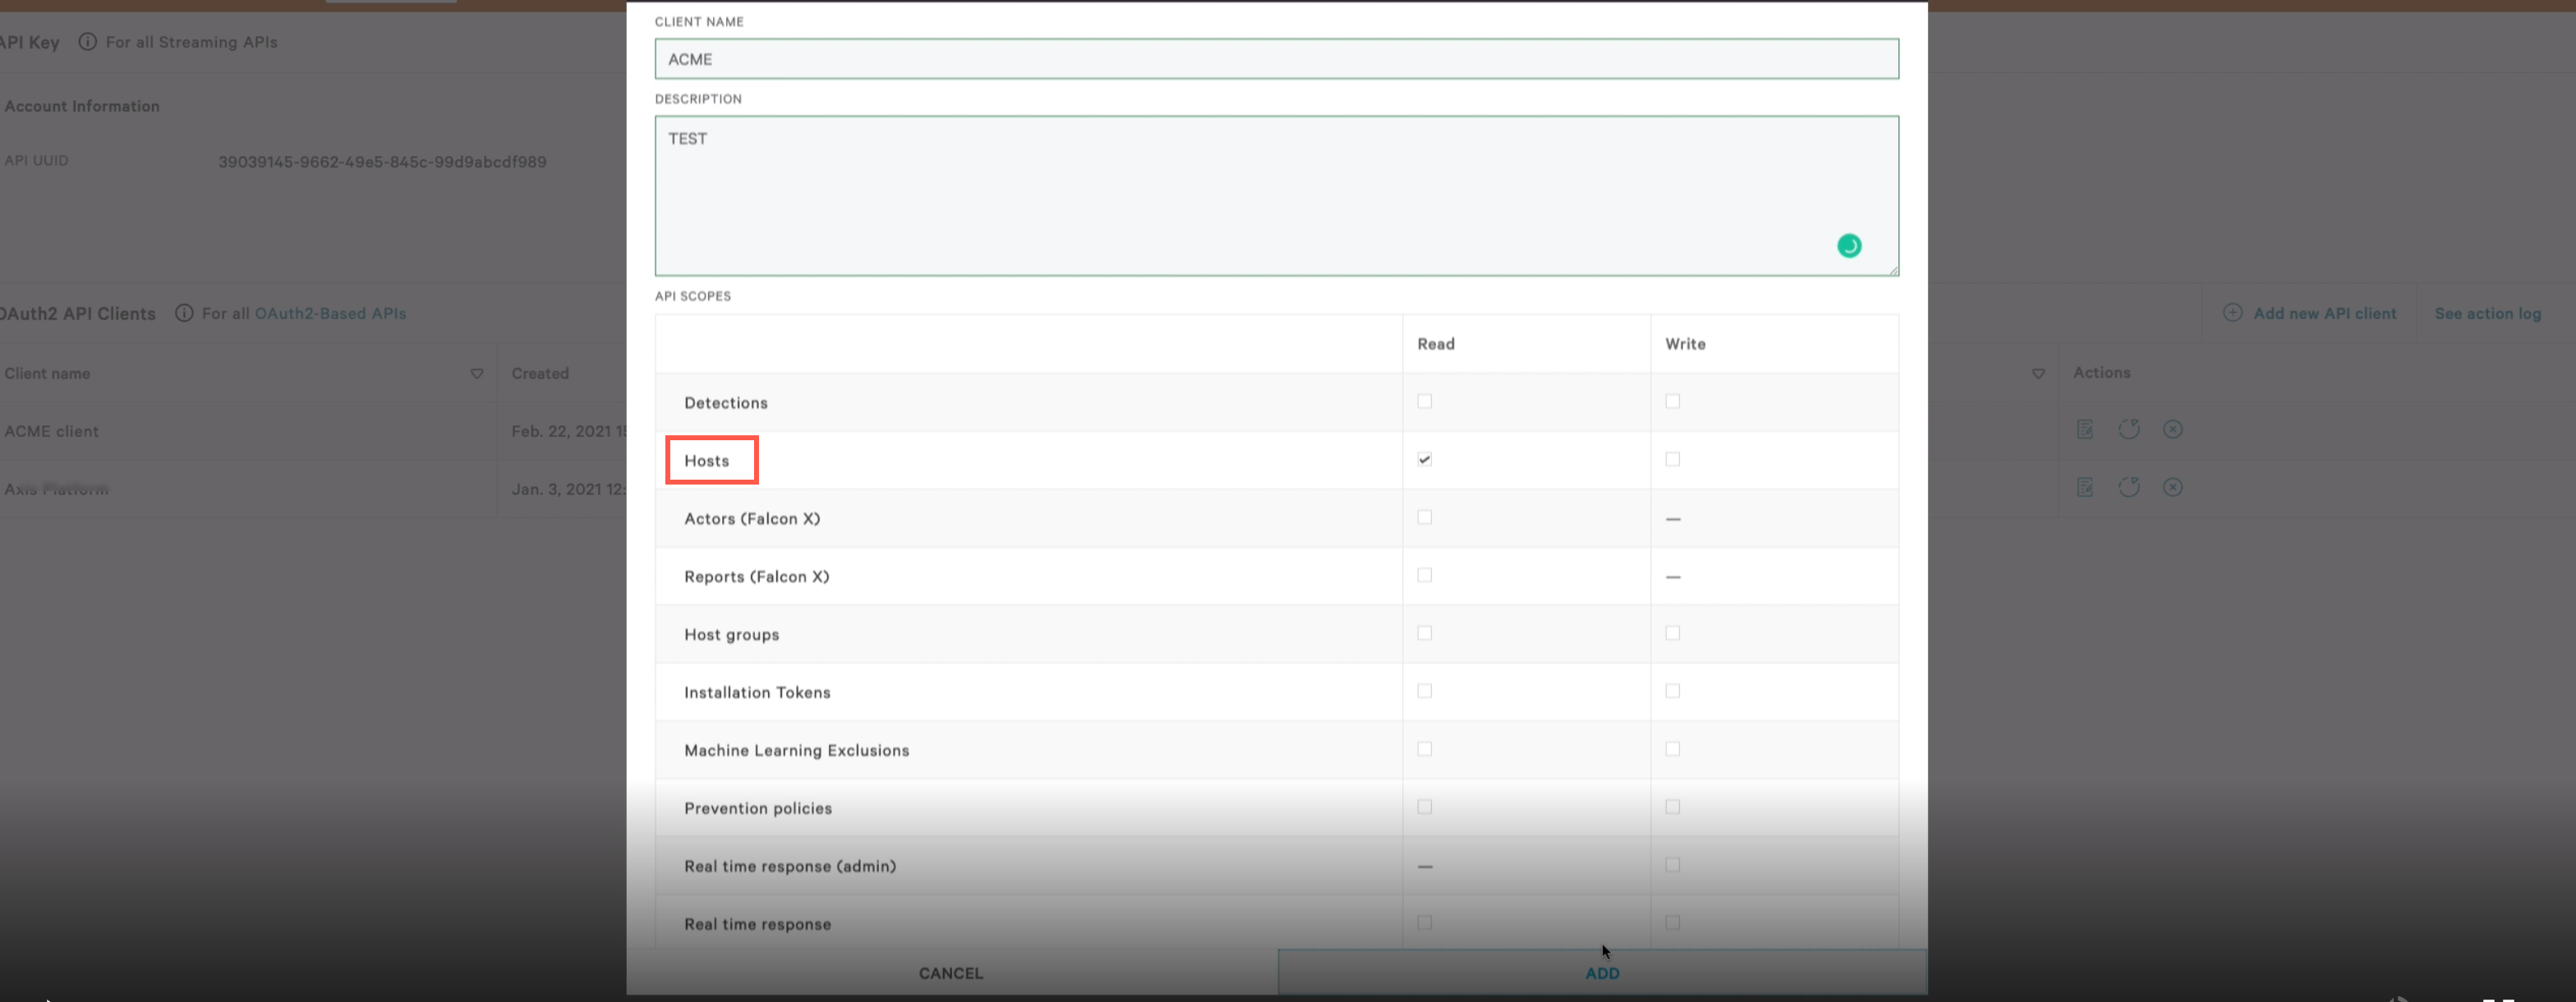
- In the new API window, enter the client name and description.
- API Scopes asserts the specific actions Crowdstrike can be allowed to do on your behalf. Select the relevant scopes and click Add.
Be sure to set the permissions for the host to "read". - From the summary dialog, copy the Client ID, Secret, and Base URL.
- Click Done.
Creating an Integration in Axis Security
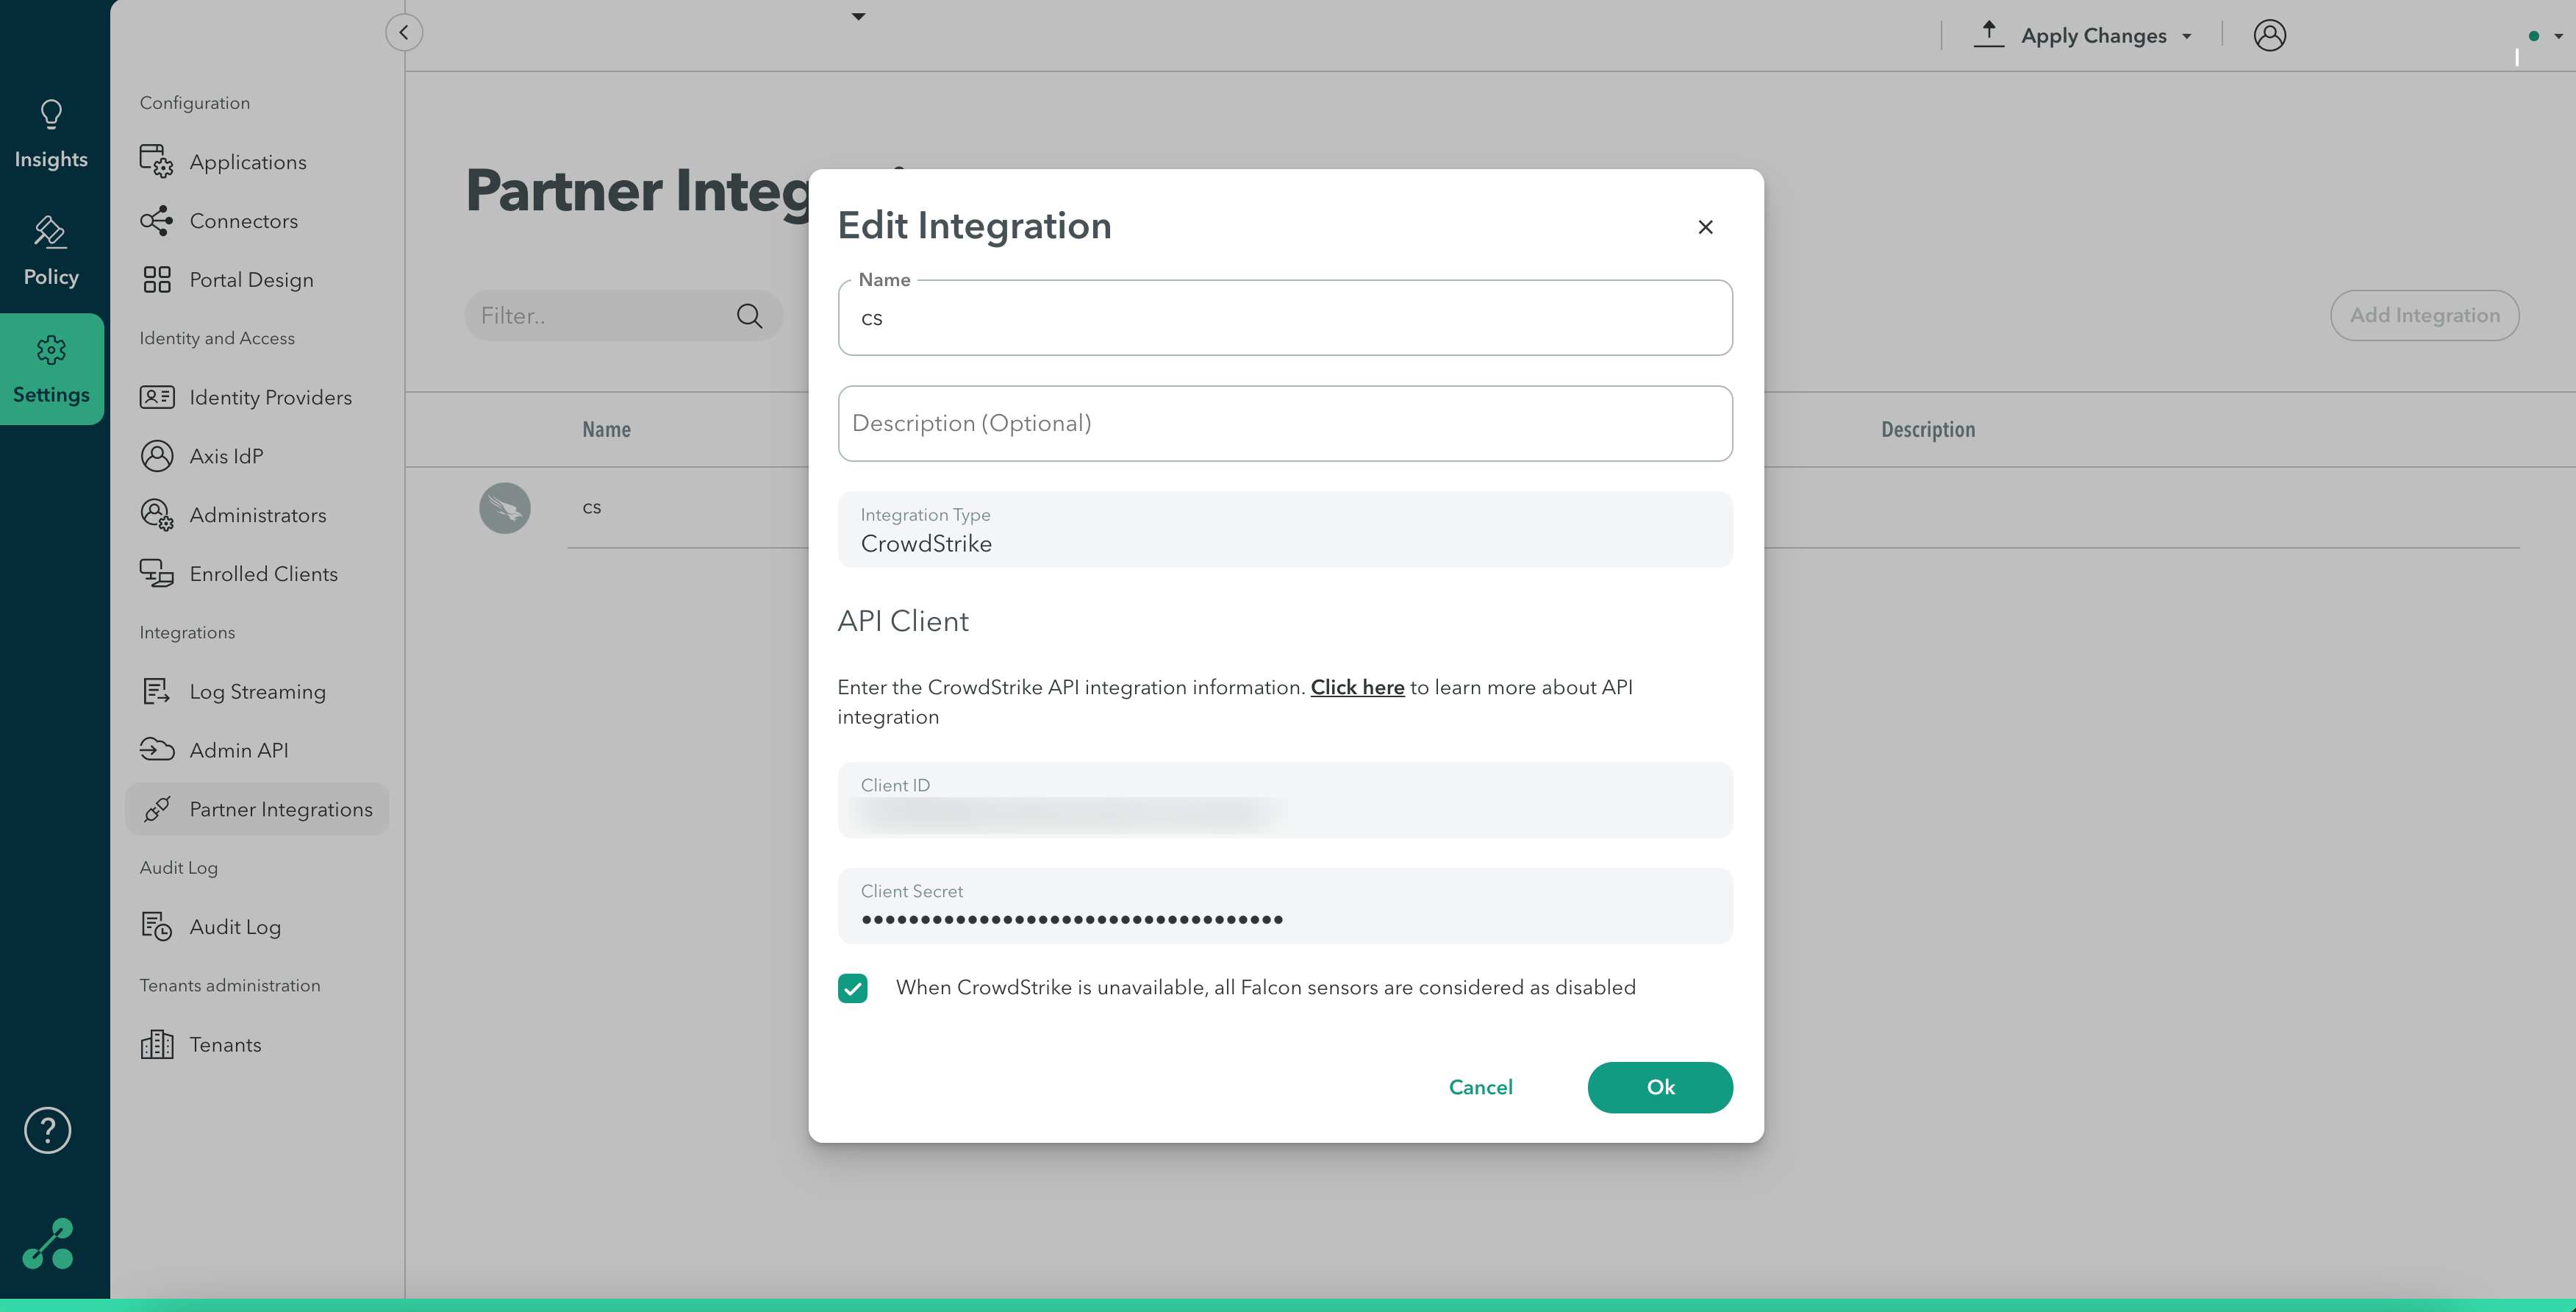
- Go to Settings -> Integrations -> New Integration.
- Add a name.
- (Optional) add a description.
- Under Integration Type, enter Crowdstrike.
API Client
Enter the API integration information generated from Crowdstrike (step 6 in the Crowdstrike section). Click here to learn more about API integration.
- Enter the Client ID.
- Enter the API Secret Key.
- Click Submit.
Creating a Device Posture Object in Axis Security
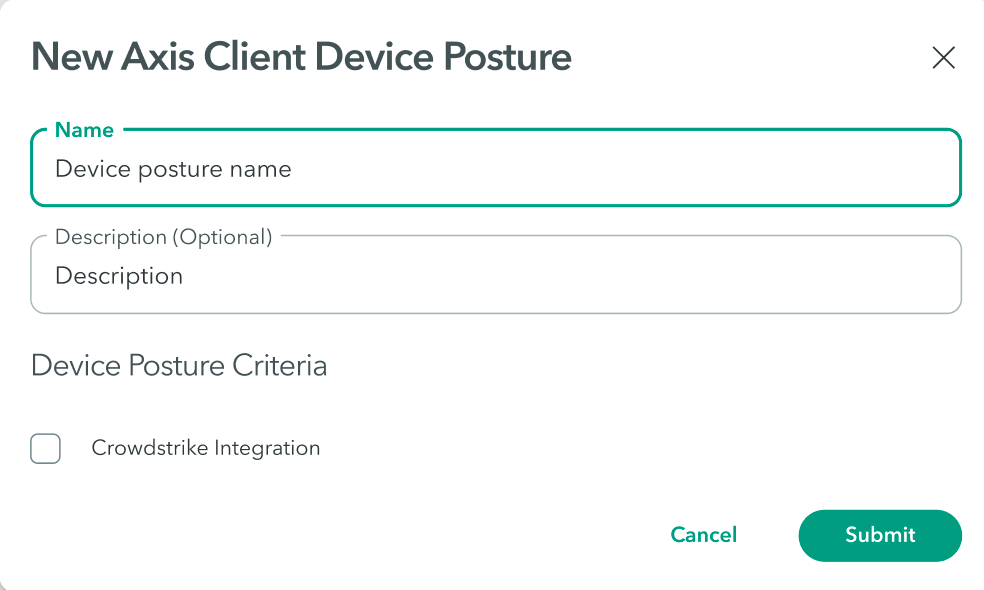
- In the Management Console, go to Policy -> Device Posture -> New Device Posture.
- Select Atmos Agent.
- Under Device Posture Criteria, check Crowdstrike Integration.
Use the Device Posture Object in a Policy
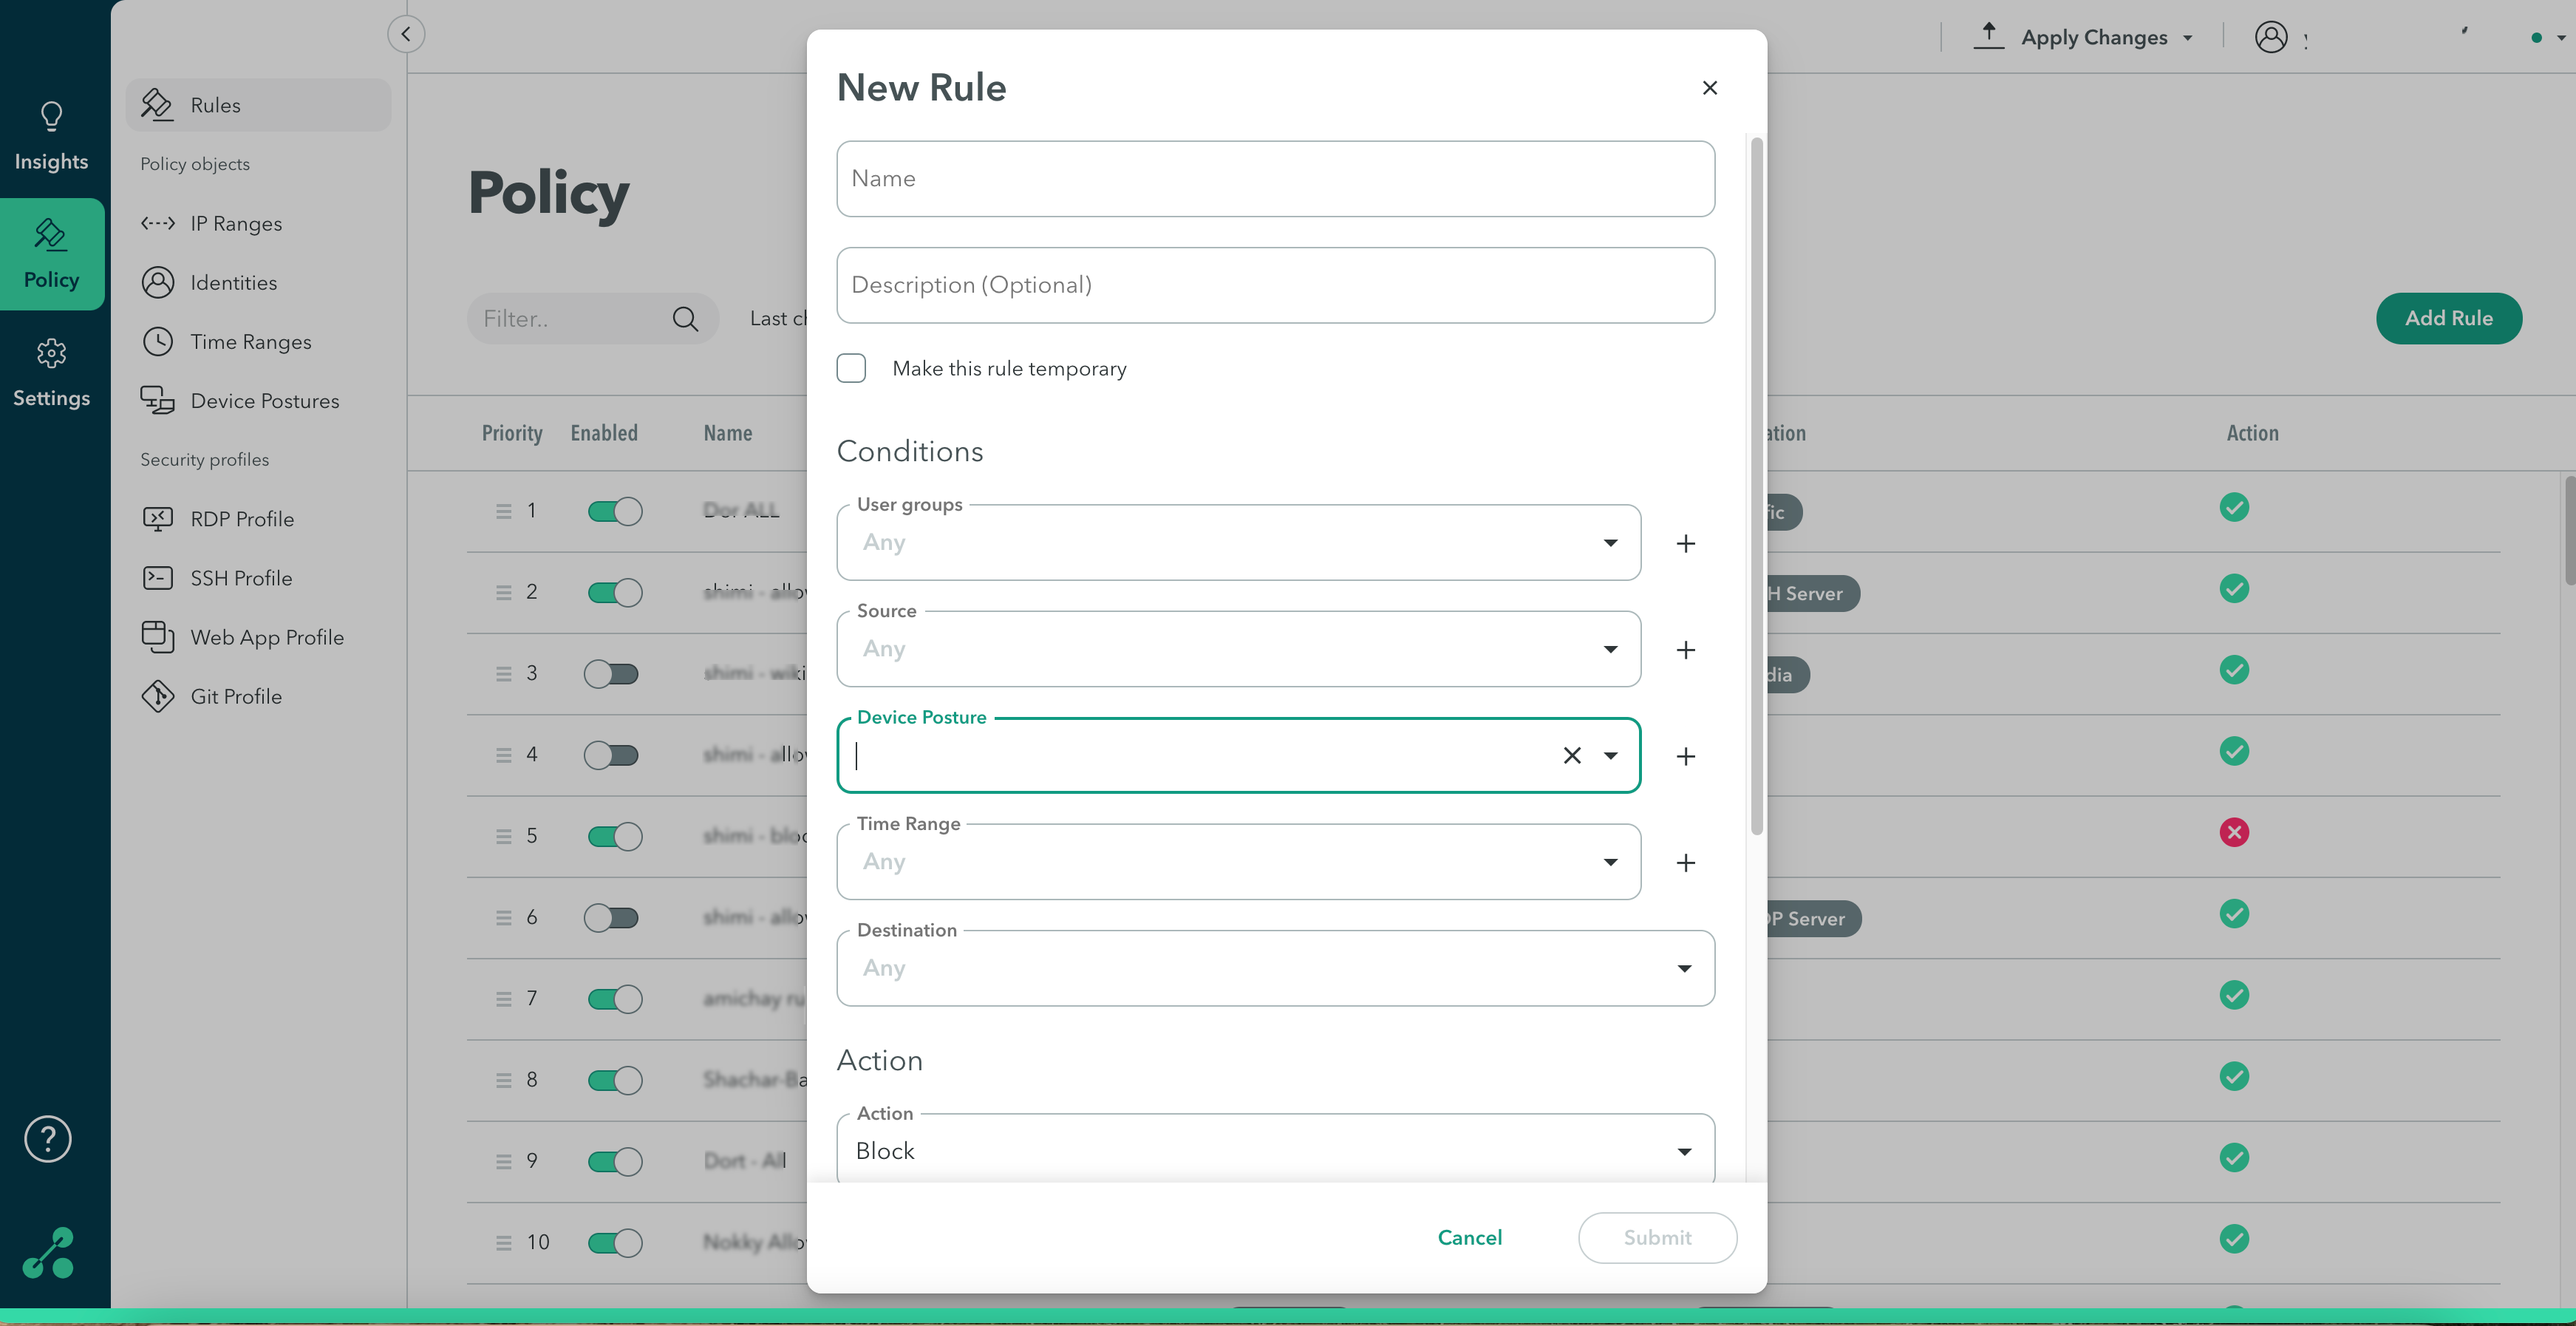
- In the Management Console, go to Policy -> Add Rule.
- Continue adding the rule (click here to learn more).
- Under Device Posture, select the device posture object created in the previous steps.
- Click Submit.
Note
To commit your changes, navigate to the top-right menu, click Apply Changes, then select Commit Changes.
Troubleshooting Sync Issues
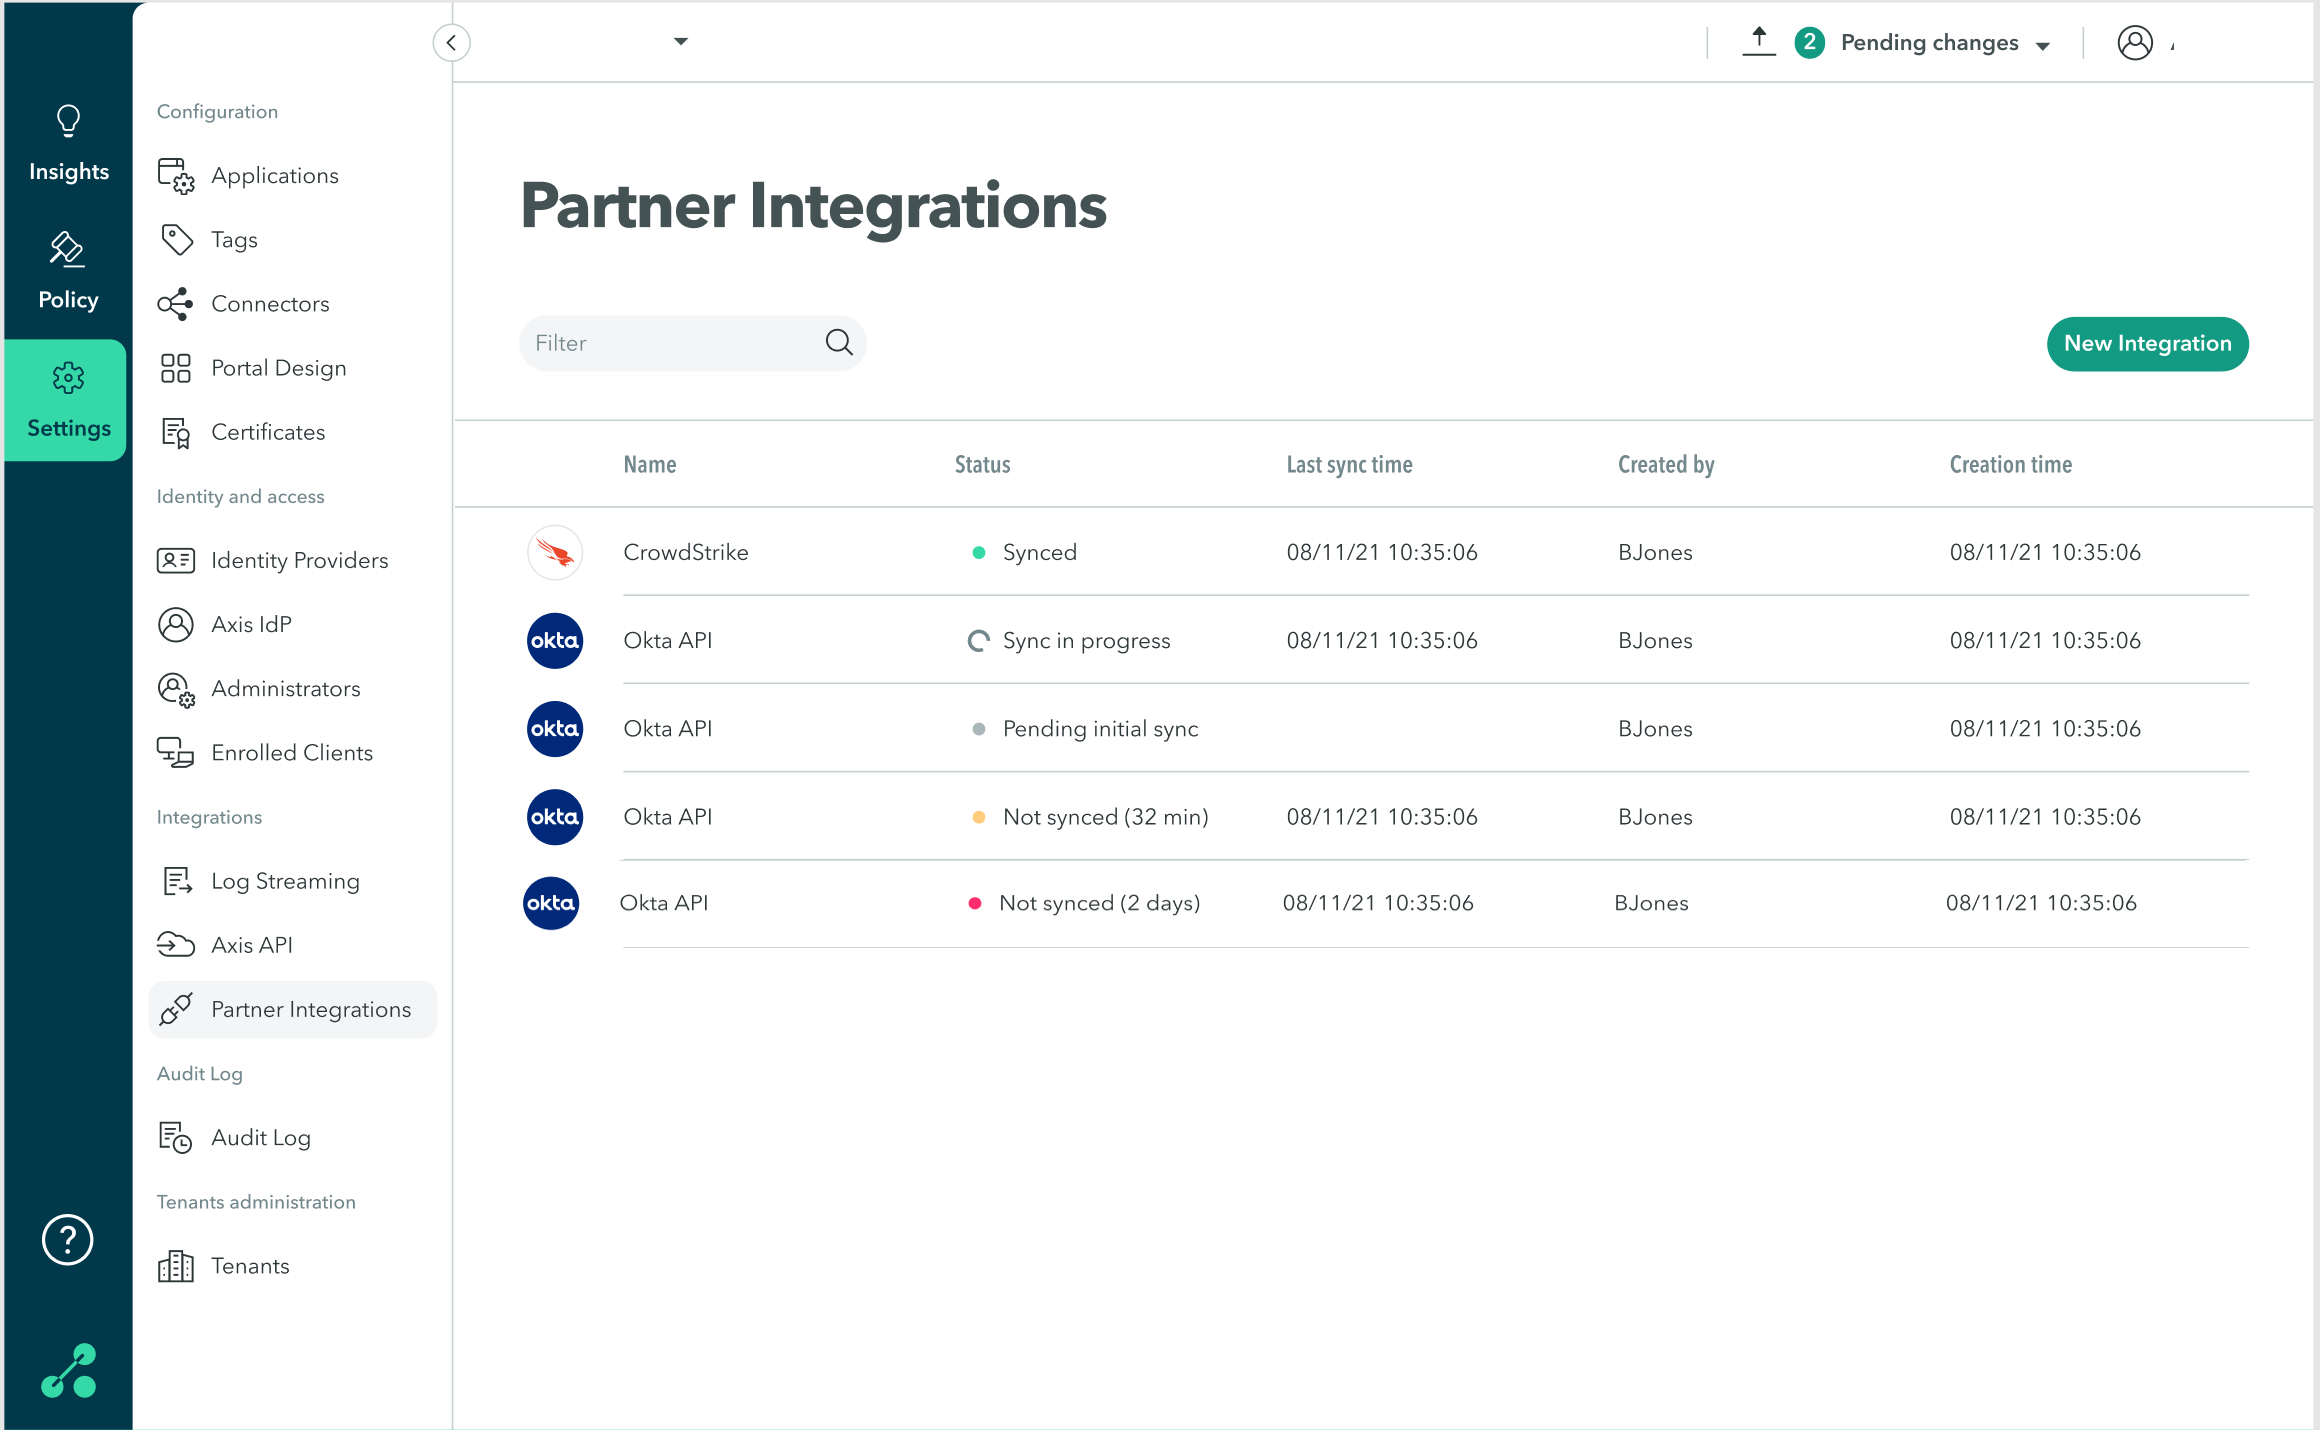
The Partner Integrations table provides the following sync status information:
| Synced | Integration has synced successfully |
| Sync in progress | Integration is currently syncing |
| Pending initial sync | Integration has not synced yet Note: After you' ve submitted the form and committed your changes, the integration can take up 20 minutes for the status to change to Sync. However, the sync happens immediately. |
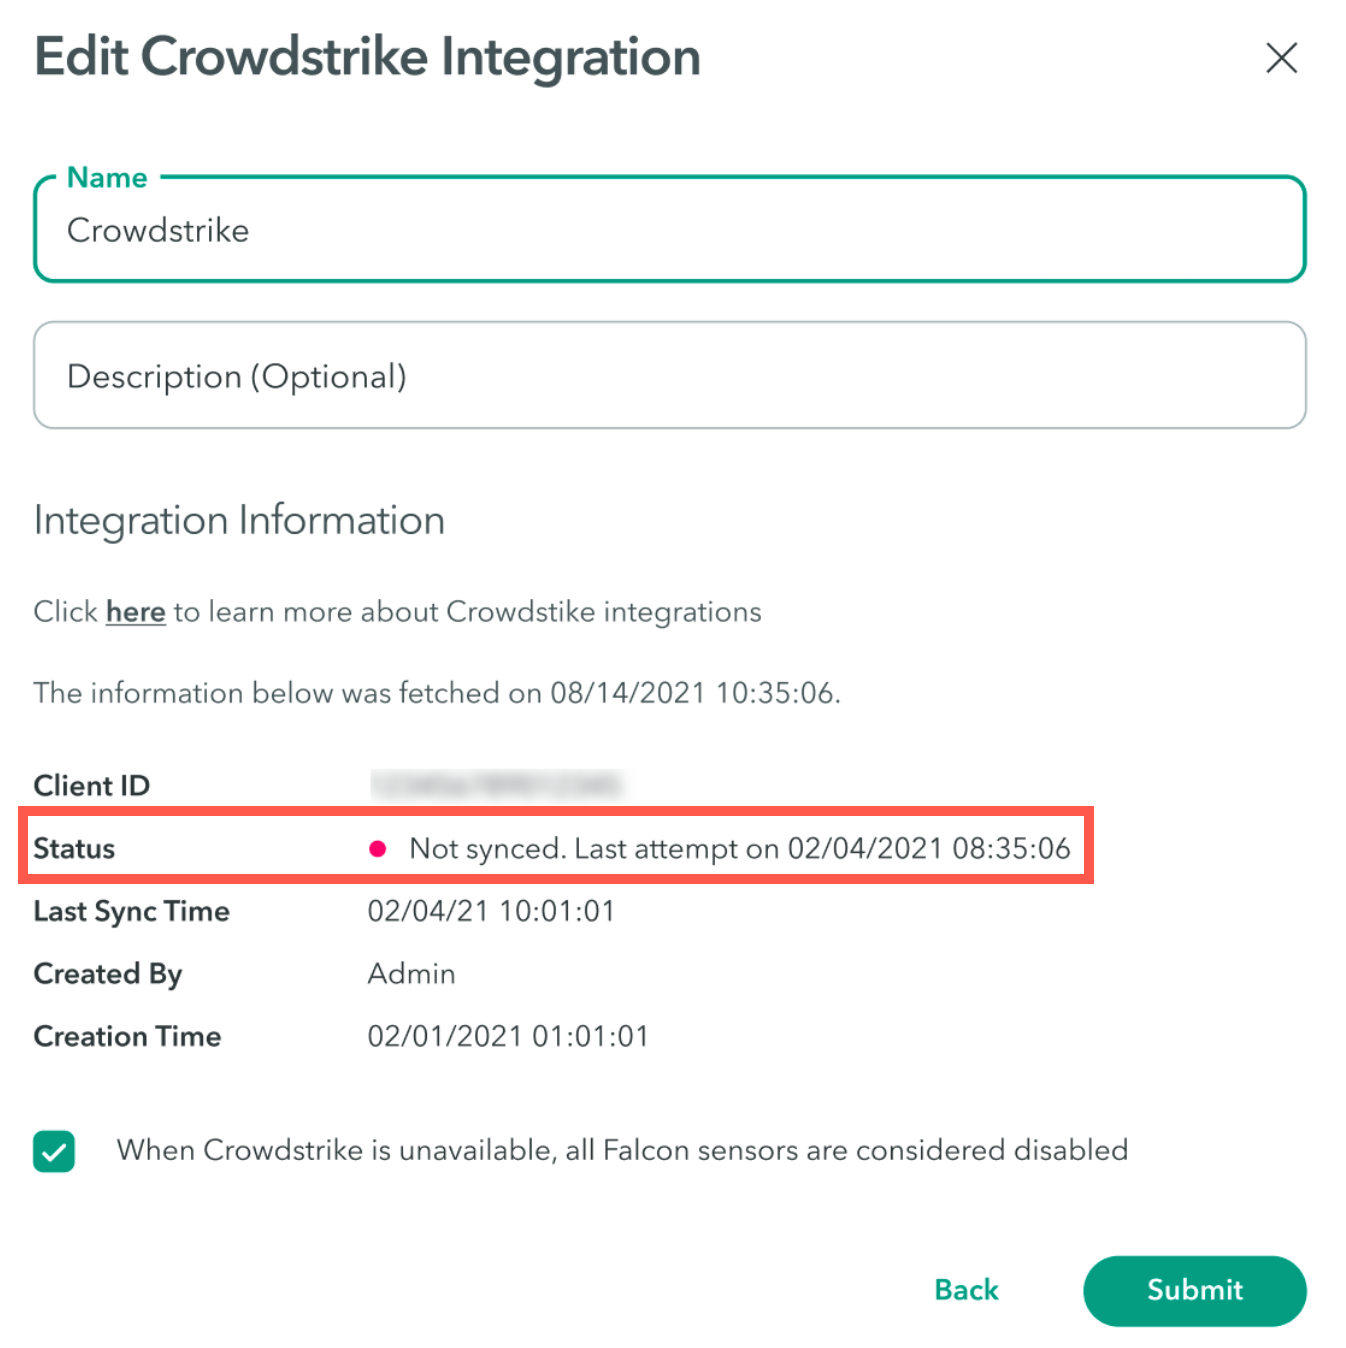
| Not synced | Integration has not synced recently, there may be a temporary sync issue. Indicates the time since the last successful sync. |
If the integration sync indicator is red, contact Axis Support: [email protected].
Updated over 1 year ago
