SCIM Provisioning with Okta
User provisioning integrates an external user directory with your Axis Cloud. Axis Security enables you to use SAML as your method of authentication and SCIM as your method of provisioning. This article describes how to configure user provisioning when Okta is your Identity Provider.
Before you begin, you must configure an Okta as an Identity Provider.
Prerequisites
Before you can configure user provisioning for Okta, there are several prerequisites:
- An account in Okta with permission to manage users.
- Download the Axis Security app in Okta.
- User must be an admin in Okta.
Supported Features
The following provisioning features are supported:
- Push new users: New users created through Okta will also be created in the third-party application.
- Group Push: Existing Okta groups and their members can be pushed to provisioning-enabled third-party applications. They are then sourced by Okta.
- Push profile updates: Updates made to the user's profile through Okta will be pushed to the third-party application.
- Push user deactivation: Deactivating the user or disabling the user's access to the application through Okta will deactivate the user in the third-party application.
- Reactivate Users: User accounts can be reactivated in the application.
Step 1: Configuring the Okta IdP in the Axis Management Console to enable user auto-provisioning
- Go to Settings -> Identity Providers
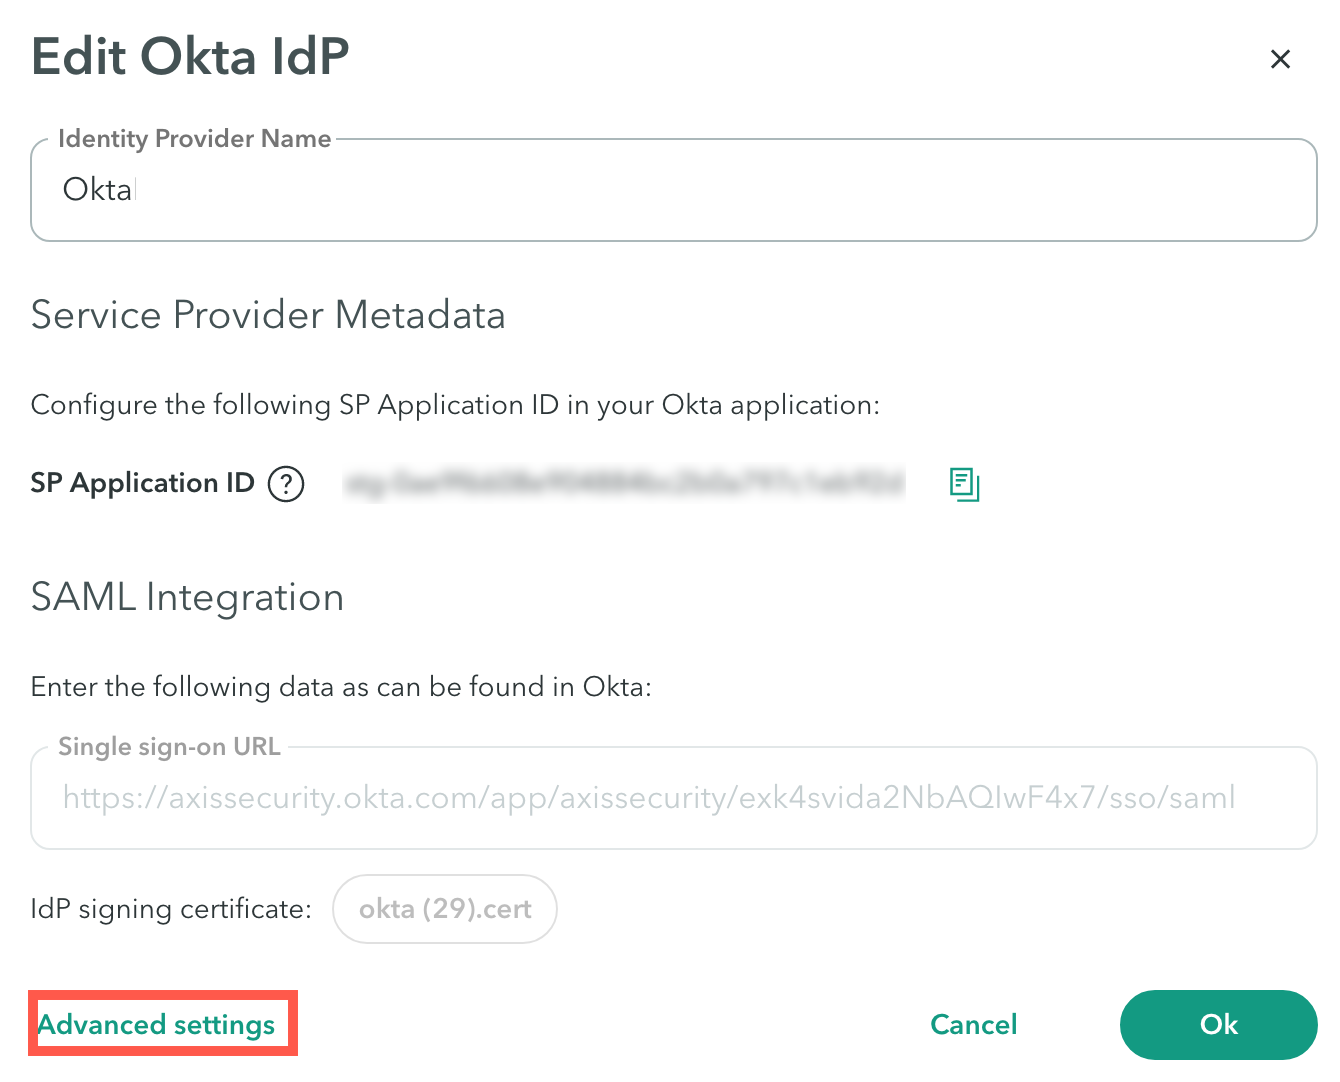
- Hover over the relevant Okta IdP and click Edit .
The Edit Okta IdP window appears.
- Navigate to the Advanced settings section.
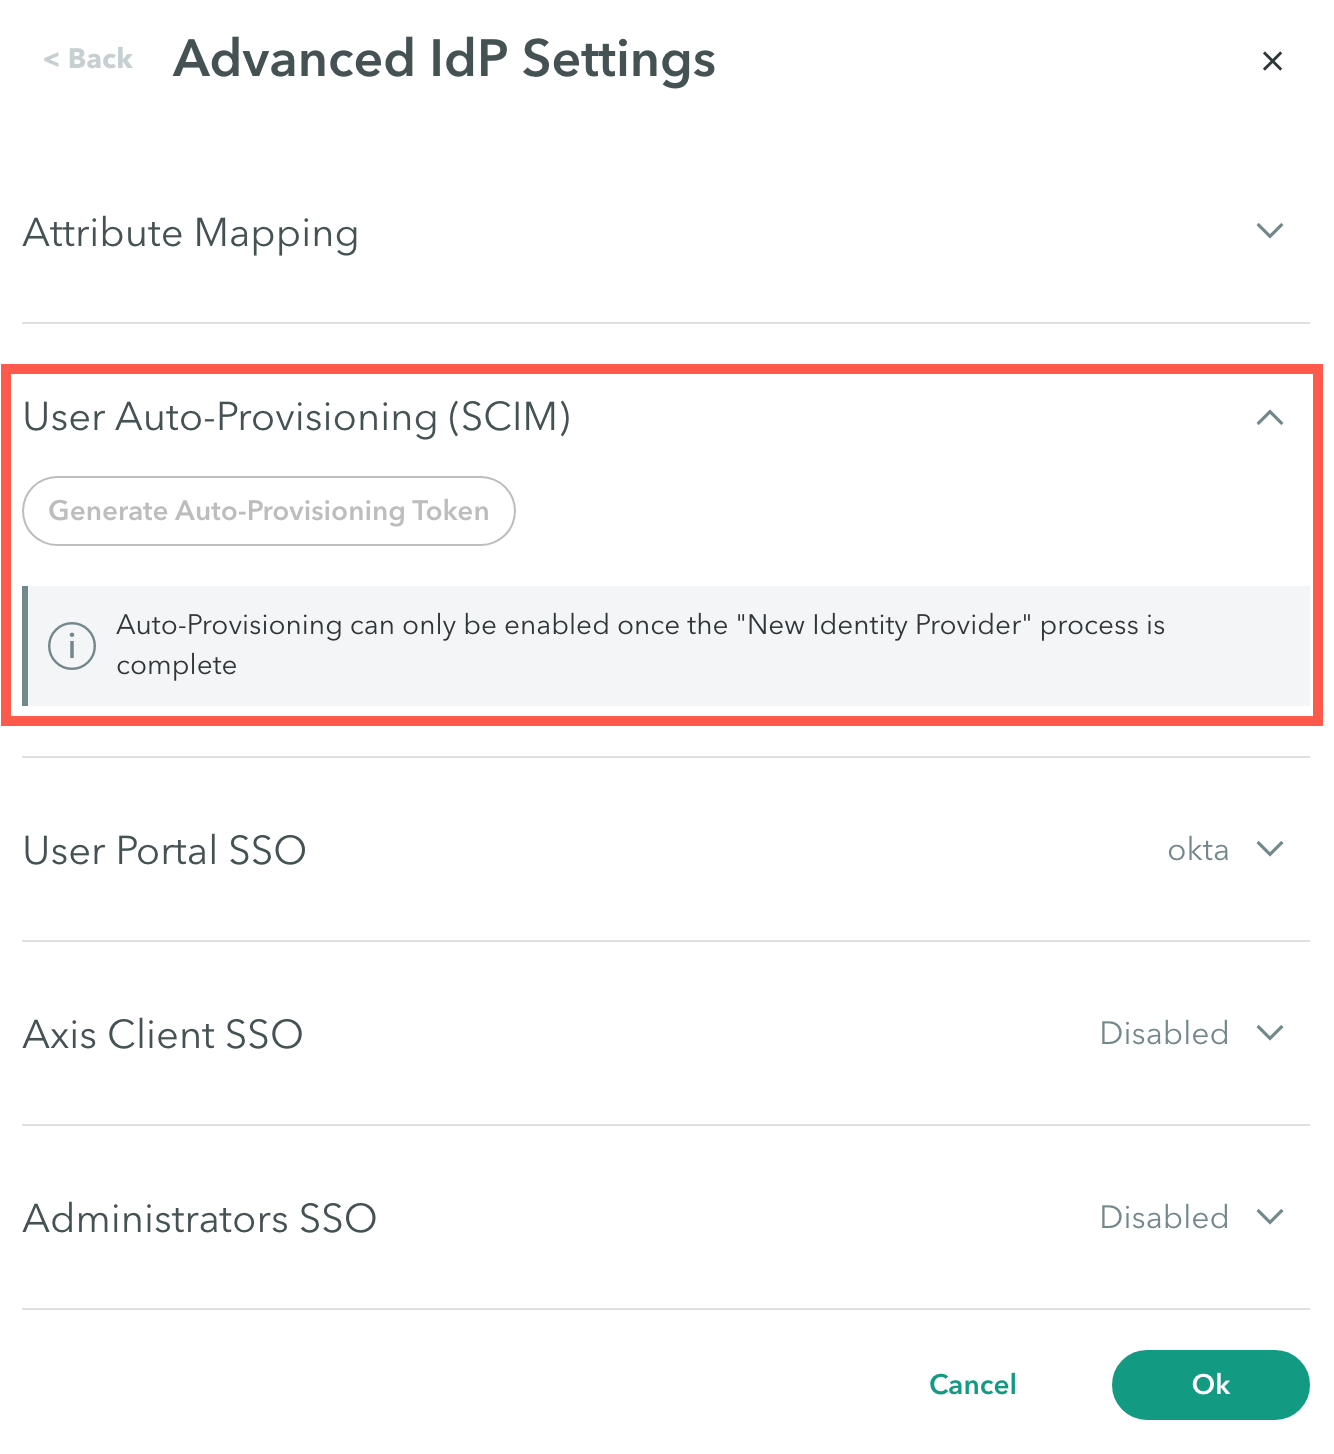
- In the User Auto-Provisioning (SCIM) section, click Generate Auto-Provisioning Token.
- Copy the SCIM provisioning token.
Notes:
- The token is valid for one year. You will be notified if you try to use an expired token.
- Once the form is closed you will not be able to see the token.
To revoke an Auto-Provisioning token:
- Go to Settings -> Identity Providers
- Hover over the relevant Okta IdP and click Edit .
The Edit Okta IdP window appears.
- Navigate to the Advanced settings section.
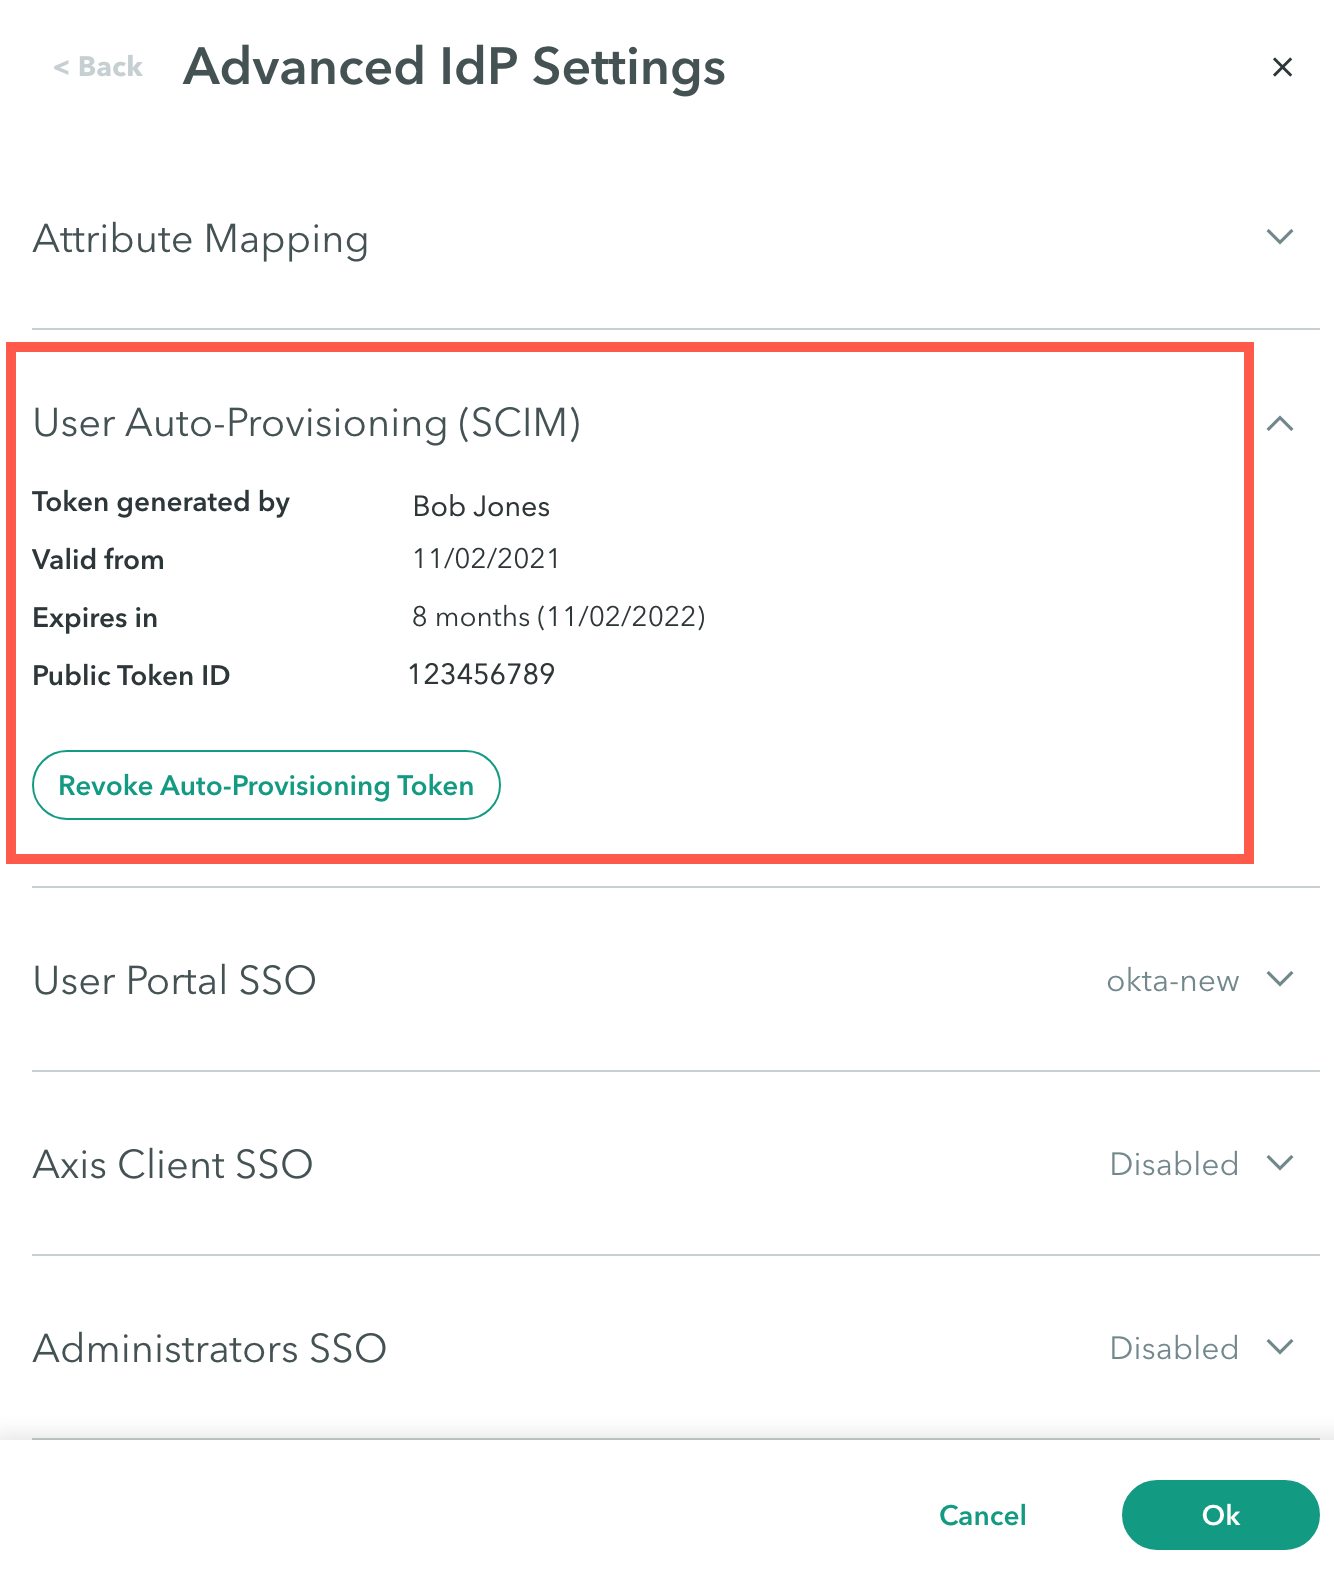
- In the User Auto-Provisioning (SCIM) section, click Revoke Auto-Provisioning Token.
Step 2: Auto-Provisioning in Okta Using SCIM
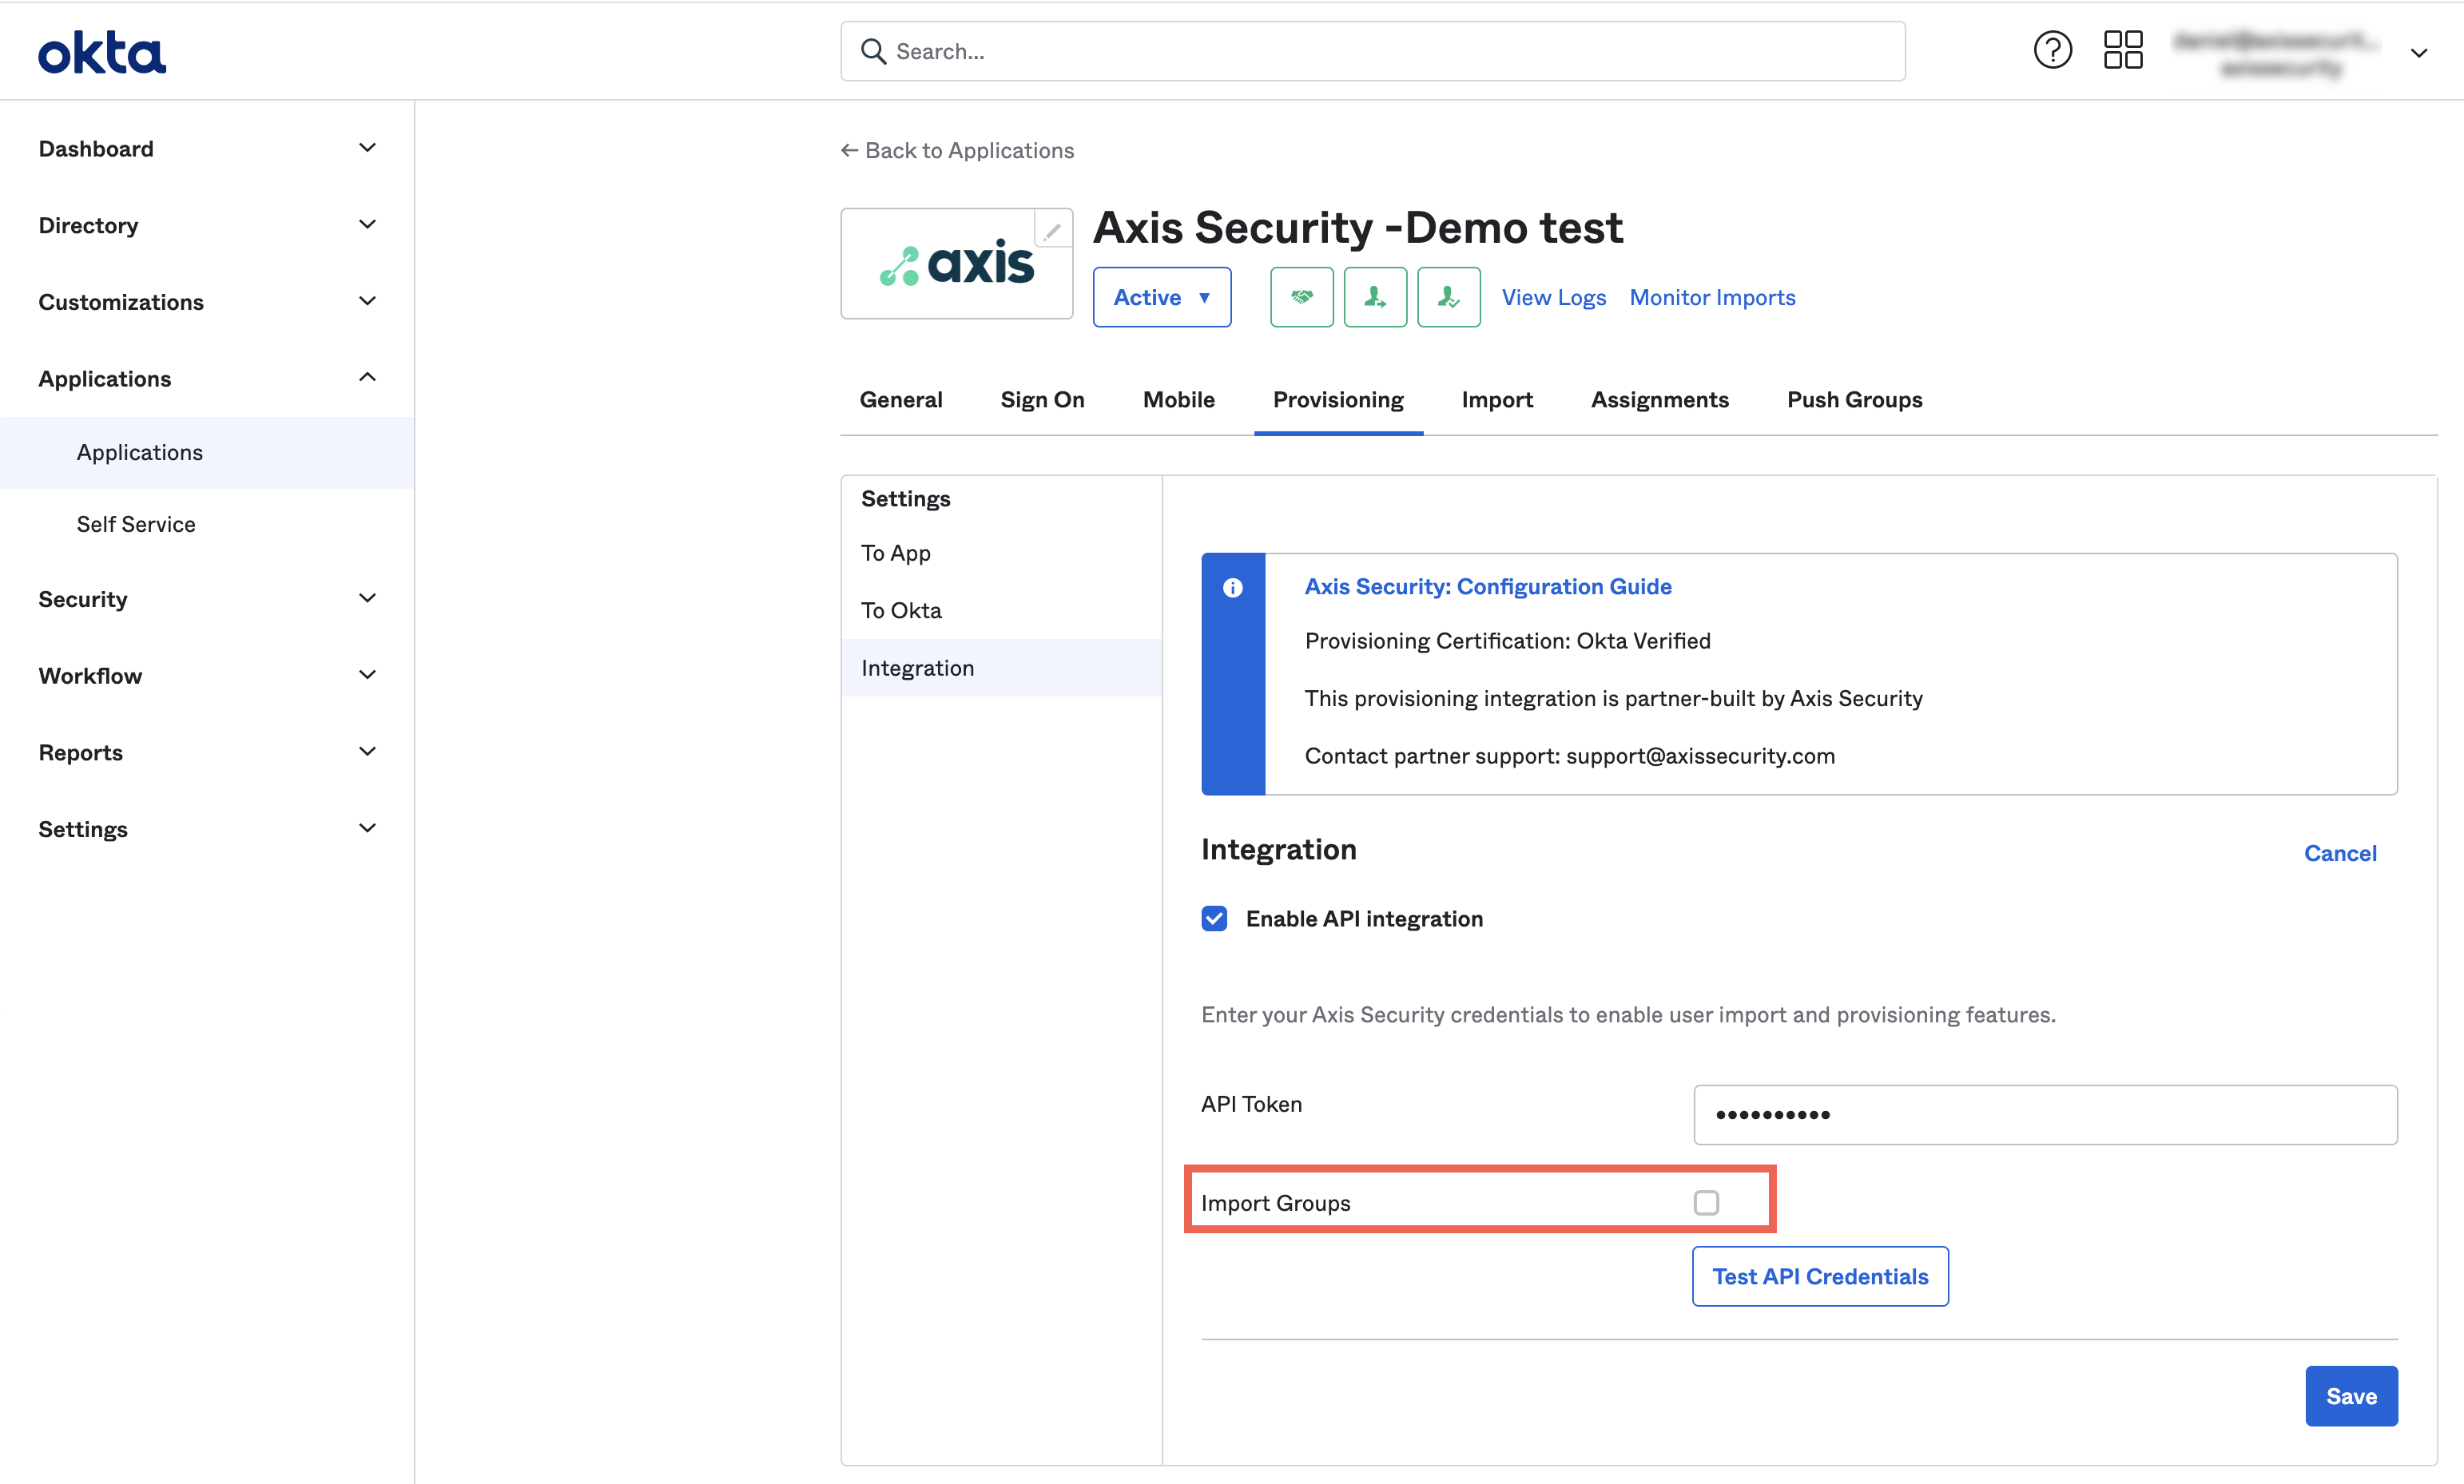
- In the Axis application, in the provisioning tab-> integration section, you will be prompted for the Oauth Bearer Token. Paste the token copied in step 1: Configuring the Okta IdP in the Axis Management Console to enable user auto-provisioning.
Note:
Make sure not to check Import Groups
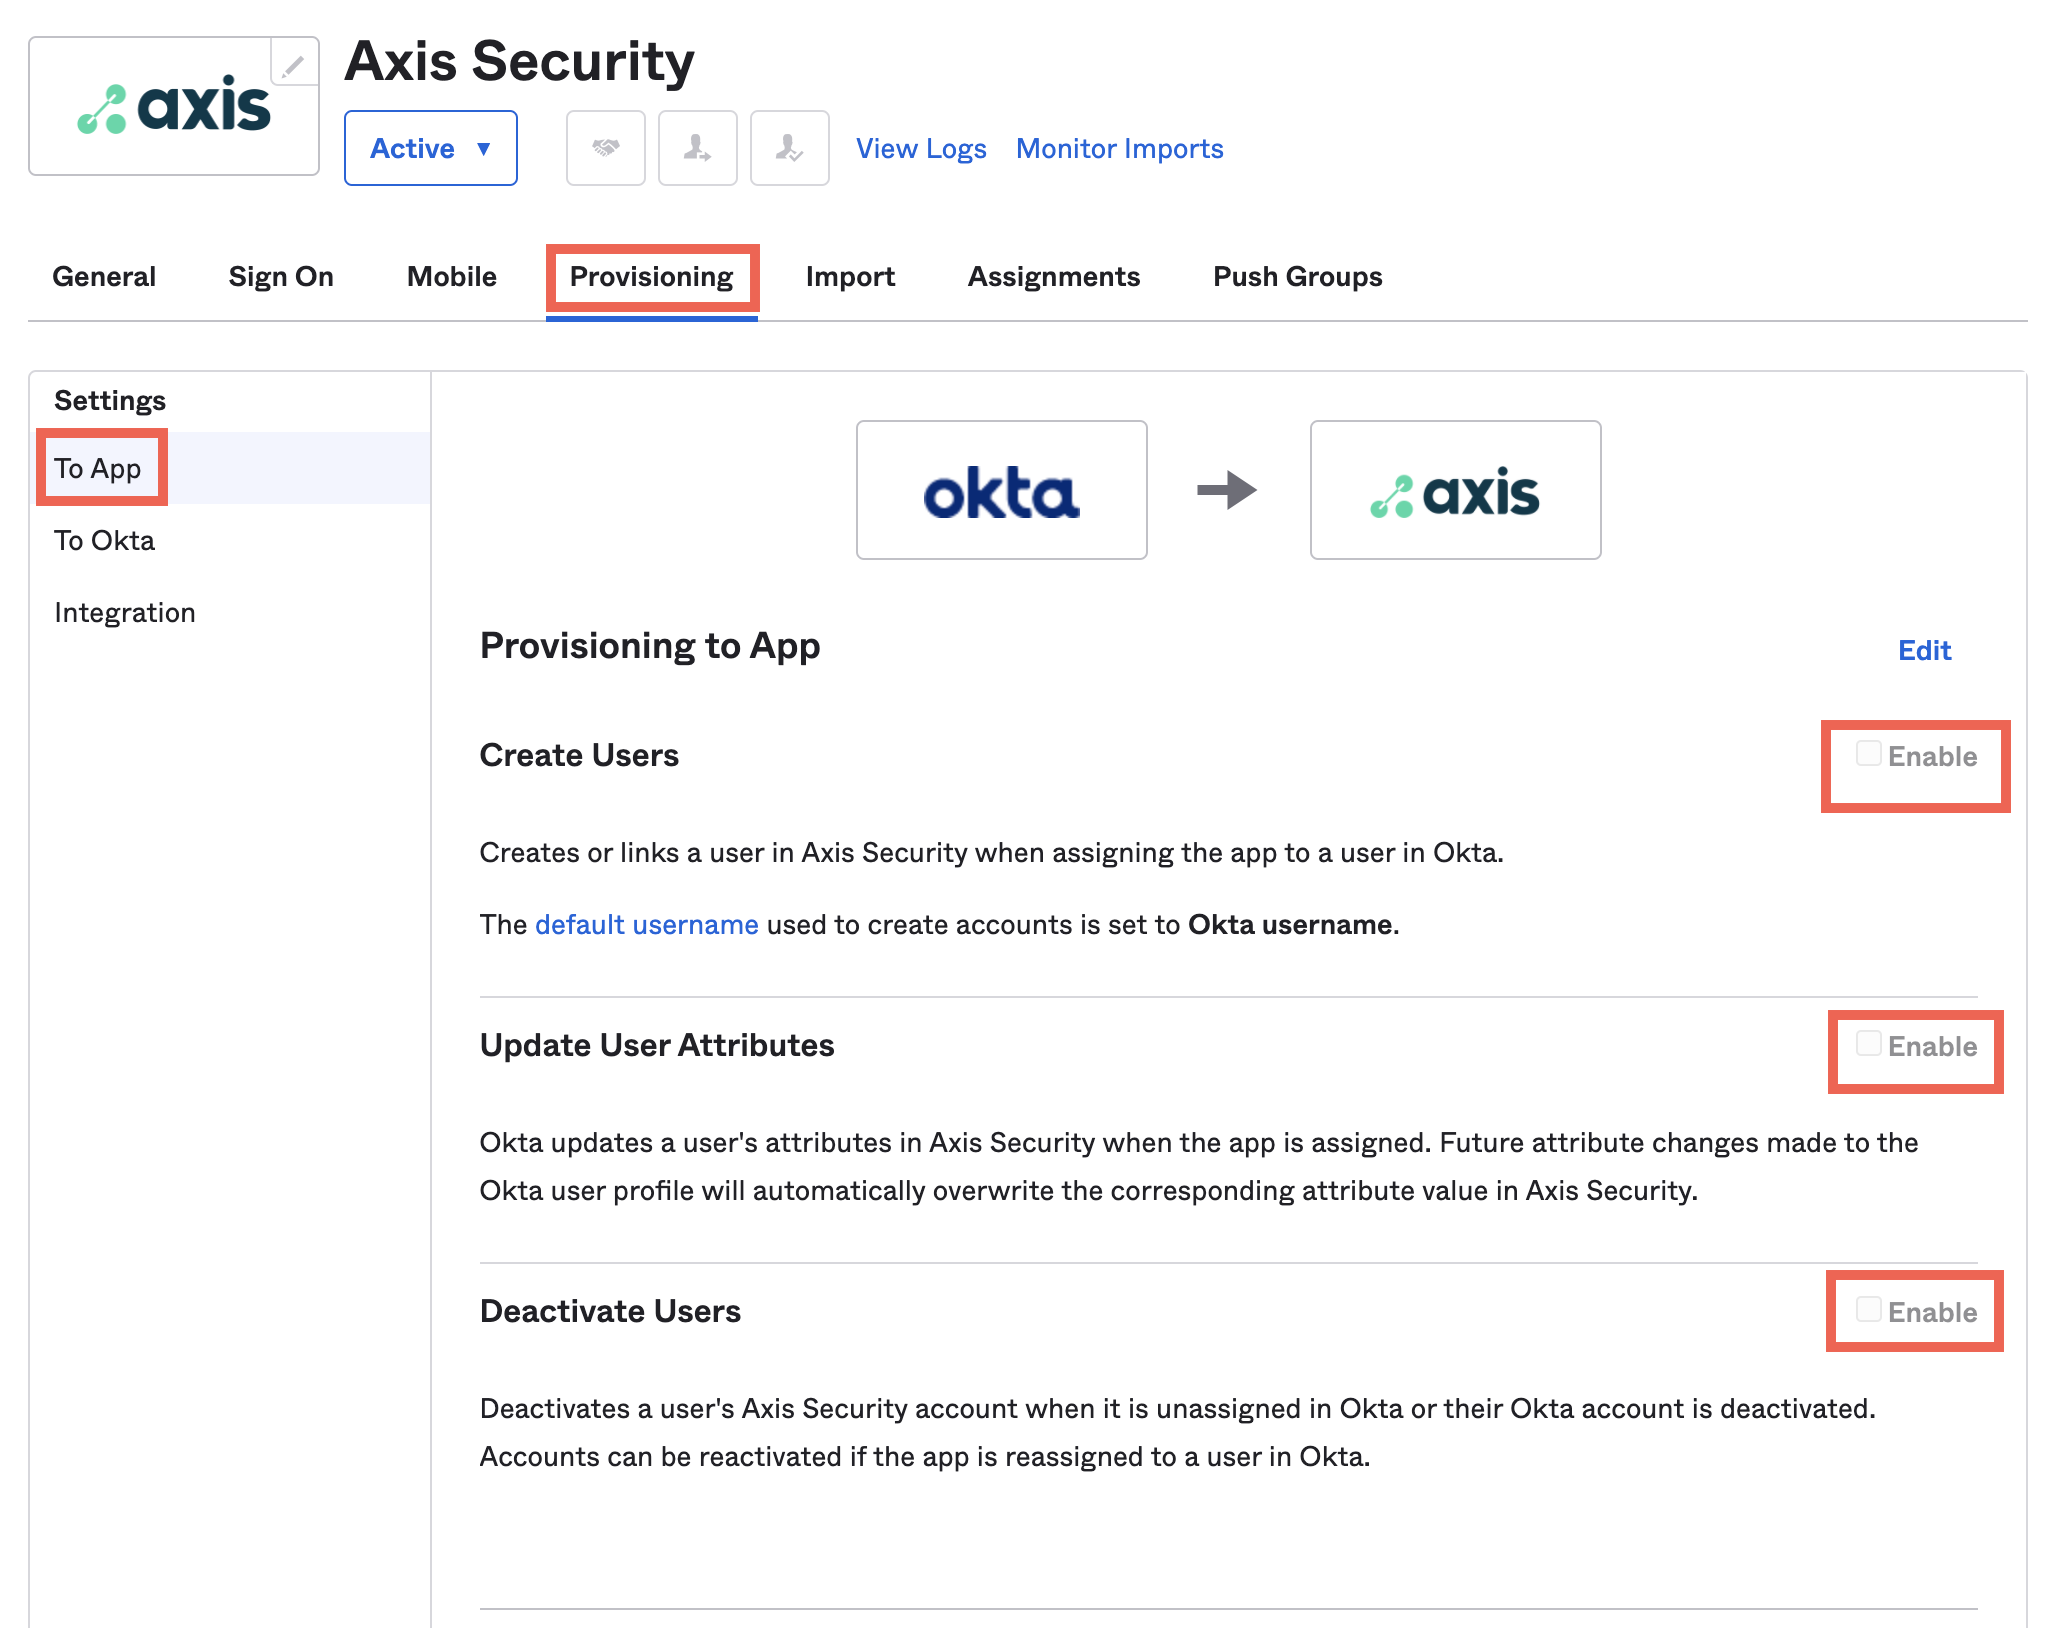
- Under To App, make sure to check Create Users, Update User Attributes and Deactivate Users.
Axis Security keeps the following information by default:
- Division
- Department
- Display name (Given name + Last name)
- Username- your unique identifier
Notes:
- This information can be changed, and the change will be reflected in the Axis Security database.
- If an Axis admin was configured using a certain username or email address, changes in Okta will not be reflected in the Axis Security database.
Step 3: Assigning people or groups to Axis Security
When you assign users and groups, all the users are synced between Okta and Axis.
- In the Okta admin portal, click the Assignments tab.
- Click the Assign drop-down menu and select Assign to people or Assign to groups.
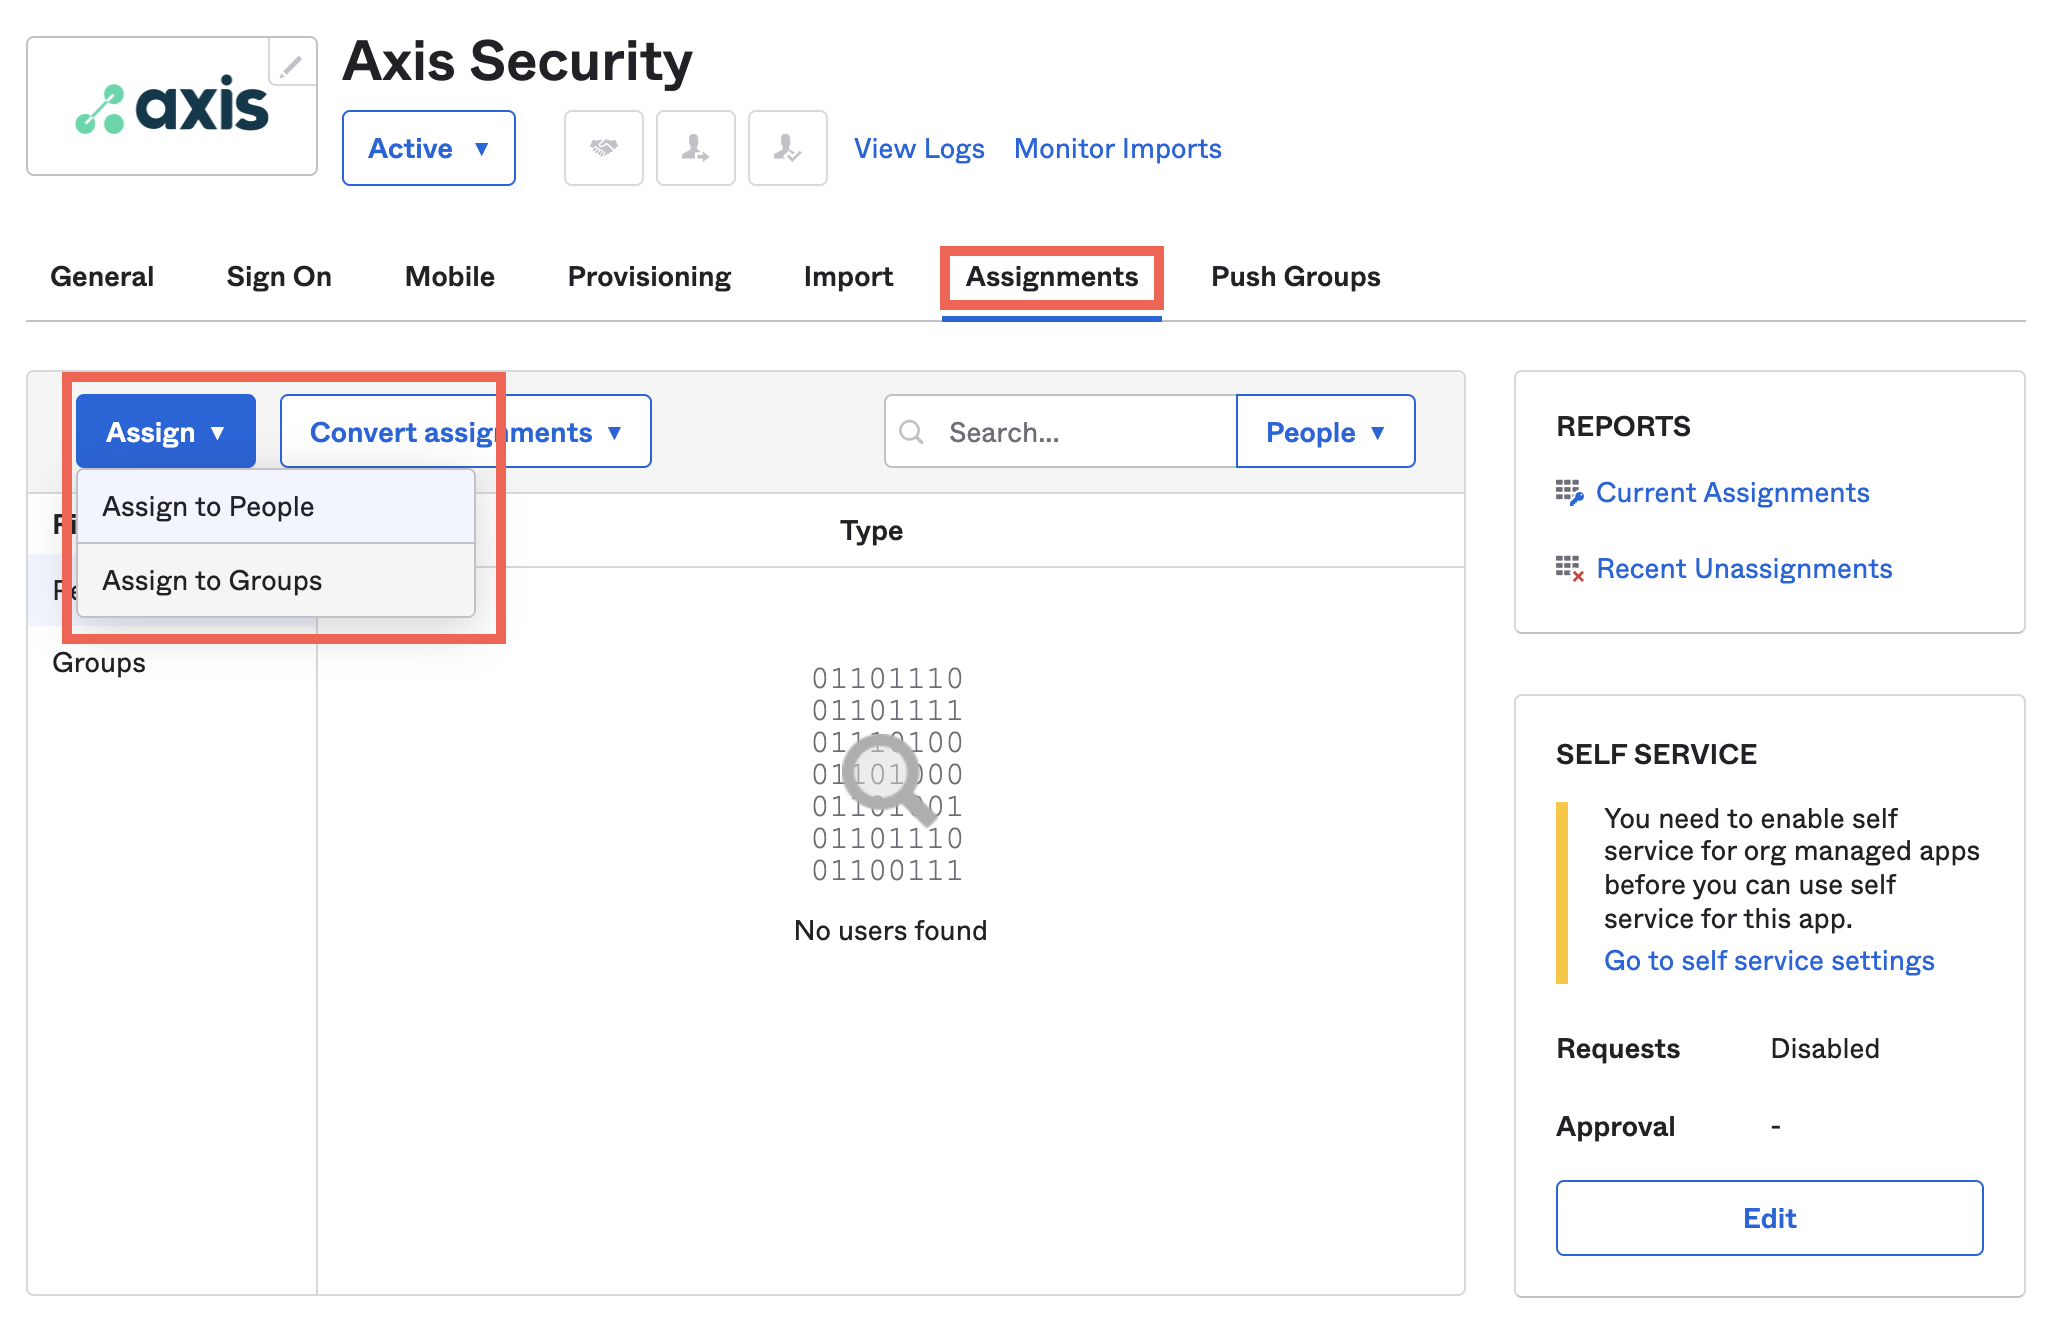
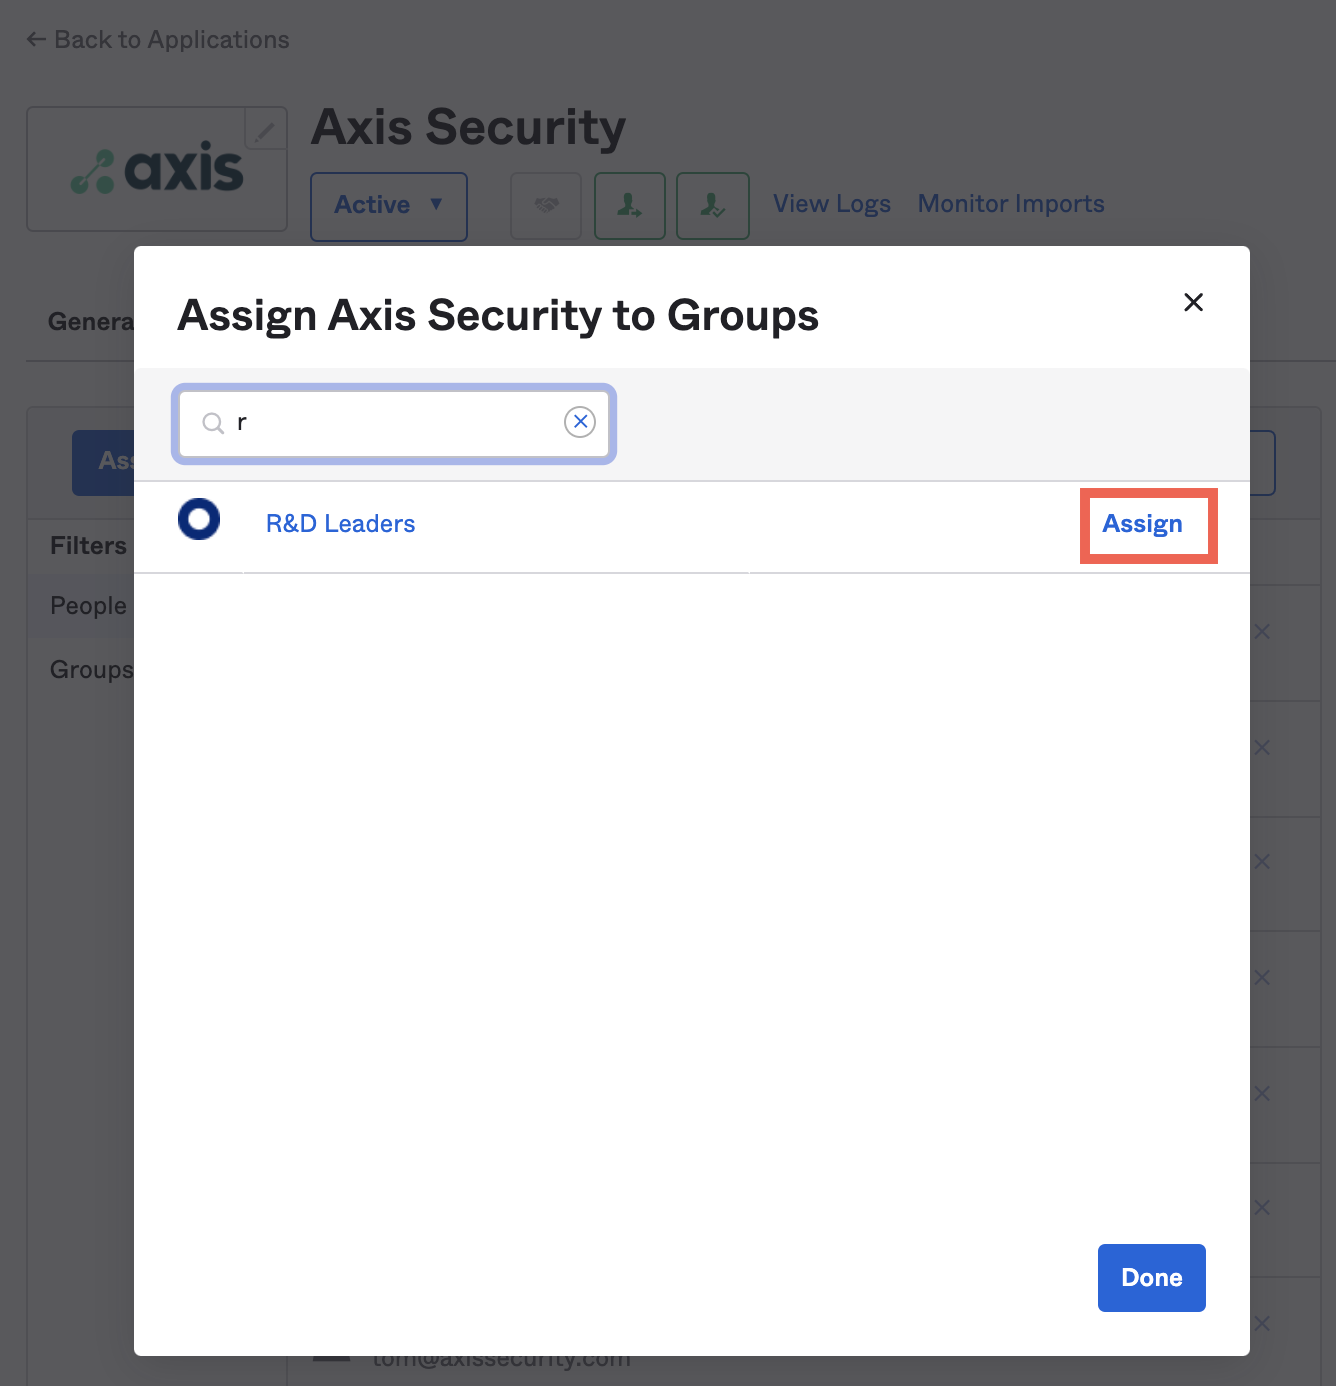
- Click Assign next to the people and groups you wish to assign to Axis. This means these people are now in the Axis database and will be synced when changes are applied.
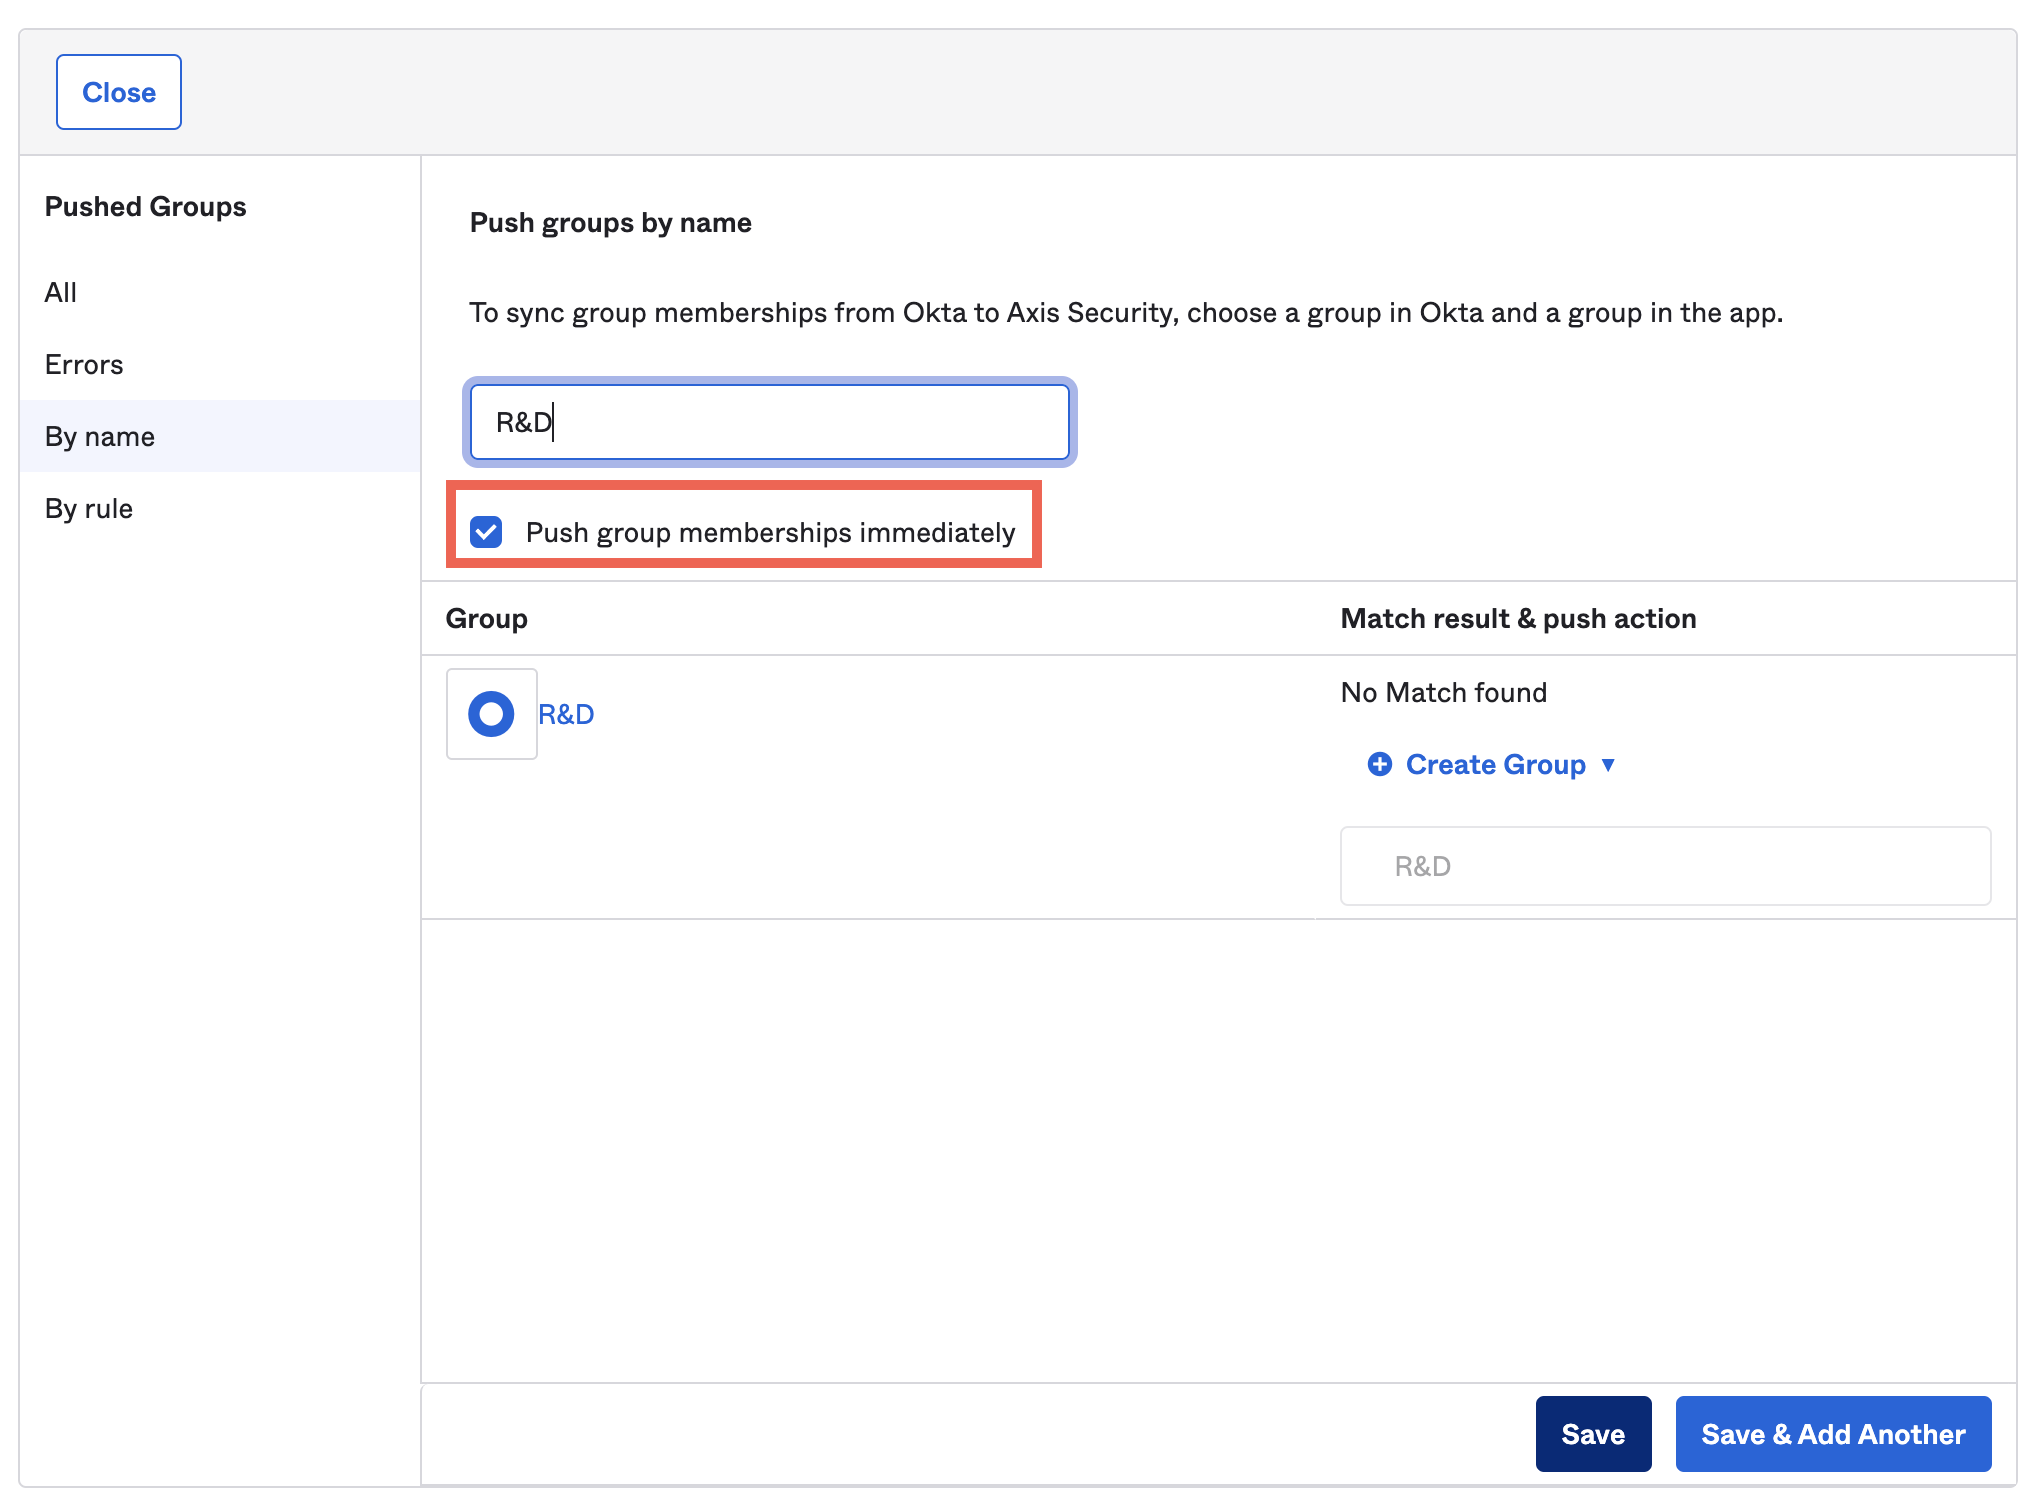
4. In the Push Groups tab, enter a group to push. Tick the box next to Push group memberships immediately. This means all the groups and their memberships are now in the Axis database and will be synced when changes are applied. These memberships are then mastered by Okta. When you push a group, it creates the group in Axis and will create all the memberships (relations) between the assigned groups and users.
- Click Done.
Known Issues
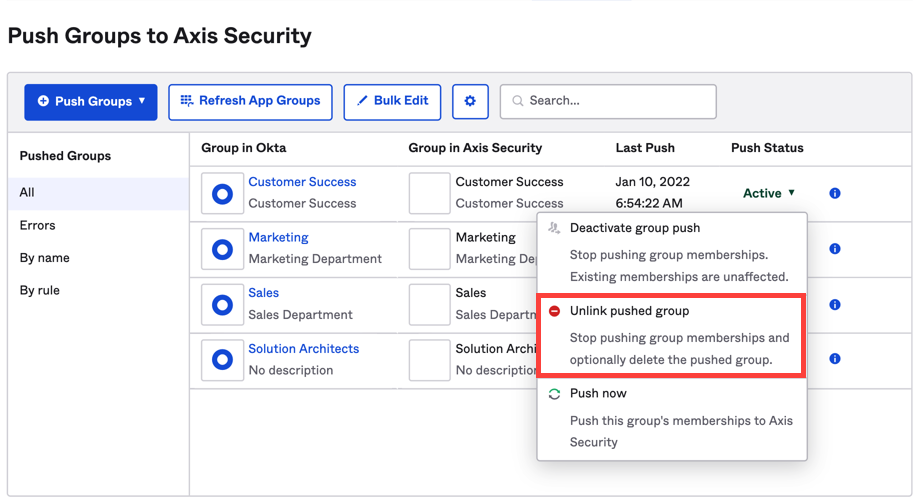
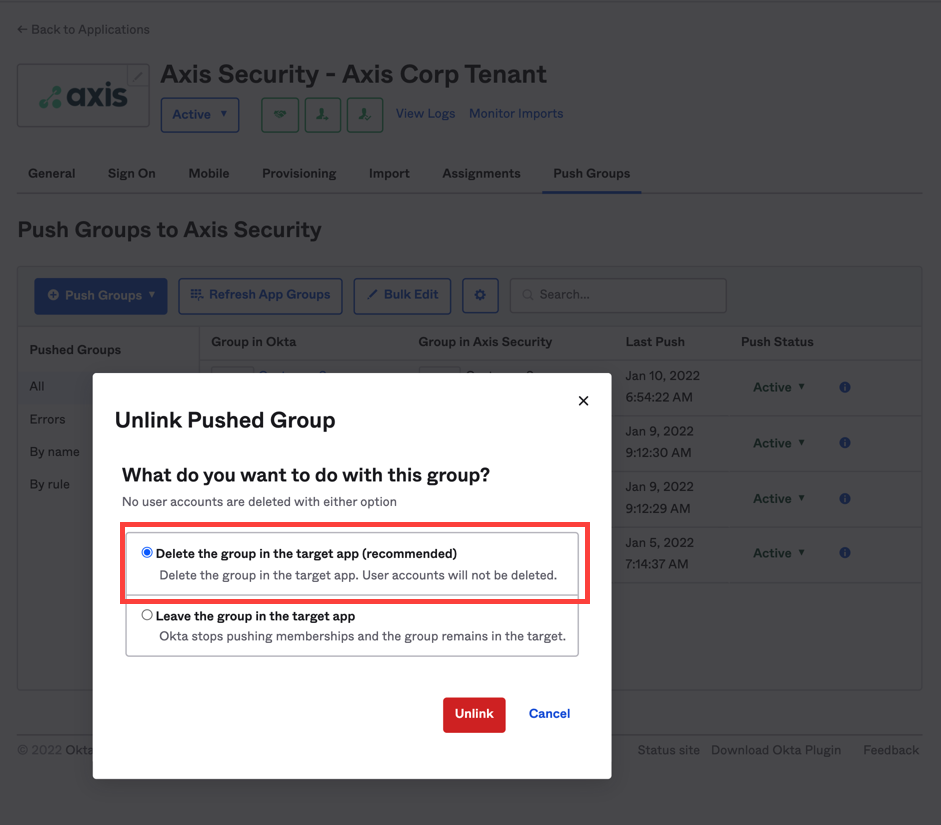
If you remove a group from the Push group tab in the Axis app in Okta, and delete it completely from the Axis app, you will need to create a New Identity for the group in the Axis Management Console.
Updated about 3 years ago
